2013 MITSUBISHI iMiEV airbag
[x] Cancel search: airbagPage 96 of 258

The front airbags ARE NOT DESIGNED TO DE-
PLOY when…
The
front airbags are not designed to deploy in con-
ditions where they cannot typically provide protec-
tion to the occupant. Such conditions are shown in
the illustration. 1- Rear end collisions
2-
Side collisions
3- Vehicle rolls onto its side or roof
Because the front airbags do not protect the occu-
pant in all types of collisions, be sure to always prop-
erly wear your seat belts.
The front airbags MAY DEPLOY when…
The front airbags may deploy if the bottom of the
vehicle suffers a moderate-to-severe impact (under-
carriage damage). Examples of some typical conditions are shown in
the illustration.
1- Collision
with an elevated median/island or
kerb
2- Vehicle travels over a deep hole/pothole
3- Vehicle drives down a steep slope and hits the ground
Because the front airbags may deploy in certain
types of unexpected impacts as shown in the illus-
tration that can easily move you out of position, it
is important to always properly wear your seat
belts. Your seat belts will help keep you a safe dis-
tance from the steering wheel and instrument panel
during the initial stages of airbag deployment. The
initial stage of airbag inflation is the most forceful
one and can possibly cause serious or fatal injuries
if you contact it at this stage. WARNING
l Do
not attach anything to the steering
wheel’s padded cover, such as badges or
accessories. It might strike and injure an
occupant if the airbag inflates.
l Do not set anything on, or attach any-
thing to, the instrument panel above the
glove box. It might strike and injure an oc-
cupant if the airbag inflates. WARNING
l Do
not attach accessories to, or put them
in front of, the windscreen. These objects
could restrict the airbag inflation, or
strike and injure an occupant if the air-
bags inflate.
l Do not put packages, pets or other ob-
jects between the airbags and the driver
or front passenger. It could affect airbag
performance, or could cause injury when
the airbag inflates. Seat and seat belts
3-26
3
OHAE13E1
Page 97 of 258
WARNING
l Right after the airbag inflation, several
airbag system components will be hot. Do
not touch these components. There is a
danger of being burnt.
l The airbag system is designed to work on-
ly once. Once the airbags have deployed,
they will not work again. They must
promptly be replaced, and we recom-
mend you to have the entire airbag sys-
tem inspected by a MITSUBISHI
MOTORS Authorized Service Point.
Side airbag system E00407600518
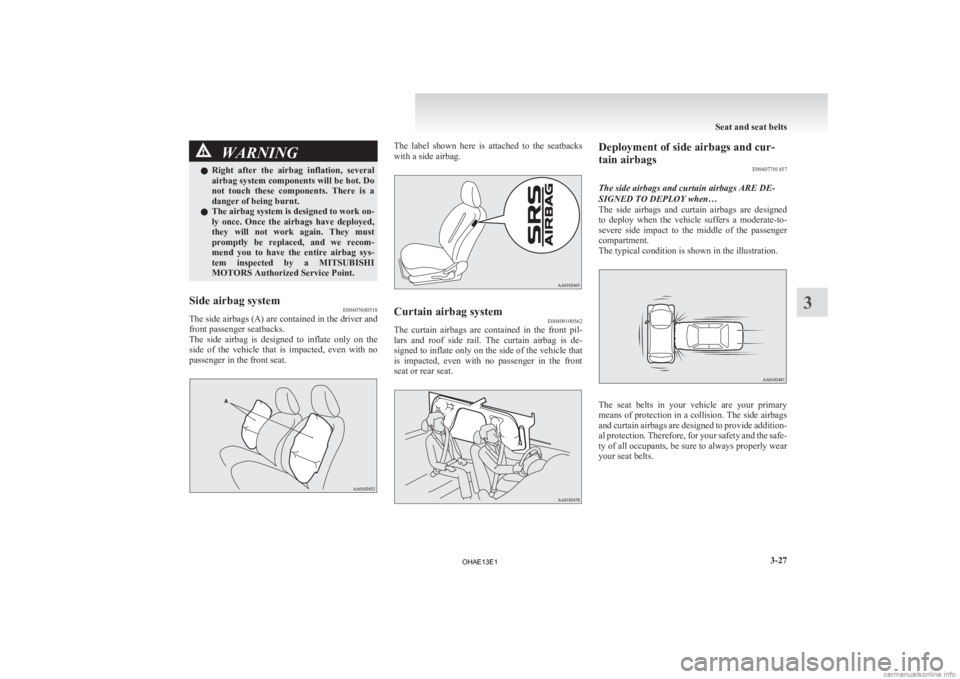
The side airbags (A) are contained in the driver and
front passenger seatbacks.
The
side airbag is designed to inflate only on the
side of the vehicle that is impacted, even with no
passenger in the front seat. The label shown here is attached to the seatbacks
with a side airbag.
Curtain airbag system
E00409100562
The curtain airbags are contained in the front pil-
lars
and roof side rail. The curtain airbag is de-
signed to inflate only on the side of the vehicle that
is impacted, even with no passenger in the front
seat or rear seat. Deployment of side airbags and cur-
tain airbags
E00407701457
The side airbags and curtain airbags ARE DE-
SIGNED TO DEPLOY when…
The
side airbags and curtain airbags are designed
to deploy when the vehicle suffers a moderate-to-
severe side impact to the middle of the passenger
compartment.
The typical condition is shown in the illustration. The seat belts in your vehicle are your primary
means
of protection in a collision. The side airbags
and curtain airbags are designed to provide addition-
al protection. Therefore, for your safety and the safe-
ty of all occupants, be sure to always properly wear
your seat belts. Seat and seat belts
3-27 3
OHAE13E1
Page 98 of 258
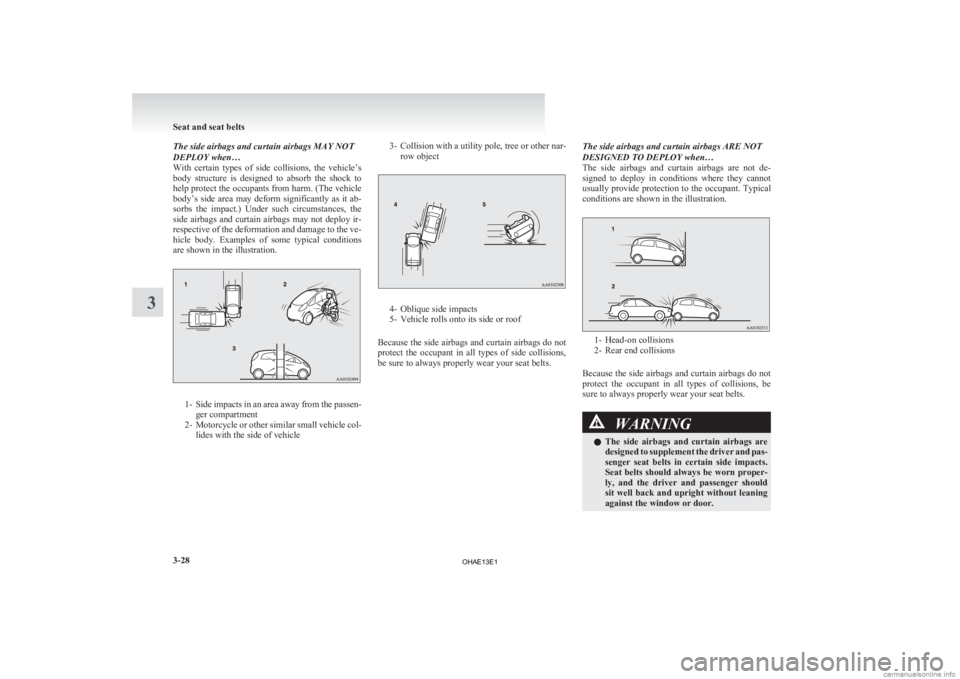
The side airbags and curtain airbags MAY NOT
DEPLOY when…
With
certain types of side collisions, the vehicle’s
body structure is designed to absorb the shock to
help protect the occupants from harm. (The vehicle
body’s side area may deform significantly as it ab-
sorbs the impact.) Under such circumstances, the
side airbags and curtain airbags may not deploy ir-
respective of the deformation and damage to the ve-
hicle body. Examples of some typical conditions
are shown in the illustration. 1- Side
impacts in an area away from the passen-
ger compartment
2- Motorcycle or other similar small vehicle col- lides with the side of vehicle 3- Collision
with a utility pole, tree or other nar-
row object 4- Oblique side impacts
5-
Vehicle rolls onto its side or roof
Because the side airbags and curtain airbags do not
protect the occupant in all types of side collisions,
be sure to always properly wear your seat belts. The side airbags and curtain airbags ARE NOT
DESIGNED TO DEPLOY when…
The
side airbags and curtain airbags are not de-
signed to deploy in conditions where they cannot
usually provide protection to the occupant. Typical
conditions are shown in the illustration. 1- Head-on collisions
2-
Rear end collisions
Because the side airbags and curtain airbags do not
protect the occupant in all types of collisions, be
sure to always properly wear your seat belts. WARNING
l The
side airbags and curtain airbags are
designed to supplement the driver and pas-
senger seat belts in certain side impacts.
Seat belts should always be worn proper-
ly, and the driver and passenger should
sit well back and upright without leaning
against the window or door. Seat and seat belts
3-28
3
OHAE13E1
Page 99 of 258
WARNING
l The side airbags and curtain airbags in-
flate with great force. The driver and pas-
senger should not put their arms out the
window, and should not lean against the
door, in order to reduce risk of serious or
possible fatal injury from the deploying
side airbags and curtain airbags. WARNING
l Do
not allow any rear seat occupant to
hold onto the seatback of either front
seat, in order to reduce risk of injury
from the deploying side airbags. Special
care should be taken with children.
l Do not place any objects near or in front
of the seatback of either front seat. They
could interfere with proper side airbag in-
flation, and also could cause injury if
thrown free by side airbag deployment. WARNING
l Do
not place stickers, labels or additional
trim on the seatback of either front seat.
They could interfere with proper side air-
bag inflation.
l Do not install seat covers on seats with
side airbags.
Do not re-cover seats that have side air-
bags. This could interfere with proper
side airbag inflation.
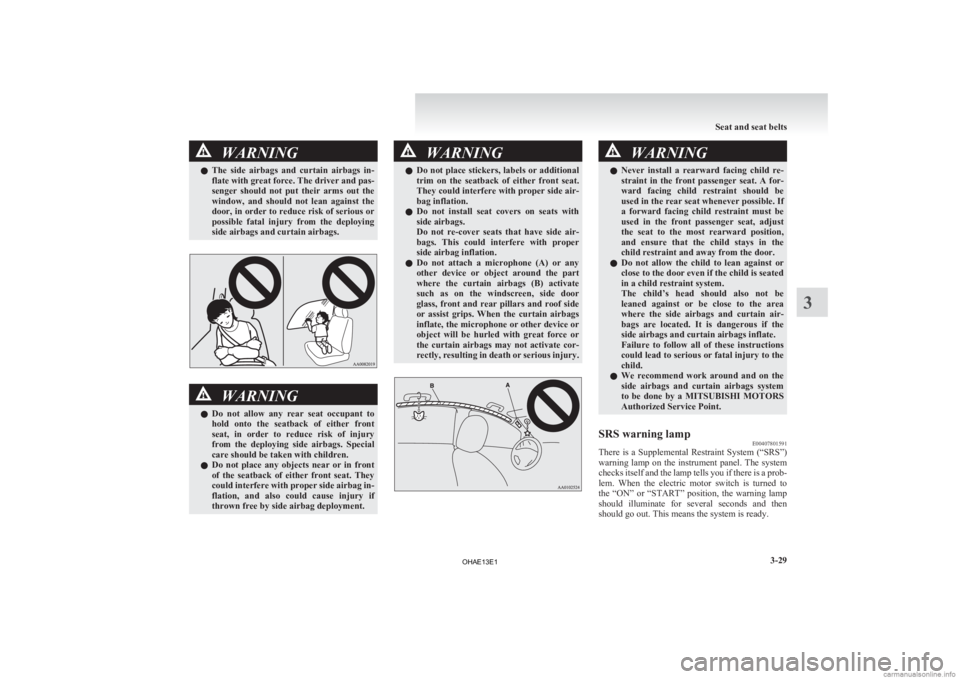
l Do not attach a microphone (A) or any
other device or object around the part
where the curtain airbags (B) activate
such as on the windscreen, side door
glass, front and rear pillars and roof side
or assist grips. When the curtain airbags
inflate, the microphone or other device or
object will be hurled with great force or
the curtain airbags may not activate cor-
rectly, resulting in death or serious injury. WARNING
l Never install a rearward facing child re-
straint in the front passenger seat. A for-
ward facing child restraint should be
used in the rear seat whenever possible. If
a forward facing child restraint must be
used in the front passenger seat, adjust
the seat to the most rearward position,
and ensure that the child stays in the
child restraint and away from the door.
l Do not allow the child to lean against or
close to the door even if the child is seated
in a child restraint system.
The child’s head should also not be
leaned against or be close to the area
where the side airbags and curtain air-
bags are located. It is dangerous if the
side airbags and curtain airbags inflate.
Failure to follow all of these instructions
could lead to serious or fatal injury to the
child.
l We recommend work around and on the
side airbags and curtain airbags system
to be done by a MITSUBISHI MOTORS
Authorized Service Point.
SRS warning lamp E00407801591
There is a Supplemental Restraint System (“SRS”)
warning
lamp on the instrument panel. The system
checks itself and the lamp tells you if there is a prob-
lem. When the electric motor switch is turned to
the “ON” or “START” position, the warning lamp
should illuminate for several seconds and then
should go out. This means the system is ready. Seat and seat belts
3-29 3
OHAE13E1
Page 100 of 258
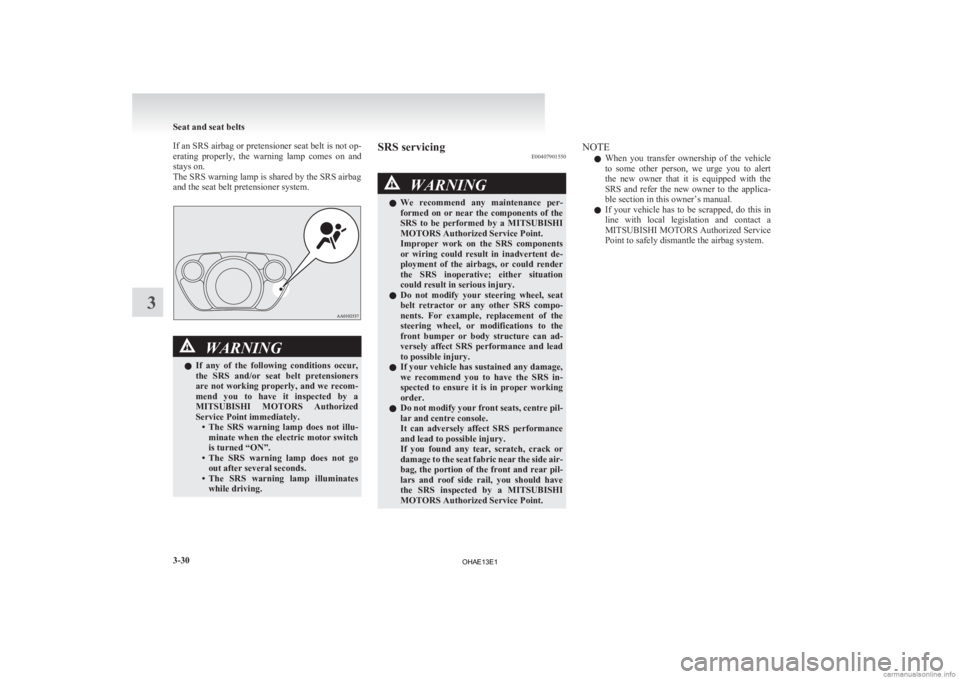
If an SRS airbag or pretensioner seat belt is not op-
erating
properly, the warning lamp comes on and
stays on.
The SRS warning lamp is shared by the SRS airbag
and the seat belt pretensioner system. WARNING
l If
any of the following conditions occur,
the SRS and/or seat belt pretensioners
are not working properly, and we recom-
mend you to have it inspected by a
MITSUBISHI MOTORS Authorized
Service Point immediately. • The SRS warning lamp does not illu-minate when the electric motor switch
is turned “ON”.
• The SRS warning lamp does not go out after several seconds.
• The SRS warning lamp illuminates while driving. SRS servicing
E00407901550 WARNING
l We
recommend any maintenance per-
formed on or near the components of the
SRS to be performed by a MITSUBISHI
MOTORS Authorized Service Point.
Improper work on the SRS components
or wiring could result in inadvertent de-
ployment of the airbags, or could render
the SRS inoperative; either situation
could result in serious injury.
l Do not modify your steering wheel, seat
belt retractor or any other SRS compo-
nents. For example, replacement of the
steering wheel, or modifications to the
front bumper or body structure can ad-
versely affect SRS performance and lead
to possible injury.
l If your vehicle has sustained any damage,
we recommend you to have the SRS in-
spected to ensure it is in proper working
order.
l Do not modify your front seats, centre pil-
lar and centre console.
It can adversely affect SRS performance
and lead to possible injury.
If you found any tear, scratch, crack or
damage to the seat fabric near the side air-
bag, the portion of the front and rear pil-
lars and roof side rail, you should have
the SRS inspected by a MITSUBISHI
MOTORS Authorized Service Point. NOTE
l When
you transfer ownership of the vehicle
to some other person, we urge you to alert
the new owner that it is equipped with the
SRS and refer the new owner to the applica-
ble section in this owner’s manual.
l If your vehicle has to be scrapped, do this in
line with local legislation and contact a
MITSUBISHI MOTORS Authorized Service
Point to safely dismantle the airbag system. Seat and seat belts
3-30
3
OHAE13E1
Page 193 of 258
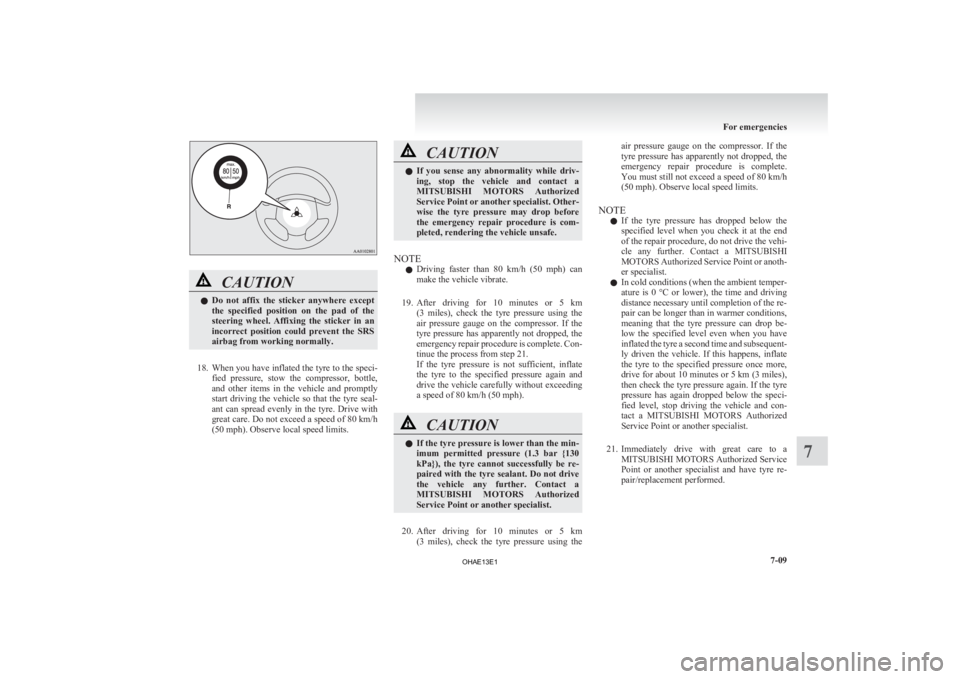
CAUTION
l
Do not affix the sticker anywhere except
the specified position on the pad of the
steering wheel. Affixing the sticker in an
incorrect position could prevent the SRS
airbag from working normally.
18. When
you have inflated the tyre to the speci- fied pressure, stow the compressor, bottle,
and other items in the vehicle and promptly
start driving the vehicle so that the tyre seal-
ant can spread evenly in the tyre. Drive with
great care. Do not exceed a speed of 80 km/h
(50 mph). Observe local speed limits. CAUTION
l
If
you sense any abnormality while driv-
ing, stop the vehicle and contact a
MITSUBISHI MOTORS Authorized
Service Point or another specialist. Other-
wise the tyre pressure may drop before
the emergency repair procedure is com-
pleted, rendering the vehicle unsafe.
NOTE l Driving
faster than 80 km/h (50 mph) can
make the vehicle vibrate.
19. After driving for 10 minutes or 5 km (3 miles), check the tyre pressure using the
air pressure gauge on the compressor. If the
tyre pressure has apparently not dropped, the
emergency repair procedure is complete. Con-
tinue the process from step 21.
If the tyre pressure is not sufficient, inflate
the tyre to the specified pressure again and
drive the vehicle carefully without exceeding
a speed of 80 km/h (50 mph). CAUTION
l
If
the tyre pressure is lower than the min-
imum permitted pressure (1.3 bar {130
kPa}), the tyre cannot successfully be re-
paired with the tyre sealant. Do not drive
the vehicle any further. Contact a
MITSUBISHI MOTORS Authorized
Service Point or another specialist.
20. After
driving for 10 minutes or 5 km (3 miles), check the tyre pressure using the air pressure gauge on the compressor. If the
tyre
pressure has apparently not dropped, the
emergency repair procedure is complete.
You must still not exceed a speed of 80 km/h
(50 mph). Observe local speed limits.
NOTE l If the tyre pressure has dropped below the
specified level when you check it at the end
of the repair procedure, do not drive the vehi-
cle any further. Contact a MITSUBISHI
MOTORS Authorized Service Point or anoth-
er specialist.
l In cold conditions (when the ambient temper-
ature is 0 °C or lower), the time and driving
distance necessary until completion of the re-
pair can be longer than in warmer conditions,
meaning that the tyre pressure can drop be-
low the specified level even when you have
inflated the tyre a second time and subsequent-
ly driven the vehicle. If this happens, inflate
the tyre to the specified pressure once more,
drive for about 10 minutes or 5 km (3 miles),
then check the tyre pressure again. If the tyre
pressure has again dropped below the speci-
fied level, stop driving the vehicle and con-
tact a MITSUBISHI MOTORS Authorized
Service Point or another specialist.
21. Immediately drive with great care to a MITSUBISHI MOTORS Authorized Service
Point or another specialist and have tyre re-
pair/replacement performed. For emergencies
7-09 7
OHAE13E1
Page 245 of 258

A
Accessory (Installation) 04
Accessory socket 6-36
Active stability control (ASC)
5-18
Additional equipment 8-20
Air conditioning Important operation tips for the air condition-
ing 6-09
Air purifier 6-09
Airbag 3-20
Antenna 6-30
Anti-lock brake system (ABS) 5-15 Warning lamp 5-16
Assist grips 6-41
Audio Error codes 6-26
Handling of compact discs 6-29
LW/MW/FM electronic tuning radio with CD
player 6-10
Auxiliary battery 8-12 Specification 9-05
Auxiliary battery charge warning lamp 4-10
BBasic knowledge for charging 1-04
Battery
Auxiliary battery
8-12
Auxiliary battery charge warning lamp 4-10
Discharged battery (Emergency starting) 7-02
Disposal information for used batteries 05
Traction battery 02
Bonnet 8-07
Brake assist system 5-15
Brake Anti-lock brake 5-15
Braking 5-14 Fluid 8-11,9-08
Parking brake 5-03
Warning lamp 4-09
Bulb capacity
8-23C Capacities 9-08
Card holder 6-36,6-39
Cargo loads 5-20
Central door locks 2-06
Charging indicator
4-09
Charging Quick charging 1-12
Regular charging 1-08
Child restraint 3-11
Child-protection rear doors 2-07
Cleaning Exterior of your vehicle 8-03
Interior of your vehicle 8-02
Plastic, vinyl leather, etc. 8-02
Clock 6-31
Cold Cautions and actions to deal with intense
cold 08
Combination headlamps and dipper switch 4-11
Coolant 8-09,9-08
Cruising range 03,9-07
Cruising range indicator 4-03,4-06
Cup holder 6-40
D Daytime running lamps 4-13
Bulb capacity
8-24
Replacement 8-31
Demister (rear window) 4-18
Digital clock 6-31
Dimensions 9-03 Dipper (High/Low beam change) 4-13
Door ajar warning lamp 4-10
Doors
Central door locks 2-06
Child-protection
2-07
Lock and unlock 2-05
Driving the vehicle 5-11
Driving, alcohol and drugs 5-02
E Economical driving 5-02
Electric motor switch
5-07
Electric motor unit Warning lamp 4-10
Electric motor Number 9-02
Specifications 9-05
Electric power steering system (EPS) 5-17
Electric window control 2-09 Driver’s switches 2-09
Lock switch 2-09
Passenger’s switches 2-09
Timer function 2-10
Electronic immobilizer (Anti-theft starting sys-
tem) 2-02
Emergency starting 7-02
Energy level gauge 4-06
Energy usage indicator 4-03
Error codes 6-26
EV charging cable 1-05
Exterior and interior lamp operation 8-19
F Fluid capacities and lubricants 9-08
Fluid
Brake fluid 8-11,9-08
Coolant 8-09 Alphabetical index
1
OHAE13E1