2013 MINI Countryman automatic
[x] Cancel search: automaticPage 12 of 275

CockpitAT A GLANCE
11
1Adjusting the exterior mirrors in and out44
6 Ignition lock 50 7
Buttons on steering wheel,
right
left side
8 Horn: the entire surface
9 Adjusting the steering wheel 45
10 Releasing the hood 215
Power windows, front
36
MINI Countryman: power windows,
rear 36
MINI Countryman: safety switch for
power windows in rear passenger
compartment 37
2 Parking lamps 84
Low beams 84
Automatic headlamp control 84
Adaptive Light Control 85
Turn signals 55
High beams 86
Headlamp flasher 55
Roadside parking lamps 86
Computer 61
3 Tachometer 12
Instrument lighting 86
Resetting the trip odometer 60
4 Wiper system 55
5 Switching the ignition on/off and
starting/stopping the engine
50
Resuming cruise control58
Storing speed and accelerating or
decelerating
Activating/deactivating cruise
control 58
Increasing or reducing volume
Telephone
Press: accepting and ending a call,
starting dialing of selected phone
number and redialing if no phone
number is selected
Microphone in the roofliner on the
driver's side
Activating/deactivating voice acti-
vation system 21
Microphone in the roofliner on the
driver's side
Changing the radio station
Selecting a music track
Scrolling through the redial list
00320051004F004C00510048000300280047004C0057004C005200510003
Page 13 of 275

AT A GLANCECockpit
12
Displays
1Tachometer 60
with indicator and warning lamps 13
2 Display for
>Current vehicle speed 60
> Indicator and warning lamps 13
3 Resetting the trip odometer 604
Display for
>Position of automatic transmission 52
> Computer 61
> Date of next scheduled service, and
remaining distance to be driven 64
> Odometer and trip odometer 60
> Settings and information 62
> Personal Prof ile settings26
5 Instrument lighting 86
6 Speedometer
with indicator and warning lamps 13
7 Control Display 17
8 Fuel gauge 60
00320051004F004C00510048000300280047004C0057004C005200510003
Page 15 of 275

AT A GLANCECockpit
14
Around the center console
1Hazard warning flashers
2 Speedometer 12
3 Radio/CD 143 4
Air conditioner or automatic climate
control 88
Selecting waveband
Changing the audio source
Changing the radio station or track
Ejecting CD
Temperature
Recirculated-air mode
Air distribution for air conditioner
Air distribution to the windshield
Air distribution to the upper body
area
00320051004F004C00510048000300280047004C0057004C005200510003
Page 16 of 275

CockpitAT A GLANCE
15
5Switches in the center console 6
Storage compartment
7 Changing to a differen t menu on the Control
Display 18
8 MINI joystick 16
Move in four directions, turn or press
9 USB audio interface 154
10 Accessing the main me nu on the Control
Display 17
Around the headliner
1Indicator/warning lamp for front passenger
airbags 82
Air distribution to the footwell
Automatic air distribution and flow
rate
Maximum cooling
Cooling function
Defrosting windows
Rear window defroster
Windshield heating
Air flow rate
Seat heating
42
Central locking system, inside 30
Front fog lamps 86
Sport button 74
Driving stability control systems
Dynamic Stability Control DSC 72
Dynamic Traction Control
DTC 73
2
Reading lamps 87
Ambient lighting 87
Glass roof, electric 35
Interior lamps 87
00320051004F004C00510048000300280047004C0057004C005200510003
Page 18 of 275
Onboard computerAT A GLANCE
17
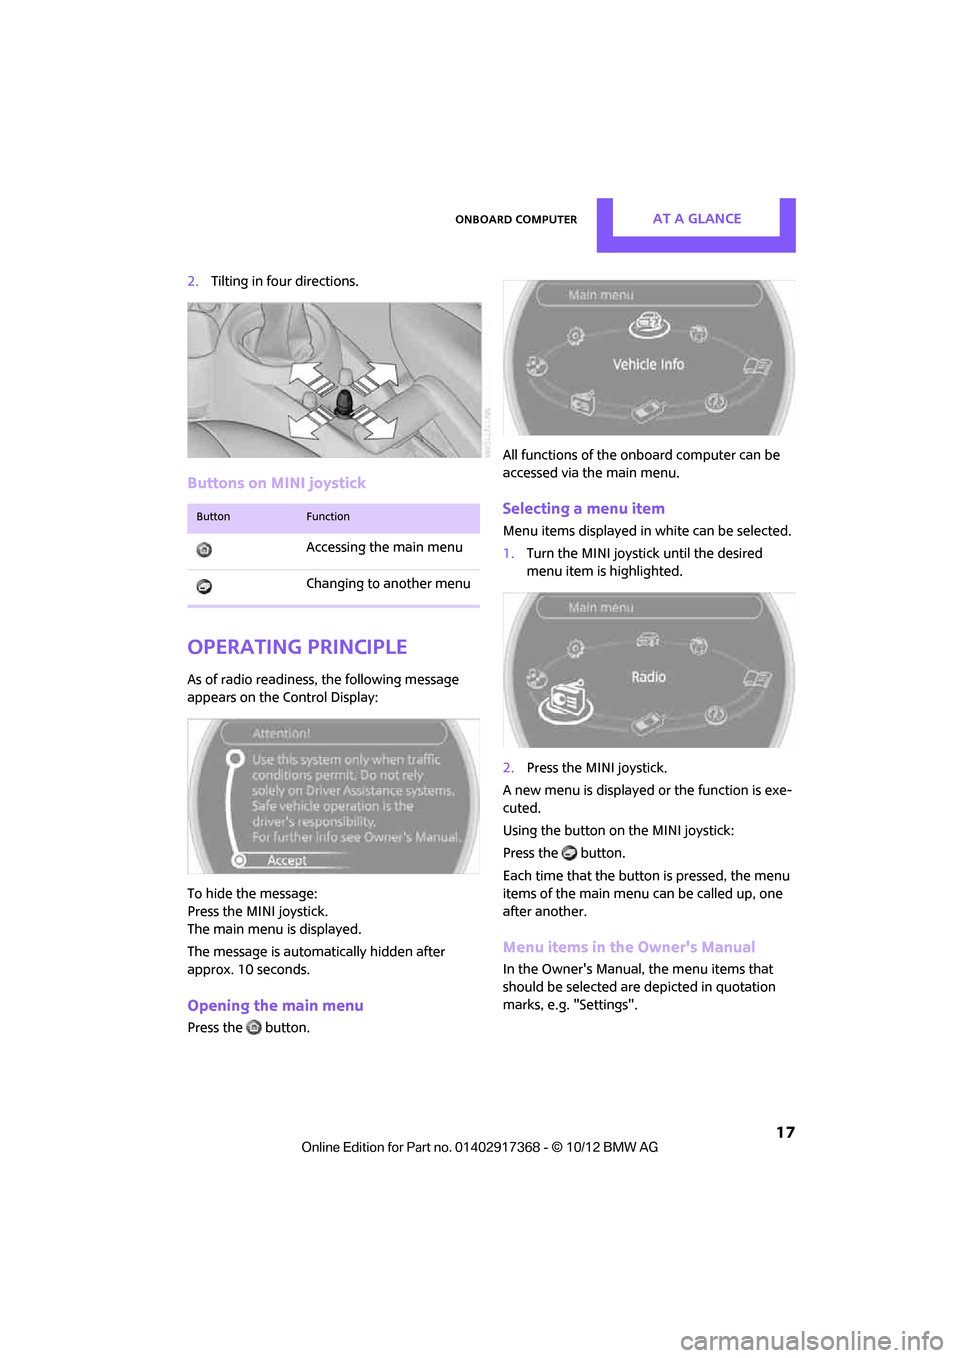
2.Tilting in four directions.
Buttons on MINI joystick
Operating principle
As of radio readiness, the following message
appears on the Control Display:
To hide the message:
Press the MINI joystick.
The main menu is displayed.
The message is automatically hidden after
approx. 10 seconds.
Opening the main menu
Press the button. All functions of the onboard computer can be
accessed via the main menu.
Selecting a menu item
Menu items displayed in
white can be selected.
1. Turn the MINI joystick until the desired
menu item is highlighted.
2. Press the MINI joystick.
A new menu is displayed or the function is exe-
cuted.
Using the button on the MINI joystick:
Press the button.
Each time that the button is pressed, the menu
items of the main menu can be called up, one
after another.
Menu items in the Owner's Manual
In the Owner's Manual, the menu items that
should be selected are depicted in quotation
marks, e.g. "Settings".
ButtonFunction
Accessing the main menu
Changing to another menu
00320051004F004C00510048000300280047004C0057004C005200510003
Page 21 of 275
AT A GLANCELetters and numbers
20
Letters and numbers
Vehicle equipment
In this chapter, all production, country, and
optional equipment that is offered in the model
range is described. Equipment is also described
that is not available because of, for example,
selected options or coun try version. This also
applies to safety relate d functions and systems.
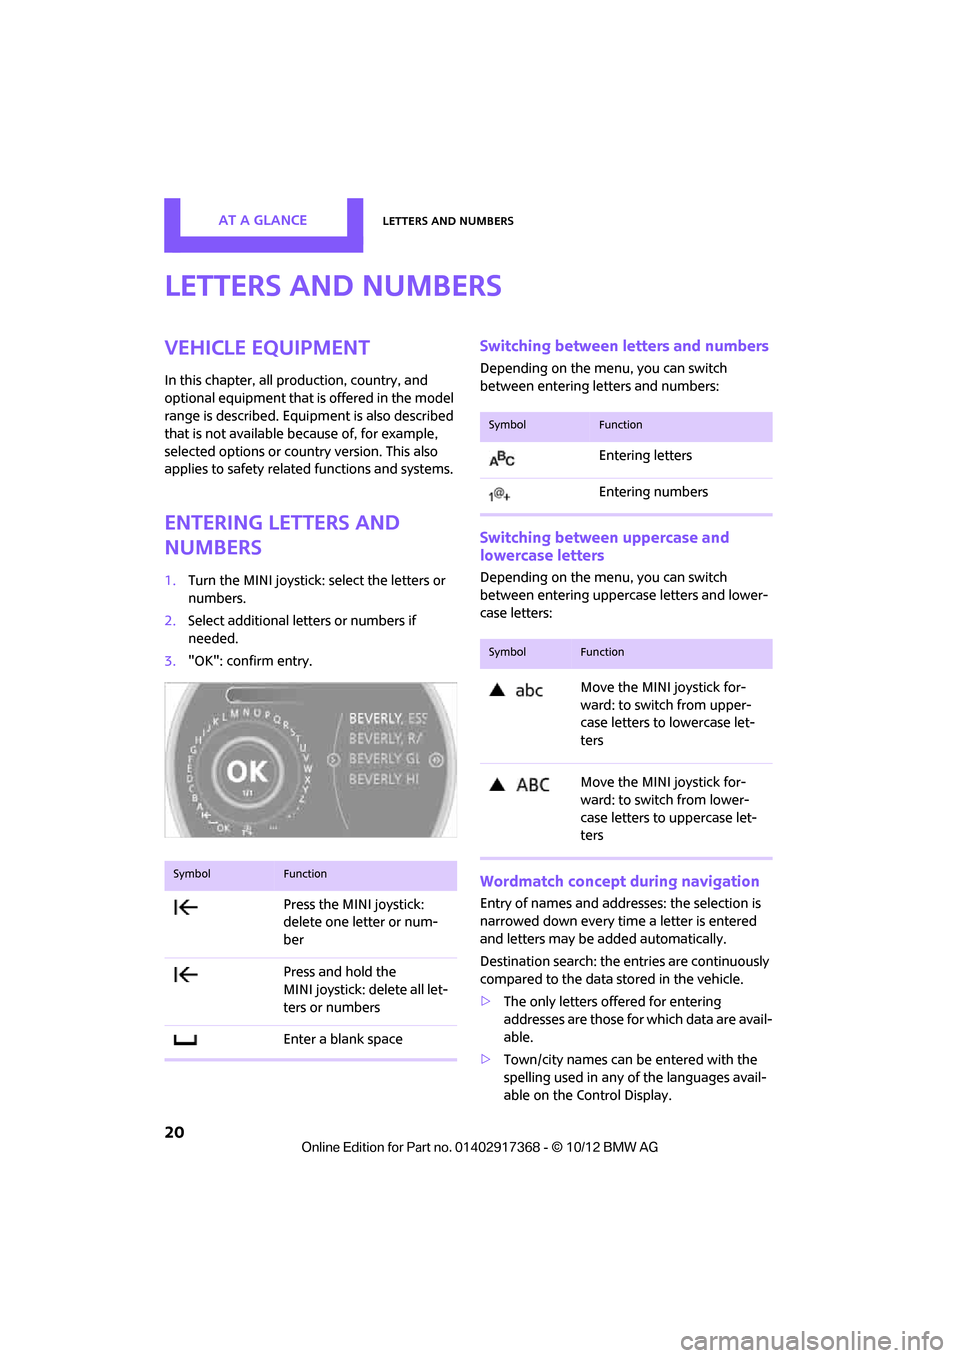
Entering letters and
numbers
1.Turn the MINI joystick: select the letters or
numbers.
2. Select additional letters or numbers if
needed.
3. "OK": confirm entry.
Switching between letters and numbers
Depending on the menu, you can switch
between entering letters and numbers:
Switching between uppercase and
lowercase letters
Depending on the menu, you can switch
between entering uppercase letters and lower-
case letters:
Wordmatch concept during navigation
Entry of names and addre sses: the selection is
narrowed down every time a letter is entered
and letters may be added automatically.
Destination search: the en tries are continuously
compared to the data stored in the vehicle.
> The only letters of fered for entering
addresses are those for which data are avail-
able.
> Town/city names can be entered with the
spelling used in any of the languages avail-
able on the Control Display.
SymbolFunction
Press the MINI joystick:
delete one letter or num-
ber
Press and hold the
MINI joystick: delete all let-
ters or numbers
Enter a blank space
SymbolFunction
Entering letters
Entering numbers
SymbolFunction
Move the MINI joystick for-
ward: to switch from upper-
case letters to lowercase let-
ters
Move the MINI joystick for-
ward: to switch from lower-
case letters to uppercase let-
ters
00320051004F004C00510048000300280047004C0057004C005200510003
Page 28 of 275

Opening and closingCONTROLS
27
Personal Profile settings
For more information on specific settings, refer
to the specified pages.
> Response of the central locking system
when the car is being unlocked 27
> Automatic locking of the vehicle 30
> Triple turn signal activation 55
> Settings for the displays on the onboard
computer, in the speedometer and in the
tachometer:
>12 h/24 h mode of the clock 66
> Date format 67
> Brightness of the Control Display 70
> Language on the Control Display 69
> Units of measure for fuel consumption,
distance covered/re maining distances
and temperature 64
> Light settings:
>Pathway lighting 85
> Daytime running lights 85
> Automatic climate control: activating/deac-
tivating the AUTO program, setting the tem-
perature, air volume and air distribution 90
> Entertainment:
>Audio volume 141
> Tone control 141
Central lock ing system
The concept
The central locking system is ready for operation
whenever the driver's door is closed.
The system simultaneously engages and
releases the locks on the following:
>Doors
> Tailgate
> Fuel filler flap
Operating from outside
>Via the remote control
> Using the door lock
> In cars with Comfor t Access, via the door
handles on the driver's and passenger's
sides
The anti-theft system is also operated at the
same time. It prevents the doors from being
unlocked using the lock buttons or door han-
dles. The remote control can also be used to
switch the welcome lamps, the interior light, and
the ambient lighting on and off. The alarm sys-
tem
is also activated or deactivated, page 32.
Operating from inside
Switch/button for central locking system,
page30.
In the event of a sufficiently severe accident, the
central locking system unlocks automatically. In
addition, the hazard warning flashers and inte-
rior lamps come on.
Opening and closing:
from outside
Persons or animals in a parked vehicle
could lock the doors from the inside. Take
the key with you when you leave the vehicle so
that the vehicle can be opened from the out-
side. <
Using the remote control
Unlocking
Press the button.
The welcome lamps and interior lamps come on.
Unlocking mode
You can also set which parts of the car are
unlocked. The setting is stored for the remote
control in use.
00320051004F004C00510048000300280047004C0057004C005200510003
Page 31 of 275

CONTROLSOpening and closing
30
Opening and closing:
from inside
Operation via
>Switch in the center console
> Button in the driver's door or front passen-
ger door:
The illustration shows the button in the MINI
Paceman as an example.
The switch or the button locks or unlocks the
doors and tailgate when the doors are closed,
but the anti-theft system is not activated. The
fuel filler flap remains unlocked.
Unlocking and opening
> Either unlock the doors together using the
switch or the buttons for the central locking
system and then pull the door handle above
the armrest or
> pull on the door handle of either door twice:
the first time unlocks the door, the second
time opens it.
Locking
>Press the switch/button or
> press down the safety lock button of a door.
To prevent you from being locked out, the
open driver's door cannot be locked using
the lock button.
Persons or animals in a parked vehicle
could lock the doors from the inside. Take
the key with you when you leave the vehicle so
that the vehicle can be opened from the out-
side. <
Automatic locking
You can also set the situations in which the car
locks. The setting is stored for the remote con-
trol in use.
1."Settings"
2. "Door locks"
3. Select a menu item:
>"Lock if no door is opened"
The central locking system automatically
locks the vehicle after a short time if no
door has been opened.
> "Lock after start. to drive"
The central locking system locks the
vehicle as soon as you begin to drive.
The setting is stored fo r the remote control cur-
rently in use.
00320051004F004C00510048000300280047004C0057004C005200510003