2013 MERCEDES-BENZ SLS-CLASS stop start
[x] Cancel search: stop startPage 11 of 286

Fuse box
Front-passenger footwell ...............245
Rear compartment .........................245
Fuses
Allocation chart ............................. 245
Before changing ............................. 245
Important safety notes ..................244
see Fuses G
Garage door opener Clearing the memory .....................211
Notes ............................................. 208
Opening/closing the garage door ..211
Programming (button in the rear-
view mirror) ................................... 209
Gasoline ............................................. 278
Gear indicator .................................... 119
Gear or selector lever (cleaning
guidelines) ......................................... 225
Genuine Mercedes-Benz parts .........274
Glove box ........................................... 196H
Hazard warning lamps ........................94
Head bags ............................................ 41
Headlamp cleaning system Notes ............................................. 281
Headlamps
Adding fluid to cleaning system .....217
Cleaning system (capacity )............ 282
Cleaning system (function) ..............95
Cleaning system (notes) ................281
Fogging up ....................................... 95
see Automatic headlamp mode
Head level heating (AIRSCARF) ..........85
Heating see Climate control
High-beam headlamps
Display message ............................ 171
Switching on/off .............................. 94
Hill start assist .................................. 115
Hood Closing .......................................... .215
Display message ............................ 180Important safety notes
..................214
Opening ......................................... 214
Hydroplaning ..................................... 133 I
Ignition lock ....................................... 113
Immobilizer .......................................... 58
Indicator lamps see Warning and indicator lamps
Instrument cluster
Overview .......................................... 27
Settings ......................................... 153
Warning and indicator lamps ...........28
Instrument cluster lighting ..............154
Interior lighting Automatic control ............................ 95
Delayed switch-off (on-board
computer) ...................................... 155
Emergency lighting ..........................96
Manual control ................................ .96
Overview .......................................... 95
Reading lamp ................................... 95 J
Jack Storage location ............................ 228
Using ............................................. 233
Jump-start (engine)
see Jump starting (engine)
Jump starting (engine) ......................240 K
KEYLESS-GO start function Display message ............................ 181
Start/Stop button .......................... 113
Starting the engine ........................114
Key positions
SmartKey ....................................... 113
Kickdown ........................................... 120
Driving tips .................................... 120
Knee bag .............................................. 40 Index
9ProCarManuals.com
Page 16 of 286

Warning lamp ................................. 190
Warning lamp (function) ...................36
Standing lamps
Display message ............................ 172
Switching on/off .............................. 94
Starting (engine) ................................ 114
Steering wheel Adjusting (electrically) .....................86
Button overview ............................... 29
Buttons (on-board computer) ......... 147
Cleaning ......................................... 225
Important safety notes ....................86
Paddle shifters ............................... 121
Storing settings (memory
function) .......................................... 89
Stopwatch (RACETIMER) ................... 157
Stowage compartments Armrest (under) ............................. 197
Center console .............................. 197
Cup holders ................................... 198
Glove box ...................................... .196
Important safety information .........196
Parcel net ...................................... 197
Rear wall ........................................ 197
Stowage space
Center console (rear) .....................197
Summer opening
see Convenience opening feature
Summer tires ..................................... 250
Sun visor ............................................ 198
Surround lighting (on-board
computer) .......................................... 155
Suspension tuning AMG adaptive sport suspension
system ........................................... 136
Switching air-recirculation mode
on/off ................................................. 107
Switching off the alarm (ATA) ............58 T
Tachometer ........................................ 146
Tail lamps Display message ............................ 171
Tank content
Fuel gauge ....................................... 27Technical data
................................... 282
Notes ............................................. 274
Tires/wheels ................................. 270
TELEAID
Call priority .................................... 205
Display message ............................ 169
Downloading destinations
(COMAND) ..................................... 205
Emergency call .............................. 202
Important safety notes ..................201
Locating a stolen vehicle ...............206
MB info call button ........................204
Remote vehicle locking ..................205
Roadside Assistance button ..........203
Search & Send ............................... 205
Self-test ......................................... 201
System .......................................... 201
Telephone
Accepting a call ............................. 152
Menu (on-board computer) ............152
Number from the phone book ....... .152
Redialing ........................................ 153
Rejecting/ending a call .................152
Temperature
Coolant (on-board computer) ......... 157
Engine oil ....................................... 146
Engine oil (on-board computer) ...... 157
Outside temperature ..................... .147
Theft deterrent systems
ATA (Anti-Theft Alarm system) .........58
Immobilizer ...................................... 58
Theft-deterrent systems
Tow-away alarm ............................... 59
Timing (RACETIMER) .........................157
TIREFIT kit .......................................... 229
Tire pressure Calling up (on-board computer) .....255
Checking manually ........................255
Display message .................... 177, 179
Maximum ....................................... 254
Notes ............................................. 252
Not reached (TIREFIT) ....................231
Reached (TIREFIT) ..........................231
Recommended ............................... 251
see Tire pressure 14
IndexProCarManuals.com
Page 33 of 286

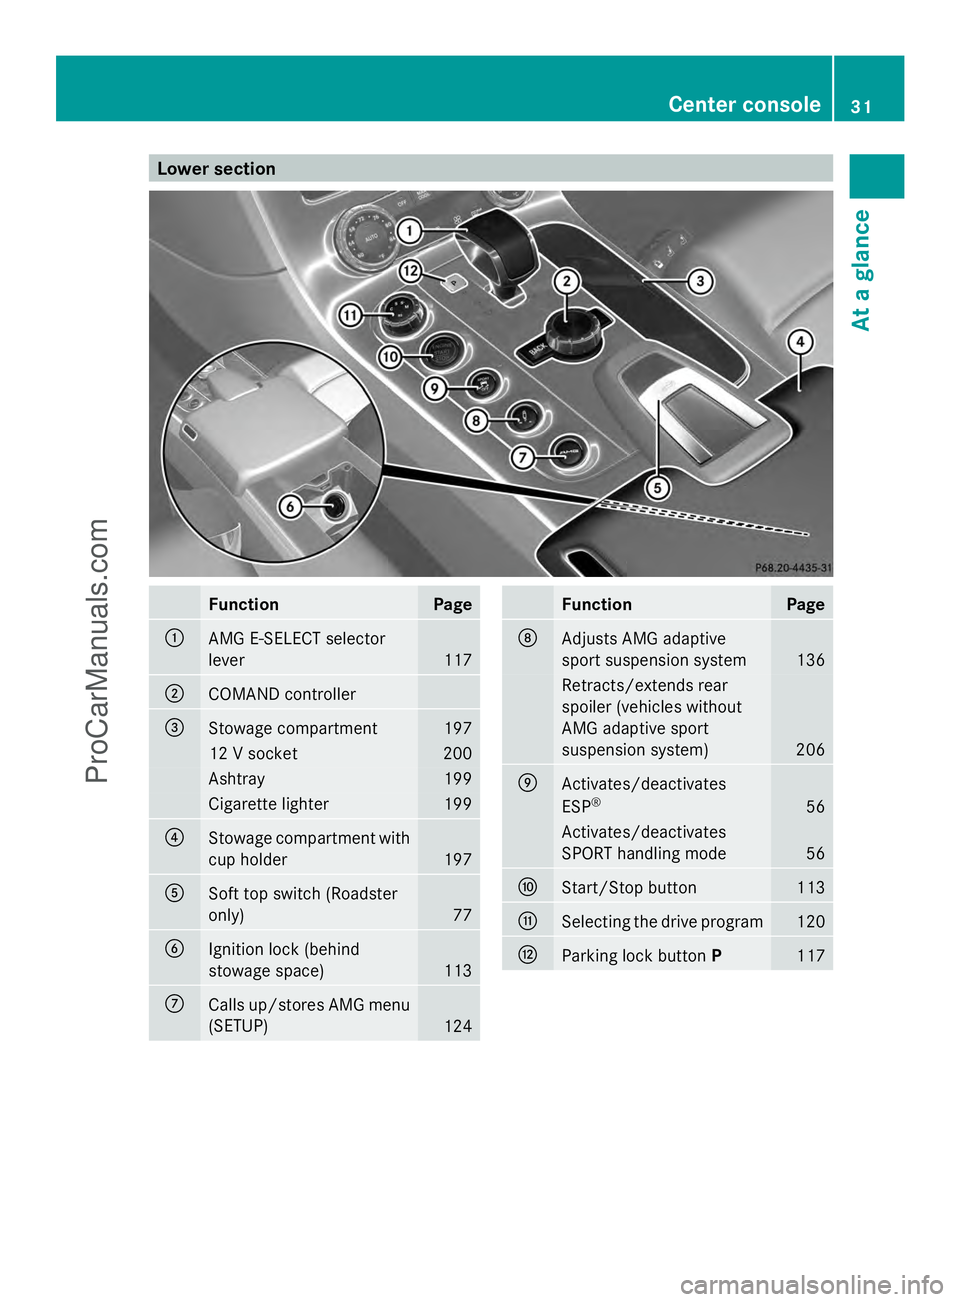
Lower section
Function Page
:
AMG E-SELECT selector
lever
117
;
COMAND controller
=
Stowage compartment 197
12 V socket 200
Ashtray 199
Cigarette lighter 199
?
Stowage compartment with
cup holder 197
A
Soft top switch (Roadster
only)
77
B
Ignition lock (behind
stowage space) 113
C
Calls up/stores AMG menu
(SETUP)
124 Function Page
D
Adjusts AMG adaptive
sport suspension system
136
Retracts/extends rear
spoiler (vehicles without
AMG adaptive sport
suspension system)
206
E
Activates/deactivates
ESP
® 56
Activates/deactivates
SPORT handling mode
56
F
Start/Stop button 113
G
Selecting the drive program 120
H
Parking lock button
P 117Center console
31At a glance
ProCarManuals.com
Page 47 of 286

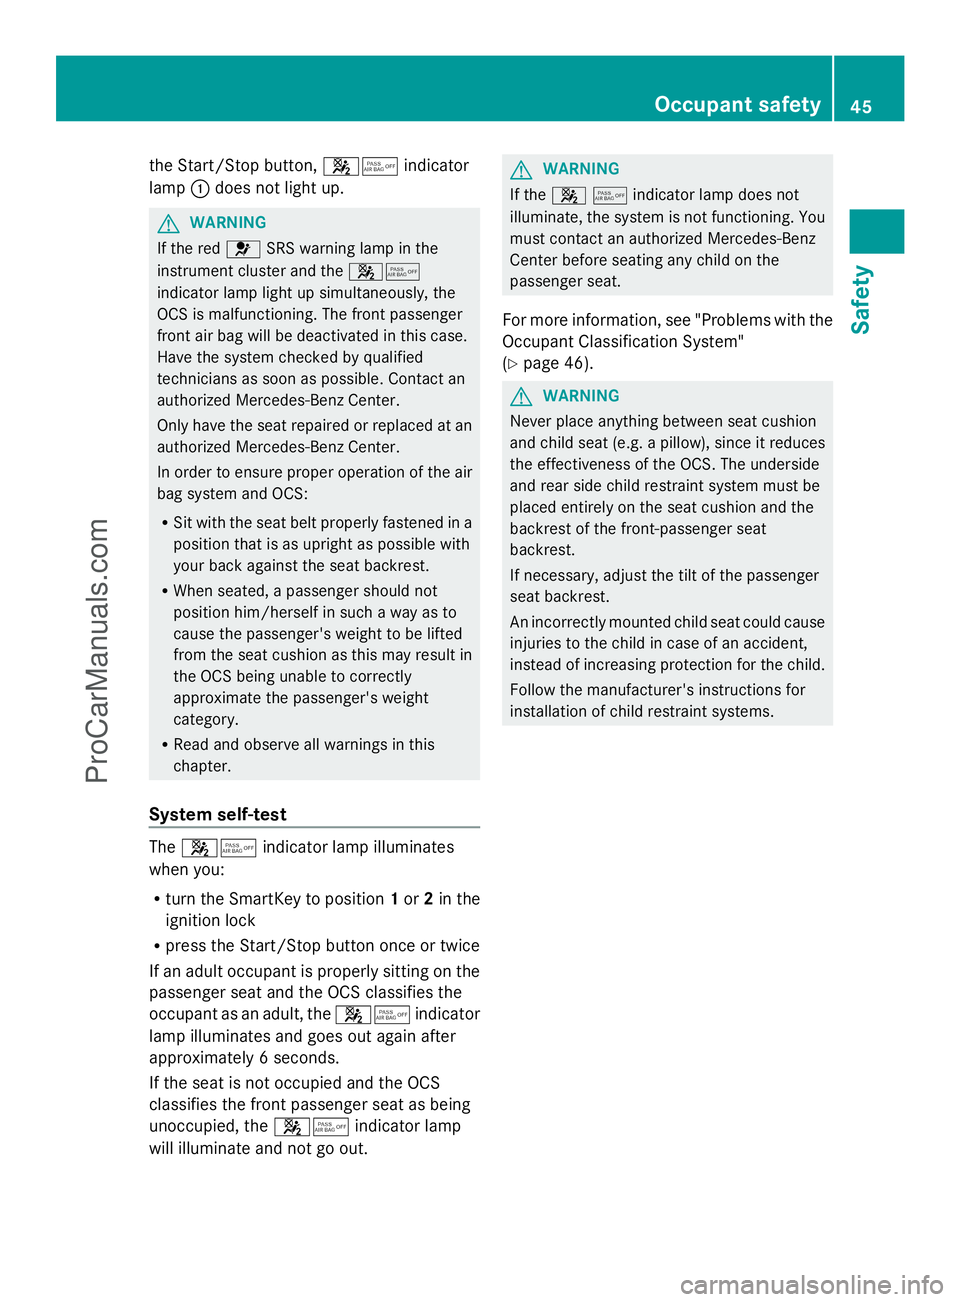
the Start/Stop button,
45indicator
lamp :does not light up. G
WARNING
If the red 6SRS warning lamp in the
instrument cluster and the 45
indicator lamp light up simultaneously, the
OCS is malfunctioning. The front passenger
front air bag will be deactivated in this case.
Have the system checked by qualified
technicians as soon as possible. Contact an
authorized Mercedes-Benz Center.
Only have the seat repaired or replaced at an
authorized Mercedes-Benz Center.
In order to ensure proper operation of the air
bag system and OCS:
R Sit with the seat belt properly fastened in a
position that is as upright as possible with
your back against the seat backrest.
R When seated, a passenger should not
position him/herself in such a way as to
cause the passenger's weight to be lifted
from the seat cushion as this may result in
the OCS being unable to correctly
approximate the passenger's weight
category.
R Read and observe all warnings in this
chapter.
System self-test The
45 indicator lamp illuminates
when you:
R turn the SmartKey to position 1or 2in the
ignition lock
R press the Start/Stop button once or twice
If an adult occupant is properly sitting on the
passenger seat and the OCS classifies the
occupant as an adult, the 45indicator
lamp illuminates and goes out again after
approximately 6 seconds.
If the seat is not occupied and the OCS
classifies the front passenger seat as being
unoccupied, the 45indicator lamp
will illuminate and not go out. G
WARNING
If the 45indicator lamp does not
illuminate, the system is not functioning. You
must contact an authorized Mercedes-Benz
Center before seating any child on the
passenger seat.
For more information, see "Problems with the
Occupant Classification System"
(Y page 46). G
WARNING
Never place anything between seat cushion
and child seat (e.g. a pillow), since it reduces
the effectiveness of the OCS. The underside
and rear side child restraint system must be
placed entirely on the seat cushion and the
backrest of the front-passenger seat
backrest.
If necessary, adjust the tilt of the passenger
seat backrest.
An incorrectly mounted child seat could cause
injuries to the child in case of an accident,
instead of increasing protection for the child.
Follow the manufacturer's instructions for
installation of child restraint systems. Occupant safety
45Safety Z
ProCarManuals.com
Page 56 of 286

X
Install the child restraint system.
X Tension Top Tether belt ?. Comply with
the manufacturer's installation
instructions when doing so.
The child restraint system with Top Tether
belt ?has been removed:
X Slide cover :onto Top Tether
anchorage ;. Panic alarm
X
To activate: press!button :for
approximately one second.
An alarm sounds and the exterior lighting
flashes.
X To deactivate: press!button :
again.
or
X Insert the SmartKey into the ignition lock.
or
X Press the Start/Stop button.
The SmartKey must be in the vehicle.
i USA only:
This device complies with Part 15 of the
FCC regulations. Operation is subject to
the following two conditions:
1. This device may not cause harmful
interference, and
2. this device must accept any interference
received, including interference that may
cause undesired operation of the device. Any unauthorized modification to this
device could void the user's authority to
operate the equipment.
The Product label with FCC ID and IC
certification number can be found in the
battery case of the key.
i Canada only:
This device complies with RSS-Gen of
Industry Canada. Operation is subject to
the following two conditions:
1. This device may not cause harmful
interference, and
2. this device must accept any interference
received, including interference that may
cause undesired operation of the device.
Any unauthorized modification to this
device could void the user's authority to
operate the equipment.
The Product label with FCC ID and IC
certification number can be found in the
battery case of the key. Driving safety systems
Overview of driving safety systems
In this section, you will find information about
the following driving safety systems:
R ABS ( Anti-lock BrakingSystem)
R BAS ( Brake Assist System)
R ESP ®
(Electronic StabilityProgram)
R EBD ( electronic brakeforcedistribution)
R ADAPTIVE BRAKE Important safety notes
G
WARNING
The following factors increase the risk of
accidents:
R Excessive speed, especially in turns
R Wet and slippery road surfaces
R Following another vehicle too closely 54
Driving safety systemsSafety
ProCarManuals.com
Page 61 of 286

R
the hood
R Roadster: the glove box
R Roadster: a compartment in the center
console
R the vehicle with the mechanical key
The alarm is not switched off, even if you
close the open door that triggered it, for
example.
i If the alarm stays on for more than
30 seconds, the mbrace emergency call
system 1
automatically initiates a call to the
Customer Assistance center. The mbrace
emergency call system initiates the call if:
R you have subscribed to the mbrace
service
R the mbrace service has been activated
properly
R the required mobile phone, power supply
and GPS are available. X
To arm: lock the vehicle with the
SmartKey.
The turn signal lamps flash three times and
an acoustic warning sounds three times to
indicate that the vehicle is locked. Flashing
indicator lamp :indicates that the alarm
system is armed.
i If the turn signal lamps do not flash three
times and the warning tone does not sound
three times, a door or the trunk lid may not
be properly closed. It may be necessary to close the affected
door or trunk lid.
X To disarm: unlock the vehicle with the
SmartKey.
The turn signal lamps flash once and a
warning tone sounds once, indicating that
the alarm system is disarmed.
i Unless you open a door or the trunk within
approximately 40 second safter unlocking:
R the vehicle will be locked again
R the alarm system will be rearmed
X To stop the alarm: press the Start/Stop
button in the center console. The SmartKey
must be inside the vehicle.
or
X Press the %or& button on the
SmartKey.
or
X Insert the SmartKey into the ignition lock.
The alarm is switched off. Tow-away alarm
An audible and visual alarm is triggered if your
vehicle's angle of inclination is altered while
the tow-away alarm is armed. This occurs if
the vehicle is jacked up on one side, for
example.
i If the alarm stays on for more than 30
seconds, the mbrace 2
system initiates a
call to the Customer Assistance Center
automatically. The emergency call system
initiates the call provided that:
R you have subscribed to the mbrace
service
R the mbrace service has been activated
properly
R the required mobile phone, power supply
and GPS are available.
1 The system is called Tele Aid in Canada.
2 TELEAID in Canada. Theft deterrent locking system
59Safety Z
ProCarManuals.com
Page 62 of 286

X
To arm: lock the vehicle with the
SmartKey.
The tow-away alarm is armed after
approximately 30 seconds.
X To deactivate: unlock the vehicle with the
SmartKey.
The tow-away alarm is deactivated
automatically.
To prevent a false alarm, deactivate the tow-
away alarm manually if your vehicle:
R is being transported
R is being loaded onto a ferry or car
transporter, for example
R is parked on a movable surface, e.g. in a
split-level garage
X To deactivate: use the Start/Stop button
to set SmartKey position 0.
or
X Remove the SmartKey from the ignition
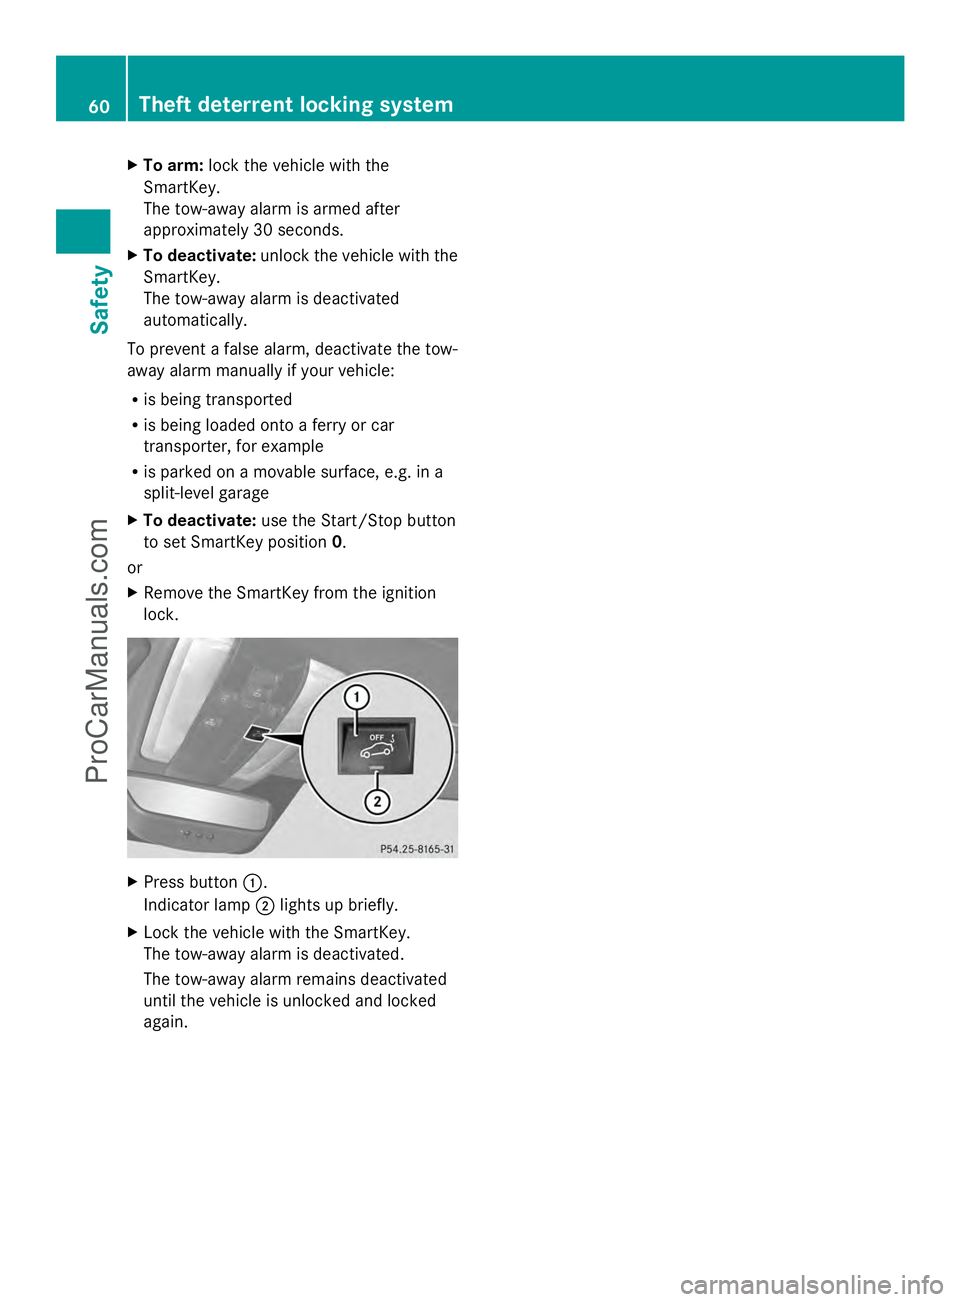
lock. X
Press button :.
Indicator lamp ;lights up briefly.
X Lock the vehicle with the SmartKey.
The tow-away alarm is deactivated.
The tow-away alarm remains deactivated
until the vehicle is unlocked and locked
again. 60
Theft deterrent locking systemSafety
ProCarManuals.com
Page 76 of 286

features. If, in automatic operation mode, a
side window encounters an obstruction that
blocks its path, the anti-entrapment feature
will stop the side window and open it slightly.
The side windows operate differently when
the switch is pulled and held. These details
can be found in the "Closing a blocked side
window" section in this chapter.
The closing of the side windows can be
immediately halted by releasing the switch or,
if the switch was pulled past the resistance
point and released, by pressing or pulling the
respective switch.
If a side window encounters an obstruction
that blocks its path when you are closing the
side windows by pressing and holding the
& button on the SmartKey, the anti-
entrapment feature will not operate. G
WARNING
Do not keep any part of your body up against
the window pane when opening a window. The
downward motion of the pane may pull that
part of your body down between the window
pane and the door frame and trap it there. If
there is a risk of entrapment, release the
switch and pull it to close the window.
Observe the important safety notes in the
"Children in the vehicle" section (Y page 51). Opening and closing the side
windows
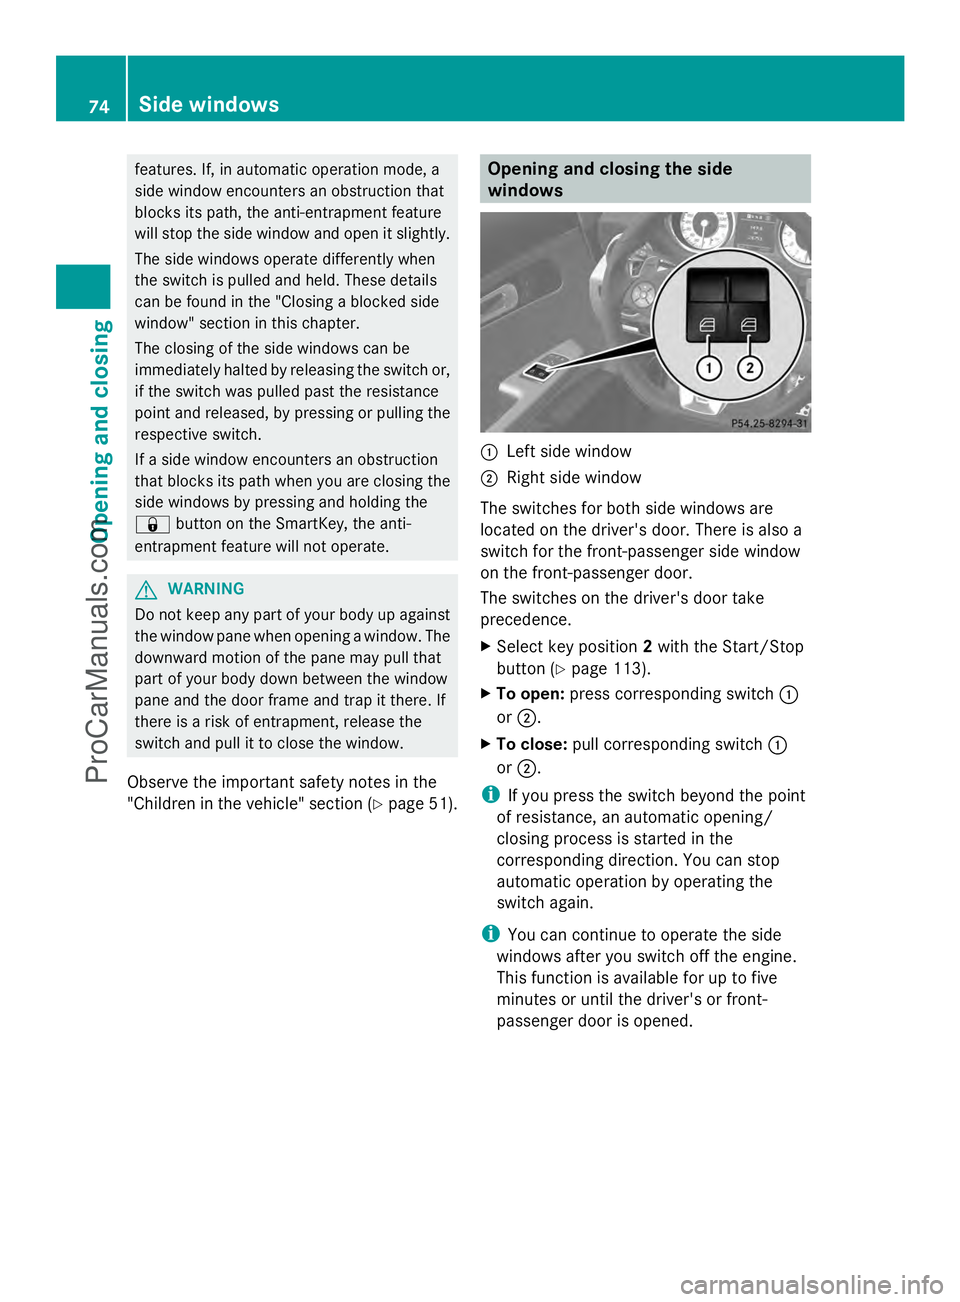
:
Left side window
; Right side window
The switches for both side windows are
located on the driver's door. There is also a
switch for the front-passenger side window
on the front-passenger door.
The switches on the driver's door take
precedence.
X Select key position 2with the Start/Stop
button (Y page 113).
X To open: press corresponding switch :
or ;.
X To close: pull corresponding switch :
or ;.
i If you press the switch beyond the point
of resistance, an automatic opening/
closing process is started in the
corresponding direction. You can stop
automatic operation by operating the
switch again.
i You can continue to operate the side
windows after you switch off the engine.
This function is available for up to five
minutes or until the driver's or front-
passenger door is opened. 74
Side windowsOpening and closing
ProCarManuals.com