2013 MERCEDES-BENZ SLS-CLASS steering wheel
[x] Cancel search: steering wheelPage 203 of 286
mbrace
7
Important safety notes !
You must have a license agreement to
activate the mbrace service. Ensure that
your system is activated and ready for use,
and press the ïMB Info call button to
register. If one of these steps is not carried
out, it may not be possible to activate the
system.
If you have questions about the activation,
contact one of the following telephone
hotlines:
R USA: Mercedes-Benz Customer
Assistance center at
1-800-FOR-MERCedes
(1-800-367-6372) or 1-866-990-9007
R Canada: Customer Service at
1-888-923-8367
Shortly after successfully registering with the
mbrace service, a user ID and password will
be sent to you by mail. You can use this
password to log onto the mbrace area under
"Owners Online" at http://
www.mbusa.com 8
.
The mbrace system is available if:
R it has been activated and is operational
R the corresponding mobile phone network
is available for transmitting data to the
Customer Center
R a service subscription is available
R the starter battery is sufficiently charged
i Determining the location of the vehicle on
a map is only possible if there is sufficient
GPS reception and the vehicle position can
be forwarded to the Customer Center. The mbrace system The mbrace system provides various
services, e.g.:
R
automatic and manual emergency call
R Roadside Assistance call
R MB Info call
To adjust the volume during an mbrace call,
proceed as follows:
X Press the WorX button on the
multifunction steering wheel.
or
X Use the volume controller of COMAND.
You can find further information and a
description of all available features under
"Owners Online" at http://
www.mbusa.com 9
.
Self-diagnosis of the system After you have switched on the ignition, the
system carries out a self-diagnosis.
A malfunction in the system has been
detected if one of the following conditions
occurs:
R
the indicator lamp in the SOS button does
not light up during the system self-
diagnosis.
R the indicator lamp in the FRoadside
Assistance button does not light up during
the system self-diagnosis.
R the indicator lamp in the ïinformation
button does not light up during self-
diagnosis of the system.
R the indicator lamp in the SOS button, the
F Roadside Assistance button or the
ï information button continues to light
up red after the system self-diagnosis.
R the Tele
Tele Aid AidInoperative
Inoperative orTele
Tele Aid
Aid
Not Activated
Not Activated message appears in the
multifunction display after the system self-
diagnosis.
7 The system is called TELE AID in Canada.
8 USA only.
9 USA only. Features
201Stowage an d features Z
ProCarManuals.com
Page 206 of 286
Mercedes-Benz Center. You may be charged
for services such as repair work and/or
towing. Further details are available in your
mbrace manual.
i The mbrace system failed to initiate a
Roadside Assistance call if:
R the indicator lamp in Roadside
Assistance button :is flashing
continuously.
R no voice connection to the Mercedes-
Benz Customer Assistance Center was
established.
This may be because the corresponding
mobile phone network is not available.
The Call
Call Failed Failed message appears on the
multifunction display.
X To end a call: press the~button on the
multifunction steering wheel.
or
X Press the corresponding button for ending
a phone call on COMAND.
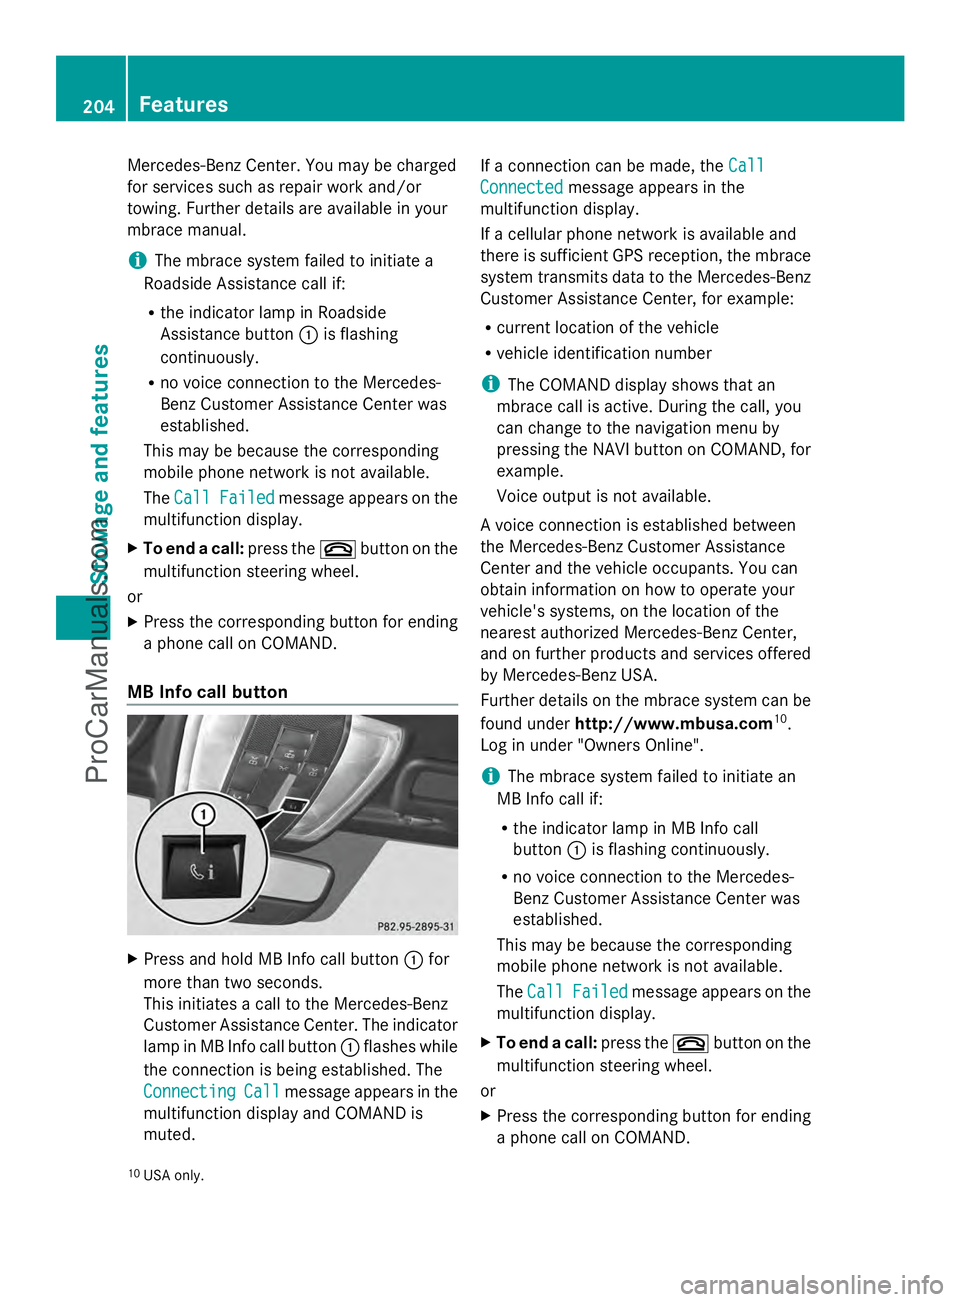
MB Info call button X
Press and hold MB Info call button :for
more than two seconds.
This initiates a call to the Mercedes-Benz
Customer Assistance Center. The indicator
lamp in MB Info call button :flashes while
the connection is being established. The
Connecting
Connecting Call Callmessage appears in the
multifunction display and COMAND is
muted. If a connection can be made, the
Call Call
Connected Connected message appears in the
multifunction display.
If a cellular phone network is available and
there is sufficient GPS reception, the mbrace
system transmits data to the Mercedes-Benz
Customer Assistance Center, for example:
R current location of the vehicle
R vehicle identification number
i The COMAND display shows that an
mbrace call is active. During the call, you
can change to the navigation menu by
pressing the NAVI button on COMAND, for
example.
Voice output is not available.
A voice connection is established between
the Mercedes-Benz Customer Assistance
Center and the vehicle occupants. You can
obtain information on how to operate your
vehicle's systems, on the location of the
nearest authorized Mercedes-Benz Center,
and on further products and services offered
by Mercedes-Benz USA.
Further details on the mbrace system can be
found under http://www.mbusa.com 10
.
Log in under "Owners Online".
i The mbrace system failed to initiate an
MB Info call if:
R the indicator lamp in MB Info call
button :is flashing continuously.
R no voice connection to the Mercedes-
Benz Customer Assistance Center was
established.
This may be because the corresponding
mobile phone network is not available.
The Call Call Failed Failed message appears on the
multifunction display.
X To end a call: press the~button on the
multifunction steering wheel.
or
X Press the corresponding button for ending
a phone call on COMAND.
10 USA only. 204
FeaturesStowage and features
ProCarManuals.com
Page 207 of 286
Call priority
When service calls are active, e.g. Roadside
Assistance or MB Info calls, an emergency
call can still be initiated. In this case, an
emergency call will take priority and override
all other active calls.
The indicator lamp of the respective button
flashes until the call is ended. An emergency
call can only be terminated by the Mercedes-
Benz Customer Assistance Center. All other
calls can be ended by pressing the ~
button on the multifunction steering wheel or
the corresponding button for ending a
telephone call on COMAND.
i If an mbrace call is initiated, audio output
is muted. The mobile phone is no longer
connected to COMAND. However, if you
want to use your mobile phone, we
recommend that you do this only when the
vehicle is stationary and in a safe location.
Downloading destinations in COMAND i
Information on the components and
operating principles of COMAND can be
found in the separate COMAND operating
instructions.
This service is part of the mbrace PLUS
Package and cannot be purchased
separately.
i You can only use the Destination
Download function if the vehicle is
equipped with a navigation system.
Destination Download gives you access to a
database with over 15 million points of
interest (POIs)/important destinations that
can be downloaded onto the navigation
system of your vehicle. If you know the
destination, you can download the address or
obtain the location of points of interest
(POIs)/important destinations in the
surrounding area.
You are prompted to confirm route guidance
to the address entered. The system calculates the route and
subsequently starts the route guidance with
the address entered.
i If you select No
No , the address can be stored
in the address book.
i The Destination Download function is
available if the corresponding mobile
phone network is available and data
transfer is possible.
Route Assistance
This service is part of the mbrace PLUS
Package and cannot be purchased
separately.
i You can also use the Route Assistance
function if your vehicle is not equipped with
a navigation system.
Within the framework of this service, you
receive a professional and reliable form of
navigation support without having to leave
your vehicle.
The customer service representative
determines a suitable driving route based on
your current vehicle position and the desired
destination and guides you live through the
current sections of the route.
Search & Send "Search & Send" is a destination entry
service. You can find further information on
"Search & Send" in the separate COMAND
operating instructions.
Vehicle remote closing
If you forget to lock your vehicle but are no
longer in the vicinity of the vehicle, it can be
locked for you by the Mercedes-Benz
Customer Assistance Center.
The vehicle can be locked remotely up to four
days after the ignition was last switched off.
X
Contact the following service hotlines:
R
USA: Mercedes-Benz Customer
Assistance Center at Features
205Stowage and features Z
ProCarManuals.com
Page 220 of 286

You can obtain further information from an
authorized Mercedes-Benz Center or at
http://www.mbusa.com (USA only).
The service interval message informs you of
the next service due date.
If a service due date has been exceeded, you
also hear a warning tone.
The multifunction display shows a service
message for several seconds, e.g.:
Next Service A in .. days
Next Service A in .. days
Service A Due Service A Due
Service A Exceeded by .. days Service A Exceeded by .. days
The letter indicates which service is due. A A
stands for a minor service and B
Bfor a major
service. A number or another letter may be
displayed after the letter. This figure indicates
any necessary additional maintenance work
to be performed.
You can obtain further information from an
authorized Mercedes-Benz Center.
The service interval display does not take into
account any periods of time during which the
battery is disconnected.
Maintaining the time-dependent service
schedule:
X Note down the service due date displayed
in the multifunction display before
disconnecting the battery.
or
X After reconnecting the battery, subtract
the battery disconnection periods from the
service date shown on the display.
i The service interval display does not
provide any information regarding the
engine's oil level. Observe the notes on the
engine oil level (Y page 215).
Hiding a service message X
Press the %ora button on the
steering wheel. Displaying service messages X
Switch on the ignition.
X Press the =or; button on the
steering wheel to select the Serv. Serv.menu.
X Press the 9or: button to select the
ASSYST PLUS
ASSYST PLUS submenu and confirm with
a.
The service due date appears in the
multifunction display.
Points to remember Resetting the service interval display
A qualified specialist workshop, e.g. an
authorized Mercedes-Benz Center, will reset
the service interval display after the
necessary service work has been carried out.
You can also obtain further information on
maintenance work, for example.
!
If the service interval display has been
reset unintentionally, have the setting
corrected at a Mercedes-Benz Center.
Have service work carried out as described
in the Maintenance Booklet. This may
otherwise lead to increased wear and
damage to the major assemblies or the
vehicle.
Special service requirements
The specified maintenance interval takes only
the normal operation of the vehicle into
account. Under arduous operating conditions
or increased load on the vehicle,
maintenance work must be carried out more
frequently, for example:
R regular city driving with frequent
intermediate stops
R if the vehicle is primarily used to travel
short distances
R use in mountainous terrain or on poor road
surfaces
R if the engine is often left idling for long
periods 218
MaintenanceMaintenance and care
ProCarManuals.com
Page 227 of 286
Impurities combined with the effects of road
grit and corrosive environmental factors may
cause flash rust to form on the surface. You
can restore the original shine of the exhaust
pipe by cleaning it regularly, especially in
winter and after washing. Interior care
Cleaning the display !
For cleaning, do not use any of the
following:
R alcohol-based thinner or gasoline
R abrasive cleaning agents
R commercially-available household
cleaning agents
These may damage the display surface. Do
not put pressure on the display surface
when cleaning. This could lead to
irreparable damage to the display.
X Before cleaning the display, make sure that
it is switched off and has cooled down.
X Clean the display surface using a
commercially available microfiber cloth
and TFT/LCD display cleaner.
X Dry the display surface using a dry
microfiber cloth.
Cleaning the plastic trim G
WARNING
Care products and cleaning agents containing
solvents cause surfaces in the cockpit to
become porous. As a result, plastic parts may
come loose in the event of air bag
deployment. There is a risk of injury.
Do not use any care products and cleaning
agents to clean the cockpit.
! Do not affix the following to plastic
surfaces:
R stickers
R films
R scented oil bottles or similar items You can otherwise damage the plastic.
! Do not allow cosmetics, insect repellent
or sunscreen to come into contact with the
plastic trim. This maintains the high-quality
look of the surfaces.
X Wipe the plastic trim with a damp, lint-free
cloth, e.g. a microfiber cloth.
X Heavy soiling: use car care and cleaning
products recommended and approved by
Mercedes-Benz.
The surface may change color temporarily.
Wait until the surface is dry again.
Cleaning the steering wheel and
selector lever X
Thoroughly wipe with a damp cloth or use
leather care agents that have been
recommended and approved by Mercedes-
Benz.
Cleaning genuine wood and trim
elements !
Do not use solvent-based cleaning agents
such as tar remover, wheel cleaners,
polishes or waxes. There is otherwise a risk
of damaging the surface.
! Do not use chrome polish on trim pieces.
The trim pieces have a chrome look but are
mostly made of anodized aluminum and
can lose their shine if chrome polish is
used. Use a damp, lint-free cloth instead
when cleaning the trim pieces.
If the chrome-plated trim pieces are very
dirty, you can use a chrome polish. If you
are unsure as to whether the trim pieces
are chrome-plated or not, consult an
authorized Mercedes-Benz Center.
X Wipe the wooden trim and trim pieces with
a damp, lint-free cloth, e.g. a microfiber
cloth.
X Heavy soiling: use car care and cleaning
products recommended and approved by
Mercedes-Benz. Care
225Maintenance and care Z
ProCarManuals.com
Page 246 of 286
X
Switch on the hazard warning lamps
(Y page 94).
X Make sure that the SmartKey is in position
2 in the ignition and that the engine is
running throughout the towing procedure.
X Move the transmission to Nwith the E-
SELECT lever. Check the transmission
position in the instrument cluster. Towing a vehicle with both axles on
the ground
When having your vehicle towed, observe the
important safety notes ( Ypage 242).
X Switch on the hazard warning lamps
(Y page 94).
i When towing with the hazard warning
lamps switched on, use the combination
switch as usual to signal a change of
direction. In this case, only the turn signals
for the desired direction flash. When the
combination switch is reset, the hazard
warning lamps start flashing again.
X Insert the SmartKey into the ignition lock
(Y page 113).
X Start the engine and leave the SmartKey in
the ignition.
X Move the transmission to Nwith the E-
SELECT lever.
X Check the transmission position in the
instrument cluster display (Y page 119).
X Leave the engine running during the entire
towing procedure. Transporting the vehicle
The towing eye can be used to pull the vehicle
onto a trailer or transporter for transporting
purposes.
! Only lash the vehicle down by the wheels
or wheel rims, not by parts of the vehicle
such as axle or steering components.
Otherwise, the vehicle could be damaged. X
Start the engine.
X Make sure that the SmartKey is in position
2in the ignition and that the engine is
running during the entire loading operation.
X Move the transmission to Nwith the E-
SELECT lever. Check the transmission
position in the instrument cluster.
As soon as the vehicle is loaded:
X Prevent the vehicle from rolling away by
applying the electric parking brake.
X Shift the transmission to Pwith the button
in the center console.
X Turn the SmartKey to position 0in the
ignition lock and remove the SmartKey
from the ignition lock.
X Secure the vehicle. Fuses
Important safety notes
G
WARNING
Only use fuses approved by Mercedes-Benz
with the specified amperage for the system in
question and do not attempt to repair or
bridge a blown fuse. Using other than
approved fuses or using repaired or bridged
fuses may cause an overload leading to a fire,
and/or cause damage to electrical
components and/or systems. Have the cause
determined and remedied by an authorized
Mercedes-Benz Center.
! Only use fuses that have been approved
for Mercedes-Benz vehicles and which
have the correct fuse rating for the system
concerned. Otherwise, components or
systems could be damaged.
The fuses in your vehicle serve to close down
faulty circuits. If a fuse blows, all the
components on the circuit and their functions
stop operating.
Blown fuses must be replaced with fuses of
the same rating, which you can recognize by
the color and value. The fuse ratings are listed 244
FusesBreakdown assistance
ProCarManuals.com
Page 253 of 286
possible when you come to a road that is
not snow-covered.
R Local regulations may restrict the use of
snow chains. Observe the appropriate
regulations if you wish to mount snow
chains.
R Do not exceed the maximum permissible
speed of 30 mph (50 km/h).
R Snow chains must not be mounted on
emergency spare wheels.
i You may wish to deactivate
ESP ®
(Y page 56) when pulling away with
snow chains installed. You can thereby
allow the wheels to spin in a controlled
manner, achieving an increased driving
force (cutting action). M+S tires
G
WARNING
M+S tires with a tread depth of less than 1
/ 6
inch (4 mm) must be replaced. They are no
longer suitable for winter operation. G
WARNING
If you mount the spare wheel when driving
with M+S tires, bear in mind that driving
stability will be impaired due to unstable
cornering characteristics caused by the
different tire characteristics. Adapt your style
of driving accordingly.
Have the spare wheel replaced by a normal
wheel with an M+S tire at the nearest
Mercedes-Benz Center.
At temperatures below 45 ‡ (+7 †), use all-
season tires or winter tires. Both types of tire
are identified by the M+S marking.
Only winter tires bearing the isnowflake
symbol in addition to the M+S marking
provide the best possible grip in wintry road
conditions. Only these tires will allow driving
safety systems such as ABS and ESP ®
to
function optimally in winter. This is because these tires were specifically developed for
driving in snow.
Use M+S tires of the same make and tread on
all wheels to maintain safe handling
characteristics.
Always observe the maximum permissible
speed specified for the M+S tires you have
mounted.
When you have mounted the M+S tires:
X
Check the tire pressures (Y page 251).
X Restart the tire pressure monitor
(Y page 257). Tire pressure
Tire pressure specifications
G
WARNING
Follow recommended tire inflation pressures.
Do not underinflate tires. Underinflated tires
wear excessively and/or unevenly, adversely
affect handling and fuel economy, and are
more likely to fail from being overheated.
Do not overinflate tires. Overinflated tires can
adversely affect handling and ride comfort,
wear unevenly, increase stopping distance,
and result in sudden deflation (blowout)
because they are more likely to become
punctured or damaged by road debris,
potholes etc.
Do not overload the tires by exceeding the
specified load limit as indicated on the Tire
and Loading Information placard on the
driver's door B-pillar. Overloading the tires
can overheat them, possibly causing a
blowout. Overloading the tires can also result
in handling or steering problems, or brake
failure.
You will find a table of recommended tire
pressures on the Tire and Loading
Information placard on the B-pillar on the
driver's side (Y page 258). You will find a
table of tire pressure for various operating
conditions on the inside of your vehicle's fuel
filler flap. Tire pressure
251Wheels and tires Z
ProCarManuals.com
Page 256 of 286
Overinflation
G
WARNING
Follow recommended tire inflation pressures.
Do not overinflate tires. Overinflated tires can
adversely affect handling and ride comfort,
wear unevenly, increase stopping distance,
and result in sudden deflation (blowout)
because they are more likely to become
punctured or damaged by road debris,
potholes etc.
Overinflated tires may:
R have an adverse effect on handling
characteristics
R wear quickly and unevenly
R be more susceptible to damage
R have an adverse effect on ride comfort
R increase the braking distance
Maximum tire pressure G
WARNING
Never exceed the maximum tire inflation
pressure. Follow recommended tire inflation
pressures.
Do not underinflate tires. Underinflated tires
wear excessively and/or unevenly, adversely
affect handling and fuel economy, and are
more likely to fail from being overheated.
Do not overinflate tires. Overinflated tires can
adversely affect handling and ride comfort,
wear unevenly, increase stopping distance,
and result in sudden deflation (blowout)
because they are more likely to become
punctured or damaged by road debris,
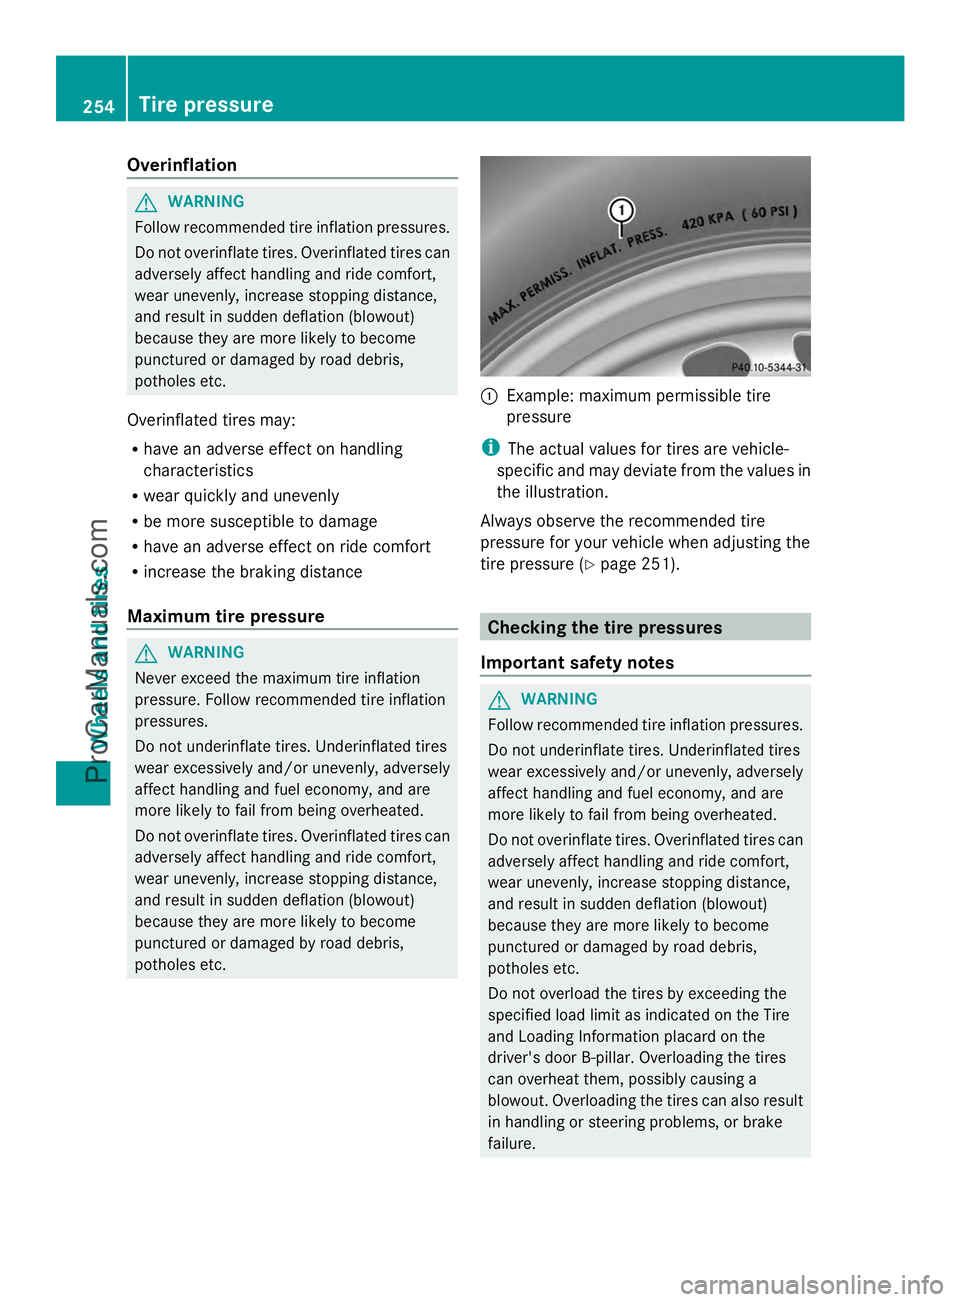
potholes etc. :
Example: maximum permissible tire
pressure
i The actual values for tires are vehicle-
specific and may deviate from the values in
the illustration.
Always observe the recommended tire
pressure for your vehicle when adjusting the
tire pressure (Y page 251). Checking the tire pressures
Important safety notes G
WARNING
Follow recommended tire inflation pressures.
Do not underinflate tires. Underinflated tires
wear excessively and/or unevenly, adversely
affect handling and fuel economy, and are
more likely to fail from being overheated.
Do not overinflate tires. Overinflated tires can
adversely affect handling and ride comfort,
wear unevenly, increase stopping distance,
and result in sudden deflation (blowout)
because they are more likely to become
punctured or damaged by road debris,
potholes etc.
Do not overload the tires by exceeding the
specified load limit as indicated on the Tire
and Loading Information placard on the
driver's door B-pillar. Overloading the tires
can overheat them, possibly causing a
blowout. Overloading the tires can also result
in handling or steering problems, or brake
failure. 254
Tire pressureWheels and tires
ProCarManuals.com