2013 MERCEDES-BENZ SLS-CLASS change wheel
[x] Cancel search: change wheelPage 181 of 286
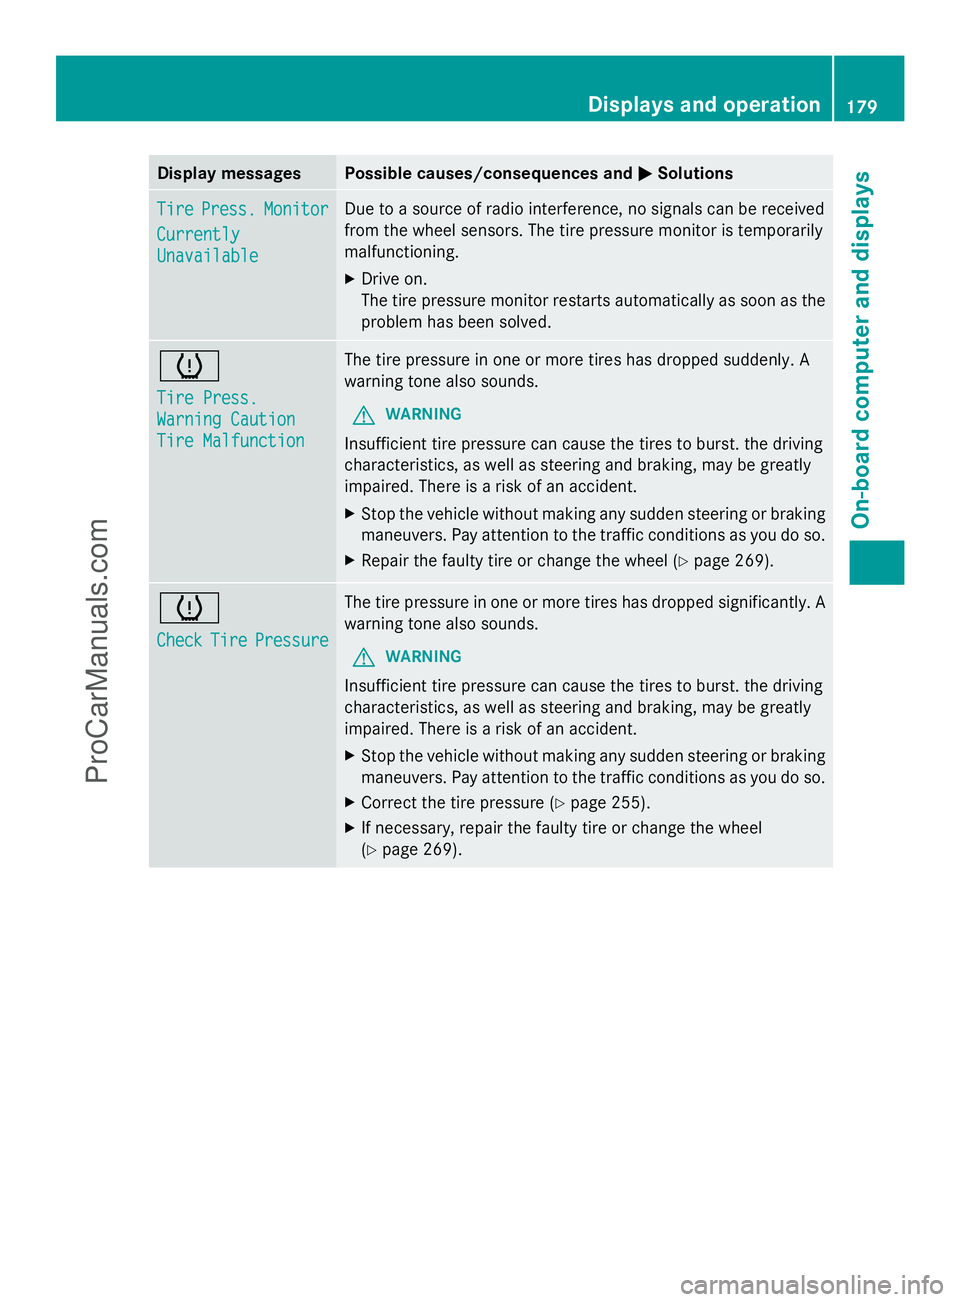
Display messages Possible causes/consequences and
M
MSolutions Tire
Tire
Press.
Press. Monitor
Monitor
Currently
Currently
Unavailable Unavailable Due to a source of radio interference, no signals can be received
from the wheel sensors. The tire pressure monitor is temporarily
malfunctioning.
X
Drive on.
The tire pressure monitor restarts automatically as soon as the
problem has been solved. h
Tire Press. Tire Press.
Warning Caution Warning Caution
Tire Malfunction Tire Malfunction The tire pressure in one or more tires has dropped suddenly. A
warning tone also sounds.
G WARNING
Insufficient tire pressure can cause the tires to burst. the driving
characteristics, as well as steering and braking, may be greatly
impaired. There is a risk of an accident.
X Stop the vehicle without making any sudden steering or braking
maneuvers. Pay attention to the traffic conditions as you do so.
X Repair the faulty tire or change the wheel ( Ypage 269). h
Check Check
Tire
TirePressure
Pressure The tire pressure in one or more tires has dropped significantly. A
warning tone also sounds.
G WARNING
Insufficient tire pressure can cause the tires to burst. the driving
characteristics, as well as steering and braking, may be greatly
impaired. There is a risk of an accident.
X Stop the vehicle without making any sudden steering or braking
maneuvers. Pay attention to the traffic conditions as you do so.
X Correct the tire pressure (Y page 255).
X If necessary, repair the faulty tire or change the wheel
(Y page 269). Displays and operation
179On-board computer and displays Z
ProCarManuals.com
Page 195 of 286
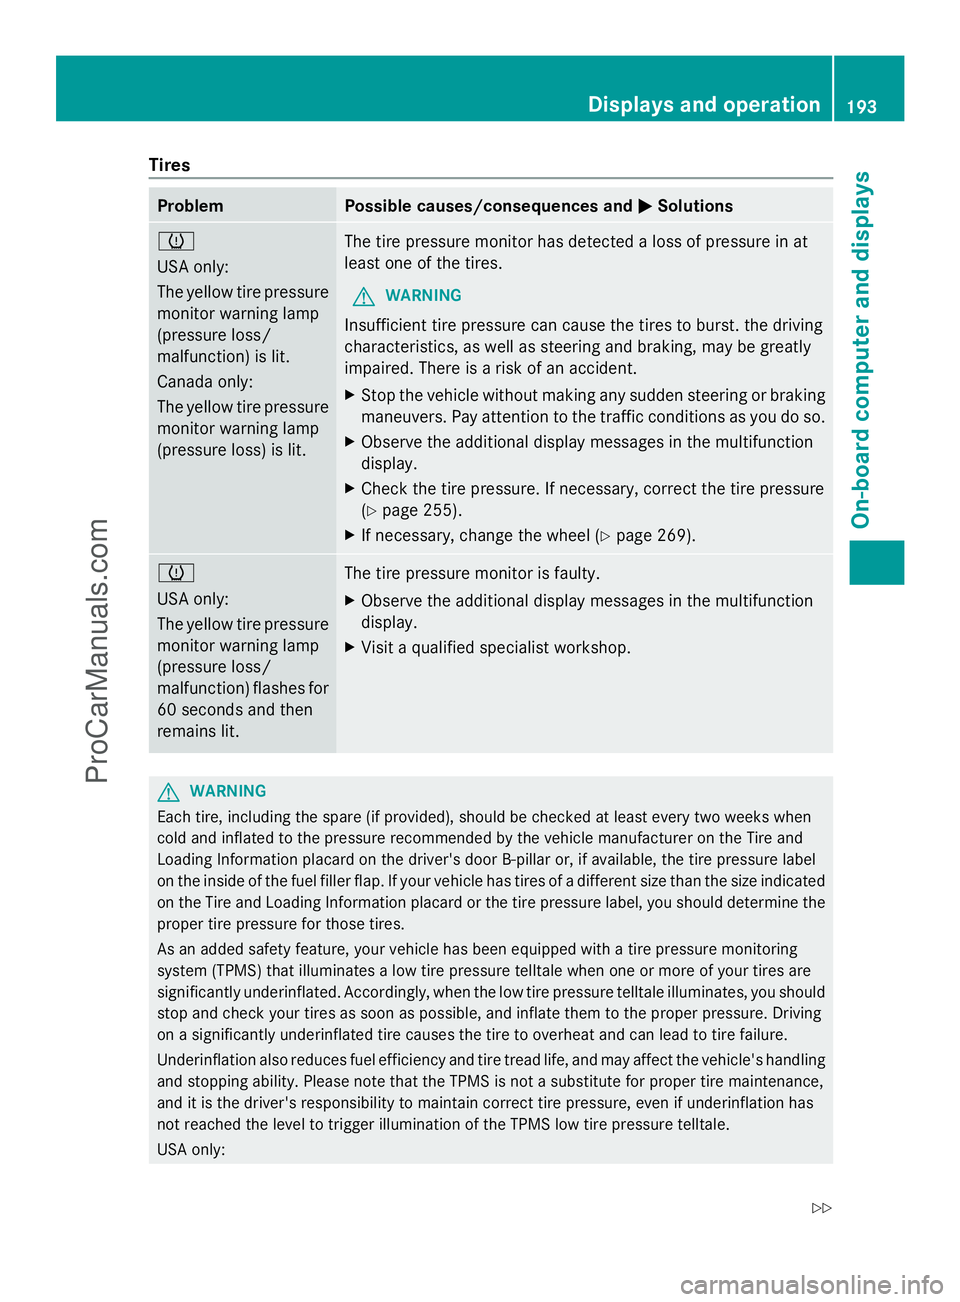
Tires
Problem Possible causes/consequences and
M
MSolutions h
USA only:
The yellow tire pressure
monitor warning lamp
(pressure loss/
malfunction) is lit.
Canada only:
The yellow tire pressure
monitor warning lamp
(pressure loss) is lit. The tire pressure monitor has detected a loss of pressure in at
least one of the tires.
G WARNING
Insufficient tire pressure can cause the tires to burst. the driving
characteristics, as well as steering and braking, may be greatly
impaired. There is a risk of an accident.
X Stop the vehicle without making any sudden steering or braking
maneuvers. Pay attention to the traffic conditions as you do so.
X Observe the additional display messages in the multifunction
display.
X Check the tire pressure. If necessary, correct the tire pressure
(Y page 255).
X If necessary, change the wheel (Y page 269).h
USA only:
The yellow tire pressure
monitor warning lamp
(pressure loss/
malfunction) flashes for
60 seconds and then
remains lit.
The tire pressure monitor is faulty.
X
Observe the additional display messages in the multifunction
display.
X Visit a qualified specialist workshop. G
WARNING
Each tire, including the spare (if provided), should be checked at least every two weeks when
cold and inflated to the pressure recommended by the vehicle manufacturer on the Tire and
Loading Information placard on the driver's door B-pillar or, if available, the tire pressure label
on the inside of the fuel filler flap. If your vehicle has tires of a different size than the size indicated
on the Tire and Loading Information placard or the tire pressure label, you should determine the
proper tire pressure for those tires.
As an added safety feature, your vehicle has been equipped with a tire pressure monitoring
system (TPMS) that illuminates a low tire pressure telltale when one or more of your tires are
significantly underinflated. Accordingly, when the low tire pressure telltale illuminates, you should
stop and check your tires as soon as possible, and inflate them to the proper pressure. Driving
on a significantly underinflated tire causes the tire to overheat and can lead to tire failure.
Underinflation also reduces fuel efficiency and tire tread life, and may affect the vehicle's handling
and stopping ability. Please note that the TPMS is not a substitute for proper tire maintenance,
and it is the driver's responsibility to maintain correct tire pressure, even if underinflation has
not reached the level to trigger illumination of the TPMS low tire pressure telltale.
USA only: Displays and operation
193On-boardcompu ter and displays
Z
ProCarManuals.com
Page 206 of 286
Mercedes-Benz Center. You may be charged
for services such as repair work and/or
towing. Further details are available in your
mbrace manual.
i The mbrace system failed to initiate a
Roadside Assistance call if:
R the indicator lamp in Roadside
Assistance button :is flashing
continuously.
R no voice connection to the Mercedes-
Benz Customer Assistance Center was
established.
This may be because the corresponding
mobile phone network is not available.
The Call
Call Failed Failed message appears on the
multifunction display.
X To end a call: press the~button on the
multifunction steering wheel.
or
X Press the corresponding button for ending
a phone call on COMAND.
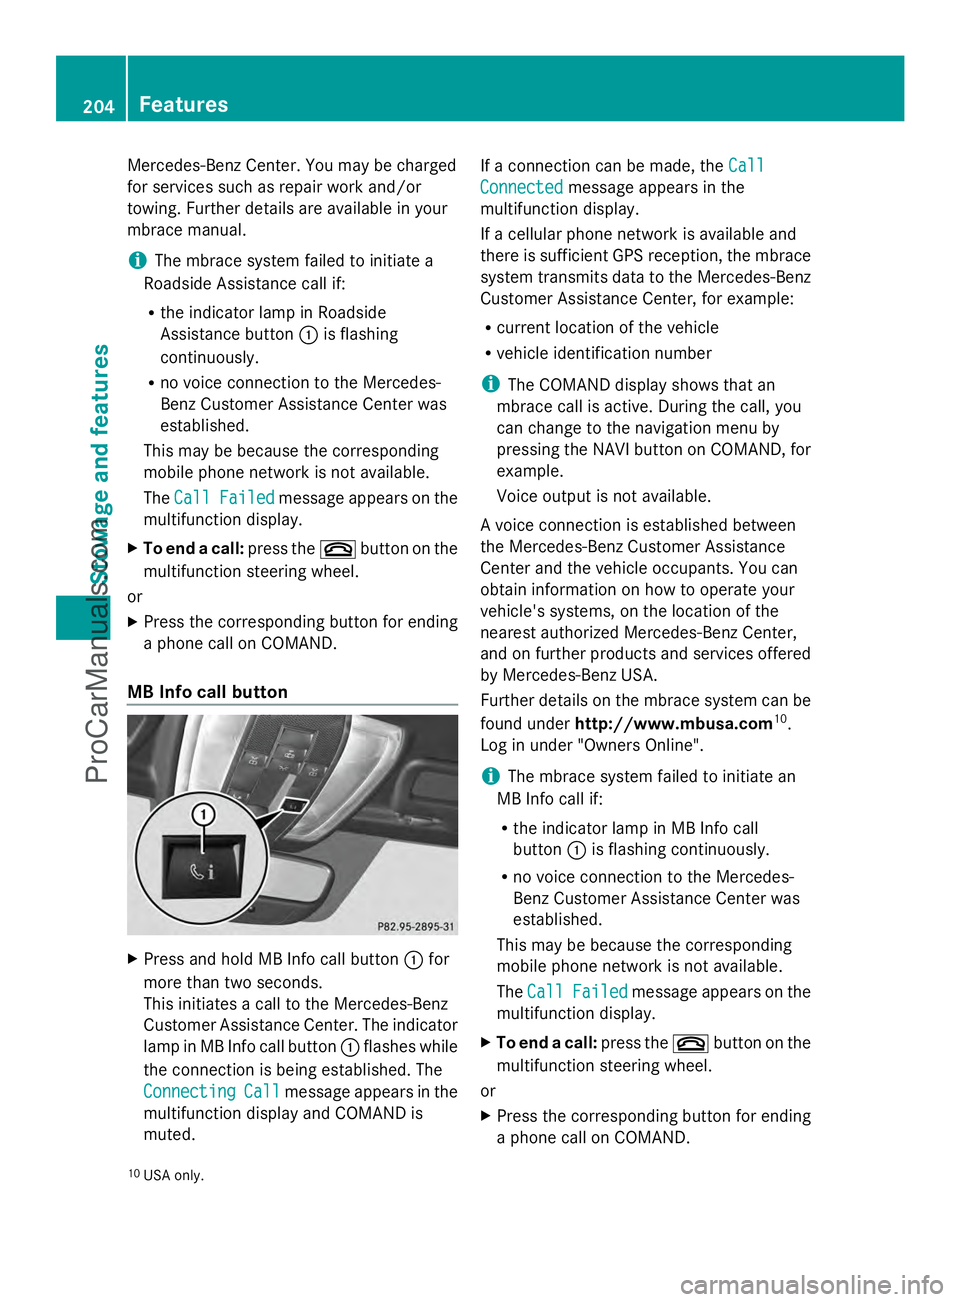
MB Info call button X
Press and hold MB Info call button :for
more than two seconds.
This initiates a call to the Mercedes-Benz
Customer Assistance Center. The indicator
lamp in MB Info call button :flashes while
the connection is being established. The
Connecting
Connecting Call Callmessage appears in the
multifunction display and COMAND is
muted. If a connection can be made, the
Call Call
Connected Connected message appears in the
multifunction display.
If a cellular phone network is available and
there is sufficient GPS reception, the mbrace
system transmits data to the Mercedes-Benz
Customer Assistance Center, for example:
R current location of the vehicle
R vehicle identification number
i The COMAND display shows that an
mbrace call is active. During the call, you
can change to the navigation menu by
pressing the NAVI button on COMAND, for
example.
Voice output is not available.
A voice connection is established between
the Mercedes-Benz Customer Assistance
Center and the vehicle occupants. You can
obtain information on how to operate your
vehicle's systems, on the location of the
nearest authorized Mercedes-Benz Center,
and on further products and services offered
by Mercedes-Benz USA.
Further details on the mbrace system can be
found under http://www.mbusa.com 10
.
Log in under "Owners Online".
i The mbrace system failed to initiate an
MB Info call if:
R the indicator lamp in MB Info call
button :is flashing continuously.
R no voice connection to the Mercedes-
Benz Customer Assistance Center was
established.
This may be because the corresponding
mobile phone network is not available.
The Call Call Failed Failed message appears on the
multifunction display.
X To end a call: press the~button on the
multifunction steering wheel.
or
X Press the corresponding button for ending
a phone call on COMAND.
10 USA only. 204
FeaturesStowage and features
ProCarManuals.com
Page 221 of 286
Under these or similar conditions, have, for
example, the air filter, engine oil and oil filter
replaced or changed more frequently. Under
arduous operating conditions, the tires must
be checked more often. Further information
can be obtained at a qualified specialist
workshop, e.g. an authorized Mercedes-Benz
Center.
Driving abroad
An extensive Mercedes-Benz Service network
is also available in other countries. You can
obtain further information from any
authorized Mercedes-Benz Center. Care
Notes on care
Regular care of your vehicle is a condition for
retaining the quality in the long term.
Use care products and cleaning agents
recommended and approved by Mercedes-
Benz. G
WARNING
Many cleaning products can be hazardous.
Some are poisonous, others are flammable.
Always follow the instructions on the
particular container. Always open your
vehicle's doors or windows when cleaning the
inside.
Never use fluids or solvents that are not
designed for cleaning your vehicle.
Always lock away cleaning products and keep
them out of reach of children.
! For cleaning your vehicle, do not use any
of the following:
R dry, rough or hard cloths
R abrasive cleaning agents
R solvents
R cleaning agents containing solvents
Do not scrub.
Do not touch the surfaces or protective
films with hard objects, e.g. a ring or ice scraper. You could otherwise scratch or
damage the surfaces and protective film. H
Environmental note
Dispose of empty packaging and cleaning
cloths in an environmentally responsible
manner.
! Do not park the vehicle for an extended
period right after cleaning it, particularly
after having cleaned the wheels with wheel
cleaner. Wheel cleaners could cause
increased corrosion of the brake discs and
brake pads/linings. For this reason, you
should drive for a few minutes after
cleaning. Braking heats the brake discs and
brake pads, thus drying them. The vehicle
can then be parked. Exterior care
Automatic car wash G
WARNING
Braking efficiency is reduced after washing
the vehicle. There is a risk of an accident.
After the vehicle has been washed, brake
carefully while paying attention to the traffic
conditions until full braking power is restored.
You can wash the vehicle in an automatic car
wash from the very start.
If the vehicle is very dirty, pre-wash it before
cleaning it in an automatic car wash.
! Never clean your vehicle in a Touchless
Automatic Car Wash as these use special
cleaning agents. These cleaning agents can
damage the paintwork or plastic parts.
! When washing your vehicle in a tow-
through car wash, use the SmartKey
instead of the Start/Stop button.
Start the engine using the SmartKey.. Move
the transmission to Nwith the E-SELECT
lever. Use the SmartKey to switch the
engine off again and then turn the
SmartKey to position 2. Make sure that you Care
219Maintenance and care Z
ProCarManuals.com
Page 227 of 286
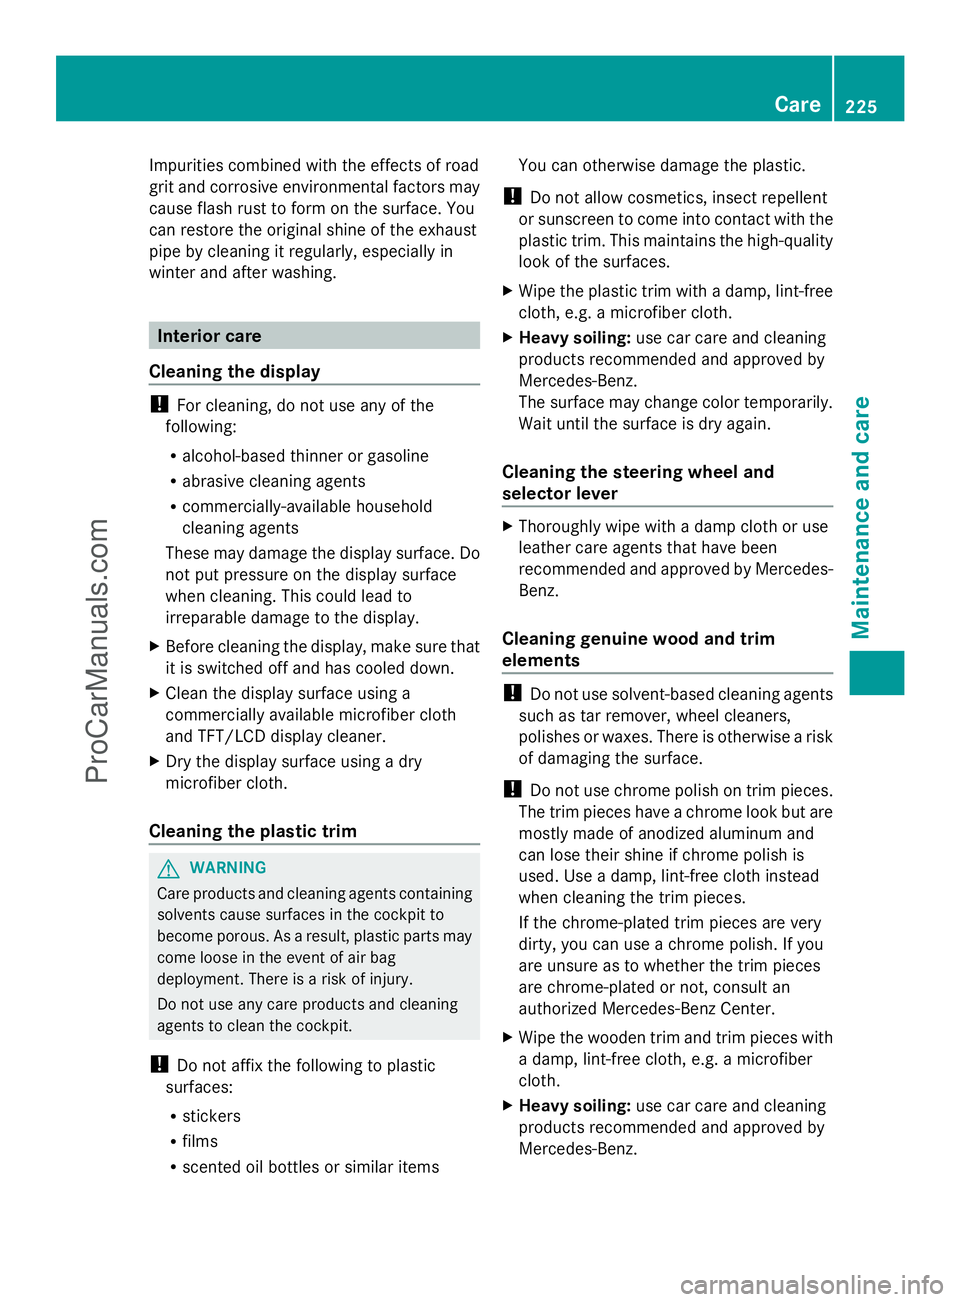
Impurities combined with the effects of road
grit and corrosive environmental factors may
cause flash rust to form on the surface. You
can restore the original shine of the exhaust
pipe by cleaning it regularly, especially in
winter and after washing. Interior care
Cleaning the display !
For cleaning, do not use any of the
following:
R alcohol-based thinner or gasoline
R abrasive cleaning agents
R commercially-available household
cleaning agents
These may damage the display surface. Do
not put pressure on the display surface
when cleaning. This could lead to
irreparable damage to the display.
X Before cleaning the display, make sure that
it is switched off and has cooled down.
X Clean the display surface using a
commercially available microfiber cloth
and TFT/LCD display cleaner.
X Dry the display surface using a dry
microfiber cloth.
Cleaning the plastic trim G
WARNING
Care products and cleaning agents containing
solvents cause surfaces in the cockpit to
become porous. As a result, plastic parts may
come loose in the event of air bag
deployment. There is a risk of injury.
Do not use any care products and cleaning
agents to clean the cockpit.
! Do not affix the following to plastic
surfaces:
R stickers
R films
R scented oil bottles or similar items You can otherwise damage the plastic.
! Do not allow cosmetics, insect repellent
or sunscreen to come into contact with the
plastic trim. This maintains the high-quality
look of the surfaces.
X Wipe the plastic trim with a damp, lint-free
cloth, e.g. a microfiber cloth.
X Heavy soiling: use car care and cleaning
products recommended and approved by
Mercedes-Benz.
The surface may change color temporarily.
Wait until the surface is dry again.
Cleaning the steering wheel and
selector lever X
Thoroughly wipe with a damp cloth or use
leather care agents that have been
recommended and approved by Mercedes-
Benz.
Cleaning genuine wood and trim
elements !
Do not use solvent-based cleaning agents
such as tar remover, wheel cleaners,
polishes or waxes. There is otherwise a risk
of damaging the surface.
! Do not use chrome polish on trim pieces.
The trim pieces have a chrome look but are
mostly made of anodized aluminum and
can lose their shine if chrome polish is
used. Use a damp, lint-free cloth instead
when cleaning the trim pieces.
If the chrome-plated trim pieces are very
dirty, you can use a chrome polish. If you
are unsure as to whether the trim pieces
are chrome-plated or not, consult an
authorized Mercedes-Benz Center.
X Wipe the wooden trim and trim pieces with
a damp, lint-free cloth, e.g. a microfiber
cloth.
X Heavy soiling: use car care and cleaning
products recommended and approved by
Mercedes-Benz. Care
225Maintenance and care Z
ProCarManuals.com
Page 230 of 286
Useful information
i This Operator's Manual describes all
models and all standard and optional
equipment of your vehicle available at the
time of publication of the Operator's
Manual. Country-specific differences are
possible. Please note that your vehicle may
not be equipped with all features
described. This also applies to safety-
related systems and functions.
i Please read the information on qualified
specialist workshops (Y page 22).Where will I find...?
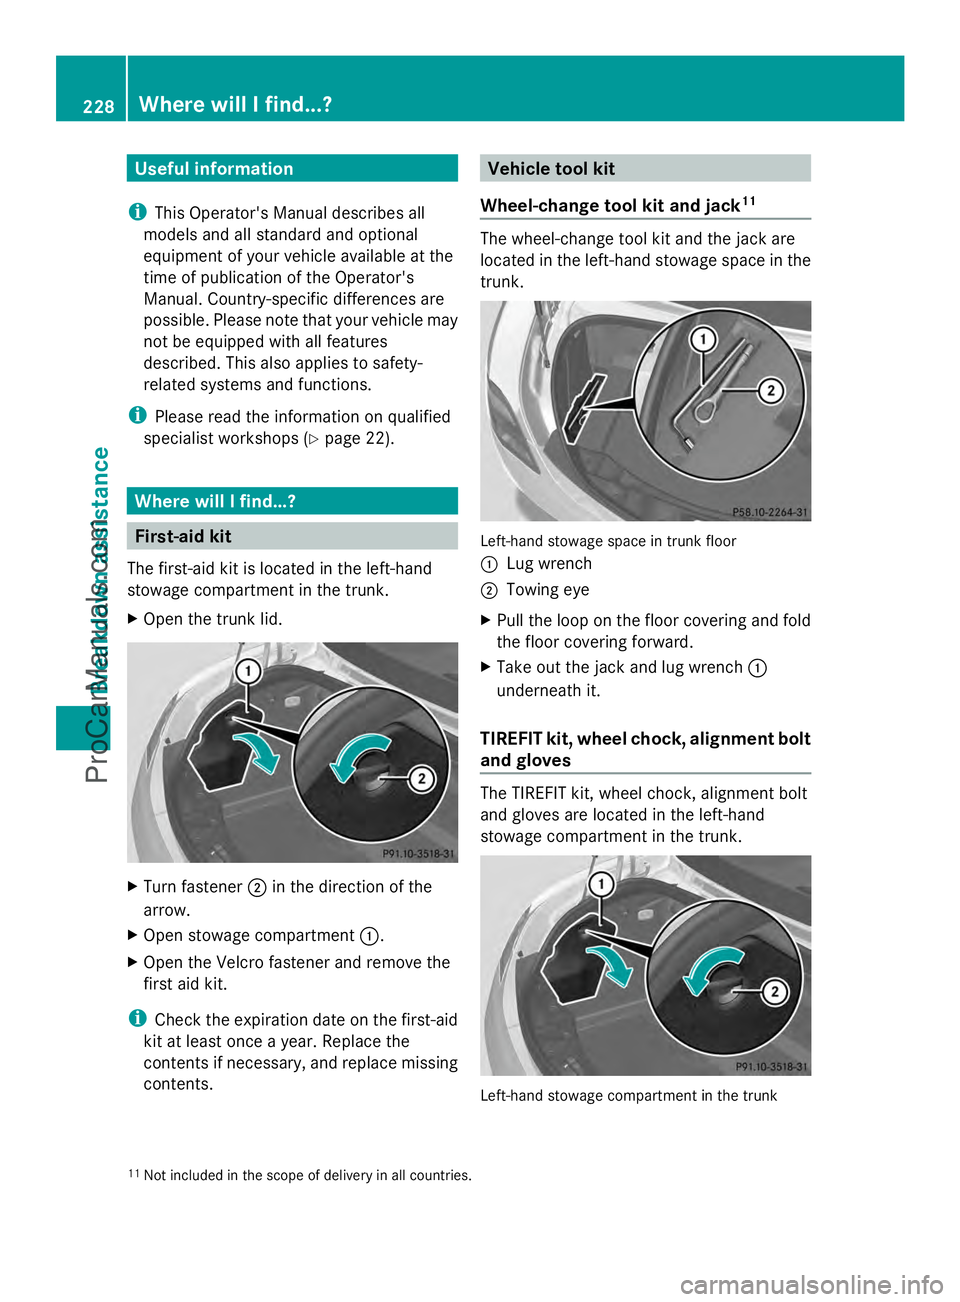
First-aid kit
The first-aid kit is located in the left-hand
stowage compartment in the trunk.
X Open the trunk lid. X
Turn fastener ;in the direction of the
arrow.
X Open stowage compartment :.
X Open the Velcro fastener and remove the
first aid kit.
i Check the expiration date on the first-aid
kit at least once a year. Replace the
contents if necessary, and replace missing
contents. Vehicle tool kit
Wheel-change tool kit and jack 11 The wheel-change tool kit and the jack are
located in the left-hand stowage space in the
trunk.
Left-hand stowage space in trunk floor
:
Lug wrench
; Towing eye
X Pull the loop on the floor covering and fold
the floor covering forward.
X Take out the jack and lug wrench :
underneath it.
TIREFIT kit, wheel chock, alignment bolt
and gloves The TIREFIT kit, wheel chock, alignment bolt
and gloves are located in the left-hand
stowage compartment in the trunk.
Left-hand stowage compartment in the trunk
11 Not included in the scope of delivery in all countries. 228
Where will I find...?Breakdown assistance
ProCarManuals.com
Page 231 of 286

X
Remove the jack from the left-hand
stowage space in the trunk to allow the
stowage compartment to be opened.
X Turn fastener ;in the direction of the
arrow.
X Open stowage compartment :.
X Remove the TIREFIT kit, wheel chock,
alignment bolt and gloves. Flat tire
Preparing the vehicle
Your vehicle is equipped with a TIREFIT kit.
X Stop the vehicle on solid, non-slippery and
level ground, as far away as possible from
traffic.
X Switch on the hazard warning lamps.
X Apply the electric parking brake manually
(Y page 129).
X Bring the front wheels into the straight-
ahead position.
X Shift the transmission to Pwith the button
in the center console.
X Switch off the engine.
X Remove the SmartKey from the ignition
lock.
X All occupants must get out of the vehicle.
Make sure that they are not endangered as
they do so.
X Make sure that no one is near the danger
area while a wheel is being changed.
Anyone who is not directly assisting in the
wheel change should, for example, stand
behind the barrier.
X Get out of the vehicle. Pay attention to
traffic conditions when doing so.
X Close the driver's door. TIREFIT kit
Using the TIREFIT kit G
WARNING
TIREFIT is a limited repair device. TIREFIT
cannot be used for cuts or punctures larger
than approximately 0.16 in (4 mm) and tire
damage caused by driving with extremely low
tire inflation pressure, or on a flat tire, or a
damaged wheel.
Do not drive the vehicle under such
circumstances.
Contact the nearest authorized Mercedes-
Benz Center for assistance or call Roadside
Assistance. G
WARNING
Take care not to allow the contents of TIREFIT
to come in contact with hair, eyes or clothing.
TIREFIT is harmful if inhaled, swallowed or
absorbed through the skin - causes skin, eye
and respiratory irritation.
Any contact with eyes or skin should be
flushed immediately with plenty of water.
If clothing comes in contact with TIREFIT,
change clothing as soon as possible.
In case of allergic reaction or rash, consult a
physician immediately. G
WARNING
Keep TIREFIT away from children. If
swallowed, rinse mouth immediately with
plenty of water and drink plenty of water.
Do not induce vomiting.
Consult a doctor immediately.
Keep away from open flame or heat source.
You can use the TIREFIT kit to seal small
punctures, particularly those in the tire tread.
You can use TIREFIT at outside temperatures
down to -40 †. Flat ti
re
229Breakdo wn assis tance Z
ProCarManuals.com
Page 234 of 286

The sticker must be attached on the
instrument cluster where it will be easily seen
by the driver.
Vehicle handling characteristics of a TIREFIT
repaired tire may change. Adapt your driving
accordingly.
X Stop after driving for approximately ten
minutes and check the tire pressure with
the tire inflation compressor.
i On tires that are equipped with a tire
pressure sensor (tire pressure monitor),
the use of sealant can lead to malfunction
messages and incorrect displays.
Therefore, use pressure gauge Bin the
TIREFIT kit to check and correct the tire
pressure. G
WARNING
If tire inflation pressure has fallen below
130 kPa (1.3 bar/26 psi) do not continue to
drive the vehicle.
Park your vehicle safely away from the
roadway and contact the nearest authorized
Mercedes-Benz Center or Roadside
Assistance.
Have the damaged tire replaced.
X Correct the tire pressure if it is still at least
130 kPa (1.3 bar/20 psi) (for the values,
see the Tire and Loading Information
placard on the driver's side B-pillar or tire
pressure table on the fuel filler flap).
To increase the tire pressure: switch on
the tire inflation compressor.
To reduce the tire pressure: open release
screw C.
! The manufacturer does not guarantee
that all tire damage can be repaired using
the TIREFIT kit, particularly in the case of
cuts and punctures with a diameter of more
than four millimeters or on the sidewall. The
manufacturer is not responsible for
damage caused by inappropriate use of the
TIREFIT kit. X
Drive to the nearest workshop and have the
tire changed there.
X Have the tire sealant bottle replaced as
soon as possible at a qualified specialist
workshop, e.g. at an authorized Mercedes-
Benz Center. H
Environmental note
Have the used tire sealant bottle disposed of
professionally, e.g. at an authorized
Mercedes-Benz Center.
X Have the TIREFIT kit replaced every four
years at a qualified specialist workshop,
e.g. an authorized Mercedes-Benz Center. Changing a wheel and mounting the
spare wheel
Preparing the vehicle X
Prepare the vehicle as described
(Y page 229).
X Bring the wheels into the straight-ahead
position.
X Take the following objects from the left-
hand stowage compartment and the left-
hand stowage space in the trunk:
R
lug wrench
R folding wheel chock
R jack
R alignment bolt
X Secure the vehicle to prevent it from rolling
away.
Securing the vehicle to prevent it from
rolling away G
WARNING
Only jack up the vehicle on level ground or on
slight inclines/declines. The vehicle could
otherwise fall off the jack and injure you or
others. 232
Flat tireBreakdown assistance
ProCarManuals.com