2013 MERCEDES-BENZ SL-CLASS ROADSTER length
[x] Cancel search: lengthPage 100 of 572
R
do not transport heavy loads on the
seats. Do
not place sharp objects on the
seat cushions, e.g. knives, nails or tools.
The seats should only be occupied by
passengers, if possible.
R when the seat heating is in operation, do
not cover the seats with insulating
materials, e.g. blankets, coats, bags,
seat covers, child seats or booster seats.
! Make sure that there are no objects in the
footwell or behind the seats when resetting
the seats. There is a risk that the seats
and/or the objects could be damaged.
i The head restraints cannot be removed.
For more information, contact a qualified
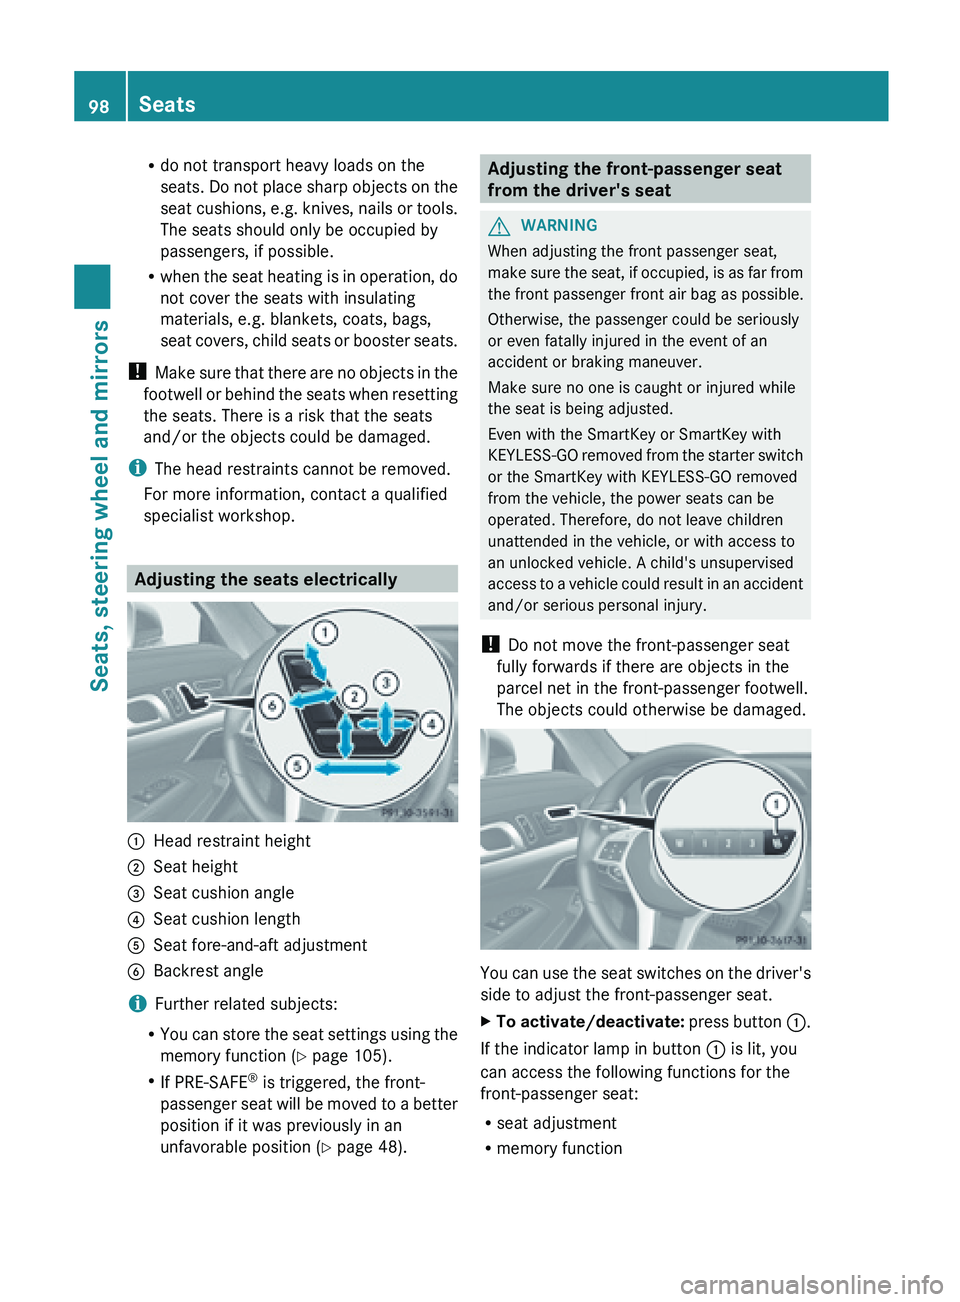
specialist workshop. Adjusting the seats electrically
:
Head restraint height
; Seat height
= Seat cushion angle
? Seat cushion length
A Seat fore-and-aft adjustment
B Backrest angle
i Further related subjects:
R You can
store the seat settings using the
memory function ( Y page 105).
R If PRE-SAFE ®
is triggered, the front-
passenger seat will be moved to a better
position if it was previously in an
unfavorable position ( Y page 48). Adjusting the front-passenger seat
from the driver's seat
G
WARNING
When adjusting the front passenger seat,
make sure
the seat, if occupied, is as far from
the front passenger front air bag as possible.
Otherwise, the passenger could be seriously
or even fatally injured in the event of an
accident or braking maneuver.
Make sure no one is caught or injured while
the seat is being adjusted.
Even with the SmartKey or SmartKey with
KEYLESS-GO removed from the starter switch
or the SmartKey with KEYLESS-GO removed
from the vehicle, the power seats can be
operated. Therefore, do not leave children
unattended in the vehicle, or with access to
an unlocked vehicle. A child's unsupervised
access to a vehicle could result in an accident
and/or serious personal injury.
! Do not move the front-passenger seat
fully forwards if there are objects in the
parcel net in the front-passenger footwell.
The objects could otherwise be damaged. You can use the seat switches on the driver's
side to adjust the front-passenger seat.
X
To activate/deactivate: press
button :.
If the indicator lamp in button : is lit, you
can access the following functions for the
front-passenger seat:
R seat adjustment
R memory function98
Seats
Seats, steering wheel and mirrors
Page 117 of 572

Switching Adaptive Highbeam Assist
on/off
:
High-beam headlamps
; Turn signal, right
= High-beam flasher
? Turn signal, left
X To activate: activate the Adaptive
Highbeam Assist function using the on-
board computer ( Y page 217).
X Turn the light switch to Ã.
X Press the combination switch beyond the
pressure point in the direction of
arrow : (Y page 112).
The _ indicator lamp in the
multifunction display lights up if it is dark
and the
light sensor activates the low-beam
headlamps.
If you are driving at speeds above
approximately 28 mph (45km/h):
the headlamp range is set automatically
depending on the distance between the
vehicle and other road users.
If you are driving at speeds above
approximately 35 mph (55km/h) and no
other road users have been detected:
the high-beam headlamps are switched on
automatically. The K indicator lamp in
the instrument cluster also lights up.
If you are driving at speeds below
approximately 30 mph (45km/h) or other
road users have been detected or the roads
are adequately lit:
The high-beam headlamps are switched off
automatically. The K indicator lamp in the instrument cluster goes out. The
_
indicator lamp in the multifunction display
remains lit.
X To deactivate: move the combination
switch back to its normal position.
The _ indicator lamp in the instrument
cluster goes out. Headlamps fogged up on the inside
The headlamps may fog up on the inside if
there is high atmospheric humidity.
X Switch on the lights and drive off.
The level of fogging diminishes, depending
on the length of the journey and the
weather conditions (humidity and
temperature).
If the level of fogging does not diminish:
X Have the headlamps checked at a qualified
specialist workshop. Interior lighting
Overview of interior lighting
Example
:
p Switches the left-hand reading lamp
on/off
; c
Switches the interior lighting on
= | Switches the interior lighting/
automatic interior lighting control off Interior lighting
115
Lights and windshield wipers Z
Page 158 of 572
R
the engine is switched off, unless it is
automatically switched off by the ECO
start/stop function.
R the driver's seat belt is not inserted in the
belt buckle and the driver's door is open.
R the vehicle is stationary for a lengthy
period.
The red F (USA only) or ! (Canada
only) indicator
lamp in the instrument cluster
lights up.
Releasing automatically The electric parking brake is released
automatically when all of the following
conditions are fulfilled:
R
the engine is running.
R the transmission is in position D or R.
R the driver's seat belt is fastened.
R you depress the accelerator pedal.
If the transmission is in position R, the trunk
lid must be closed.
For the parking brake to be released
automatically if
your seat belt is not fastened,
the following conditions must be fulfilled:
R the driver's door is closed.
R you have shifted out of P or you have
previously driven faster than 2 mph
(3 km/h).
Emergency braking The vehicle can also be braked during an
emergency by using the electric parking
brake.
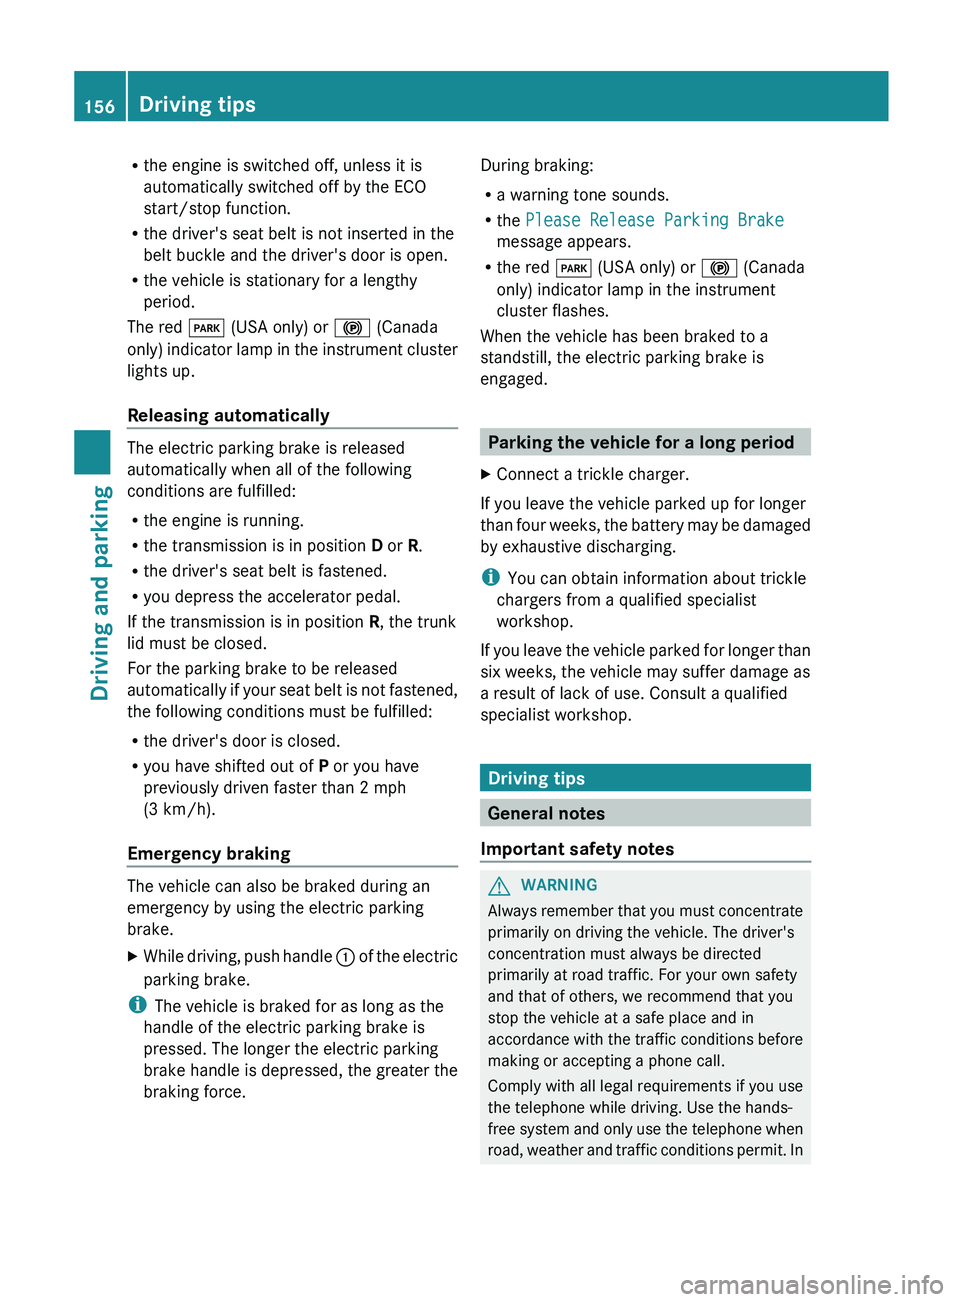
X
While driving, push handle : of
the electric
parking brake.
i The vehicle is braked for as long as the
handle of the electric parking brake is
pressed. The longer the electric parking
brake handle
is depressed, the greater the
braking force. During braking:
R
a warning tone sounds.
R the Please Release Parking Brake
message appears.
R the red F (USA only) or ! (Canada
only) indicator lamp in the instrument
cluster flashes.
When the vehicle has been braked to a
standstill, the electric parking brake is
engaged. Parking the vehicle for a long period
X Connect a trickle charger.
If you leave the vehicle parked up for longer
than four
weeks, the battery may be damaged
by exhaustive discharging.
i You can obtain information about trickle
chargers from a qualified specialist
workshop.
If you leave the vehicle parked for longer than
six weeks, the vehicle may suffer damage as
a result of lack of use. Consult a qualified
specialist workshop. Driving tips
General notes
Important safety notes G
WARNING
Always remember that you must concentrate
primarily on driving the vehicle. The driver's
concentration must always be directed
primarily at road traffic. For your own safety
and that of others, we recommend that you
stop the vehicle at a safe place and in
accordance with
the traffic conditions before
making or accepting a phone call.
Comply with all legal requirements if you use
the telephone while driving. Use the hands-
free system and only use the telephone when
road, weather and traffic conditions permit. In 156
Driving tips
Driving and parking
Page 224 of 572
This function is shown if you have stored at
least one lap and stopped the RACETIMER.
X
Press the = or ; button on the
steering wheel to select the AMG menu.
X Press the 9 button repeatedly until the
overall evaluation is shown.
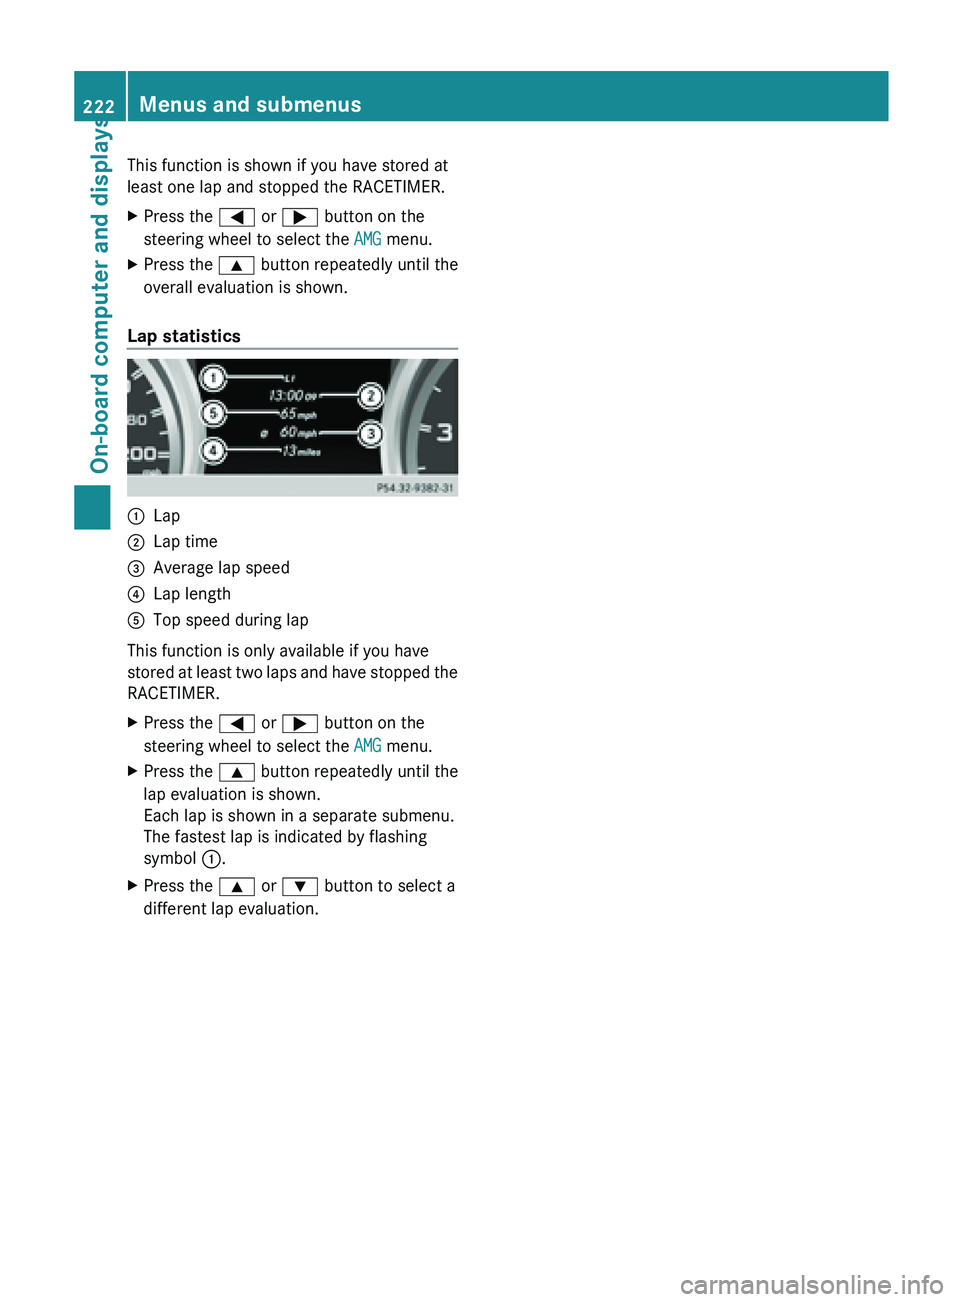
Lap statistics :
Lap
; Lap time
= Average lap speed
? Lap length
A Top speed during lap
This function is only available if you have
stored at
least two laps and have stopped the
RACETIMER.
X Press the = or ; button on the
steering wheel to select the AMG menu.
X Press the 9 button repeatedly until the
lap evaluation is shown.
Each lap is shown in a separate submenu.
The fastest lap is indicated by flashing
symbol :.
X Press the 9 or : button to select a
different lap evaluation.222
Menus and submenus
On-board computer and displays
Page 328 of 572
Announcing street names
If
the
function is switched on, the name of the
street which you are turning into is
announced.
Announcements are not made in the chosen
language in all countries. They are made when
relevant street names for the selected
language are available in the database.
X To switch on navigation mode: press
the
Ø function button.
X To show the menu:
press W
the COMAND
controller.
X Select Navi in the main function bar by
sliding ZV the COMAND controller and
press W to confirm.
X Select Announce Street
Names and press
W to confirm.
The function is switched on O or off ª,
depending on the previous status.
Ending route guidance Canceling or continuing route guidance
X
To switch on navigation mode: press
the
Ø function button.
X To show the menu: press W
the COMAND
controller.
X Select Destination in the navigation
system menu bar by turning cVd the
COMAND controller and pressing W to
confirm.
X To cancel route guidance: select
Cancel
Route Guidance
and press W to confirm.
or
X To continue route guidance: select
Continue Route Guidance and press W
to confirm.
COMAND calculates the route. Destination or area of destination
reached
When you reach your destination, COMAND
displays
a
checkered flag and route guidance
is automatically ended.
If the destination is not in close proximity to
a digitized street, the Area of
destination reached message appears
when the destination is reached.
Influencing route guidance Avoiding a section of the route blocked by
a traffic jam
This function blocks a section of the route
ahead of you. You can set the length of the
blocked route section. If possible, COMAND
calculates a detour around the blocked
section of the route.
X
To switch on navigation mode: press
the
Ø function button.
X To show the menu:
press W
the COMAND
controller.
X Select Route in the navigation system
menu bar by turning cVd the COMAND
controller and press W to confirm.
X Select Detour and press W to confirm.
X To block a section of the route: select
Longer or
Shorter
repeatedly and confirm
using W until the desired section has been
selected.
i The total
length of the section that can be
blocked is defined by the digital map. The
menu items are available accordingly.
X To start route calculation: select Start
and press W to confirm.
X To delete the blocked section: select
Delete while the message is shown and
press W to confirm.
COMAND calculates the route without the
block. 326
Navigation
COMAND
Page 433 of 572

selection window. See the example of the
display in audio CD mode
(Y
page 425).
The following options are available to you:
R Normal Track Sequence
The tracks are played in the normal order
(e.g. track 1, 2, 3, etc.).
In MP3
mode, the track order is determined
by the order in which the tracks are written
to the MP3 data carrier when it is created.
Alphabetical order is the most common.
Once all the tracks in a folder have been
played, the tracks in the next folder are
played.
R Random Medium
All the tracks on the medium are played in
random order (e.g. track 3, 8, 5 etc.).
R Random Track List (MP3 mode only)
You hear the tracks of the current track list
or the currently active folder (including all
subfolders) in random order.
i The Normal Track Sequence option is
automatically selected when you change
the disc you are currently listening to or
when you select a different medium. If an
option is selected, it remains selected after
COMAND is switched on or off.
Notes on MP3 mode General notes
Depending on the volume and format of the
MP3 data, the length of time required for
reading the data may increase.
Permissible data carriers
R
CD-R and CD-RW
R DVD-R and DVD-RW
R DVD+R and DVD+RW
R SD memory card
R USB storage device Permissible file systems
R
ISO 9660/Joliet standard for CDs
R UDF for audio and video DVDs
R FAT16 or FAT32 for SD memory cards and
USB storage media
Multisession CDs
For multisession
CDs, the content of the first
session determines how COMAND will
process the CD. COMAND plays only one
session and gives priority to the audio CD
session.
If possible, use COMAND to play only CDs
that have been written in one session.
File structure of a data carrier
When you create a disc with compressed
music files, the tracks can be organized in
folders. A folder may also contain subfolders.
The disc may contain no more than eight
directory levels. Files beyond the eighth level
will not be recognized by the system.
Track and file names
When you create a disc with compressed
music files, you can assign names to the
tracks and folders.
COMAND uses these names accordingly for
the display. Folders that contain data other
than MP3 or WMA tracks are not displayed by
COMAND.
If MP3 or WMA files are stored in the root
directory itself, the root directory will also be
treated as a folder. COMAND will then show
the name of the root directory as the folder
name.
You must observe the following when
assigning track names:
R track names must have at least one
character.
R track names must have the extension
"mp3" or "wma".
R there must be a dot between the track
name and the extension.
Example of a correct track name:
"Track1.mp3". Audio
431
COMAND Z
Page 451 of 572
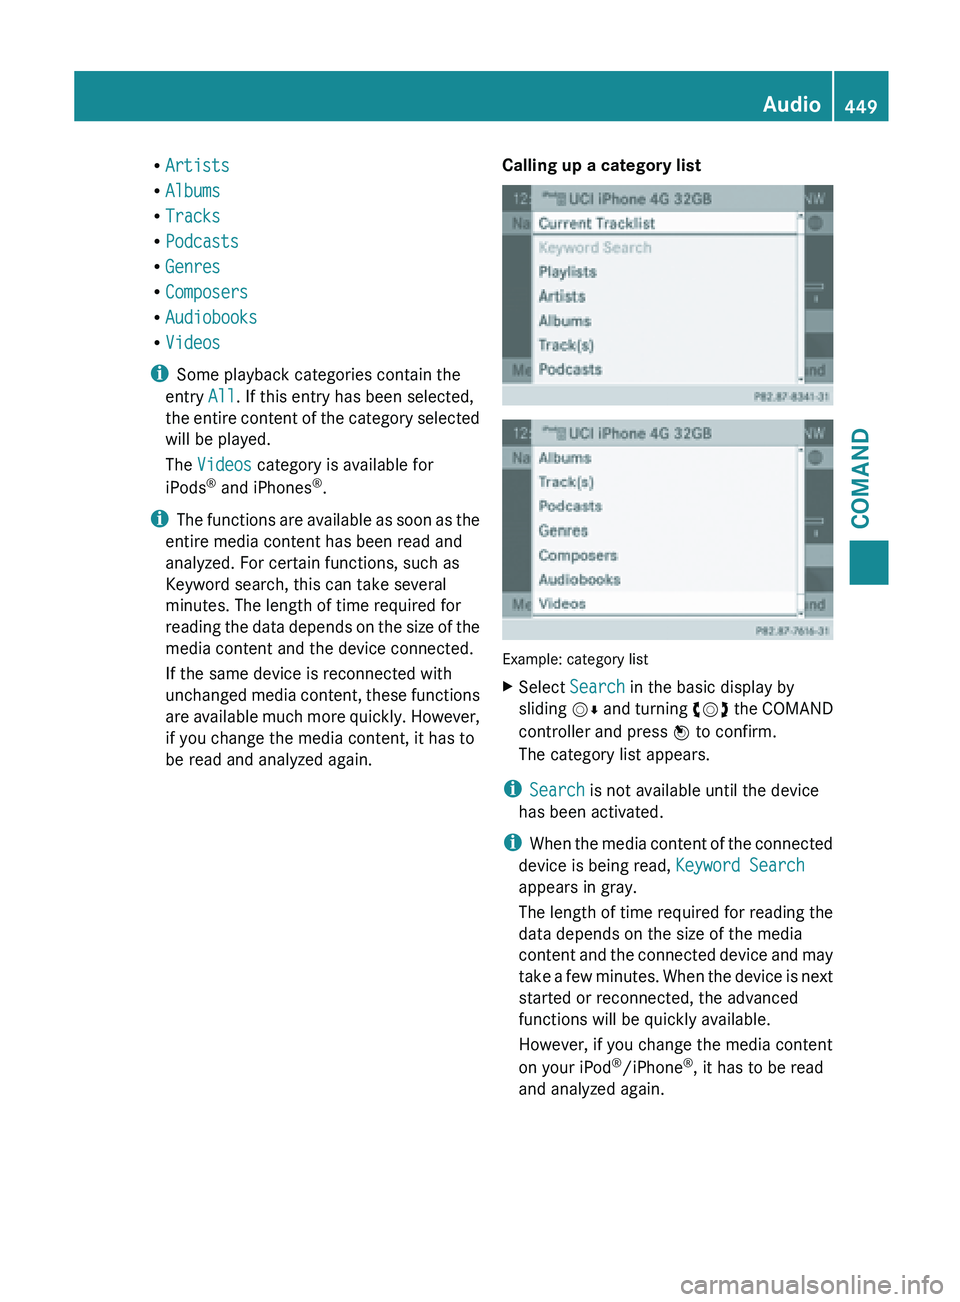
R
Artists
R Albums
R Tracks
R Podcasts
R Genres
R Composers
R Audiobooks
R Videos
i Some playback categories contain the
entry All. If this entry has been selected,
the entire
content of the category selected
will be played.
The Videos category is available for
iPods ®
and iPhones ®
.
i The functions are available as soon as the
entire media content has been read and
analyzed. For certain functions, such as
Keyword search, this can take several
minutes. The length of time required for
reading the data depends on the size of the
media content and the device connected.
If the same device is reconnected with
unchanged media content, these functions
are available much more quickly. However,
if you change the media content, it has to
be read and analyzed again. Calling up a category list
Example: category list
X
Select Search in the basic display by
sliding VÆ and
turning cVd the COMAND
controller and press W to confirm.
The category list appears.
i Search is not available until the device
has been activated.
i When the
media content of the connected
device is being read, Keyword Search
appears in gray.
The length of time required for reading the
data depends on the size of the media
content and the connected device and may
take a few minutes. When the device is next
started or reconnected, the advanced
functions will be quickly available.
However, if you change the media content
on your iPod ®
/iPhone ®
, it has to be read
and analyzed again. Audio
449
COMAND Z
Page 517 of 572

clamp. Never swap the terminal clamps.
Otherwise, the vehicle's electronic
system may be damaged.
R in vehicles with automatic transmission,
the transmission is locked in position P
after disconnecting the battery. The
vehicle is secured against rolling away.
You can
then no longer move the vehicle.
The battery and the cover of the positive
terminal clamp must be installed securely
during operation.
In order for the battery to achieve the
maximum possible service life, it must always
be sufficiently charged.
The vehicle battery, like other batteries, can
discharge over time if you do not use the
vehicle. In this case, have the battery
disconnected at a qualified specialist
workshop. You can also charge the battery
with a charger recommended by Mercedes-
Benz. Contact a qualified specialist workshop
for further information.
Have the battery charge level checked more
frequently if you use the vehicle mainly for
short trips or if you leave it standing idle for
a lengthy period. Consult a qualified specialist
workshop if you wish to leave your vehicle
parked up for a long period of time.
Only replace a battery with a battery that has
been recommended by Mercedes-Benz.
i Remove the SmartKey if you park the
vehicle and do not require any electrical
consumers. The vehicle will then use very
little energy, thus conserving battery
power.
i After an interruption to the power supply,
e.g. due to a discharged battery, you must
reset the clock (Y page 289). Charging the battery
G
WARNING
Never charge a battery still installed in the
vehicle unless
a battery charger unit approved by Mercedes-Benz is being used. Gases may
escape
during
charging and cause explosions
that may result in paint damage, corrosion or
personal injury.
A battery charger unit specially adapted for
Mercedes-Benz vehicles and tested and
approved by Mercedes-Benz is available as an
accessory. It permits the charging of the
battery in its installed position. Contact an
authorized Mercedes-Benz Center for further
information and availability.
Charge the battery in accordance with the
separate instructions for the battery charger. G
WARNING
There is a risk of acid burns during the
charging process due to the gases which
escape from
the battery. Do not lean over the
battery during the charging process. G
WARNING
Battery acid is caustic. Avoid contact with the
skin, eyes or clothing.
! Only use battery chargers with a
maximum charging voltage of 14.8 V.
! Only charge the battery using the jump-
starting connection point.
The jump-starting connection point is in the
engine compartment.
Read the battery charger's operating
instructions before charging the battery.
X Open the hood (Y page 496).
X Connect the battery charger to the positive
terminal and ground point in the same
order as when connecting the donor
battery in the jump-starting procedure
(Y page 516). Battery
515
Roadside Assistance Z