2013 MERCEDES-BENZ SL-CLASS ROADSTER change language
[x] Cancel search: change languagePage 9 of 572

Care
Carpets .......................................... 506
Car wash ........................................
500
Display ........................................... 504
Exterior lights ................................ 503
Gear or selector lever ....................505
Interior ........................................... 504
Matte finish ................................... 502
Notes ............................................. 500
Paint .............................................. 501
Plastic trim .................................... 505
Power washer ................................ 501
Rear view camera .......................... 504
Roof lining ...................................... 506
Seat belt ........................................ 506
Seat cover ..................................... 505
Sensors ......................................... 504
Steering wheel ............................... 505
Tail pipes ....................................... 504
Trim pieces .................................... 505
Washing by hand ........................... 501
Wheels ........................................... 502
Windows ........................................ 503
Wiper blades .................................. 503
Wooden trim .................................. 505
Car pool lanes .................................... 297
Car wash (care) ................................. 500
Category list (music search) ............433
CD Copy protection ............................. 432
Fast forward/fast rewind ............... 428
General information ....................... 432
Inserting ........................................ 421
Mode, switching to ........................ 424
Multisession .................................. 431
Notes on discs ............................... 432
Pause function ............................... 426
Player/changer operation
(COMAND) ..................................... 421
Safety notes .................................. 421
Selecting a media type .................. 426
Selecting a track ............................ 427
Sound settings (balance, bass,
treble) ............................................ 278
CD/DVD
Ejecting (DVD drive) ....................... 423
Inserting (DVD changer) ................421Inserting (single DVD drive)
...........421
Removing (single DVD drive) .......... 421
CD mode
Playback options ........................... 430
CD player/CD changer (on-board
computer)
.......................................... 212
Central locking Automatic locking (on-board
computer) ...................................... 218
Locking/unlocking (SmartKey) ........ 68
Changing bulbs
Important safety notes .................. 116
Overview of bulb types ..................117
Changing direction
Announcement phase .................... 322
Change of direction phase ............. 322
Preparation phase ......................... 322
Changing the character set .............. 284
Channel presets ................................ 413
Characters Changing the character set ............ 282
Changing the language ..................282
Deleting ......................................... 283
Entering ......................................... 283
Entering (address book, phone
book) ............................................. 281
Entering (navigation) ......................283
Moving the cursor .......................... 283
Switching to letters ........................ 282
Children
In the vehicle ................................... 54
Restraint systems ............................ 54
Special seat belt retractor ............... 56
Child seat
LATCH-type (ISOFIX) child seat
anchors ............................................ 56
Cigarette lighter ................................ 480
Cleaning Mirror turn signal ........................... 503
Clear button ....................................... 274
Climate control Automatic climate control (dual-
zone) .............................................. 123
Controlling automatically ...............126
Cooling with air dehumidification ..125
Defrosting the windows ................. 129
Defrosting the windshield .............. 128
Important safety notes .................. 122 Index
7
Page 193 of 572

G
WARNING
Under the following circumstances, the rear
view camera
will not function, or will function
in a limited manner:
R if the trunk lid is open
R in heavy rain, snow or fog
R at night or in very dark places
R if the camera is exposed to very bright light
R if the area is lit by fluorescent light or LED
lighting (the display may flicker)
R if there is a sudden change in temperature,
e.g. when driving into a heated garage in
winter
R if the camera lens is dirty or obstructed
R if the rear of your vehicle is damaged. In this
event, have the camera position and setting
checked at a qualified specialist workshop.
Do not use the rear view camera in these
types of situation. You could otherwise injure
others or damage objects and your vehicle
while you are parking.
General notes Rear
view camera
: is
in the trunk lid handle.
Rear view camera : is an optical parking and
maneuvering aid. It shows the area behind
your vehicle with guide lines in the COMAND
display.
The area behind the vehicle is displayed as a
mirror image, as in the rear view mirror.
i The text of messages shown in the
COMAND display depends on the language
setting. The following are examples of rear view camera messages in the COMAND
display.
Activating/deactivating the rear view
camera X
To activate: make
sure that the SmartKey
is in position 2 in the ignition lock.
X Make sure that the function "show rear
view camera display" is selected in
COMAND (Y page 276).
X Engage reverse gear.
The area
behind the vehicle is shown in the
COMAND display with guide lines.
To deactivate: the rear view camera is
deactivated if you:
R shift the transmission to position P
R drive forwards 33 ft (10 m)
R shift the transmission from position R to
another position (after 15 seconds)
R drive forwards at a speed of over 5 mph
(10km/h)
Displays in the COMAND display G
WARNUNG
Using
the rear view camera can be dangerous
if you are color-blind or if your ability to
distinguish colors is impaired.
Only use the rear view camera if you can see
and distinguish
between all the colored guide
lines that are displayed by the rear view
camera in the COMAND display. G
WARNING
Please
note that objects that do not touch the
ground may appear to be further away than
they actually are, for example:
R the bumper
of a vehicle parked behind you
R the trailer drawbar
R the ball coupling of a trailer tow hitch
R the rear end of a truck
R a slanted post
In such cases, you should not use the guide
lines to judge the distance. You may misjudge Driving systems
191
Driving and parking
Z
Page 283 of 572

:
Current position of the sound setting
For the optimum musical enjoyment, you can
focus the
sound image precisely on one seat.
This means you are right at the center of the
listening experience, with all system
parameters being precisely calculated for the
selected position. The result is authentic
music reproduction inside the vehicle.
Focusing the sound setting
X Press the $ function button.
X Select Sound by sliding VÆ and turning
cVd the COMAND controller and press
W to confirm.
X Select Bang&Olufsen and press W to
confirm.
A menu appears. A # dot marks the
current setting for Sound Mode.
X Select left, all or right and
press W to
confirm.
X To exit the menu: slide XVY
the COMAND
controller or press the % back button.
i Please note
the following: you will achieve
the best sound results on your Bang &
Olufsen sound system by playing high-
quality audio DVDs and CDs.
MP3 tracks should have a bit rate of at least
224 kbit/s.
When playing using an iPod ®
, the bit rate
should also be at least 224 kbit/s.
For optimum playback quality:
XDeactivate the “EQ” setting on the
iPod ®
. Surround-sound playback does not
function for mono signal sources, such as
the medium wave range (MW) in radio
mode.
On some stereo recordings, the sound
characteristics may differ from
conventional stereo playback.
Character entry (telephony)
Example: entering characters :*
To switch the character bar to
uppercase/lowercase letters
;p To switch the character bar from
uppercase/lowercase letters to
digits
=B To change the language of the
character bar
?2 To delete a character/an entry
The example describes how to enter the
surname “Schulz”.
X Call up the input menu with data fields
(Y page 370).
X Select S and confirm by pressing W the
COMAND controller.
S appears in the data field.
X Select c and confirm by pressing W the
COMAND controller.
The letter c is added to S in the data field.
X Repeat the process until the name has
been entered in full. At a glance
281
COMAND Z
Page 284 of 572

Other input menu functions:
R
to delete a character/entry (Y page 283)
R to switch between upper/lower-case
letters (Y page 282)
R to change the character set (
Y page 282)
R to move the cursor in the data field
(Y page 283)
X To enter a phone number: select the
digits one
by one in the corresponding data
field by turning cVd and sliding ZVÆ the
COMAND controller and press W to
confirm.
Switching data fields :
Cursor in the next data field
; To store an entry
= 4 and 5 symbols to select a data field
In the input menu, if you want to enter a first
name after you have entered a surname, for
example, proceed as follows to switch
between the data fields:
Option 1
X Select 4 or 5 in the character bar and
press W to confirm.
The input menu shows the data field
selected.
Option 2
X Slide ZV the COMAND controller
repeatedly until the character bar
disappears.
X Select the data field by sliding ZVÆ and
press W to confirm. Storing an entry X
After making an entry in the input menu
(Y page 370): select the ¬ symbol in
the character bar by turning cVd the
COMAND controller and press W to
confirm.
The entry is stored in the address book.
Further functions available in the
character bar Changing the language of the character
bar
While making an entry in the input menu
(Y page 370):
X
Select B and press W to confirm.
X Select the language by turning cVd the
COMAND controller and press W to
confirm.
Switching the character bar to letters
While making an entry in the input menu
(Y page 370):
X Select the * (upper case) or E
(lower case) symbol and press W to
confirm.
Changing the character set
While making an entry in the input menu
(Y page 370):
X Select the p symbol and press W to
confirm.
R ABC (upper/lower case)
R 123 (digits)
R Other (special characters such as @, €,
etc.)282
At a glance
COMAND
Page 294 of 572

X
Press W.
X Select Settings by turning cVd the
COMAND controller and press W to
confirm.
X Select Voice Control and press W to
confirm.
X Select Help Window and press W to
confirm.
You have switched the help window on
O or off ª.
Individualization Using individualization, you can fine-tune the
Voice Control System to your own voice and
thus improve voice recognition; see the
separate operating instructions.
Bluetooth
®
settings
General information about Bluetooth ®Bluetooth
®
-capable devices, e.g. mobile
phones, have
to comply with a certain profile
in order to be connected to COMAND. Every
Bluetooth ®
device has its own specific
Bluetooth ®
name.
Bluetooth ®
technology is the standard for
short-range wireless data transmission of up
to approximately 10 meters. Bluetooth ®
allows, for example, the exchange of vCards. Bluetooth
®
is a registered trademark of
Bluetooth Special Interest Group (SIG) Inc.
Activating/deactivating Bluetooth ® X
Press W.
The system menu appears.
X Select Settings by turning cVd the
COMAND controller and press W to
confirm.
X Select Activate Bluetooth and press
W to confirm.
This switches Bluetooth ®
on O or off ª. Setting the system language
This function allows you to determine the
language for the menu displays and the
navigation announcements. The selected
language affects the characters available for
entry.
The navigation announcements are not
available in
all languages. If a language is not
available, the navigation announcements will
be in English.
When you set the system language, the
language of the Voice Control System will
change accordingly. If the selected language
is not supported by the Voice Control System,
English will be selected.
X Press the W button.
X Select Settings by turning cVd the
COMAND controller and press W to
confirm.
X Select Language and press W to confirm.
The list of languages appears. The # dot
indicates the current setting. 292
System settings
COMAND
Page 338 of 572

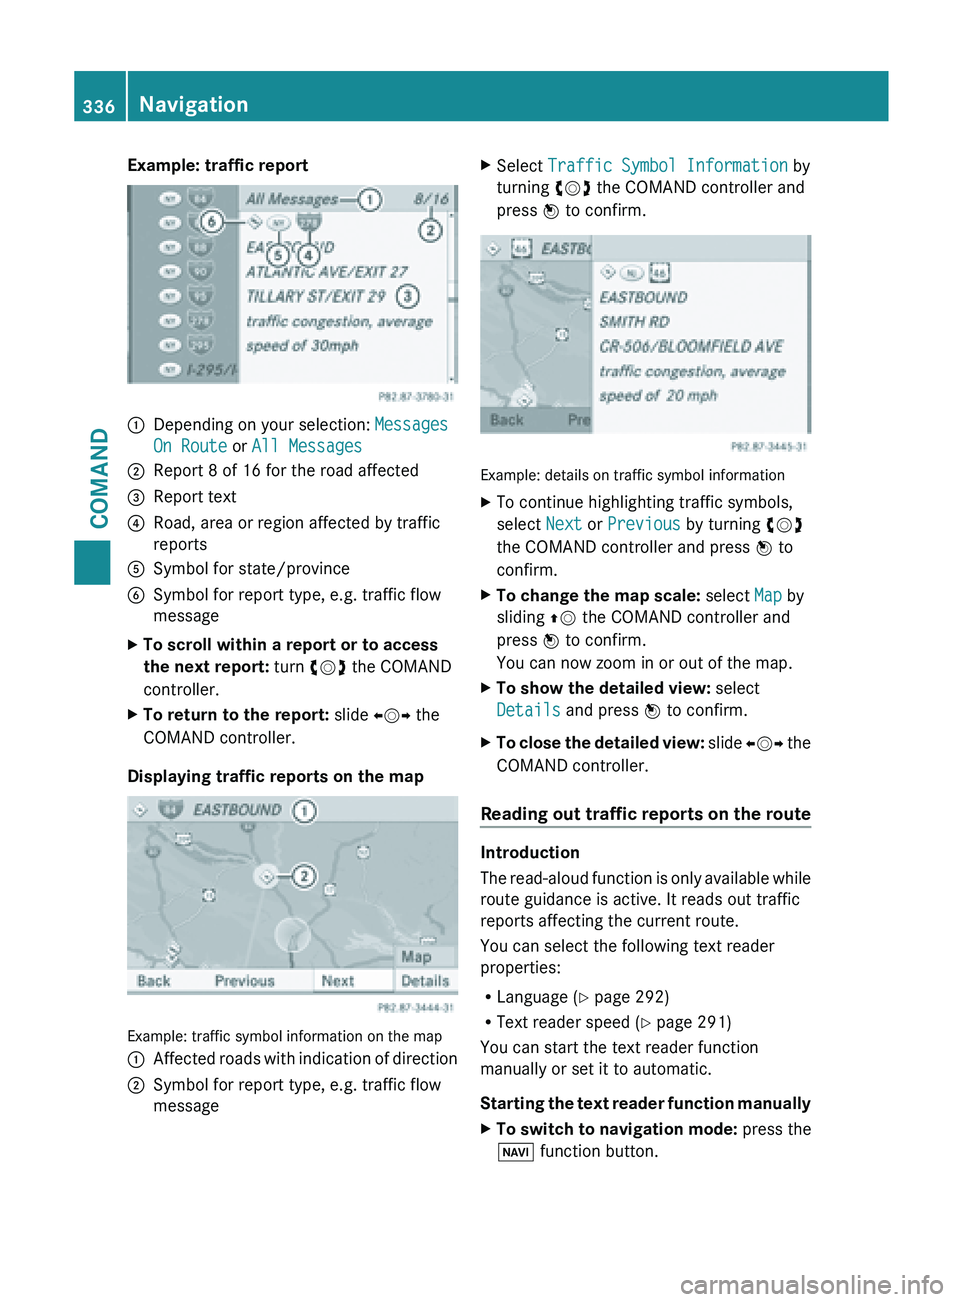
Example: traffic report
:
Depending on your selection: Messages
On Route or All Messages
; Report 8 of 16 for the road affected
= Report text
? Road, area or region affected by traffic
reports
A Symbol for state/province
B Symbol for report type, e.g. traffic flow
message
X To scroll within a report or to access
the next report: turn cVd the COMAND
controller.
X To return to the report: slide XVY the
COMAND controller.
Displaying traffic reports on the map Example: traffic symbol information on the map
:
Affected roads with indication of direction
; Symbol for report type, e.g. traffic flow
message X
Select Traffic Symbol Information by
turning cVd the COMAND controller and
press W to confirm. Example: details on traffic symbol information
X
To continue highlighting traffic symbols,
select Next or Previous by turning cVd
the COMAND controller and press W to
confirm.
X To change the map scale: select Map by
sliding ZV the COMAND controller and
press W to confirm.
You can now zoom in or out of the map.
X To show the detailed view: select
Details and press W to confirm.
X To close the detailed view: slide
XVY the
COMAND controller.
Reading out traffic reports on the route Introduction
The
read-aloud
function is only available while
route guidance is active. It reads out traffic
reports affecting the current route.
You can select the following text reader
properties:
R Language (Y page 292)
R Text reader speed ( Y page 291)
You can start the text reader function
manually or set it to automatic.
Starting the text reader function manually
X To switch to navigation mode: press the
Ø function button. 336
Navigation
COMAND
Page 378 of 572

This may occur in exceptional cases, for
example when using certain mobile
phones/brackets and if the mobile phone
inbox holds a large number of text
messages.
i In order to be able to use the text
message function, the Bluetooth ®
mobile
phone has to support Bluetooth ®
MAP
(Message Access Profile).
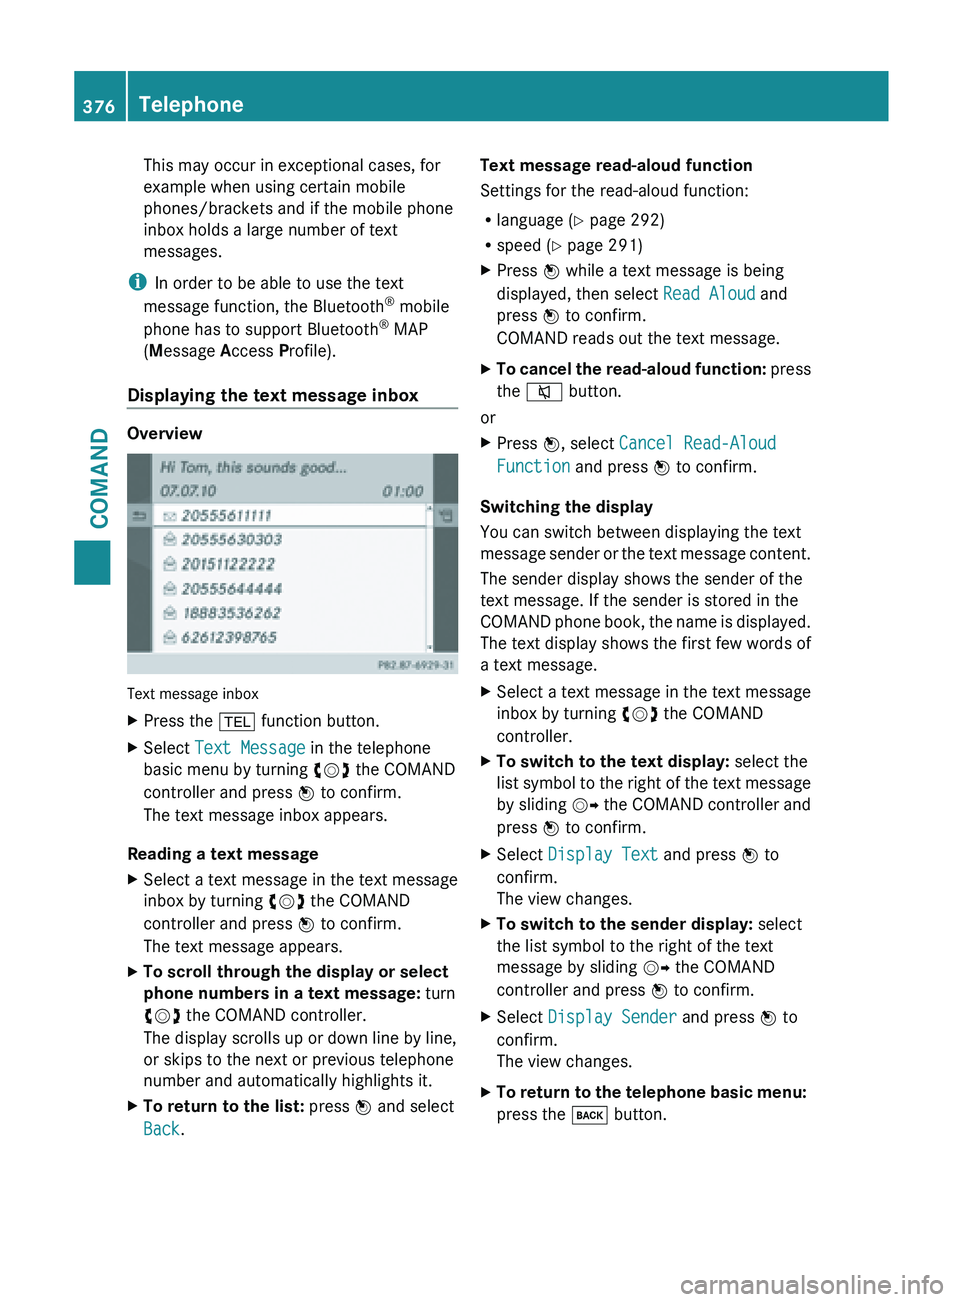
Displaying the text message inbox Overview
Text message inbox
X
Press the % function button.
X Select Text Message in the telephone
basic menu by turning cVd the COMAND
controller and press W to confirm.
The text message inbox appears.
Reading a text message
X Select a text message in the text message
inbox by turning cVd the COMAND
controller and press W to confirm.
The text message appears.
X To scroll through the display or select
phone numbers in a text message: turn
cVd the COMAND controller.
The display scrolls up or down line by line,
or skips to the next or previous telephone
number and automatically highlights it.
X To return to the list: press W and select
Back. Text message read-aloud function
Settings for the read-aloud function:
R
language (
Y
page 292)
R speed ( Y page 291)
X Press W while a text message is being
displayed, then select Read Aloud and
press W to confirm.
COMAND reads out the text message.
X To cancel the read-aloud function: press
the
8 button.
or
X Press W, select Cancel Read-Aloud
Function and press W to confirm.
Switching the display
You can switch between displaying the text
message sender
or the text message content.
The sender display shows the sender of the
text message. If the sender is stored in the
COMAND phone book, the name is displayed.
The text display shows the first few words of
a text message.
X Select a text message in the text message
inbox by turning cVd the COMAND
controller.
X To switch to the text display: select the
list symbol
to the right of the text message
by sliding VY the COMAND controller and
press W to confirm.
X Select Display Text and press W to
confirm.
The view changes.
X To switch to the sender display: select
the list symbol to the right of the text
message by sliding VY the COMAND
controller and press W to confirm.
X Select Display Sender and press W to
confirm.
The view changes.
X To return to the telephone basic menu:
press the k button.376
Telephone
COMAND
Page 459 of 572

X
Equipped with a DVD changer: press W
the COMAND controller to display all
magazine trays.
X Select a video DVD by turning cVd the
COMAND controller and press W to
confirm.
COMAND loads the video DVD and begins
playing it.
i If you select a CD, an audio DVD or an
MP3 medium,
you switch to the respective
audio mode. Further information about the
media list on ( Y page 426).
DVD menu Calling up the DVD menu
The
DVD
menu is the menu stored on the DVD
itself. It is structured in various ways
according to the individual DVD and permits
certain actions and settings.
In the case of multi-language DVDs, for
example, you can change the DVD language
in the DVD menu.
X Show the menu (Y page 455).
X Select DVD-Video in the menu by turning
cVd the COMAND controller and press
W to confirm.
X Select DVD Functions and press W to
confirm.
X Select Menu and press W to confirm.
The DVD menu appears.
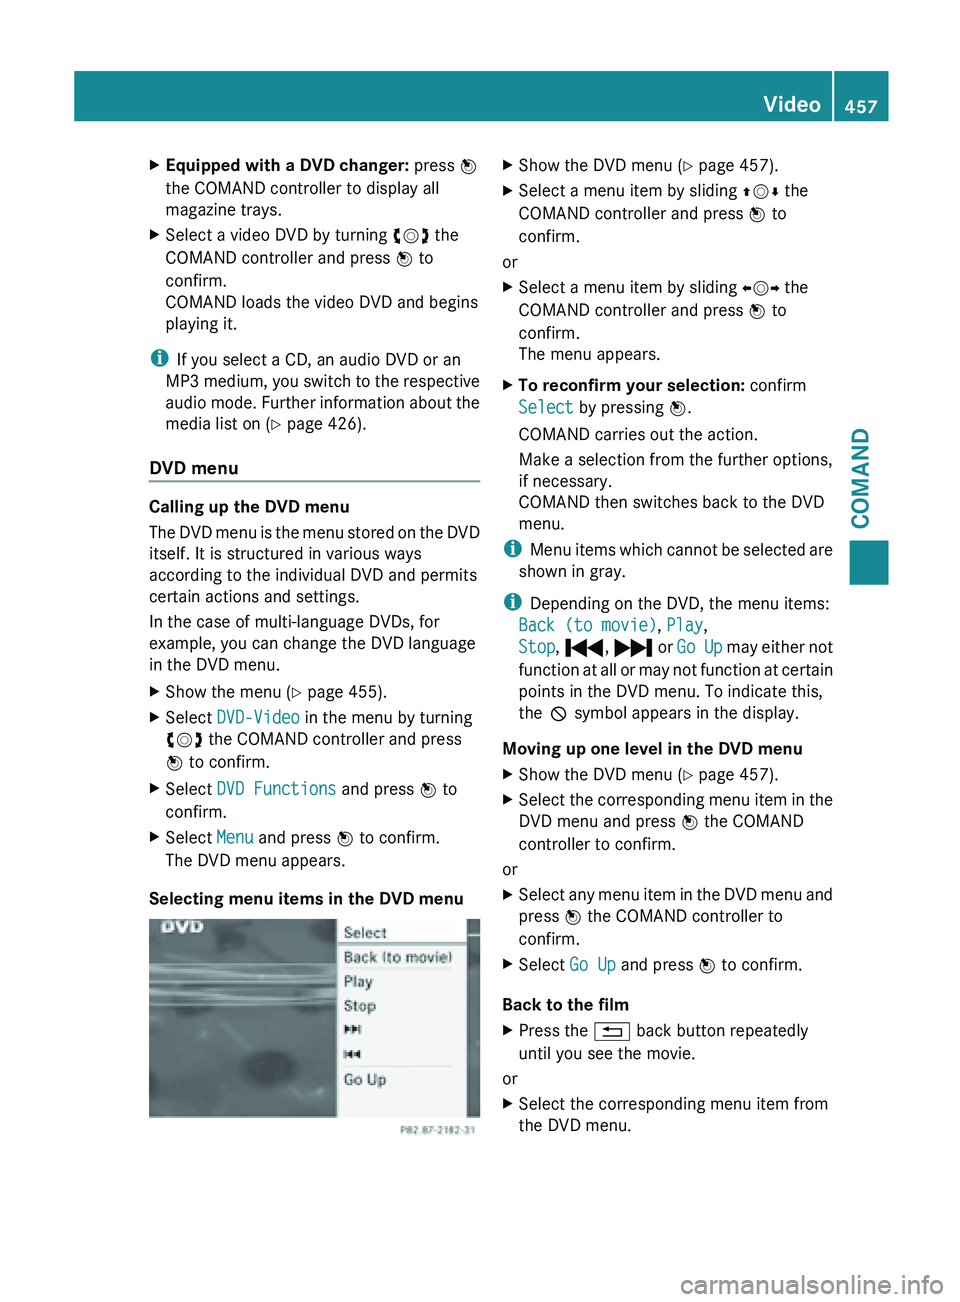
Selecting menu items in the DVD menu X
Show the DVD menu (Y page 457).
X Select a menu item by sliding ZVÆ the
COMAND controller and press W to
confirm.
or
X Select a menu item by sliding XVY the
COMAND controller and press W to
confirm.
The menu appears.
X To reconfirm your selection: confirm
Select by pressing W.
COMAND carries out the action.
Make a selection from the further options,
if necessary.
COMAND then switches back to the DVD
menu.
i Menu items
which cannot be selected are
shown in gray.
i Depending on the DVD, the menu items:
Back (to movie), Play,
Stop, ., / or Go Up may either not
function at all or may not function at certain
points in the DVD menu. To indicate this,
the K symbol appears in the display.
Moving up one level in the DVD menu
X Show the DVD menu (Y page 457).
X Select the corresponding menu item in the
DVD menu and press W the COMAND
controller to confirm.
or
X Select any menu item in the DVD menu and
press W the COMAND controller to
confirm.
X Select Go Up and press W to confirm.
Back to the film
X Press the % back button repeatedly
until you see the movie.
or
X Select the corresponding menu item from
the DVD menu. Video
457
COMAND Z