2013 MERCEDES-BENZ SL-CLASS ROADSTER navigation
[x] Cancel search: navigationPage 317 of 572

the search, the POI list with character bar
appears
(Y
page 312).
Depending on your selection, you can select
all available points of interest on the digital
map or the points of interest in the vicinity of
the selected position.
X Proceed as described in "Searching for a
phone book entry" (Y page 369).
If COMAND can assign the characters
entered to one entry unambiguously, the
address entry appears automatically.
X To start route calculation: select Start
and press W to confirm.
ZAGAT ®
survey service The Z icon before a search result shows that
a ZAGAT
®
rating is available for this entry. :
ZAGAT ratings
; To display details
X Select an entry with the "Z" icon by turning
cVd the COMAND controller and press
W to confirm.
The ZAGAT evaluations appear. ZAGAT example description
X
To show the information: select
Details and press W to confirm.
Selecting a point of interest using the
map Point of interest on the map
You can select points of interest that are
available in the selected (visible) section of
the map. The POI is highlighted on the map,
you will see further information on the upper
edge of the display.
X
To switch on navigation mode: press
the
Ø function button.
X To show the menu: press W
the COMAND
controller.
X Select Guide in the navigation system
menu bar by turning cVd the COMAND
controller and press W to confirm.
If points of interest are available:
Depending on the map scale selected,
point of interest icons appear on the map.
The scale at which the icons are displayed Navigation
315
COMAND Z
Page 318 of 572
on the map varies according to the icon.
You can select the icons that you want
COMAND to display
(
Y page 344).
If no points of interest are available, you will
see a message to this effect.
i You also see this message if you have
selected the No
Symbols menu item under
"Map display" ( Y page 344).
X To confirm the message: press W the
COMAND controller.
X To select a POI: select Next or Previous
and press W to confirm.
X To show details for the selection: select
Details and press W to confirm.
X To change to the map: slide ZV the
COMAND controller.
You can
move the map and select the map
section.
X To start route calculation: select Start
and press W to confirm.
A prompt
appears asking whether the point
of interest should be used as the
destination.
X Select Yes or No and press W to confirm.
If you select Yes, route guidance starts.
If you
select No, you can choose a new point
of interest.
i Continue is displayed instead of Start
when Calculate Alternative
Routes is
activated in the navigation menu
(Y page 327). Personal points of interest
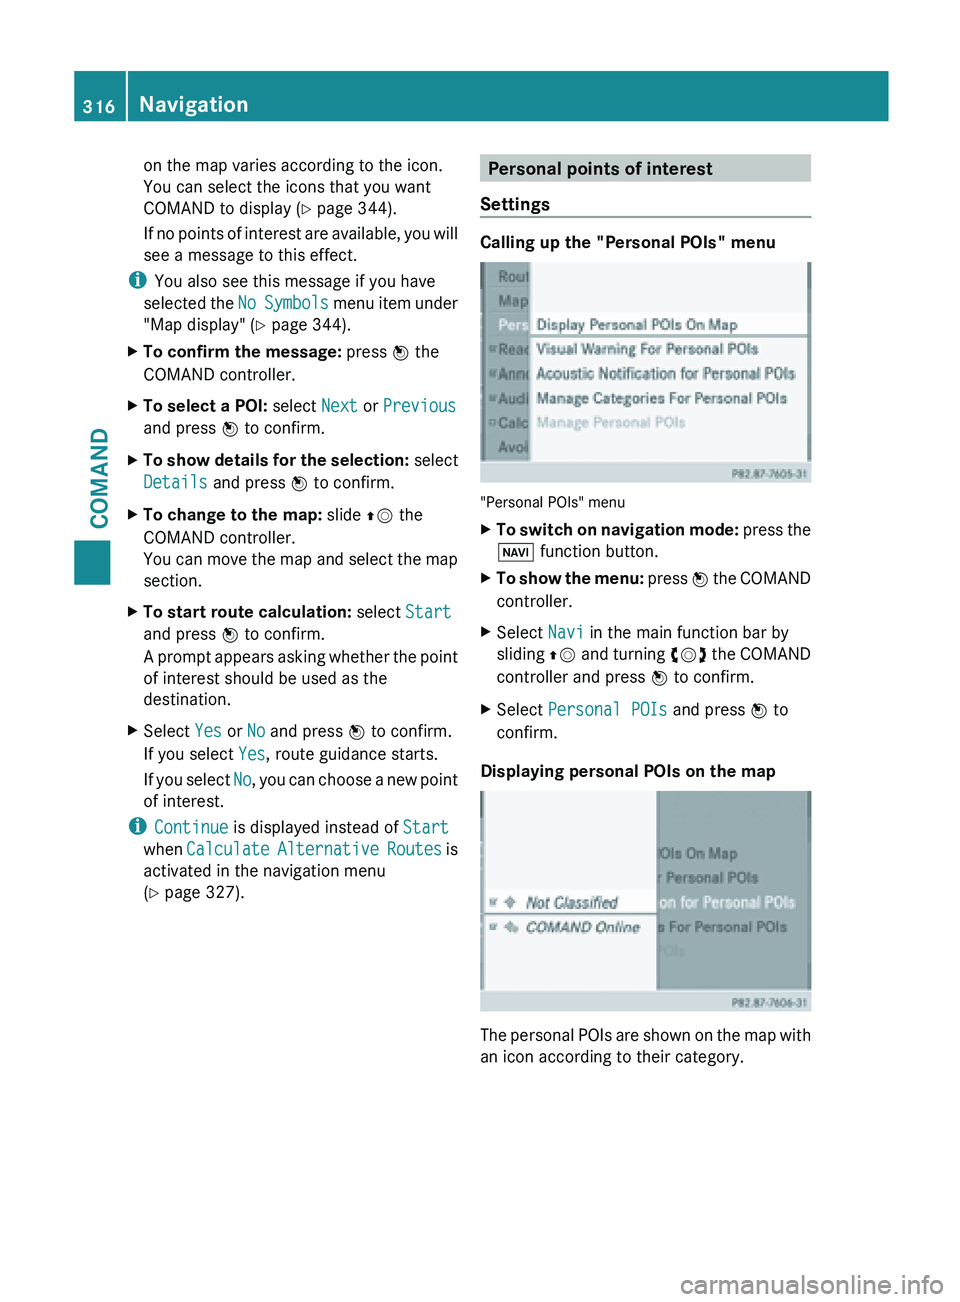
Settings Calling up the "Personal POIs" menu
"Personal POIs" menu
X
To switch on navigation mode: press
the
Ø function button.
X To show the menu:
press W
the COMAND
controller.
X Select Navi in the main function bar by
sliding ZV and
turning cVd the COMAND
controller and press W to confirm.
X Select Personal POIs and press W to
confirm.
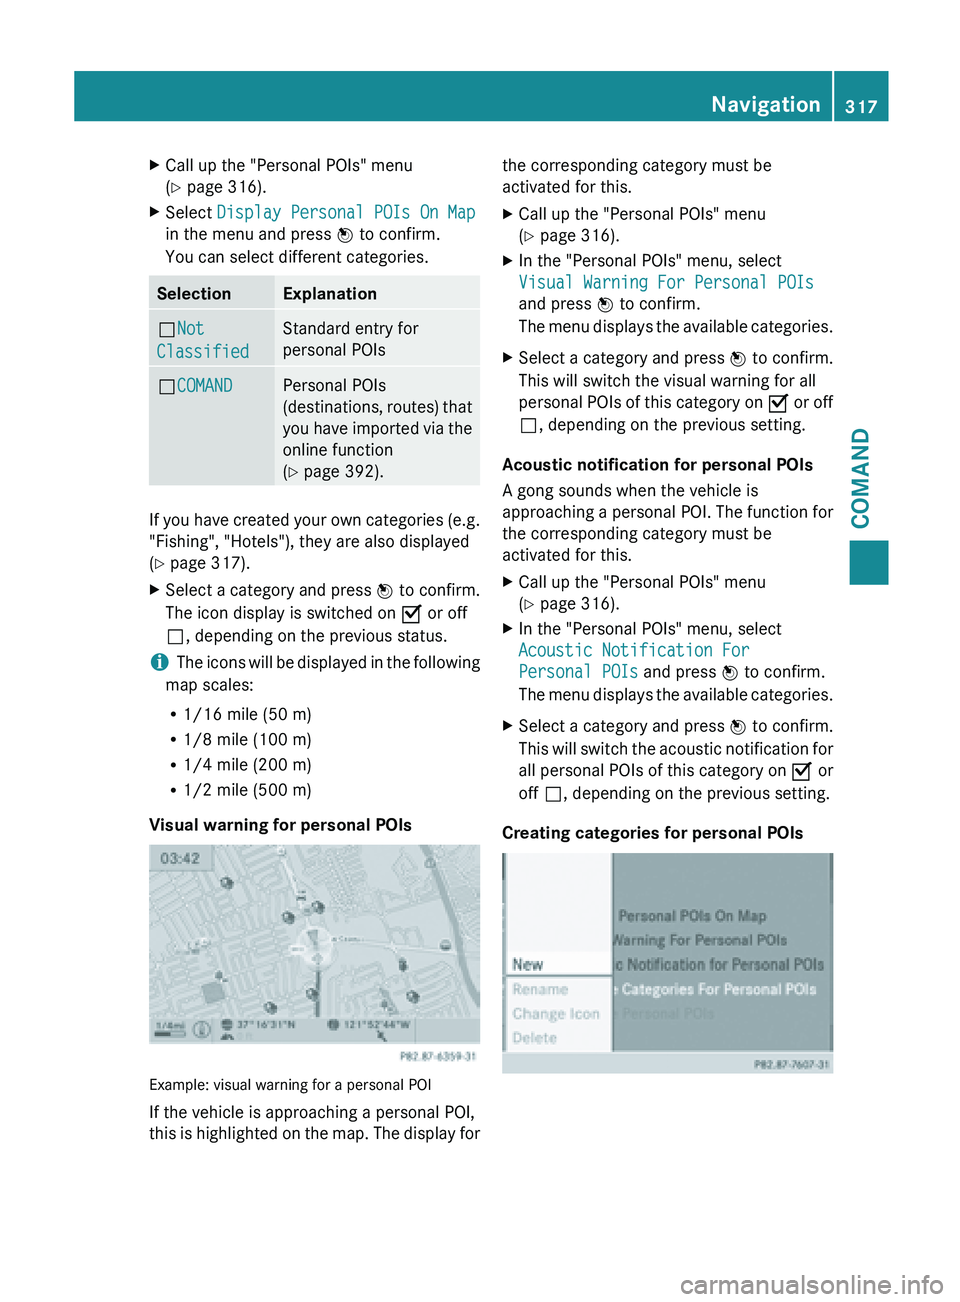
Displaying personal POIs on the map The personal POIs are shown on the map with
an icon according to their category.316
Navigation
COMAND
Page 319 of 572
X
Call up the "Personal POIs" menu
(Y page 316).
X Select Display Personal POIs On Map
in the menu and press W to confirm.
You can select different categories. Selection Explanation
ªNot
Classified Standard entry for
personal POIs
ªCOMAND Personal POIs
(destinations,
routes)
that
you have imported via the
online function
(Y page 392). If you have created your own categories (e.g.
"Fishing", "Hotels"), they are also displayed
(Y page 317).
X
Select a category and press W to confirm.
The icon display is switched on O or off
ª, depending on the previous status.
i The icons will be displayed in the following
map scales:
R 1/16 mile (50 m)
R 1/8 mile (100 m)
R 1/4 mile (200 m)
R 1/2 mile (500 m)
Visual warning for personal POIs Example: visual warning for a personal POI
If the vehicle is approaching a personal POI,
this
is
highlighted on the map. The display for the corresponding category must be
activated for this.
X
Call up the "Personal POIs" menu
(Y page 316).
X In the "Personal POIs" menu, select
Visual Warning For Personal POIs
and press W to confirm.
The menu
displays the available categories.
X Select a category and press W to confirm.
This will switch the visual warning for all
personal POIs
of this category on O or off
ª, depending on the previous setting.
Acoustic notification for personal POIs
A gong sounds when the vehicle is
approaching a
personal POI. The function for
the corresponding category must be
activated for this.
X Call up the "Personal POIs" menu
(Y page 316).
X In the "Personal POIs" menu, select
Acoustic Notification For
Personal POIs and press W to confirm.
The menu
displays the available categories.
X Select a category and press W to confirm.
This will
switch the acoustic notification for
all personal POIs of this category on O or
off ª, depending on the previous setting.
Creating categories for personal POIs Navigation
317
COMAND Z
Page 320 of 572
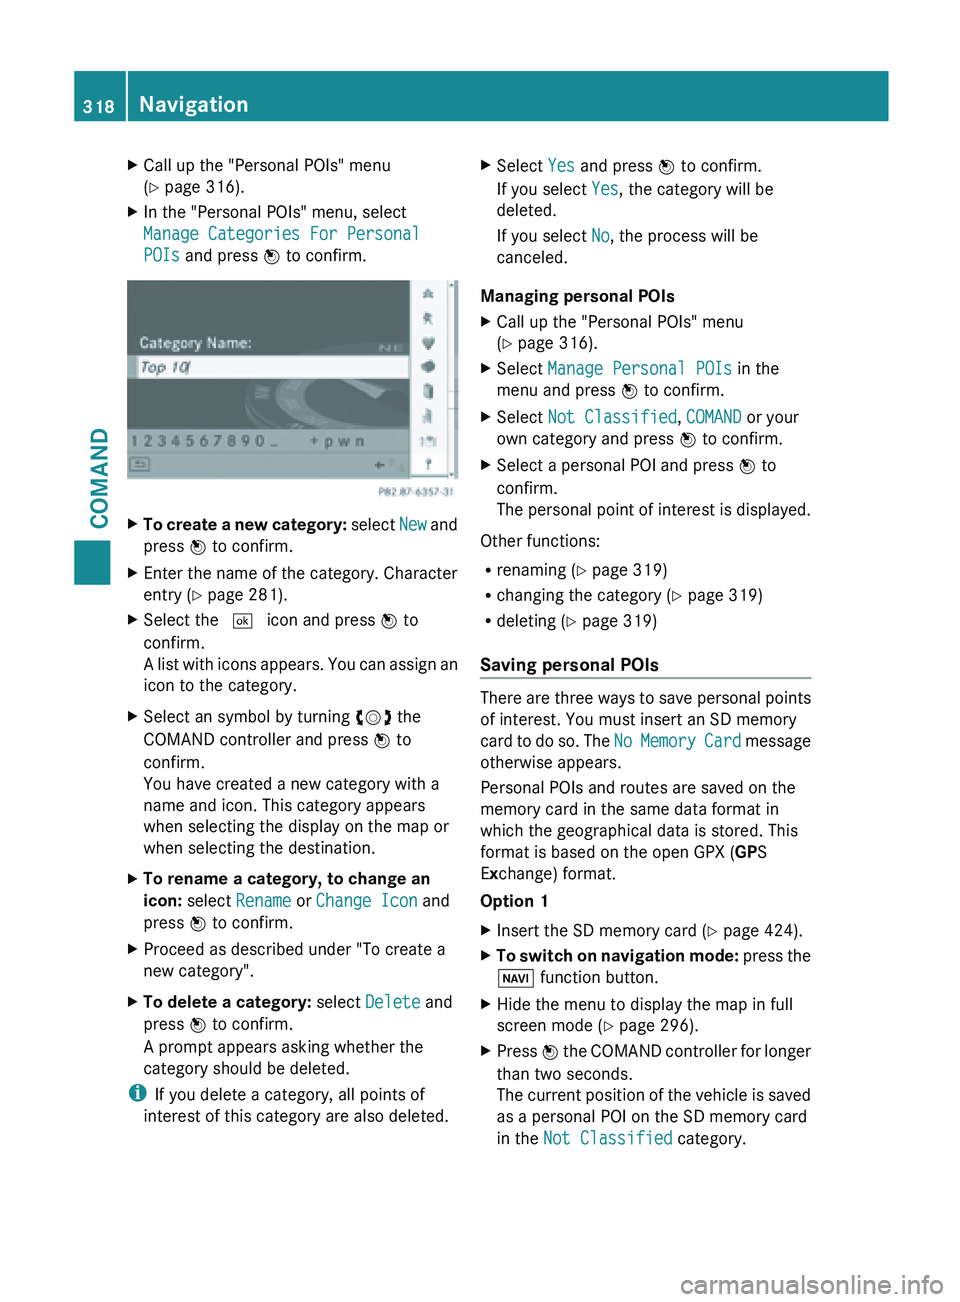
X
Call up the "Personal POIs" menu
(Y page 316).
X In the "Personal POIs" menu, select
Manage Categories For Personal
POIs and press W to confirm. X
To create a new category: select New and
press W to confirm.
X Enter the name of the category. Character
entry (Y page 281).
X Select the ¬ icon and press W to
confirm.
A list
with icons appears. You can assign an
icon to the category.
X Select an symbol by turning cVd the
COMAND controller and press W to
confirm.
You have created a new category with a
name and icon. This category appears
when selecting the display on the map or
when selecting the destination.
X To rename a category, to change an
icon: select Rename or Change Icon and
press W to confirm.
X Proceed as described under "To create a
new category".
X To delete a category: select Delete and
press W to confirm.
A prompt appears asking whether the
category should be deleted.
i If you delete a category, all points of
interest of this category are also deleted. X
Select Yes and press W to confirm.
If you select Yes, the category will be
deleted.
If you select No, the process will be
canceled.
Managing personal POIs
X Call up the "Personal POIs" menu
(Y page 316).
X Select Manage Personal POIs in the
menu and press W to confirm.
X Select Not Classified, COMAND or your
own category and press W to confirm.
X Select a personal POI and press W to
confirm.
The personal
point of interest is displayed.
Other functions:
R renaming (Y page 319)
R changing the category (Y page 319)
R deleting ( Y page 319)
Saving personal POIs There are three ways to save personal points
of interest. You must insert an SD memory
card
to
do so. The No Memory Card message
otherwise appears.
Personal POIs and routes are saved on the
memory card in the same data format in
which the geographical data is stored. This
format is based on the open GPX ( GPS
Exchange) format.
Option 1
X Insert the SD memory card (Y page 424).
X To switch on navigation mode: press
the
Ø function button.
X Hide the menu to display the map in full
screen mode (Y page 296).
X Press W the COMAND controller for longer
than two seconds.
The
current position of the vehicle is saved
as a personal POI on the SD memory card
in the Not Classified category. 318
Navigation
COMAND
Page 321 of 572
i
The crosshair position is saved in the
scrolling map function (Y page 343).
Option 2
X Insert the SD memory card (Y page 424).
X To switch on navigation mode: press the
Ø function button.
X To show the menu: press W
the COMAND
controller.
X Select Position in the navigation system
menu bar by turning cVd the COMAND
controller and press W to confirm.
X Select Save Position As Personal
POI or Save Crosshair Pos. As
Personal POI ("Move map" function
active) and press W to confirm.
The list of personal categories appears.
X Select a category and press W to confirm.
X Name for the personal point of interest.
Character entry (Y page 281).
Option 3
X Insert the SD memory card (Y page 424).
X To switch on navigation mode: press
the
Ø function button.
X Call up the address entry menu
(Y page 299).
X Select Save from the address entry menu
and press W to confirm.
X Select Save As Personal POI and press
W to confirm.
X Select a category.
X Enter the name.
The current
address is saved as a personal
point of interest on the SD memory card.
Importing personal POIs via the online
function You can import personal POIs (destinations,
routes) via the online function (Y page 392).
When importing, you can choose whether to
write files to the SD memory card or to file
them in the address book. The imported personal POIs have their own icon and are
filed in the COMAND category.
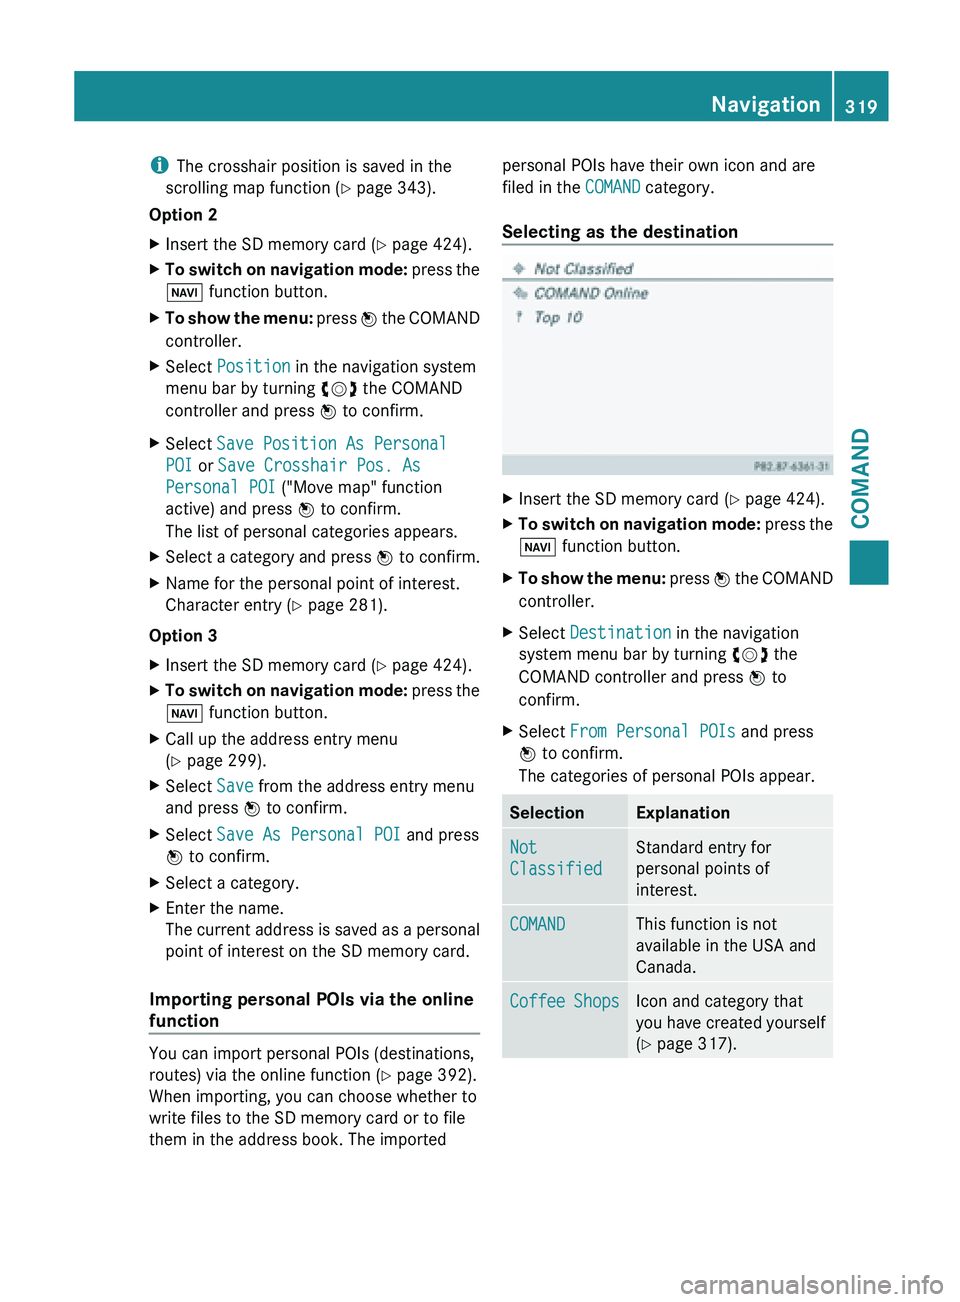
Selecting as the destination
X
Insert the SD memory card (Y page 424).
X To switch on navigation mode: press
the
Ø function button.
X To show the menu:
press W
the COMAND
controller.
X Select Destination in the navigation
system menu bar by turning cVd the
COMAND controller and press W to
confirm.
X Select From Personal POIs and press
W to confirm.
The categories of personal POIs appear. Selection Explanation
Not
Classified Standard entry for
personal points of
interest.
COMAND This function is not
available in the USA and
Canada.
Coffee Shops Icon and category that
you
have
created yourself
(Y page 317). Navigation
319
COMAND Z
Page 322 of 572
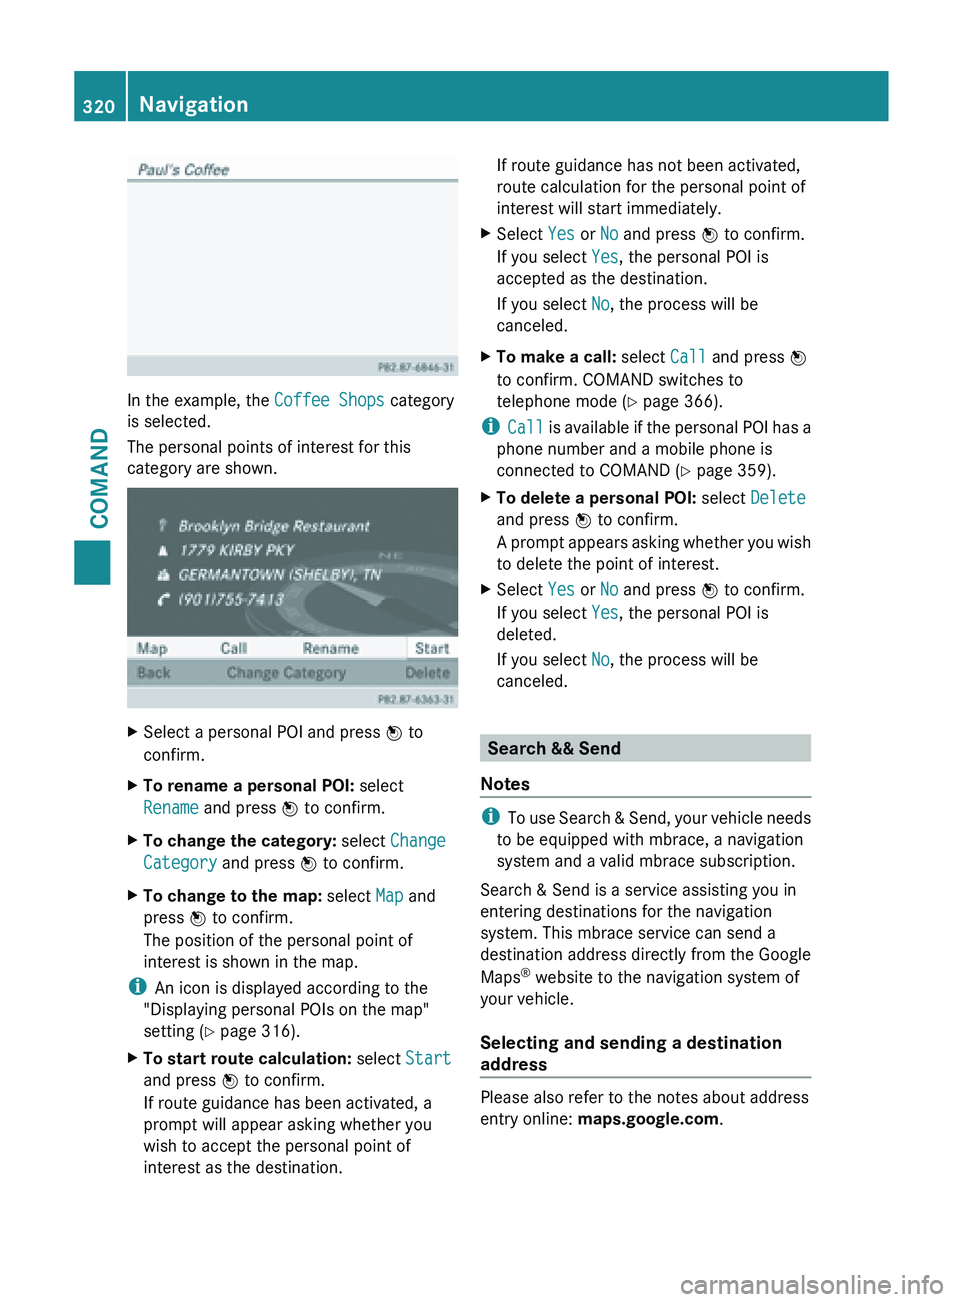
In the example, the Coffee Shops category
is selected.
The personal points of interest for this
category are shown.
X
Select a personal POI and press W to
confirm.
X To rename a personal POI: select
Rename and press W to confirm.
X To change the category: select Change
Category and press W to confirm.
X To change to the map: select Map and
press W to confirm.
The position of the personal point of
interest is shown in the map.
i An icon is displayed according to the
"Displaying personal POIs on the map"
setting ( Y page 316).
X To start route calculation: select Start
and press W to confirm.
If route guidance has been activated, a
prompt will appear asking whether you
wish to accept the personal point of
interest as the destination. If route guidance has not been activated,
route calculation for the personal point of
interest will start immediately.
X Select Yes or No and press W to confirm.
If you select Yes, the personal POI is
accepted as the destination.
If you select No, the process will be
canceled.
X To make a call: select Call and press W
to confirm. COMAND switches to
telephone mode ( Y page 366).
i Call is
available if the personal POI has a
phone number and a mobile phone is
connected to COMAND (Y page 359).
X To delete a personal POI: select Delete
and press W to confirm.
A prompt
appears asking whether you wish
to delete the point of interest.
X Select Yes or No and press W to confirm.
If you select Yes, the personal POI is
deleted.
If you select No, the process will be
canceled. Search && Send
Notes i
To use
Search & Send, your vehicle needs
to be equipped with mbrace, a navigation
system and a valid mbrace subscription.
Search & Send is a service assisting you in
entering destinations for the navigation
system. This mbrace service can send a
destination address directly from the Google
Maps ®
website to the navigation system of
your vehicle.
Selecting and sending a destination
address Please also refer to the notes about address
entry online:
maps.google.com.320
Navigation
COMAND
Page 323 of 572
X
Call up the maps.google.com website and
destination address in the address entry
field.
X Click the corresponding button to send the
destination address to the e-mail address
registered with mbrace.
X Enter the e-mail address you specified
when setting up your mbrace account into
the corresponding
field in the "Send" dialog
window.
X Click "Send".
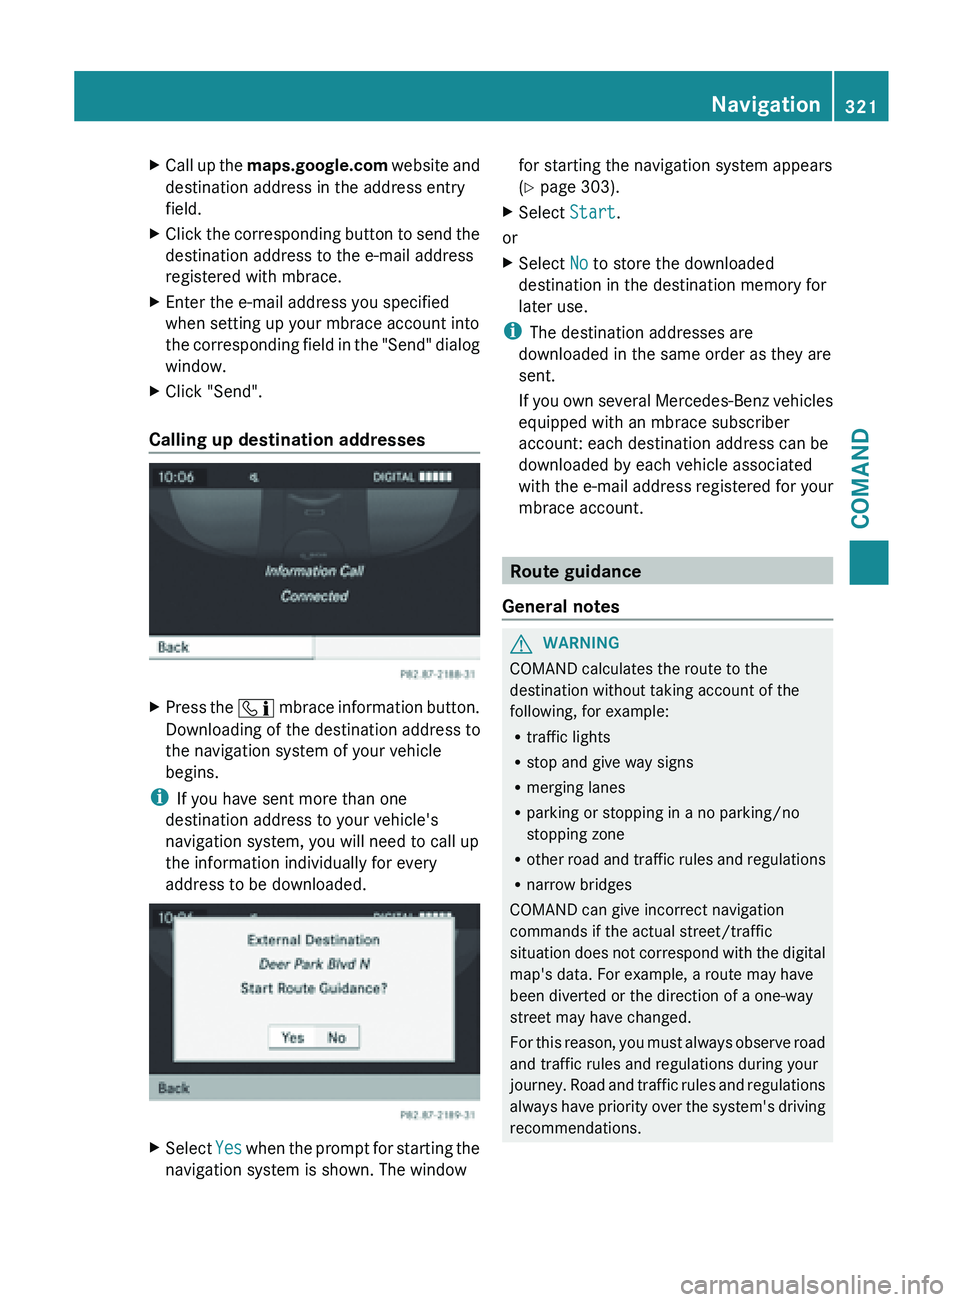
Calling up destination addresses X
Press the ï mbrace
information button.
Downloading of the destination address to
the navigation system of your vehicle
begins.
i If you have sent more than one
destination address to your vehicle's
navigation system, you will need to call up
the information individually for every
address to be downloaded. X
Select Yes when the prompt for starting the
navigation system is shown. The window for starting the navigation system appears
(
Y page 303).
X Select Start.
or
X Select No to store the downloaded
destination in the destination memory for
later use.
i The destination addresses are
downloaded in the same order as they are
sent.
If you
own several Mercedes-Benz vehicles
equipped with an mbrace subscriber
account: each destination address can be
downloaded by each vehicle associated
with the e-mail address registered for your
mbrace account. Route guidance
General notes G
WARNING
COMAND calculates the route to the
destination without taking account of the
following, for example:
R traffic lights
R stop and give way signs
R merging lanes
R parking or stopping in a no parking/no
stopping zone
R other road
and traffic rules and regulations
R narrow bridges
COMAND can give incorrect navigation
commands if the actual street/traffic
situation does not correspond with the digital
map's data. For example, a route may have
been diverted or the direction of a one-way
street may have changed.
For this reason, you must always observe road
and traffic rules and regulations during your
journey. Road and traffic rules and regulations
always have priority over the system's driving
recommendations. Navigation
321
COMAND Z
Page 324 of 572
Route guidance begins once a route has been
calculated
(
Y page 303).
COMAND guides you to your destination by
means of navigation announcements in the
form of audible navigation announcements
and route guidance displays.
The route guidance displays can only be seen
if the display is switched to navigation mode.
If you do not follow the navigation
announcements or if you leave the calculated
route, COMAND automatically calculates a
new route to the destination.
If the digital map contains the corresponding
information, the following applies:
R when selecting a route, COMAND tries to
avoid roads that only have limited access,
e.g. roads closed to through traffic.
R roads that have time restrictions (e.g.
closed on Sundays and public holidays) are
considered for route guidance on days
when they are open. For this purpose, the
relevant times must be correctly stored in
the database.
Displays during route guidance Change of direction
Changes of direction have three phases:
R
preparation phase
R announcement phase
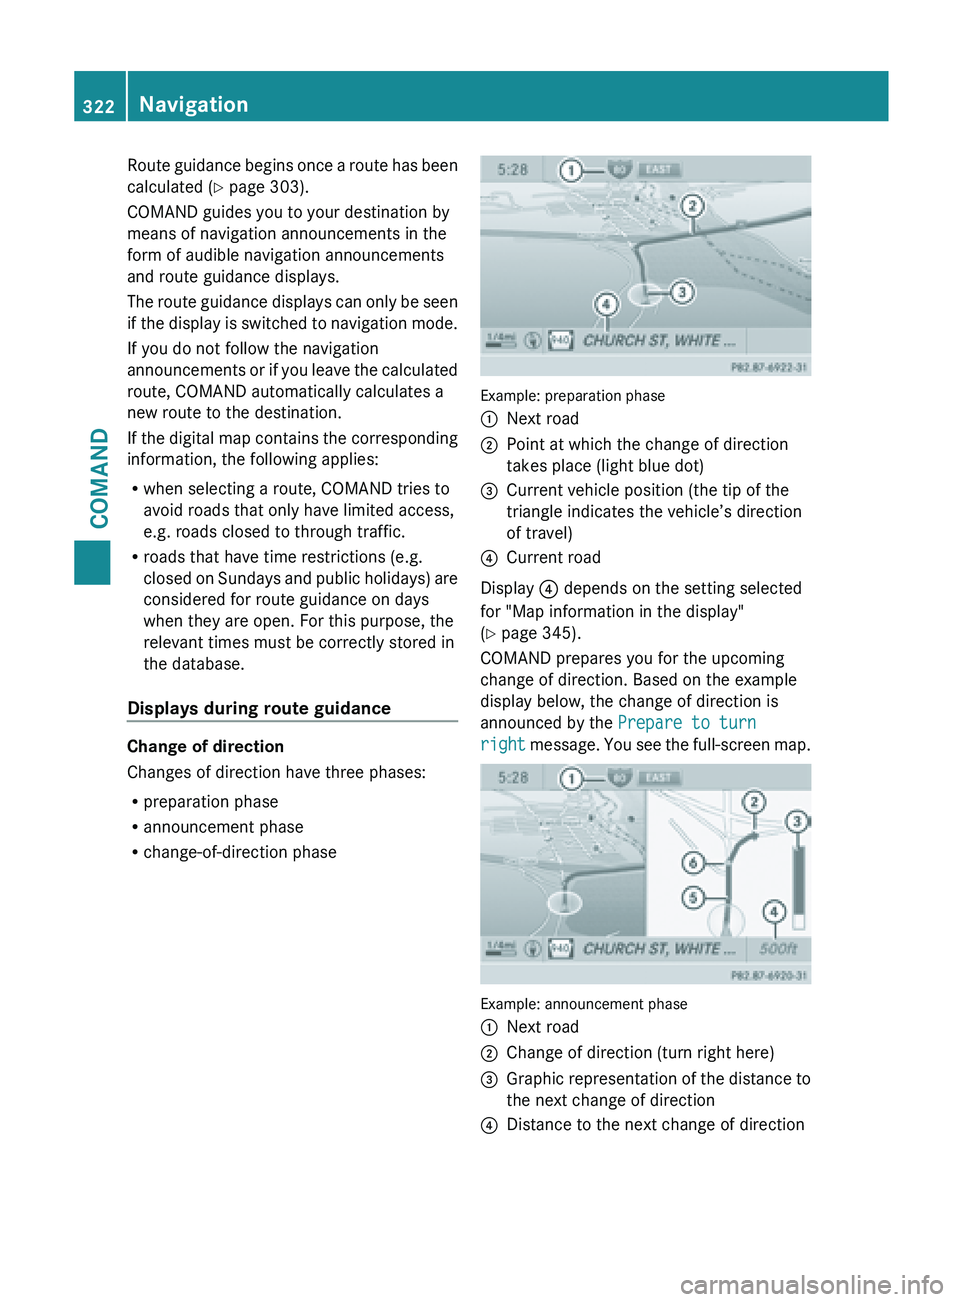
R change-of-direction phase Example: preparation phase
:
Next road
; Point at which the change of direction
takes place (light blue dot)
= Current vehicle position (the tip of the
triangle indicates the vehicle’s direction
of travel)
? Current road
Display ? depends on the setting selected
for "Map information in the display"
(Y page 345).
COMAND prepares you for the upcoming
change of direction. Based on the example
display below, the change of direction is
announced by the Prepare to turn
right message.
You see the full-screen map. Example: announcement phase
:
Next road
; Change of direction (turn right here)
= Graphic representation of the distance to
the next change of direction
? Distance to the next change of direction322
Navigation
COMAND