2013 MERCEDES-BENZ SL-CLASS ROADSTER mirror
[x] Cancel search: mirrorPage 486 of 572

i
Usually, you now have 30seconds to
initiate the next step.
X Press previously programmed button ;
,
= or ? of the integrated garage door
opener until the door starts to move.
The rolling code synchronization is then
complete.
Notes on programming the remote
control
Canadian radio frequency laws require a
"break" (or interruption) of the transmission
signals after
broadcasting for a few seconds.
Therefore, these signals may not last long
enough for the integrated garage door
opener. The signal is not recognized during
programming. Comparable with Canadian
law, some U.S. garage door openers are
designed to "time-out" in the same manner.
Proceed as follows:
R if you live in Canada
R if you have difficulties programming the
garage door opener (regardless of where
you live) when using the programming
steps
X Press and hold one of buttons ; to ? on
the integrated garage door opener.
After a
short time, indicator lamp : starts
flashing yellow.
X Release the button.
X Press button B of garage door remote
control A for
two seconds, then release it
for two seconds.
X Press button B again for two seconds.
X Repeat this sequence on button B of
remote control A until indicator lamp :
lights up green.
If indicator lamp : turns red, repeat the
process.
X Continue with the other programming
steps (see above). Problems when programming
If you are experiencing problems
programming the integrated garage door
opener on the rear-view mirror, take note of
the following instructions:
R
Check the
transmitter frequency of garage
door drive remote control A. This can
usually be found on the back of the remote
control.
The integrated garage door opener is
compatible with devices that have units
which operate in the frequency range of
280to 390MHz.
R Replace the batteries in garage door
remote control A. This increases the
likelihood that garage door remote control
A will transmit a strong and precise signal
to the integrated garage door opener in the
rear-view mirror.
R When programming, hold remote control
A at varying distances and angles from the
button that you are programming. Try
various angles at a distance between 2and
12 inches (5to 30 cm) or at the same angle
but at varying distances.
R If another remote control for the same
garage door drive is available, repeat the
same programming steps with this remote
control. Before performing these steps,
make sure that new batteries have been
installed in garage door drive remote
control A.
R Note that some remote controls only
transmit for a limited amount of time (the
indicator lamp on the remote control goes
out). Press button B on remote control
A again before transmission ends.
R Align the antenna cable of the garage door
opener unit. This can improve signal
reception/transmission.484
Features
Stowage and features
Page 487 of 572

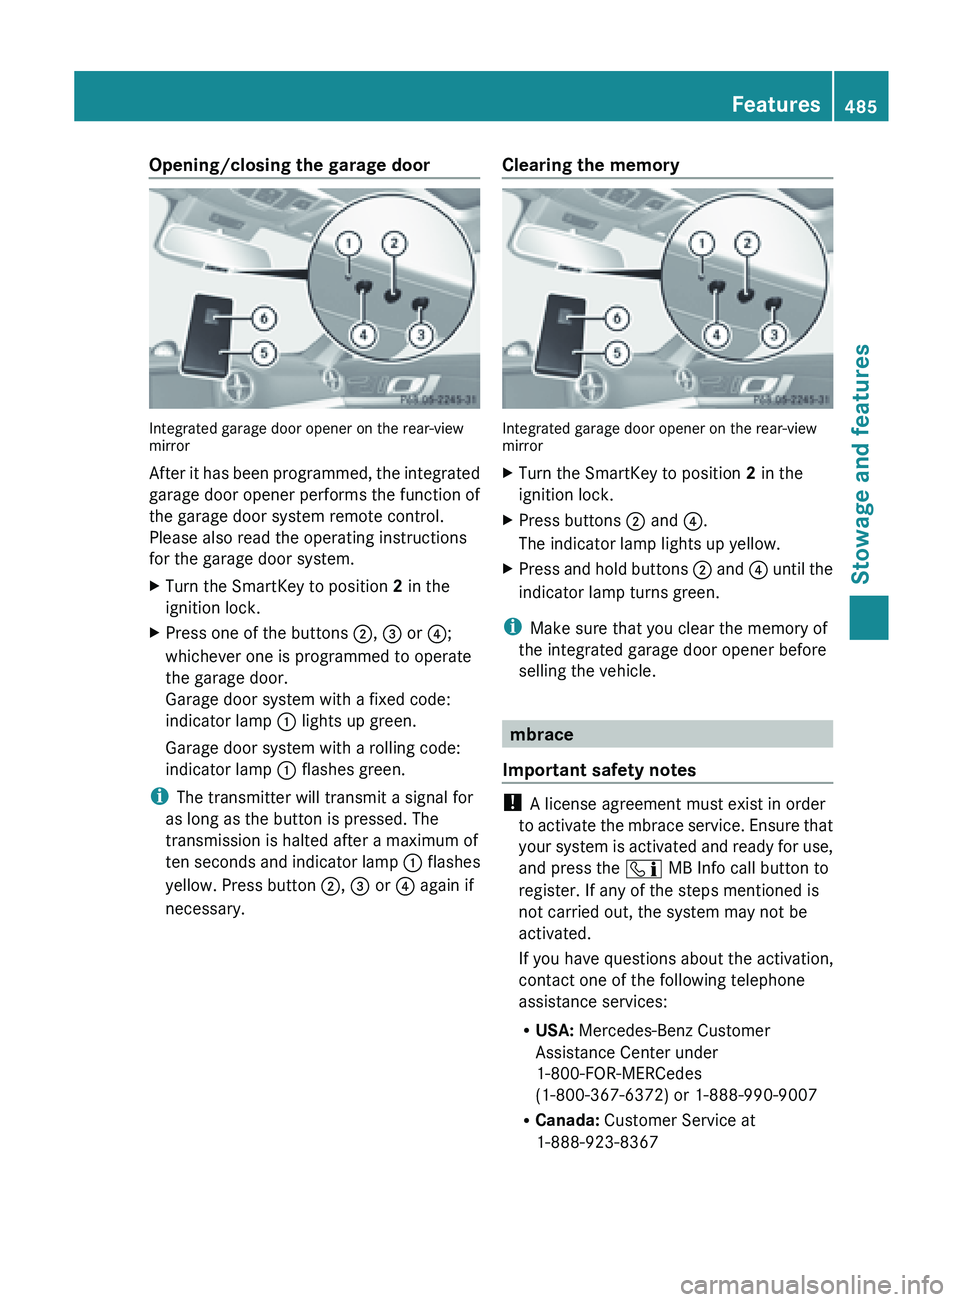
Opening/closing the garage door
Integrated garage door opener on the rear-view
mirror
After
it
has been programmed, the integrated
garage door opener performs the function of
the garage door system remote control.
Please also read the operating instructions
for the garage door system.
X Turn the SmartKey to position 2 in the
ignition lock.
X Press one of the buttons ;, = or ?;
whichever one is programmed to operate
the garage door.
Garage door system with a fixed code:
indicator lamp : lights up green.
Garage door system with a rolling code:
indicator lamp : flashes green.
i The transmitter will transmit a signal for
as long as the button is pressed. The
transmission is halted after a maximum of
ten seconds
and indicator lamp : flashes
yellow. Press button ;, = or ? again if
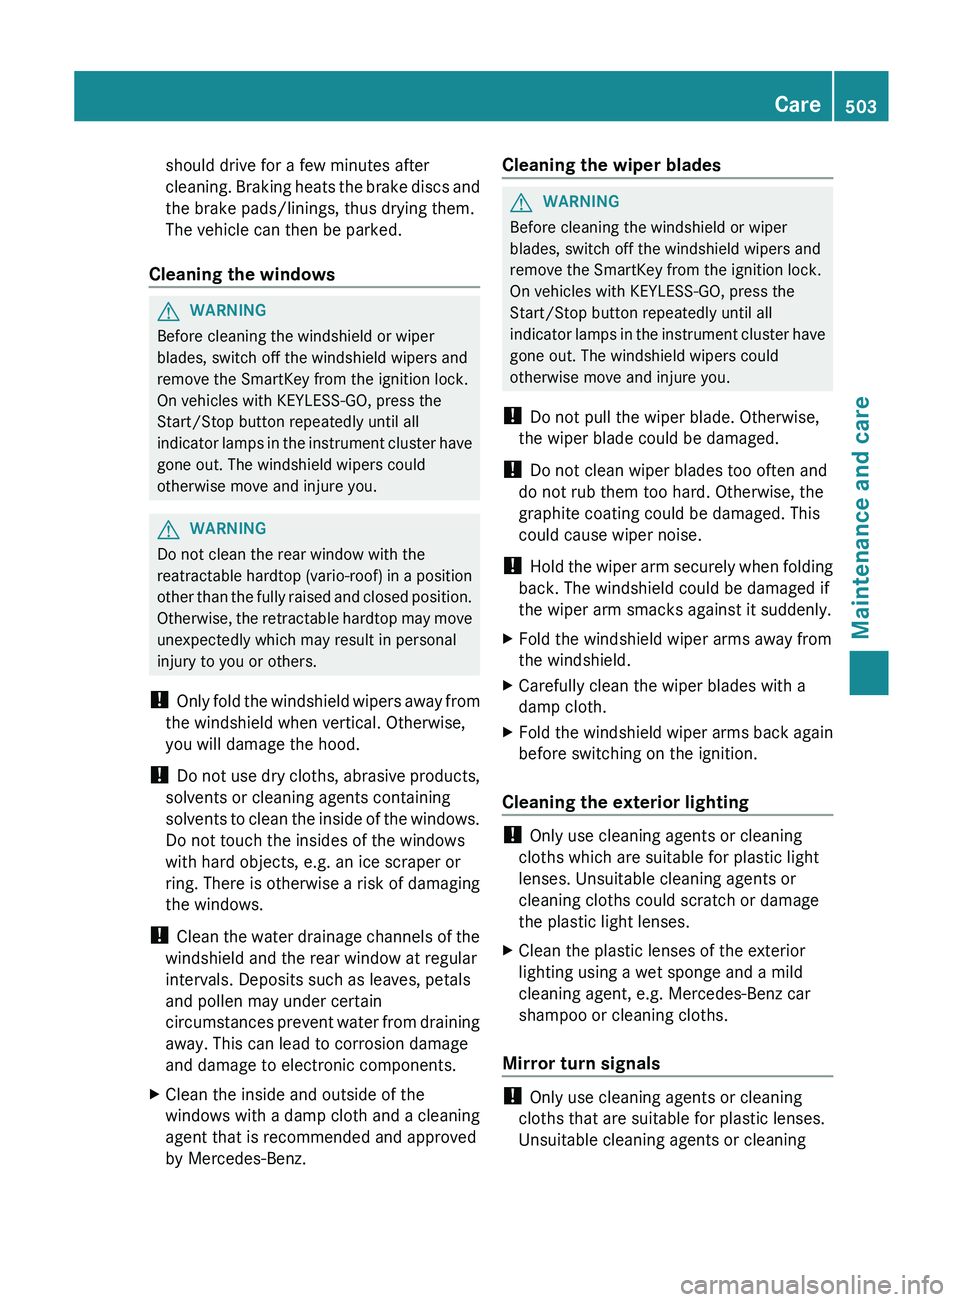
necessary. Clearing the memory Integrated garage door opener on the rear-view
mirror
X
Turn the SmartKey to position 2 in the
ignition lock.
X Press buttons ; and ?.
The indicator lamp lights up yellow.
X Press and hold buttons ; and
?
until the
indicator lamp turns green.
i Make sure that you clear the memory of
the integrated garage door opener before
selling the vehicle. mbrace
Important safety notes !
A license agreement must exist in order
to activate
the mbrace service. Ensure that
your system is activated and ready for use,
and press the ï MB Info call button to
register. If any of the steps mentioned is
not carried out, the system may not be
activated.
If you have questions about the activation,
contact one of the following telephone
assistance services:
R USA: Mercedes-Benz Customer
Assistance Center under
1-800-FOR-MERCedes
(1-800-367-6372) or 1-888-990-9007
R Canada: Customer Service at
1-888-923-8367 Features
485
Stowage and features Z
Page 505 of 572

should drive for a few minutes after
cleaning.
Braking
heats the brake discs and
the brake pads/linings, thus drying them.
The vehicle can then be parked.
Cleaning the windows G
WARNING
Before cleaning the windshield or wiper
blades, switch off the windshield wipers and
remove the SmartKey from the ignition lock.
On vehicles with KEYLESS-GO, press the
Start/Stop button repeatedly until all
indicator lamps
in the instrument cluster have
gone out. The windshield wipers could
otherwise move and injure you. G
WARNING
Do not clean the rear window with the
reatractable hardtop
(vario-roof) in a position
other than the fully raised and closed position.
Otherwise, the retractable hardtop may move
unexpectedly which may result in personal
injury to you or others.
! Only fold the windshield wipers away from
the windshield when vertical. Otherwise,
you will damage the hood.
! Do not use dry cloths, abrasive products,
solvents or cleaning agents containing
solvents to clean the inside of the windows.
Do not touch the insides of the windows
with hard objects, e.g. an ice scraper or
ring. There is otherwise a risk of damaging
the windows.
! Clean the water drainage channels of the
windshield and the rear window at regular
intervals. Deposits such as leaves, petals
and pollen may under certain
circumstances prevent water from draining
away. This can lead to corrosion damage
and damage to electronic components.
X Clean the inside and outside of the
windows with a damp cloth and a cleaning
agent that is recommended and approved
by Mercedes-Benz. Cleaning the wiper blades G
WARNING
Before cleaning the windshield or wiper
blades, switch off the windshield wipers and
remove the SmartKey from the ignition lock.
On vehicles with KEYLESS-GO, press the
Start/Stop button repeatedly until all
indicator lamps
in the instrument cluster have
gone out. The windshield wipers could
otherwise move and injure you.
! Do not pull the wiper blade. Otherwise,
the wiper blade could be damaged.
! Do not clean wiper blades too often and
do not rub them too hard. Otherwise, the
graphite coating could be damaged. This
could cause wiper noise.
! Hold the wiper arm securely when folding
back. The windshield could be damaged if
the wiper arm smacks against it suddenly.
X Fold the windshield wiper arms away from
the windshield.
X Carefully clean the wiper blades with a
damp cloth.
X Fold the windshield wiper arms back again
before switching on the ignition.
Cleaning the exterior lighting !
Only use cleaning agents or cleaning
cloths which are suitable for plastic light
lenses. Unsuitable cleaning agents or
cleaning cloths could scratch or damage
the plastic light lenses.
X Clean the plastic lenses of the exterior
lighting using a wet sponge and a mild
cleaning agent, e.g. Mercedes-Benz car
shampoo or cleaning cloths.
Mirror turn signals !
Only use cleaning agents or cleaning
cloths that are suitable for plastic lenses.
Unsuitable cleaning agents or cleaning Care
503
Maintenance and care Z
Page 506 of 572

cloths could scratch or damage the plastic
lenses of the mirror turn signals.
X Clean the plastic lenses of the mirror turn
signals in
the exterior mirror housing using
a wet sponge and mild cleaning agent, e.g.
Mercedes-Benz car shampoo or cleaning
cloths.
Cleaning the sensors !
If you clean the sensors with a power
washer, make sure that you keep a
distance of
at least 11.8 in (30 cm) between
the vehicle and the power washer nozzle.
Information about the correct distance is
available from the equipment
manufacturer. X
Clean sensors : of the driving systems
with water, car shampoo and a soft cloth.
Cleaning the rear view camera !
Do not
clean the camera lens and the area
around the rear view camera with a power
washer. X
Use clear water and a soft cloth to clean
camera lens :.
Cleaning the exhaust pipe !
Do not clean the exhaust pipe with
alkaline-based cleaning agents, such as
wheel cleaner.
X Clean the exhaust pipe with a chrome care
product tested
and approved by Mercedes-
Benz.
Impurities combined with the effects of road
grit and
corrosive environmental factors may
cause flash rust to form on the surface. You
can restore the original shine of the exhaust
pipe by cleaning it regularly, especially in
winter and after washing. Interior care
Cleaning the display !
For cleaning, do not use any of the
following:
R alcohol-based thinner or gasoline
R abrasive cleaning agents
R commercially-available household
cleaning agents
These may
damage the display surface. Do
not put pressure on the display surface
when cleaning. This could lead to
irreparable damage to the display. 504
Care
Maintenance and care
Page 568 of 572

Missing values were not available at time of
going to print.
SL 550
BlueEFFICIENCY
Vehicle length
181.7 in (4616 mm)
Vehicle length
when opening/
closing the roof
188.9 in (4797 mm)
Vehicle width
including exterior
mirrors
82.6 in (2099 mm)
Vehicle height
51.8 in (1316 mm)
Vehicle height
when opening/
closing the roof
66.8 in (1697 mm)
Wheelbase
101.8 in (2585 mm)
Turning radius
36.2 ft (11.04 m)
Maximum trunk
load
220 lb (100 kg)
SL 63 AMG and
SL 65 AMG
Vehicle length
182.9 in (4646 mm)
Vehicle length
when opening/
closing the roof
190.8 in (4846 mm)
Vehicle width
including exterior
mirrors
82.6 in (2099 mm)
Vehicle height
51.4 in – 53.7 in
(1305 mm –1363 mm )Vehicle height
when opening/
closing the roof
67.5 in – 70.5 in
(1714 mm –1791 mm )Wheelbase
101.8 in (2585 mm) SL 63 AMG and
SL 65 AMG
Turning radius
36.3 ft (11.05 m)
Maximum trunk
load566
Vehicle dataTechnical data