Page 133 of 572

will be activated. The blower runs at
medium speed.
X To switch off: press the Ì button.
The indicator
lamp in the Ì button goes
out.
Residual heat is deactivated automatically:
R after approximately 30 minutes
R when the ignition is switched on
R if the battery voltage drops
R if the coolant temperature is too low Setting the air vents
Important safety notes
G
WARNING
Very hot or very cold air can flow from the air
vents. This could cause burns or frostbite to
bare skin in the immediate vicinity of the
vents. Keep bare skin away from these air
vents. If
necessary, direct the airflow away to
a different area of the vehicle interior.
In order to ensure the direct flow of fresh air
through the air vents into the vehicle interior,
please observe the following notes:
R keep the air inlet grille on the hood and in
the engine compartment on the front-
passenger side free of blockages, such as
ice, snow or leaves.
R never cover the air vents or air intake grilles
in the vehicle interior.
i You can move the adjusters for the air
vents vertically or horizontally to set the
direction of the airflow.
i For optimal climate control in the vehicle,
open the air vents completely and set the
adjusters to the central position. Setting the center air vents
X
To open a center air vent: turn the
adjuster in one of center air vents :
counterclockwise.
X To close a center air vent: turn the
adjuster in one of center air vents :
clockwise until it engages. Setting the side air vents
:
Side window defroster vent
; Side air vent
X To open a side air vent: turn the adjuster
in side air vent ; counterclockwise.
X To close a side air vent: turn
the adjuster
in side air vent ; clockwise until it
engages. Setting the glove box air vent
! Close the air vent when heating the
vehicle. Setting the air vents
131
Climate control Z
Page 134 of 572

At high outside temperatures, open the air
vent and activate the "cooling with air
dehumidification" function. Otherwise,
temperature-sensitive items stored in the
glove box could be damaged.
:
Air vent thumbwheel
; Air vent
When automatic climate control is activated,
the glove box can be ventilated, for instance
to cool its contents. The level of airflow
depends on the airflow and air distribution
settings.
X To open/close: turn thumbwheel :
clockwise or counterclockwise. AIRSCARF, setting the vents
G
WARNING
When operating the climate control, the air
that enters the passenger compartment
through the air vents can be very hot or very
cold (depending
on the set temperature). This
could cause burns or frostbite to unprotected
skin in the immediate area of the air vents.
Always keep sufficient distance between
unprotected parts of the body and the air
vents. If necessary, use the air distribution
adjustment to direct the air to air vents in the
vehicle interior that are not in the immediate
area of unprotected skin. You can adjust the blower output of
AIRSCARF vents
: using the AIRSCARF
button ( Y page 101).132
Setting the air vents
Climate control
Page 162 of 572

!
As the ESP ®
system operates
automatically, the engine and the ignition
system must be switched off (SmartKey in
position 0
or 1
in the ignition lock or Start/
Stop button in position 0 or 1) when:
R testing the parking brake on a brake
dynamometer.
R you intend to have the vehicle towed with
the front axle raised.
Braking maneuvers triggered automatically
by ESP ®
may seriously damage the brake
system.
All checks and maintenance work on the
brake system must be carried out at a
qualified specialist workshop. Have this work
carried out at an authorized Mercedes-Benz
Center.
Have the brake pads and brake fluid installed
or replaced at a qualified specialist workshop,
e.g. an authorized Mercedes-Benz Center.
If the brake system has only been subject to
moderate loads, you should test the
functionality of your brakes at regular
intervals. To do so, press firmly on the brake
pedal when driving at a high speed. This
improves the grip of the brake pads.
A description of Brake Assist (BAS):
(Y page 58)
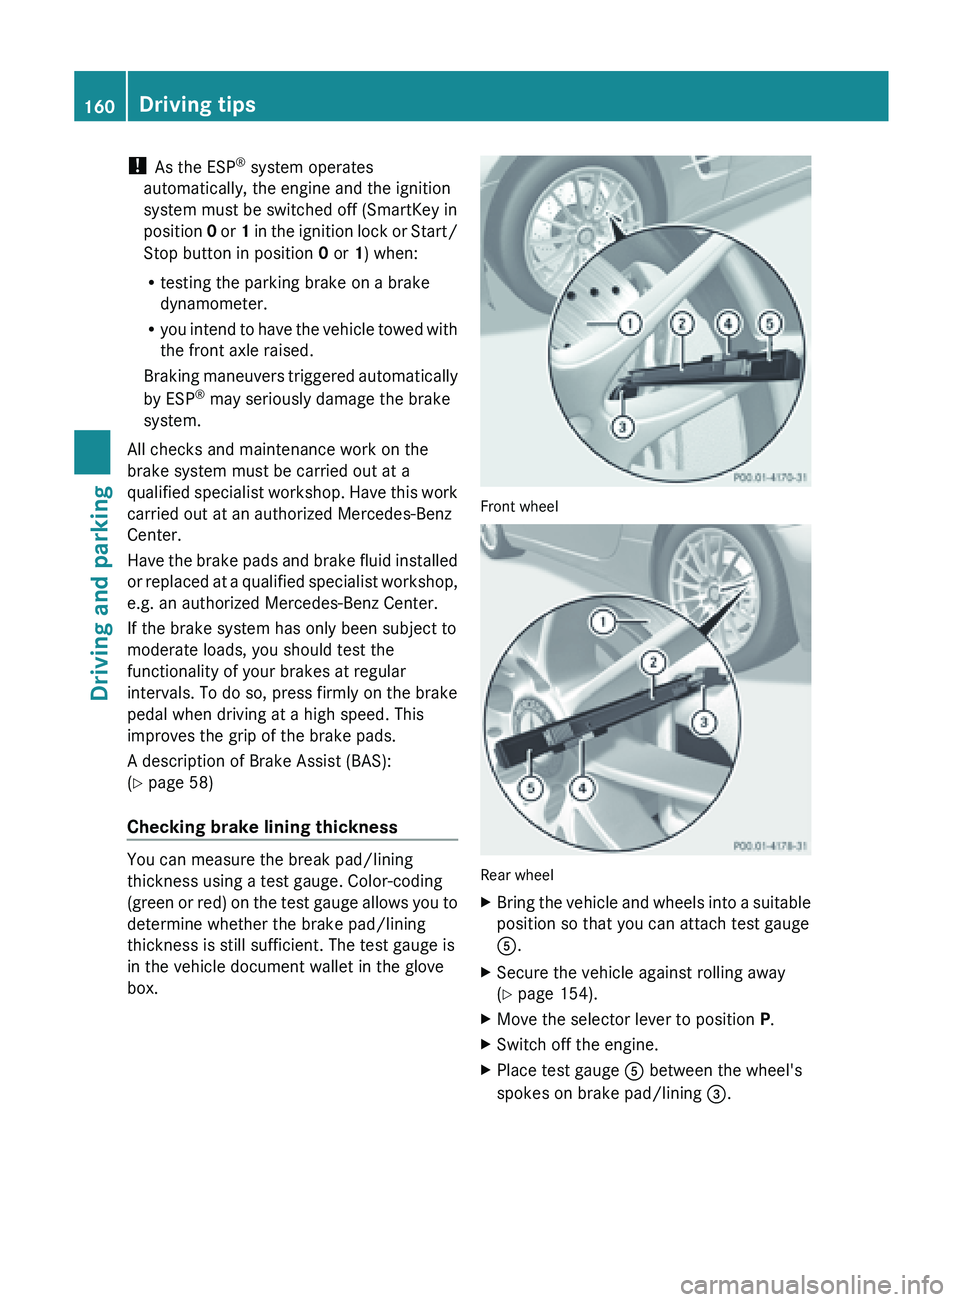
Checking brake lining thickness You can measure the break pad/lining
thickness using a test gauge. Color-coding
(green
or
red) on the test gauge allows you to
determine whether the brake pad/lining
thickness is still sufficient. The test gauge is
in the vehicle document wallet in the glove
box. Front wheel
Rear wheel
X
Bring the vehicle and wheels into a suitable
position so that you can attach test gauge
A.
X Secure the vehicle against rolling away
(Y page 154).
X Move the selector lever to position P.
X Switch off the engine.
X Place test gauge A between the wheel's
spokes on brake pad/lining =. 160
Driving tips
Driving and parking
Page 476 of 572

Useful information
i This Operator's Manual describes all
models and all standard and optional
equipment of your vehicle available at the
time of publication of the Operator's
Manual. Country-specific differences are
possible. Please
note that your vehicle may
not be equipped with all features
described. This also applies to safety-
related systems and functions.
i Read the information on qualified
specialist workshops: ( Y page 31).Stowage areas
Stowage space
Important safety notes G
WARNING
To
help avoid personal injury during a collision
or sudden maneuver, exercise care when
storing objects in the vehicle. Put luggage or
cargo in the trunk if possible.
Do not pile luggage or cargo higher than the
seat backrests.
Keep compartment lids closed. This will help
to prevent stored objects from being thrown
about and injuring vehicle occupants during
R braking
R vehicle maneuvers
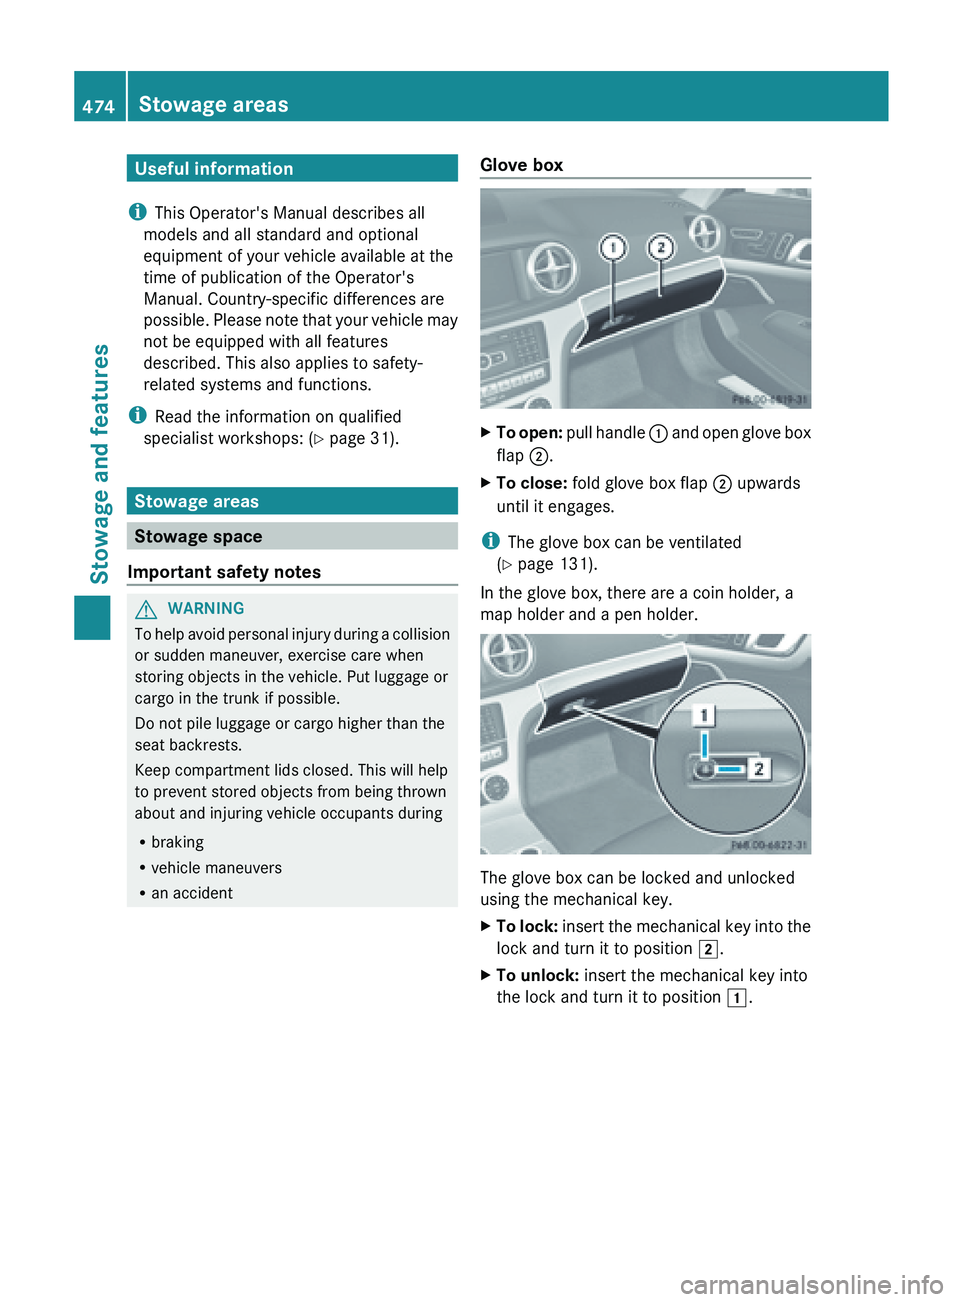
R an accident Glove box X
To open:
pull handle :
and open glove box
flap ;.
X To close: fold glove box flap ; upwards
until it engages.
i The glove box can be ventilated
(Y page 131).
In the glove box, there are a coin holder, a
map holder and a pen holder. The glove box can be locked and unlocked
using the mechanical key.
X
To
lock:
insert the mechanical key into the
lock and turn it to position 2
.
X To unlock: insert the mechanical key into
the lock and turn it to position 1.474
Stowage areas
Stowage and features