2013 MERCEDES-BENZ GLK-CLASS SUV AUX
[x] Cancel search: AUXPage 134 of 380

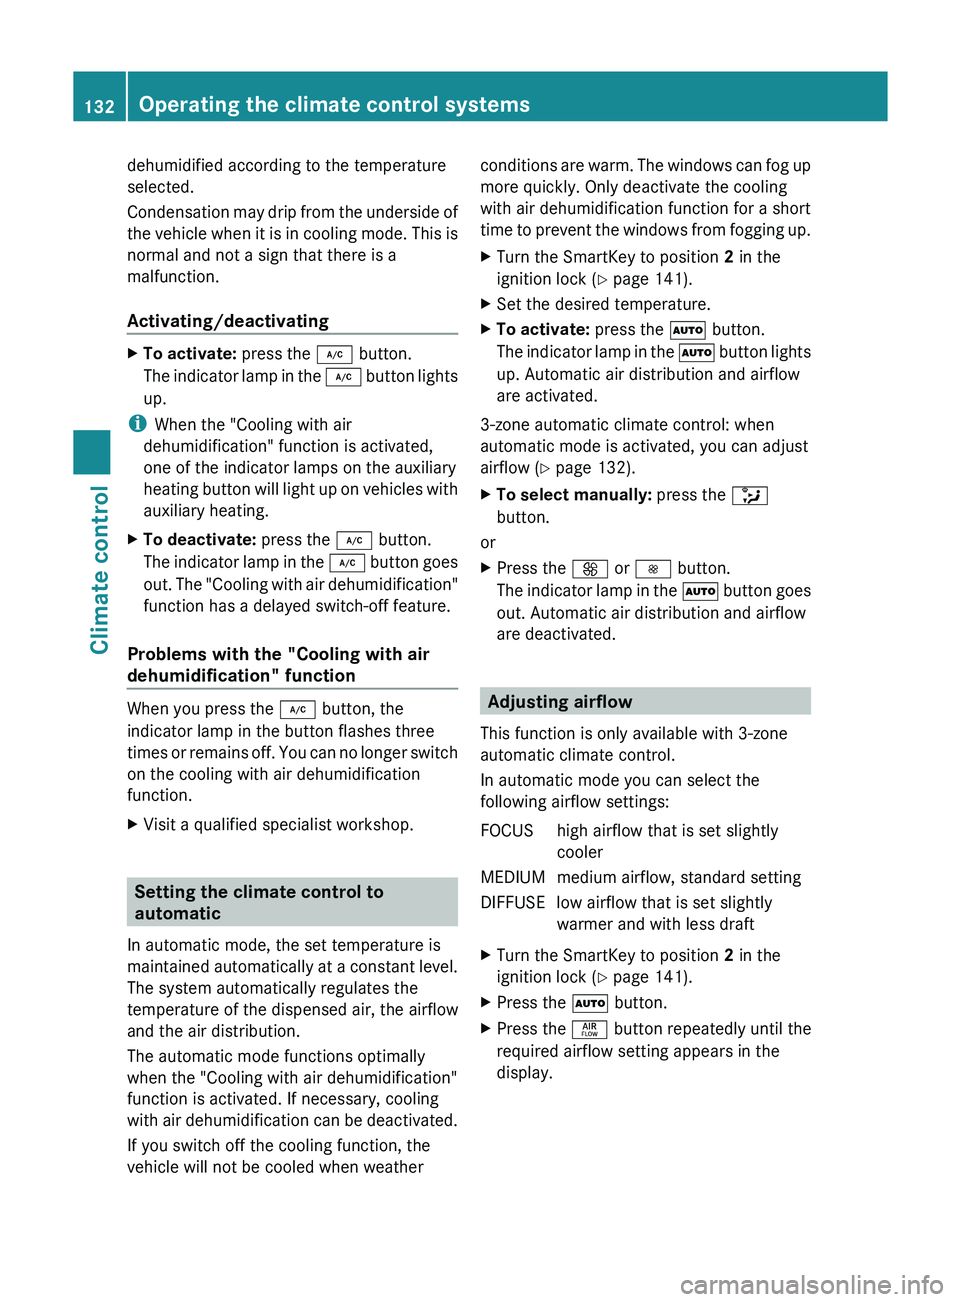
dehumidified according to the temperature
selected.
Condensation may drip from
the
underside of
the vehicle when it is in cooling mode. This is
normal and not a sign that there is a
malfunction.
Activating/deactivating X
To activate: press the 005A button.
The indicator lamp in the 005A
button lights
up.
i When the "Cooling with air
dehumidification" function is activated,
one of the indicator lamps on the auxiliary
heating button will light up
on vehicles with
auxiliary heating.
X To deactivate: press the 005A button.
The indicator lamp in the 005A
button goes
out. The "Cooling with air dehumidification"
function has a delayed switch-off feature.
Problems with the "Cooling with air
dehumidification" function When you press the
005A button, the
indicator lamp in the button flashes three
times or remains off. You
can no longer switch
on the cooling with air dehumidification
function.
X Visit a qualified specialist workshop. Setting the climate control to
automatic
In automatic mode, the set temperature is
maintained automatically at a constant
level.
The system automatically regulates the
temperature of the dispensed air, the airflow
and the air distribution.
The automatic mode functions optimally
when the "Cooling with air dehumidification"
function is activated. If necessary, cooling
with air dehumidification can be deactivated.
If you switch off the cooling function, the
vehicle will not be cooled when weather conditions are warm. The windows can fog up
more quickly. Only deactivate the cooling
with air dehumidification function for a short
time
to prevent the windows
from fogging up.
X Turn the SmartKey to position 2 in the
ignition lock (Y page 141).
X Set the desired temperature.
X To activate: press the 0058 button.
The indicator lamp in the 0058
button lights
up. Automatic air distribution and airflow
are activated.
3-zone automatic climate control: when
automatic mode is activated, you can adjust
airflow (Y page 132).
X To select manually: press the 008F
button.
or
X Press the
0097 or 0095 button.
The indicator lamp in the 0058
button goes
out. Automatic air distribution and airflow
are deactivated. Adjusting airflow
This function is only available with 3-zone
automatic climate control.
In automatic mode you can select the
following airflow settings:
FOCUS high airflow that is set slightly cooler
MEDIUM medium airflow, standard setting
DIFFUSE low airflow that is set slightly warmer and with less draft
X Turn the SmartKey to position 2 in the
ignition lock (Y page 141).
X Press the 0058 button.
X Press the 00F0 button repeatedly until the
required airflow setting appears in the
display. 132
Operating the climate control systems
Climate control
Page 139 of 380

X
Turn the SmartKey to position 0 in the
ignition lock (Y page 141) or remove it.
X To activate: press the 004B button.
The indicator lamp in the 004B
button lights
up.
i If the residual heat function is activated,
the windows may fog up on the inside.
X To deactivate: press the 004B button.
The indicator lamp in the 004B
button goes
out.
i Residual heat is deactivated
automatically:
R after approximately 30 minutes
R when the ignition is switched on
R if the battery voltage drops
R when the auxiliary heating is activated Setting the air vents
Important safety notes
G
WARNING
Very hot or very cold air can flow from the air
vents. This could result in
burns or frostbite in
the immediate vicinity of the air vents. There
is a risk of injury.
Make sure that all vehicle occupants always
maintain a sufficient distance to the air
outlets. If necessary, redirect the airflow to
another area of the vehicle interior.
In order to ensure the direct flow of fresh air
through the air vents into the vehicle interior,
please observe the following notes:
R keep the air inlet between the windshield
and the hood free of blockages, such as ice,
snow or leaves.
R never cover the air vents or air intake grilles
in the vehicle interior.
i For virtually draft-free ventilation, adjust
the sliders of the air vents to the center
position. Setting the center air vents
X
To open the center air vent: turn the
adjuster in one of center air vents 0043
counter-clockwise.
X To close the center air vent: turn the
adjuster in one of center air vents 0043
clockwise until it engages. Setting the side air vents
0043
Side window defroster vent
0044 Side air vent
X To open a side air vent: turn the adjuster
in side air vent 0044 counter-clockwise.
X To close a side air vent: turn the adjuster
in side air vent 0044
clockwise until it
engages. Setting the glove box air vent
When automatic climate control is activated,
the glove box can be ventilated, for instance Setting the air vents
137
Climate control Z
Page 156 of 380

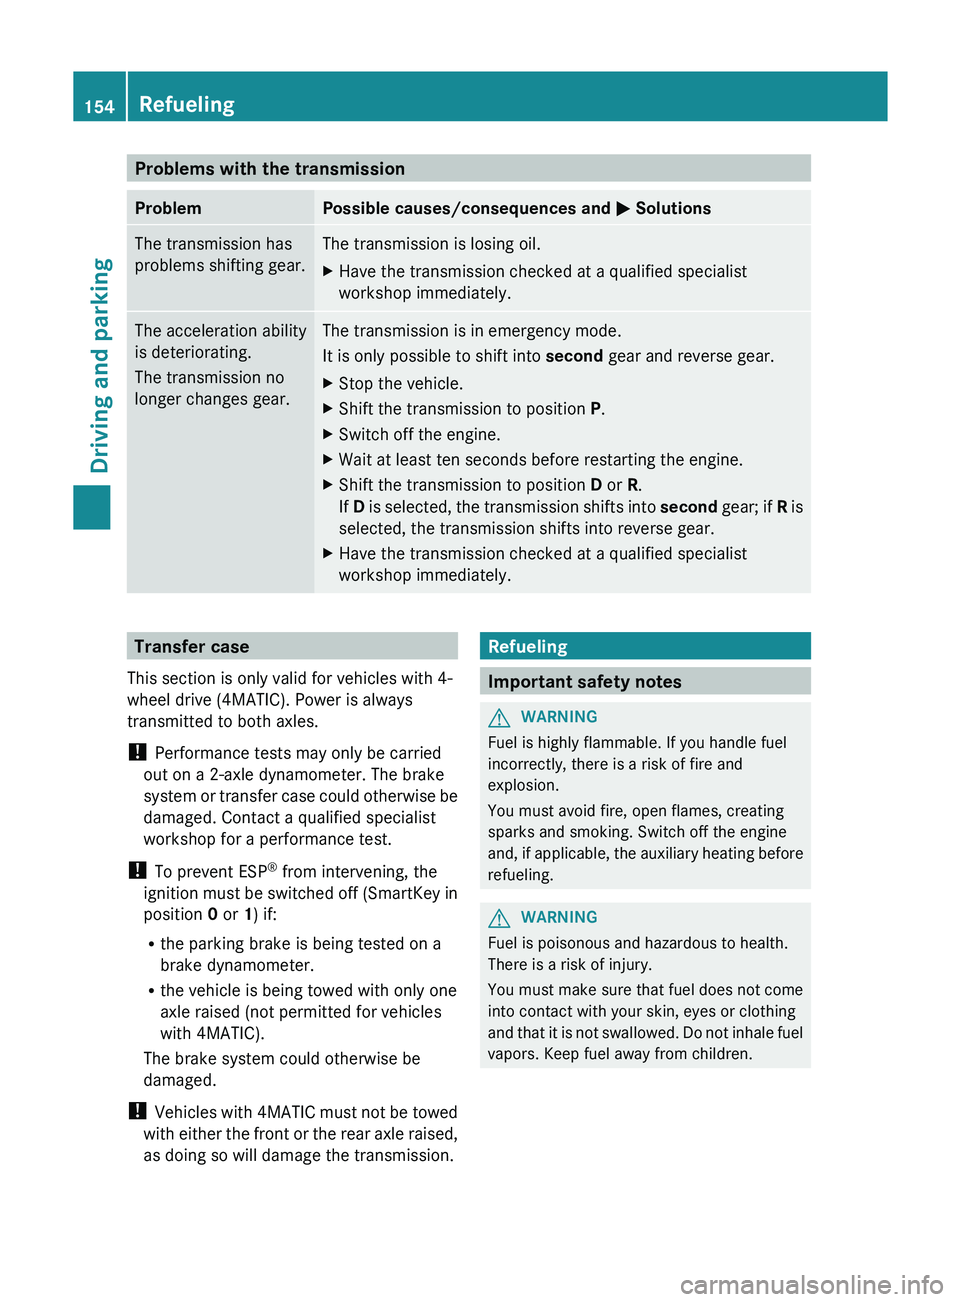
Problems with the transmission
Problem Possible causes/consequences and
0050 SolutionsThe transmission has
problems shifting gear. The transmission is losing oil.
X
Have the transmission checked at a qualified specialist
workshop immediately. The acceleration ability
is deteriorating.
The transmission no
longer changes gear. The transmission is in emergency mode.
It is only possible to shift into second
gear and reverse gear.
X Stop the vehicle.
X Shift the transmission to position P.
X Switch off the engine.
X Wait at least ten seconds before restarting the engine.
X Shift the transmission to position D or R.
If D
is selected, the transmission
shifts into second gear; if R is
selected, the transmission shifts into reverse gear.
X Have the transmission checked at a qualified specialist
workshop immediately. Transfer case
This section is only valid for vehicles with 4-
wheel drive (4MATIC). Power is always
transmitted to both axles.
! Performance tests may only be carried
out on a 2-axle dynamometer. The brake
system or transfer case could
otherwise be
damaged. Contact a qualified specialist
workshop for a performance test.
! To prevent ESP ®
from intervening, the
ignition must be switched off (SmartKey in
position 0 or 1) if:
R the parking brake is being tested on a
brake dynamometer.
R the vehicle is being towed with only one
axle raised (not permitted for vehicles
with 4MATIC).
The brake system could otherwise be
damaged.
! Vehicles with 4MATIC must not be towed
with either the front or the rear axle raised,
as doing so will damage the transmission. Refueling
Important safety notes
G
WARNING
Fuel is highly flammable. If you handle fuel
incorrectly, there is a risk of fire and
explosion.
You must avoid fire, open flames, creating
sparks and smoking. Switch off the engine
and, if applicable,
the auxiliary
heating before
refueling. G
WARNING
Fuel is poisonous and hazardous to health.
There is a risk of injury.
You must make
sure that
fuel does not come
into contact with your skin, eyes or clothing
and that it is not swallowed. Do not inhale fuel
vapors. Keep fuel away from children. 154
Refueling
Driving and parking
Page 168 of 380

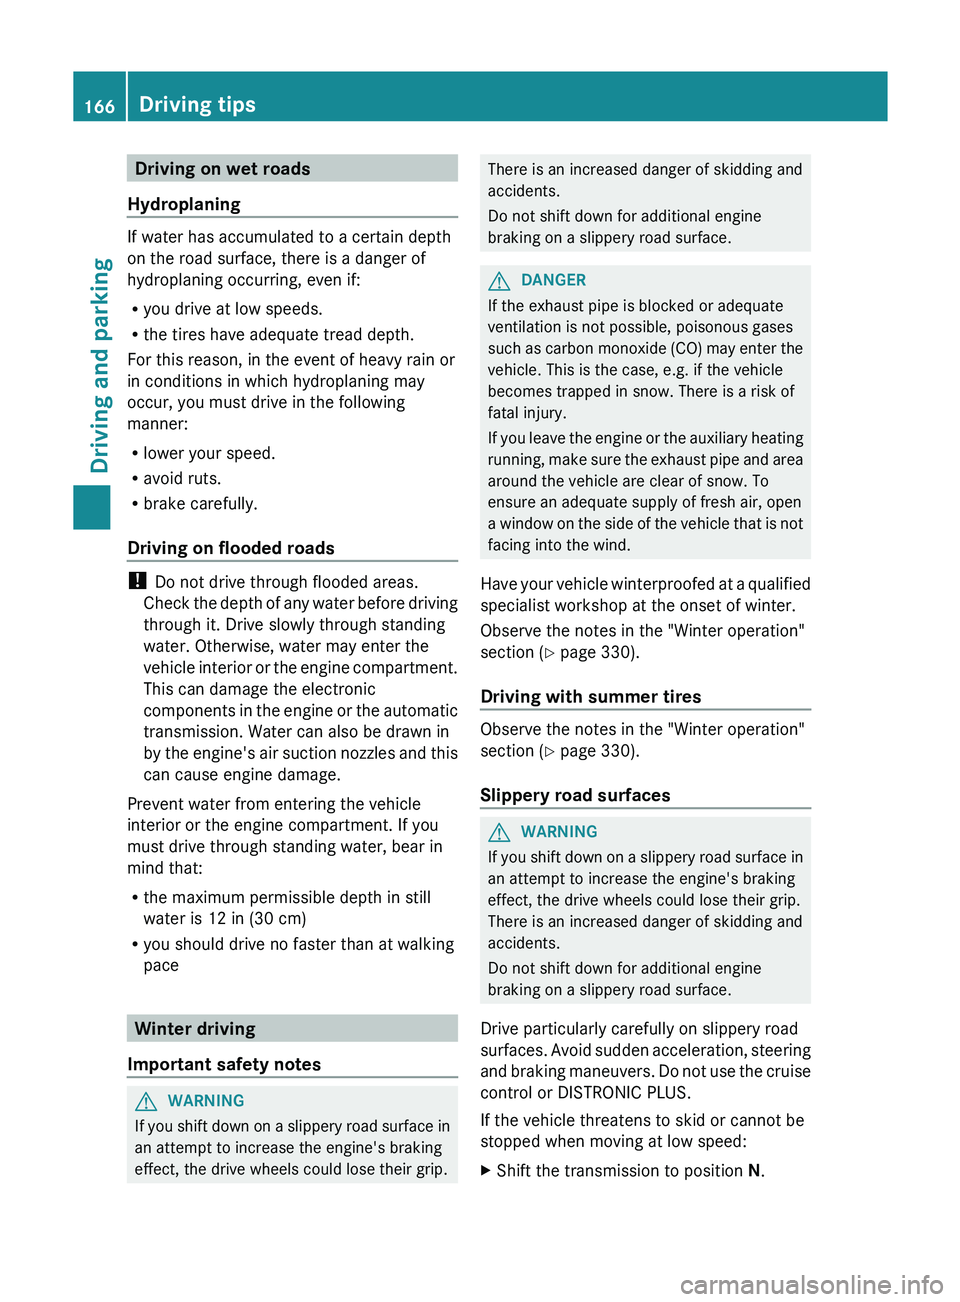
Driving on wet roads
Hydroplaning If water has accumulated to a certain depth
on the road surface, there is a danger of
hydroplaning occurring, even if:
R
you drive at low speeds.
R the tires have adequate tread depth.
For this reason, in the event of heavy rain or
in conditions in which hydroplaning may
occur, you must drive in the following
manner:
R lower your speed.
R avoid ruts.
R brake carefully.
Driving on flooded roads !
Do not drive through flooded areas.
Check the depth of any
water before driving
through it. Drive slowly through standing
water. Otherwise, water may enter the
vehicle interior or the engine compartment.
This can damage the electronic
components in the engine or the automatic
transmission. Water can also be drawn in
by the engine's air suction nozzles and this
can cause engine damage.
Prevent water from entering the vehicle
interior or the engine compartment. If you
must drive through standing water, bear in
mind that:
R the maximum permissible depth in still
water is 12 in (30 cm)
R you should drive no faster than at walking
pace Winter driving
Important safety notes G
WARNING
If you shift down on a slippery road surface in
an attempt to increase the engine's braking
effect, the drive wheels could lose their grip. There is an increased danger of skidding and
accidents.
Do not shift down for additional engine
braking on a slippery road surface.
G
DANGER
If the exhaust pipe is blocked or adequate
ventilation is not possible, poisonous gases
such as carbon monoxide (CO)
may enter the
vehicle. This is the case, e.g. if the vehicle
becomes trapped in snow. There is a risk of
fatal injury.
If you leave the engine or the auxiliary heating
running, make sure the exhaust pipe and area
around the vehicle are clear of snow. To
ensure an adequate supply of fresh air, open
a window on the side of the vehicle that is not
facing into the wind.
Have your vehicle winterproofed at a qualified
specialist workshop at the onset of winter.
Observe the notes in the "Winter operation"
section ( Y page 330).
Driving with summer tires Observe the notes in the "Winter operation"
section (
Y page 330).
Slippery road surfaces G
WARNING
If you shift down on a slippery road surface in
an attempt to increase the engine's braking
effect, the drive wheels could lose their grip.
There is an increased danger of skidding and
accidents.
Do not shift down for additional engine
braking on a slippery road surface.
Drive particularly carefully on slippery road
surfaces. Avoid sudden acceleration, steering
and
braking maneuvers. Do not use the cruise
control or DISTRONIC PLUS.
If the vehicle threatens to skid or cannot be
stopped when moving at low speed:
X Shift the transmission to position N.166
Driving tips
Driving and parking
Page 224 of 380

Other status indicators of the
navigation system
R
004B: you have reached the
destination or an
intermediate destination.
R New Route... or Calculating Route:
calculating a new route
R Off Map or Off Mapped Road : the vehicle
position is outside the area of the digital
map (off-map position).
R No Route : no route could be calculated to
the selected destination. Audio menu
Selecting a radio station i
SIRIUS XM satellite radio functions like a
normal radio.
For more information on satellite radio
operation, see the separate operating
instructions.
i For information on switching waveband
and storing stations; see the separate
operating instructions.
X Switch on the audio system or COMAND
and select Radio (see the separate
operating instructions).
X Press the 0059 or 0065 button on the
steering wheel to select the Audio menu. 0043
Waveband
0044 Station frequency with memory position X
To select a stored station: briefly press
the 0063 or 0064 button.
X To select a station from the station
list: press and briefly hold the 0063
or 0064 button.
If no station list is received:
X To select a station using the station
search: press and briefly hold the 0063
or 0064 button.
Operating an audio player or audio
media Audio data from various audio devices or
media can be played, depending on the
equipment installed in the vehicle.
X
Switch on the audio system or COMAND
and select the audio player
or medium, see
the separate operating instructions.
X Press the 0059 or 0065 button on the
steering wheel to select the Audio menu. Example: CD/DVD changer display
0043
Current title
X To select the next/previous track:
briefly press the 0063 or 0064 button.
X To select a track from the track list
(rapid scrolling): press and hold the
0063 or 0064 button until
desired track has
been reached.
If you press and hold 0063
or 0064, the rapid
scrolling speed is increased. Not all audio
drives or data carriers support this function.
If track information is stored on the audio
device or medium, the multifunction display
will
show the number and name of the track.
The current track does not appear in audio
AUX mode (Auxiliary audio mode: external
audio source connected). 222
Menus and submenus
On-board computer and displays
Page 273 of 380

Stowage areas
Stowage space
Important safety notes G
WARNING
If objects in the passenger compartment are
stowed incorrectly, they can slide or be
thrown around and hit vehicle occupants.
There is a risk of injury, particularly in the
event of sudden braking or a sudden change
in direction.
R Always stow objects so that
they cannot be
thrown around in such situations.
R Always make sure that objects do not
protrude from stowage spaces, parcel nets
or stowage nets.
R Close the lockable stowage spaces while
driving.
R Stow and secure objects that are heavy,
hard, pointy, sharp-edged, fragile or too
large in the cargo compartment.
Observe the loading guidelines (Y page 270).
Stowage compartments in the front Glove box
X
To open: pull handle 0043 and open
glove box
flap 0044.
X To close: fold glove box flap 0044 upwards
until it engages.
The glove box can only be locked and
unlocked using the mechanical key. X
To lock: insert the mechanical key into the
lock and turn it 90° clockwise to position
0048.
X To unlock: insert the mechanical key into
the lock and turn it 90° counter-clockwise
to position 0047
.
i The glove box can be ventilated
(Y page 137).
Stowage compartment under the armrest X
To open: press left-hand button 0044 or right-
hand button
0043.
The stowage compartment opens.
i Depending on the vehicle's equipment, a
USB connection and an
AUX
IN connection
or a Media Interface are installed in the
stowage compartment. A Media Interface
is a universal interface for portable audio
equipment, e.g. for an iPod ®
or MP3 player
(see the separate Audio or COMAND
Operating Instructions). Stowage areas
271
Stowage and features Z
Page 368 of 380

H
Environmental note
Dispose of service products in an
environmentally responsible manner.
Service products include the following:
R Fuels (e.g. gasoline, diesel)
R Exhaust gas aftertreatment additives, e.g.
DEF
R Lubricants (e.g. engine oil, transmission
oil)
R Coolant
R Brake fluid
R Windshield washer fluid
R Climate control system refrigerant
Comply with all valid regulations with respect
to handling, storing, and disposing of service
fluids.
Components and service products must be
matched. You should therefore only use
products that have been tested and approved
by Mercedes-Benz.
Information about tested and approved
products can be obtained from an authorized
Mercedes-Benz Center or on the Internet at
http://bevo.mercedes-benz.com.
You can recognize service products approved
by Mercedes-Benz by the following
inscription on the containers:
R MB-Freigabe (e.g. MB-Freigabe 229.51)
R MB Approval (e.g. MB Approval 229.51)
Other designations or recommendations
indicate a level of quality or a specification in
accordance with an MB Sheet number (e.g.
MB 229.5). They have not necessarily been
approved by Mercedes-Benz. Fuel
Important safety notes G
WARNING
Fuel is highly flammable. If you handle fuel
incorrectly, there is a risk of fire and
explosion. You must avoid fire, open flames, creating
sparks and smoking. Switch off the engine
and, if applicable, the
auxiliary
heating before
refueling. G
WARNING
Fuel is poisonous and hazardous to health.
There is a risk of injury.
You must make sure that
fuel does not come
into contact with your skin, eyes or clothing
and that it is not swallowed. Do not inhale fuel
vapors. Keep fuel away from children.
If you or others come into contact with fuel,
observe the following:
R Wash away fuel from skin immediately
using soap and water.
R If fuel comes into contact with your eyes,
immediately rinse them thoroughly with
clean water. Seek medical assistance
without delay.
R If fuel is swallowed, seek medical
assistance without delay. Do not induce
vomiting.
R Immediately change out of clothing which
has come into contact with fuel.
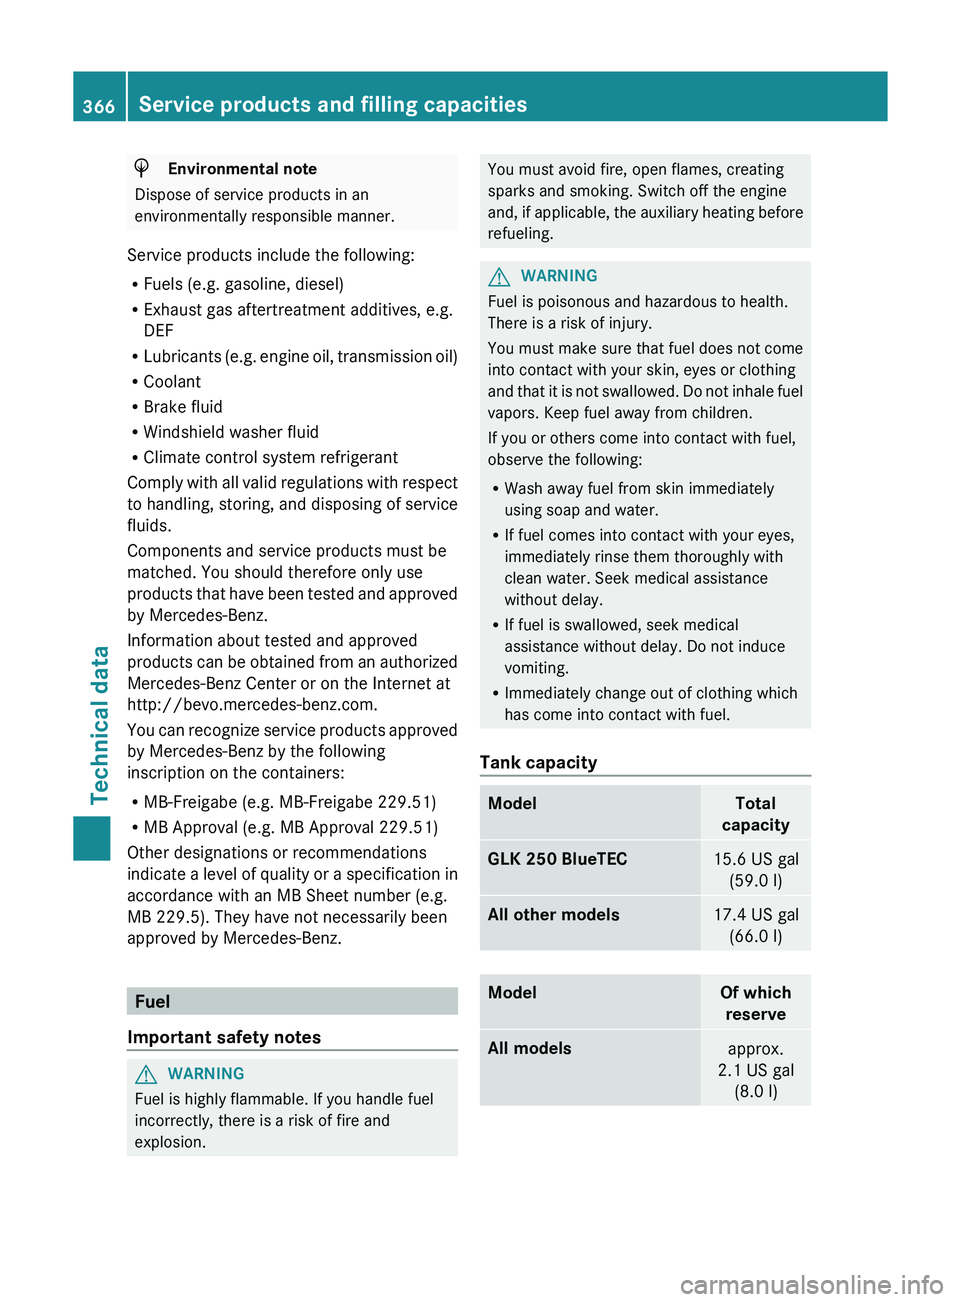
Tank capacity Model Total
capacity GLK 250 BlueTEC
15.6 US gal
(59.0 l) All other models
17.4 US gal
(66.0 l) Model Of which
reserve All models
approx.
2.1 US gal (8.0 l)366
Service products and filling capacities
Technical data