2013 MERCEDES-BENZ GLK-CLASS SUV towing
[x] Cancel search: towingPage 324 of 380
Towing the vehicle with the rear axle
raised
Only possible for vehicles without
4MATIC.
When towing your vehicle with the rear axle
raised, it is important that you observe the
safety instructions ( Y page 320).
! The ignition must be switched off if you
are towing the vehicle with the rear axle
raised. Intervention by ESP ®
could
otherwise damage the brake system.
X Switch on the hazard warning lamps
(Y page 113).
X Turn the SmartKey to position 0 in the
ignition lock and remove the SmartKey
from the ignition lock.
X When leaving the vehicle, take the
SmartKey or the KEYLESS-GO key
with you.Towing a vehicle with both axles on
the ground
It is important that you observe the safety
instructions when towing away your vehicle
(Y page 320).
X Switch on the hazard warning lamps
(Y page 113).
i When towing with the hazard warning
lamps switched on, use the combination
switch as usual to signal a change of
direction. In this case, only the indicator
lamps for the direction of
travel flash. After
resetting the combination switch, the
hazard warning lamp starts flashing again.
X Turn the SmartKey to position 2 in the
ignition lock.
X When the vehicle is stationary, depress the
brake pedal and keep it depressed.
X Shift the automatic transmission to
position N.
X Release the brake pedal.
X Release the parking brake. Transporting the vehicle
The towing eyes or trailer tow hitch can be
used to pull the vehicle onto a trailer or
transporter if you wish to transport it.
X Turn the SmartKey to position 2 in the
ignition lock.
X Shift the automatic transmission to
position N.
As soon as the vehicle has been loaded:
X Prevent the vehicle from rolling away by
applying the parking brake.
X Shift the automatic transmission to
position P.
X Turn the SmartKey to position 0 in the
ignition lock and remove the SmartKey
from the ignition lock.
X Secure the vehicle.
! Only lash the
vehicle down
by the wheels
or wheel rims, not by parts of the vehicle
such as axle or steering components.
Otherwise, the vehicle could be damaged. Notes on 4MATIC vehicles
! Vehicles with 4MATIC must not
be towed
with either the front or the rear axle raised,
as doing so will damage the transmission.
If the vehicle has transmission damage or
damage to the front or rear axle, have it
transported on a transporter or trailer.
In the event of damage to the electrical
system
If the battery is defective, the automatic
transmission will be locked in position P. To
shift the automatic transmission to position
N, you must provide power to the vehicle's
electrical system in the same way as when
jump-starting (Y page 318).
Have the vehicle transported on a transporter
or trailer. 322
Towing and tow-starting
Breakdown assistance
Page 335 of 380
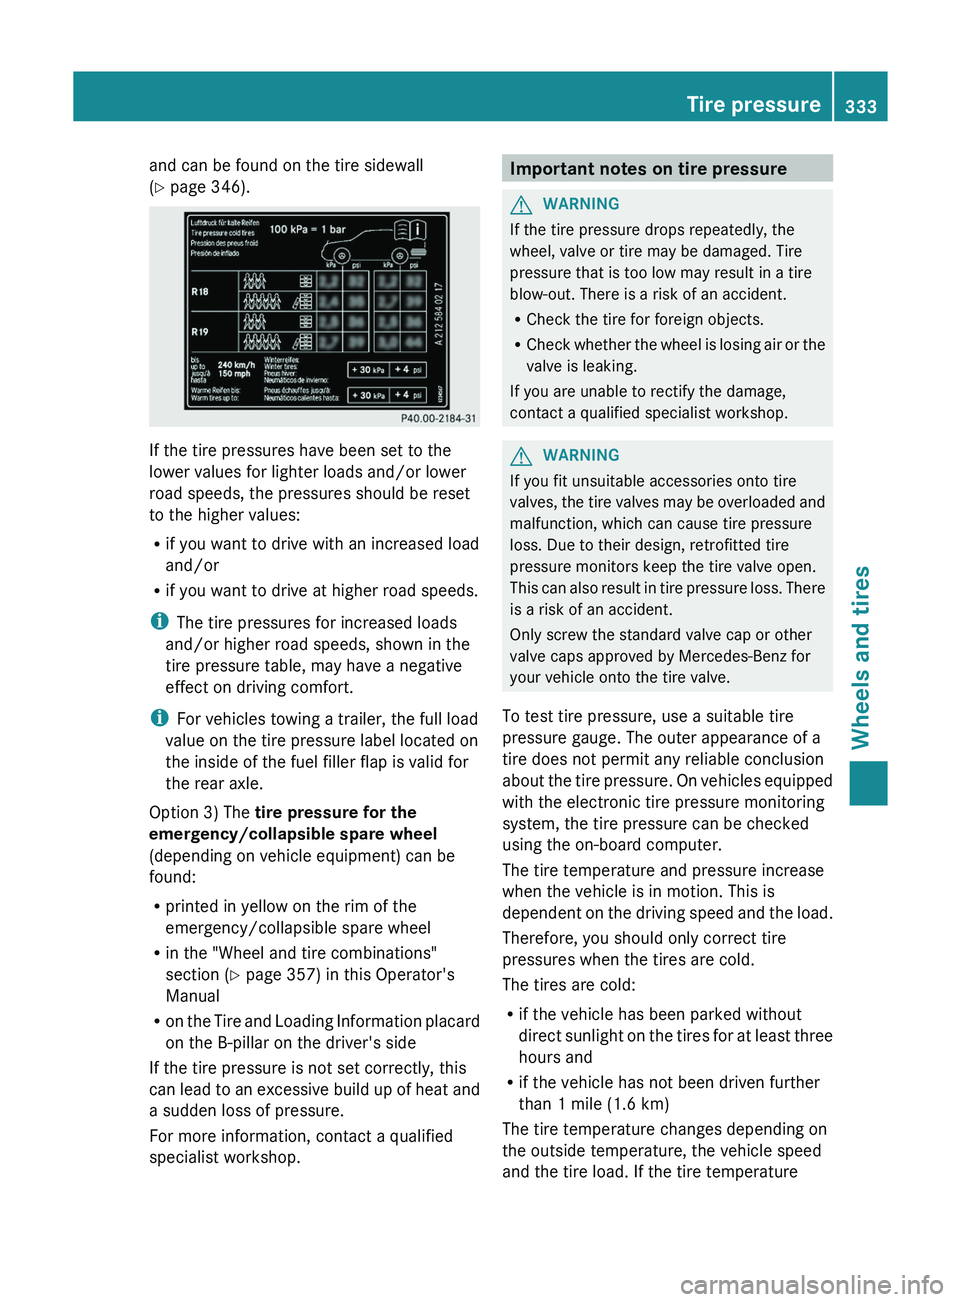
and can be found on the tire sidewall
(Y page 346).
If the tire pressures have been set to the
lower values for lighter loads and/or lower
road speeds, the pressures should be reset
to the higher values:
R
if you want to drive with an increased load
and/or
R if you want to drive at higher road speeds.
i The tire pressures for increased loads
and/or higher road speeds, shown in the
tire pressure table, may have a negative
effect on driving comfort.
i For vehicles towing a trailer, the full load
value on the tire pressure label located on
the inside of the fuel filler flap is valid for
the rear axle.
Option 3) The tire pressure for the
emergency/collapsible spare wheel
(depending on vehicle equipment) can be
found:
R printed in yellow on the rim of the
emergency/collapsible spare wheel
R in the "Wheel and tire combinations"
section ( Y page 357) in this Operator's
Manual
R on the Tire and Loading
Information placard
on the B-pillar on the driver's side
If the tire pressure is not set correctly, this
can lead to an excessive build up of heat and
a sudden loss of pressure.
For more information, contact a qualified
specialist workshop. Important notes on tire pressure
G
WARNING
If the tire pressure drops repeatedly, the
wheel, valve or tire may be damaged. Tire
pressure that is too low may result in a tire
blow-out. There is a risk of an accident.
R Check the tire for foreign objects.
R Check whether the wheel is
losing air or the
valve is leaking.
If you are unable to rectify the damage,
contact a qualified specialist workshop. G
WARNING
If you fit unsuitable accessories onto tire
valves, the tire valves may
be overloaded and
malfunction, which can cause tire pressure
loss. Due to their design, retrofitted tire
pressure monitors keep the tire valve open.
This can also result in tire pressure loss. There
is a risk of an accident.
Only screw the standard valve cap or other
valve caps approved by Mercedes-Benz for
your vehicle onto the tire valve.
To test tire pressure, use a suitable tire
pressure gauge. The outer appearance of a
tire does not permit any reliable conclusion
about the tire pressure. On vehicles equipped
with the electronic tire pressure monitoring
system, the tire pressure can be checked
using the on-board computer.
The tire temperature and pressure increase
when the vehicle is in motion. This is
dependent on the driving speed and the load.
Therefore, you should only correct tire
pressures when the tires are cold.
The tires are cold:
R if the vehicle has been parked without
direct sunlight on the tires for at least three
hours and
R if the vehicle has not been driven further
than 1 mile (1.6 km)
The tire temperature changes depending on
the outside temperature, the vehicle speed
and the tire load. If the tire temperature Tire pressure
333
Wheels and tires Z
Page 337 of 380
Checking the tire pressures
Important safety notes Observe the "tire pressure information"
section (
Y page 331).
Information on air pressure for the tires on
your vehicle can be found:
R on the vehicle's Tire and Loading
Information placard on the B-pillar
R on the tire pressure label on the fuel filler
flap
R in the "Tire pressure information" section
Checking tire pressures manually To determine and set the correct tire
pressure, proceed as follows:
X
Remove the valve cap of the tire that is to
be checked.
X Press the tire pressure gauge securely onto
the valve.
X Read the tire pressure and compare it with
the recommended value on the Tire and
Loading Information placard on the
B-pillar on
the driver's
side
of your vehicle.
X If necessary, increase the tire pressure to
the recommended value ( Y page 331).
X If the tire pressure is too high, release air
by pressing down the metal
pin in the valve
using the tip of a pen, for example. Then,
check the tire pressure again using the tire
pressure gauge.
X Screw the valve cap onto the valve.
X Repeat these steps for the other tires. Tire pressure loss warning system
(Canada only)
General notes While the vehicle is in motion, the tire
pressure loss warning system monitors the
set tire pressure using
the
rotational speed of
the wheels. This enables the system to detect
significant pressure loss in a tire. If the speed of rotation of a wheel changes as a result of
a loss of pressure, a corresponding warning
message will appear in the multifunction
display.
You can recognize the tire pressure loss
warning by the
Run Flat Indicator
Active Press 'OK' to Restart message
which appears in the Service menu of the
multifunction display. Further information on
the message display can be found under
"Restarting the tire pressure loss warning
system" section (
Y page 336).
Important safety notes The tire pressure warning system does not
warn you of an incorrectly set tire pressure.
Observe the notes on the recommended tire
pressure (
Y page 331).
The tire pressure loss warning system does
not replace the need to regularly check your
vehicle's tire pressures, since an
even loss of
pressure on several tires at the same time
cannot be detected by the tire pressure loss
warning system.
The tire pressure monitor is not able to warn
you of a sudden loss of pressure, e.g. if the
tire is penetrated by a foreign object. In the
event of a sudden loss of pressure, bring the
vehicle to a halt by braking carefully. Avoid
abrupt steering maneuvers.
The function of the tire pressure loss warning
system is limited or delayed if:
R snow chains are mounted on your vehicle's
tires.
R road conditions are wintry.
R you are driving on sand or gravel.
R you adopt a very sporty driving style
(cornering at high speeds or driving with
high rates of acceleration).
R you are towing a very heavy or large trailer.
R you are driving with a heavy load (in the
vehicle or on the roof). Tire pressure
335
Wheels and tires Z
Page 343 of 380
your vehicle’s Tire and Loading Information
placard.
X Step 2: Determine the combined weight of
the driver and passengers
that will be riding
in your vehicle.
X Step 3: Subtract the combined weight of
the driver and passengers from XXX
kilograms or XXX lbs.
X Step 4: The resulting figure equals the
available amount of cargo and
luggage load
capacity. For example, if the "XXX" amount
equals 1400 lbs and there will be five
150 lbs passengers in your vehicle, the
amount of available cargo and luggage load
capacity is 650 lbs (1 400 - 750 (5 x 150)
= 650 lbs).
X Step 5: Determine the combined weight of
luggage and cargo being loaded on the
vehicle. That weight may
not safely exceed
the available cargo and luggage load
capacity calculated in step 4.
X Step 6 (if applicable): If your vehicle will
be towing a trailer, load from your trailer
will be transferred to your
vehicle. Refer to
this Operator's Manual to determine how
this reduces the available cargo and
luggage load capacity of your vehicle
(Y page 343). Loading the vehicle
341
Wheels and tires Z
Page 345 of 380
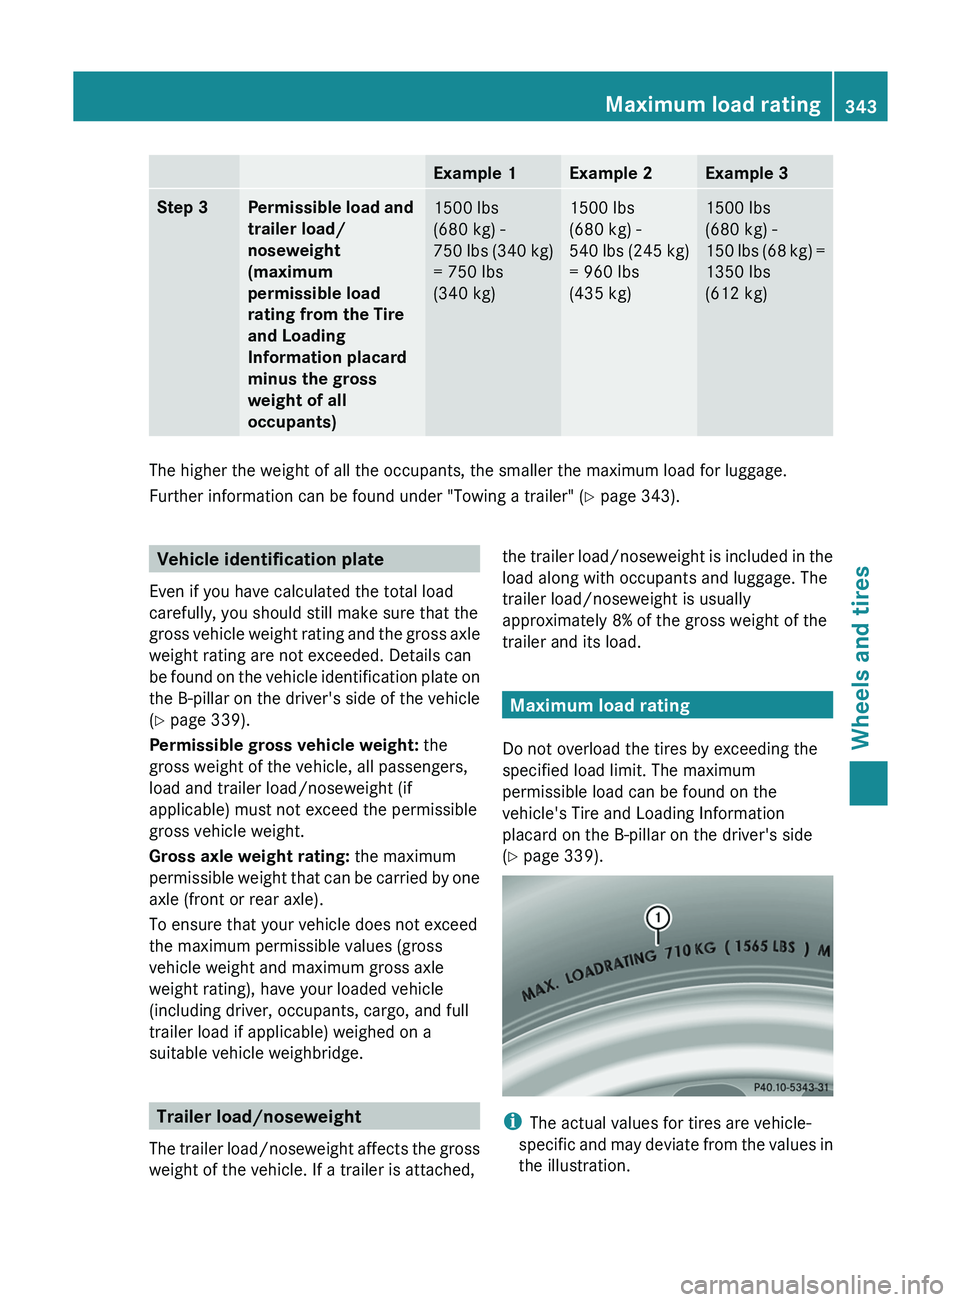
Example 1 Example 2 Example 3
Step 3 Permissible load and
trailer load/
noseweight
(maximum
permissible load
rating from the Tire
and Loading
Information placard
minus the gross
weight of all
occupants)
1500 lbs
(680 kg) -
750 lbs (340 kg)
= 750 lbs
(340 kg) 1500 lbs
(680 kg) -
540 lbs (245 kg)
= 960 lbs
(435 kg) 1500 lbs
(680 kg) -
150 lbs (68 kg)
=
1350 lbs
(612 kg) The higher the weight of all the occupants, the smaller the maximum load for luggage.
Further information can be found under "Towing a trailer" (
Y page 343).Vehicle identification plate
Even if you have calculated the total load
carefully, you should still make sure that the
gross vehicle weight rating and
the gross axle
weight rating are not exceeded. Details can
be found on the vehicle identification plate on
the B-pillar on the driver's side of the vehicle
(Y page 339).
Permissible gross vehicle weight: the
gross weight of the vehicle, all passengers,
load and trailer load/noseweight (if
applicable) must not exceed the permissible
gross vehicle weight.
Gross axle weight rating: the maximum
permissible weight that can be carried by one
axle (front or rear axle).
To ensure that your vehicle does not exceed
the maximum permissible values (gross
vehicle weight and maximum gross axle
weight rating), have your loaded vehicle
(including driver, occupants, cargo, and full
trailer load if applicable) weighed on a
suitable vehicle weighbridge. Trailer load/noseweight
The trailer load/noseweight affects the
gross
weight of the vehicle. If a trailer is attached, the trailer load/noseweight is included in the
load along with occupants and luggage. The
trailer load/noseweight is usually
approximately 8% of the gross weight of the
trailer and its load.
Maximum load rating
Do not overload the tires by exceeding the
specified load limit. The maximum
permissible load can be found on the
vehicle's Tire and Loading Information
placard on the B-pillar on the driver's side
(Y page 339). i
The actual values for tires are vehicle-
specific and may deviate from
the values in
the illustration. Maximum load rating
343
Wheels and tires Z
Page 359 of 380

X
Place the ratchet wrench onto the hexagon
nut of the jack so that the letters AB are
visible.
X Turn the ratchet wrench until the vehicle is
once again standing firmly on the ground.
X Place the jack to one side.
X Tighten the wheel bolts evenly in a
crosswise pattern in the sequence
indicated ( 0043 to 0083). The tightening
torque
must be 110 lb-ft (150 Nm).
X Turn the jack back to its initial position and
store it together with the rest of the tire-
change tool kit in the cargo compartment.
X Transport the faulty wheel in the cargo
compartment.
X Check the tire pressure of the newly
mounted wheel and adjust it if necessary.
Observe the recommended tire pressure
(Y page 331).
For further information on stowing the
collapsible spare wheel, see (Y page 361).
i Vehicles with tire pressure monitor: all
wheels mounted must be equipped with
functioning sensors. Wheel and tire combinations
General notes
! For safety reasons, Mercedes-Benz
recommends that you only use tires and
wheels which have been approved by
Mercedes-Benz specifically for your
vehicle. These tires have been specially adapted for
use with the control systems, such as ABS
or ESP
®
, and are marked as follows:
R MO = Mercedes-Benz Original
R MOE = Mercedes-Benz Original Extended
(tires featuring run-flat characteristics)
R MO1 = Mercedes-Benz Original (only
certain AMG tires)
Mercedes-Benz Original Extended tires
may
only be used on wheels that have been
specifically approved by Mercedes-Benz.
Only use tires, wheels or accessories
tested and approved by Mercedes-Benz.
Certain characteristics, e.g. handling,
vehicle noise emissions or fuel
consumption, may otherwise be adversely
affected. In addition, when driving with a
load, tire dimension variations could cause
the tires to come into contact with the
bodywork and axle components. This could
result in damage to the tires or the vehicle.
Mercedes-Benz accepts no liability for
damage resulting from the use of tires,
wheels or accessories other than those
tested and approved.
Information on tires, wheels and approved
combinations can be obtained from any
qualified specialist workshop.
! Retreaded tires are neither tested nor
recommended by Mercedes-Benz, since
previous damage cannot always be
detected on retreaded tires. As a result,
Mercedes-Benz cannot guarantee vehicle
safety if retreaded tires are mounted. Do
not mount used tires if you have no
information about their previous usage.
i The recommended pressures for various
operating conditions can be found:
R on the Tire and Loading Information
placard with the recommended tire
pressures on the B-pillar on the driver's
side
R in the tire pressure table on the inside of
the fuel filler flap Wheel and tire combinations
357
Wheels and tires Z
Page 363 of 380

X
Pull connector 0085 and the air hose out of
the housing.
X Remove the cap from the valve on the
collapsible spare wheel.
X Screw union nut 0043 on the air hose onto the
valve.
X Make sure on/off switch 0083 of the tire
inflation compressor is set to 0.
X Insert plug 0085 into the socket of the
cigarette lighter (Y
page 280) or into a 12 V
power socket (Y page 280) in your vehicle.
X Make sure that the SmartKey is in position
1(Y page 141) in the ignition lock.
X Press on/off switch 0083 on the tire inflation
compressor to I
.
The tire inflation compressor is switched
on. The tire is inflated. The tire pressure is
shown on pressure gauge 0087.
! Do not operate the tire inflation
compressor for longer than eight minutes
at a time without
a
break. It may otherwise
overheat.
The tire inflation compressor can be
operated again once it has cooled down.
X Inflate the tire to the specified tire
pressure.
The specified tire pressure is
printed on the
yellow label of the emergency spare wheel.
X When the specified tire pressure has been
reached, press on/off switch 0083 on the
electric air pump to 0.
The tire inflation compressor is switched
off. X
Turn the SmartKey to position 0 in the
ignition lock.
X If the tire pressure is higher than the
specified pressure, press pressure release
button 0044 until the correct tire
pressure has
been reached.
X Unscrew union nut 0043 on the air hose
from
the valve.
X Screw the cap onto the valve of the
collapsible spare wheel again.
X Stow plug 0085 and the air hose in the lower
section of the blower housing.
X Stow the tire inflation compressor in the
vehicle.
Stowing a used collapsible spare wheel Take the following steps to stow a used
collapsible spare wheel. Otherwise, the
collapsible spare wheel will
not
fit in the spare
wheel well. Mercedes-Benz recommends that
you have this work carried out at a qualified
specialist workshop.
! Only place the collapsible spare wheel in
the vehicle when it is dry. Otherwise,
moisture may get into the vehicle.
X Remove the valve extractor from the
vehicle tool kit.
X Unscrew the valve cap from the valve.
X Unscrew the valve insert from the valve and
release the air.
i Fully deflating the tires can take a few
minutes.
X Screw the valve insert back into the valve.
X Screw the valve cap back on.
X Place the valve extractor back into the
vehicle tool kit.
X Stow the collapsible spare wheel in the
emergency spare wheel well under the
cargo compartment and fasten in place. Emergency spare wheel
361
Wheels and tires Z
Page 377 of 380
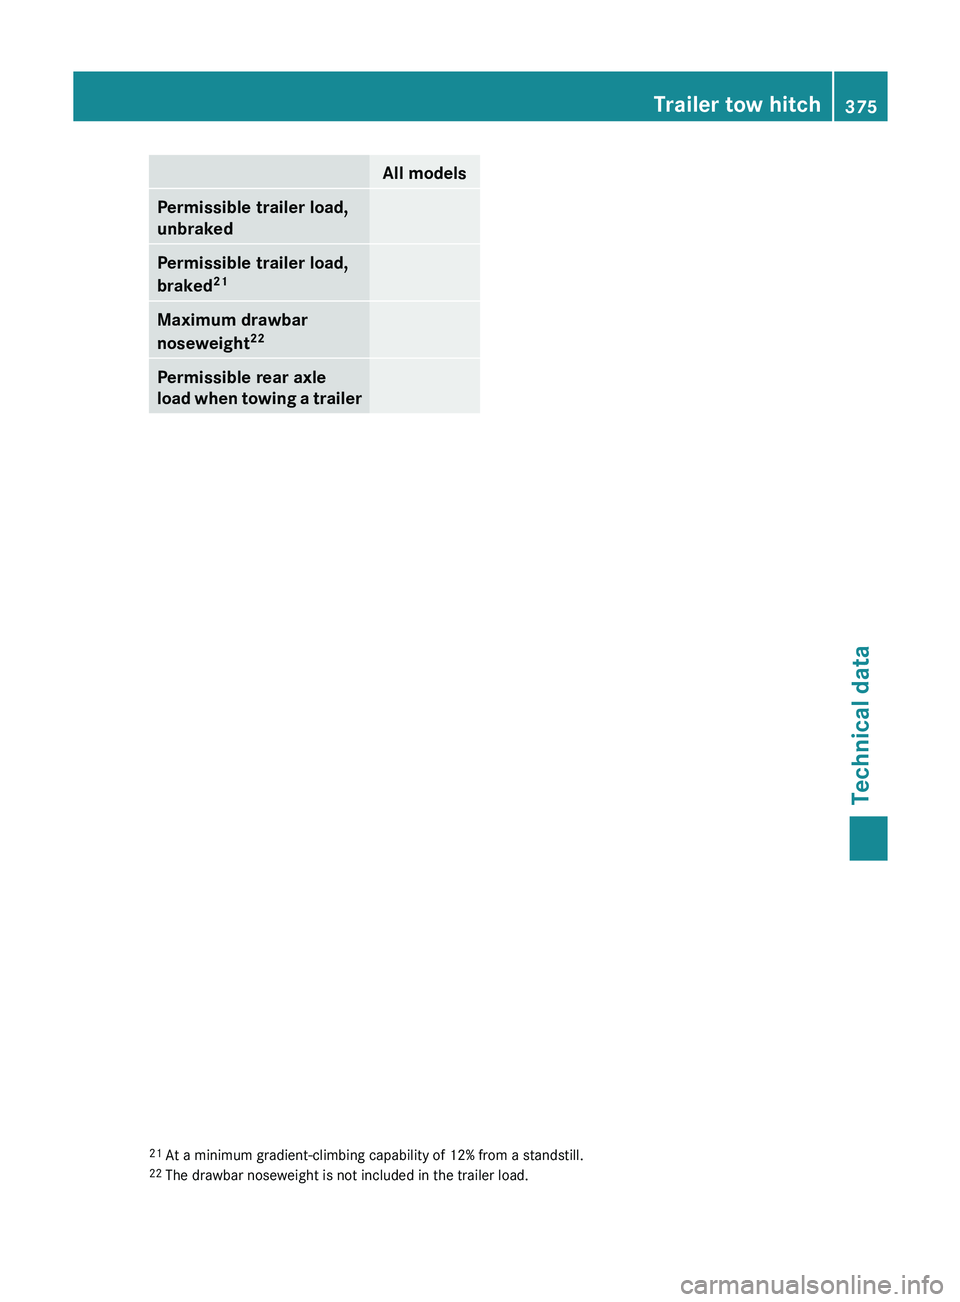
All models
Permissible trailer load,
unbraked
Permissible trailer load,
braked
21 Maximum drawbar
noseweight
22Permissible rear axle
load when towing a
trailer21
At a minimum gradient-climbing capability of 12% from a standstill.
22 The drawbar noseweight is not included in the trailer load. Trailer tow hitch
375Technical data Z