2013 MERCEDES-BENZ GLA SUV service
[x] Cancel search: servicePage 191 of 401
R
Use the left-hand steering wheel gearshift
paddle to shift to a lower gear appropriate
to the gradient.
R Use the left-hand gearshift paddle to shift
to a lower gear on long and steep downhill
gradients.
i Hill start assist will aid you when pulling
away on a hill.
For further information about hill start
assist, see (Y page 161).
Do not shift into transmission position N
when driving off-road. You could lose control
of the vehicle if you attempt to brake the
vehicle using the service brake. If the gradient
is too steep for your vehicle, back up in
reverse gear.
Always observe the approach/departure
angle values (Y page 393).
Maximum gradient-climbing capability Always observe the maximum gradient climb-
ing ability values (Y page 393).
Hilltops When driving up an uphill gradient, slightly
reduce pressure on the accelerator immedi-
ately before reaching the brow of the hill.
Make use of the vehicle's own impetus to
travel over the brow.
This style of driving prevents:
R the vehicle from lifting off the ground on the
brow of a hill
R the vehicle from travelling too quickly down
the other side.
Driving downhill R
Drive slowly.
R Do not drive at an angle down steep
inclines. Steer into the line of fall and drive
with the front wheels aligned straight. Oth- erwise, the vehicle could slip sideways, tip
and overturn. R
Before tackling steep downhill gradients,
use the left-hand steering wheel gearshift
paddle to shift to a lower gear.
R Activate DSR. If this is not sufficient, brake
gently. When doing so, make sure that the
vehicle is facing in the direction of the line
of fall.
R Check that the brakes are working normally
after a long downhill stretch.
i Off-road ABS is activated when the off-
road program is selected.
At speeds below 30 km/h the front wheels
lock cyclically during braking. The digging-
in effect achieved in the process reduces
the stopping distance when driving off-
road. The steerability of the vehicle is con-
siderably reduced if the wheels lock. Driving systems
Cruise control
General notes Cruise control maintains a constant road
speed for you. It brakes automatically in order
to avoid exceeding the set speed. You must
select a lower gear in good time on long and
steep downhill gradients, especially if the
vehicle is laden or towing a trailer. For vehi-
cles with automatic transmission, you need to have selected manual drive program M
(Y page 172). By doing so, you will make use
of the braking effect of the engine. This
relieves the load on the brake system and
prevents the brakes from overheating and
wearing too quickly.
Use cruise control only if road and traffic con- ditions are appropriate for maintaining a
steady speed for a prolonged period. You canstore any road speed above 30 km/h.
Important safety notes If you fail to adapt your driving style, cruise
control can neither reduce the risk of an acci-
dent nor override the laws of physics. Cruise 188
Driving systemsDriving and parking
Page 200 of 401

Once your vehicle is stationary, it remains
stationary and you do not need to depress the
brake.
i After a short period, the vehicle is secured
by the electric parking brake, thus relieving
the service brake.
i Depending on the specified minimum dis-
tance, your vehicle will come to a standstill
at a sufficient distance behind the vehicle in front. The specified minimum distance is
set using the control on the cruise control
lever.
The electric parking brake secures the vehicle
automatically if DISTRONIC PLUS is activated
and:
R the seat belt is unfastened and the driver's
door is open
R the engine is switched off, unless it is auto-
matically switched off by the ECO start/
stop function
R a system fault occurs
R the power supply is insufficient
If a malfunction occurs, then the transmission may also be shifted into position Pautomat-
ically.
Setting a speed Bear in mind that it may take a brief moment
until the vehicle has accelerated or braked to the set speed. :
To store the current speed or a higher
speed
; To store the current speed or a lower
speed
X Press the cruise control lever up :for a
higher speed or down ;for a lower speed.
X Keep the cruise control lever pressed until
the desired speed is reached.
X Release the cruise control lever.
The new speed is stored. DISTRONIC PLUS
is activated and adjusts the vehicle's speed to the new speed stored.
X To adjust the set speed in 1 km/h incre-
ments: briefly press the cruise control
lever up :or down ;to the pressure
point.
The last stored speed increases or decrea- ses in 1 km/h increments.
X To adjust the set speed in 10 km/h
increments: press the cruise control lever
briefly up :or down ;beyond the pres-
sure point.
The last stored speed increases or decrea- ses in 10 km/h increments.
i DISTRONIC PLUS is not deactivated if you
depress the accelerator pedal. If you accel-
erate to overtake, DISTRONIC PLUS
adjusts the vehicle's speed to the last
speed stored after you have finished over-
taking.
Setting the specified minimum distance You can set the specified minimum distance
for DISTRONIC PLUS by varying the time span Driving systems
197Driving and parking Z
Page 205 of 401
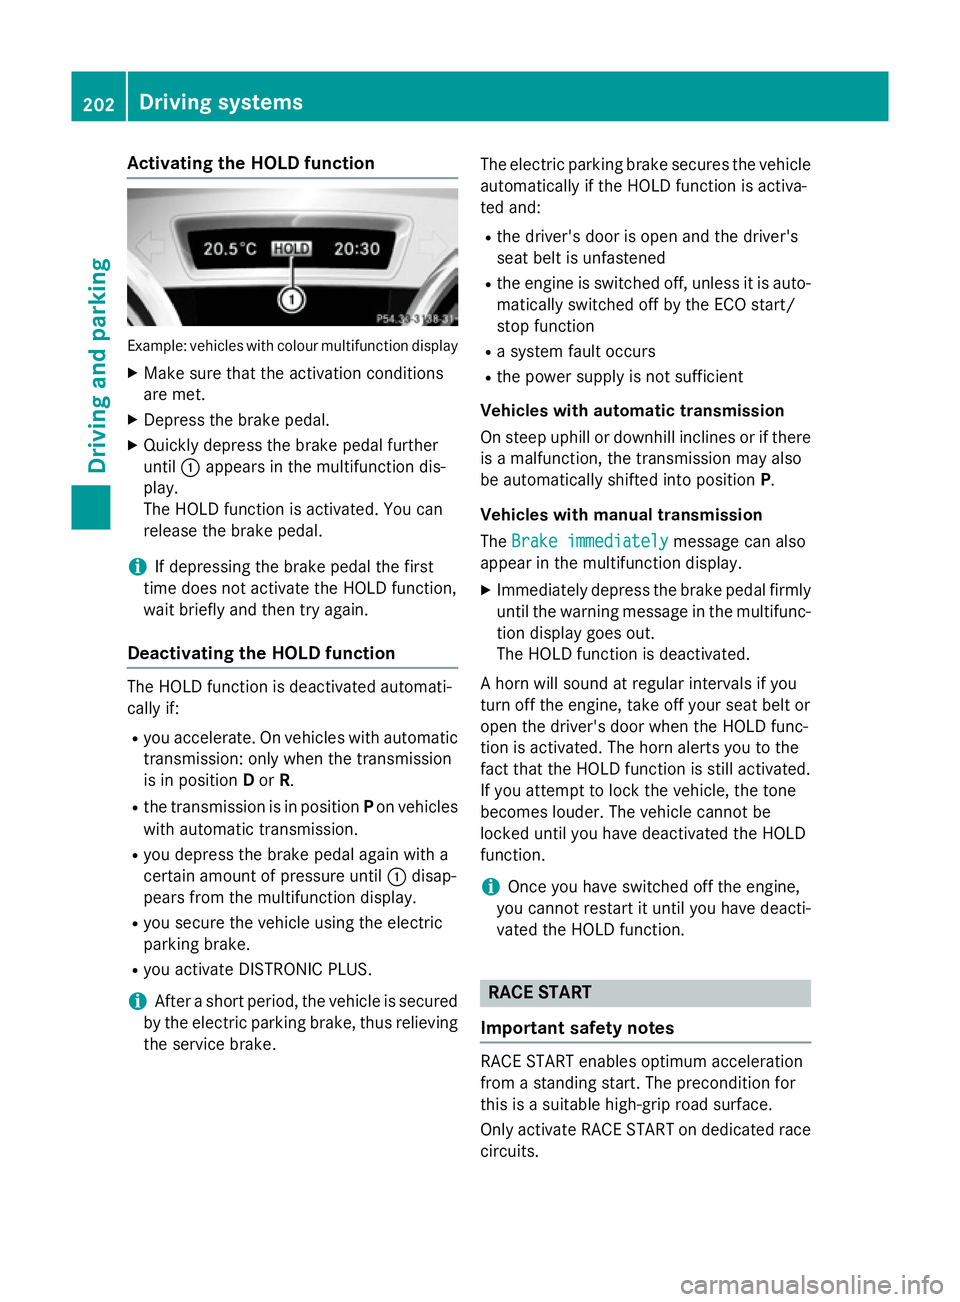
Activating the HOLD function
Example: vehicles with colour multifunction display
X Make sure that the activation conditions
are met.
X Depress the brake pedal.
X Quickly depress the brake pedal further
until :appears in the multifunction dis-
play.
The HOLD function is activated. You can
release the brake pedal.
i If depressing the brake pedal the first
time does not activate the HOLD function,
wait briefly and then try again.
Deactivating the HOLD function The HOLD function is deactivated automati-
cally if:
R you accelerate. On vehicles with automatic
transmission: only when the transmission
is in position Dor R.
R the transmission is in position Pon vehicles
with automatic transmission.
R you depress the brake pedal again with a
certain amount of pressure until :disap-
pears from the multifunction display.
R you secure the vehicle using the electric
parking brake.
R you activate DISTRONIC PLUS.
i After a short period, the vehicle is secured
by the electric parking brake, thus relieving
the service brake. The electric parking brake secures the vehicle
automatically if the HOLD function is activa-
ted and:
R the driver's door is open and the driver's
seat belt is unfastened
R the engine is switched off, unless it is auto-
matically switched off by the ECO start/
stop function
R a system fault occurs
R the power supply is not sufficient
Vehicles with automatic transmission
On steep uphill or downhill inclines or if there
is a malfunction, the transmission may also
be automatically shifted into position P.
Vehicles with manual transmission
The Brake immediately
Brake immediately message can also
appear in the multifunction display.
X Immediately depress the brake pedal firmly
until the warning message in the multifunc-
tion display goes out.
The HOLD function is deactivated.
A horn will sound at regular intervals if you
turn off the engine, take off your seat belt or
open the driver's door when the HOLD func-
tion is activated. The horn alerts you to the
fact that the HOLD function is still activated.
If you attempt to lock the vehicle, the tone
becomes louder. The vehicle cannot be
locked until you have deactivated the HOLD
function.
i Once you have switched off the engine,
you cannot restart it until you have deacti-
vated the HOLD function. RACE START
Important safety notes RACE START enables optimum acceleration
from a standing start. The precondition for
this is a suitable high-grip road surface.
Only activate RACE START on dedicated race
circuits. 202
Driving systemsDriving and pa
rking
Page 245 of 401
You will see one of the following display mes-
sages in the multifunction display:
R Telephone ready
Telephone ready or the name of the net-
work provider: the mobile phone has found a network and is ready to receive.
R Telephone No service
Telephone No service: there is no net-
work available or the mobile phone is
searching for a network.
i You can obtain further information about
suitable mobile phones and connecting
mobile phones via Bluetooth ®
:
R from any Mercedes-Benz Service Centre
R on the Internet at http://
www.mercedes-benz.com/connect
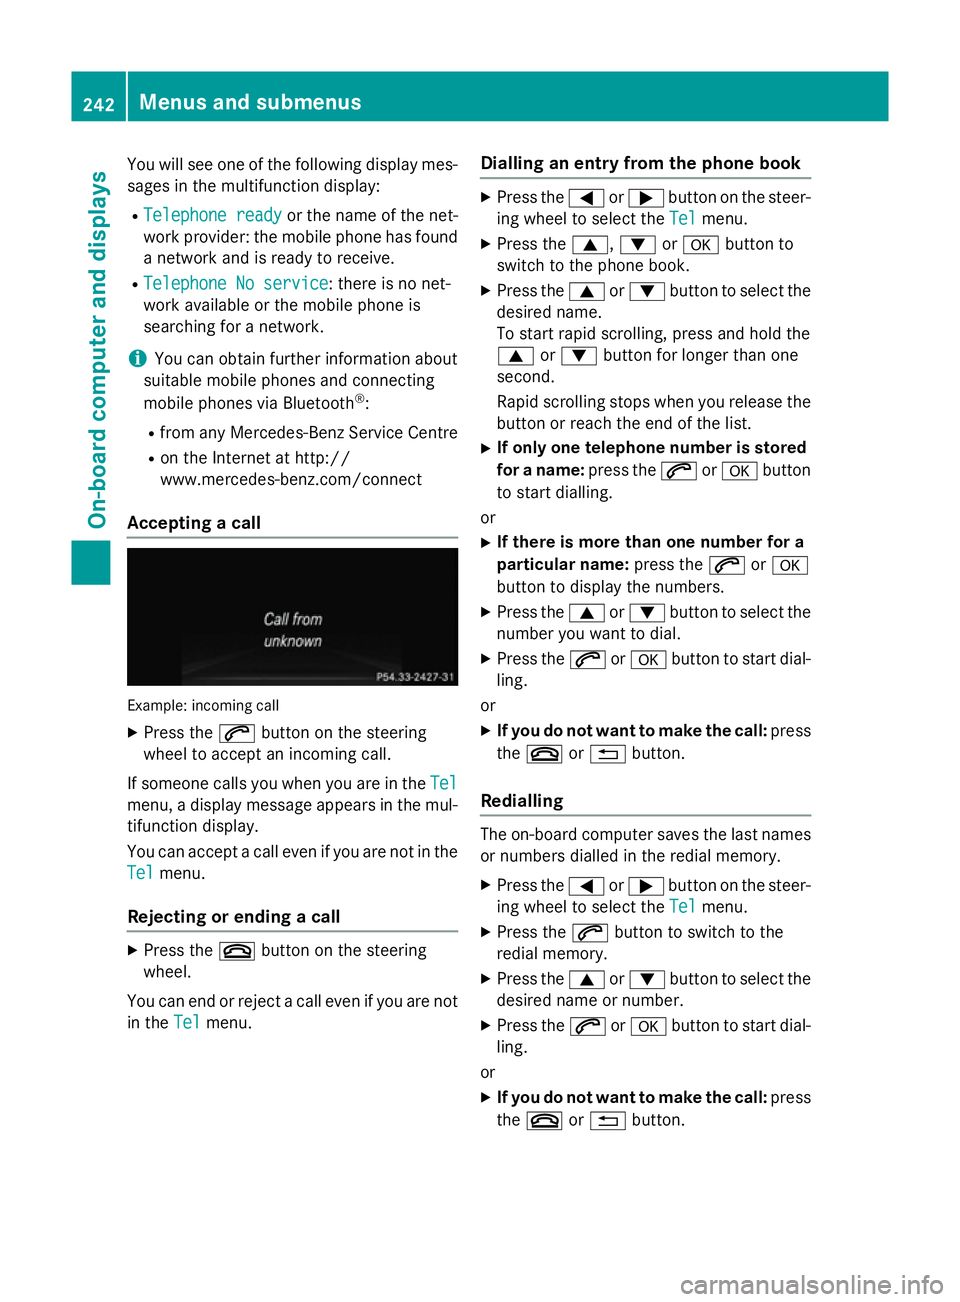
Accepting a call Example: incoming call
X Press the 6button on the steering
wheel to accept an incoming call.
If someone calls you when you are in the Tel
Tel
menu, a display message appears in the mul- tifunction display.
You can accept a call even if you are not in the
Tel
Tel menu.
Rejecting or ending a call X
Press the ~button on the steering
wheel.
You can end or reject a call even if you are not
in the Tel Telmenu. Dialling an entry from the phone book X
Press the =or; button on the steer-
ing wheel to select the Tel Telmenu.
X Press the 9,:ora button to
switch to the phone book.
X Press the 9or: button to select the
desired name.
To start rapid scrolling, press and hold the
9 or: button for longer than one
second.
Rapid scrolling stops when you release the button or reach the end of the list.
X If only one telephone number is stored
for a name: press the6ora button
to start dialling.
or X If there is more than one number for a
particular name: press the6ora
button to display the numbers.
X Press the 9or: button to select the
number you want to dial.
X Press the 6ora button to start dial-
ling.
or
X If you do not want to make the call: press
the ~ or% button.
Redialling The on-board computer saves the last names
or numbers dialled in the redial memory.
X Press the =or; button on the steer-
ing wheel to select the Tel Telmenu.
X Press the 6button to switch to the
redial memory.
X Press the 9or: button to select the
desired name or number.
X Press the 6ora button to start dial-
ling.
or X If you do not want to make the call: press
the ~ or% button. 242
Menus and submenusOn-board computer and displays
Page 248 of 401

X
Press the abutton.
The current selection is displayed.
X To activate/deactivate: press thea
button again.
When ATTENTION ASSIST is deactivated,
the é symbol appears in the multifunc-
tion display in the assistance graphic dis-
play.
For further information about ATTENTION
ASSIST, see (Y page 220).
Activating/deactivating Blind Spot
Assist X
Press the =or; button on the steer-
ing wheel to select the Assist. Assist.menu.
X Press the 9or: button to select
Blind Spot Assist
Blind Spot Assist.
X Press the abutton.
The current selection is displayed.
X To activate/deactivate: press thea
button again.
For further information about Blind Spot
Assist, see (Y page 222).
When the Blind Spot Assist Sensors Blind Spot Assist Sensors
deactivated
deactivated message is shown, the radar
sensors are deactivated.
X Switch on the radar sensor system
(Y page 249).
Activating/deactivating Lane Keeping
Assist X
Press the =or; button on the steer-
ing wheel to select the Assist. Assist.menu.
X Press the 9or: button to select
Lane Keeping Assist
Lane Keeping Assist.
X Press the abutton.
The current selection is displayed.
X Press ato confirm.
X Press the :or9 button to set Off
Off,
Standard
Standard orAdaptive
Adaptive.
X Press the abutton to save the setting.
When Lane Keeping Assist is activated, the
multifunction display shows the lane mark- ings as bright lines in the assistance
graphic.
For further information about Lane Keeping
Assist; see (Y page 224). Service menu
In the
Serv Servmenu, you have the following
options:
R Calling up display messages in the mes-
sage memory (Y page 254)
R Restarting the tyre pressure loss warning
system (Y page 358)
R Checking the tyre pressure electronically
(Y page 358)
R Calling up the service due date
(Y page 321) Settings menu
Introduction In the
Settings Settings menu, you have the following
options:
R Changing the instrument cluster settings
R Changing the light settings
R Changing the vehicle settings
R Changing the auxiliary heating settings
R Changing the convenience settings
R Restoring the factory settings Menus and submenus
245On-board computer and displays Z
Page 249 of 401
Instrument cluster
Selecting the unit of measurement for dis-
tance
You can determine whether the multifunction display shows some messages in miles or kil-
ometres.
X Press the =or; button on the steer-
ing wheel to select the Settings
Settings menu.
X Press the :or9 button to select the
Instrument cluster
Instrument cluster submenu.
X Press ato confirm.
X Press the :or9 button to select the
Display unit Speed-/odometer
Display unit Speed-/odometer func-
tion.
You will see the selected setting: km kmor
miles
miles.
X Press the abutton to save the setting.
The selected unit of measurement for dis-
tance applies to:
R the digital speedometer in the Trip
Tripmenu
R the total distance recorder and the trip
meter
R the trip computer
R the current consumption and the range
R navigation instructions in the Navi
Navi menu
R cruise control
R SPEEDTRONIC
R DISTRONIC PLUS
R ASSYST PLUS service interval display
Switching the additional speedometer
on/off
The Dig. speedometer [mph]
Dig. speedometer [mph] orDig. Dig.
speedometer [km/h]
speedometer [km/h] function (vehicles for
the United Kingdom) allows you to choose
whether the multifunction display in the sta-
tus area always shows the speed in mph
mph or in
km/h
km/h instead of the outside temperature.
X Press the =or; button on the steer-
ing wheel to select the Settings
Settingsmenu.
X Press the :or9 button to select the
Instrument cluster
Instrument cluster submenu.
X Press ato confirm. X
Press the :or9 button to select the
Dig. speedometer [mph]
Dig. speedometer [mph] orDig.
Dig.
speedometer [km/h]
speedometer [km/h] (United Kingdom)
function.
You will see the selected setting: on
on oroff off .
X Press the abutton to save the setting.
Selecting the permanent display function
You can determine whether the multifunction display permanently shows your speed or the
outside temperature.
X Press the =or; button on the steer-
ing wheel to select the Settings
Settingsmenu.
X Press the :or9 button to select the
Instrument cluster
Instrument cluster submenu.
X Press ato confirm.
X Press the :or9 button to select the
Permanent display
Permanent display function.
You will see the selected setting outside
outside
temperature
temperature orDig. speedometer
Dig. speedometer
[mph]
[mph]/Dig. speedometer [km/h] Dig. speedometer [km/h] (vehi-
cles for the United Kingdom).
X Press the abutton to save the setting.
i The speed is displayed in mph or in km/h
(United Kingdom).
Lights Switching the daytime driving lights
on/off
The
Daytime driving lights Daytime driving lights function can
only be switched on with the engine turned
off.
X Press the =or; button on the steer-
ing wheel to select the Settings Settingsmenu.
X Press the :or9 button to select the
Lights
Lights submenu.
X Press ato confirm.
X Press the :or9 button to select the
Daytime driving lights
Daytime driving lights function.
If the Daytime driving lights
Daytime driving lights function
has been switched on, the cone of light and 246
Menus and submenusOn-board computer and displays
Page 250 of 401

the
W symbol in the multifunction dis-
play are shown in orange.
X Press the abutton to save the setting.
Further information on daytime driving lights
(Y page 121).
Switching the Intelligent Light System
on/off
X Press the =or; button on the steer-
ing wheel to select the Settings
Settings menu.
X Press the :or9 button to select the
Lights
Lights submenu.
X Press ato confirm.
X Press the :or9 button to select the
Intell. Light System
Intell. Light System function.
If the Intell.
Intell. Light
LightSystem
System function has
been switched on, the cone of light and the L symbol in the multifunction display
are shown in orange.
X Press the abutton to save the setting.
When you activate the Intell.
Intell. Light
LightSys‐
Sys‐
tem
tem , you activate the following functions:
R Motorway mode
R Active light function
R Cornering light function
R Extended range foglamps
If you set the dipped-beam headlamps for
driving on the right/left, the multifunction
display shows the Intell.
Intell. Light LightSystem:
System:
system inoperative Inactive for
system inoperative Inactive for
left-side traffic left-side traffic orIntell. Light
Intell. Light
System:
System: System
Systeminoperative
inoperative Inactive
Inactive
for right-side traffic
for right-side traffic display message
instead of the Intell.
Intell.Light
LightSys.
Sys.function
in the Lights
Lights submenu (Y page 247).
Further information on the Intelligent Light
System (Y page 124).
Setting the dipped-beam headlamps for
driving on the left/right X Press the =or; button on the steer-
ing wheel to select the Settings
Settings menu.
X Press the :or9 button to select the
Lights
Lights submenu.
X Press ato confirm. X
Press the :or9 button to select the
Dipped beams Setting for: Dipped beams Setting for: function.
You will see the selected setting: Right-
Right-
side traffic
side traffic orLeft-side traffic
Left-side traffic.
X Press the abutton to save the setting.
If you change the setting, conversion does
not take place until the next time the vehi-
cle is stationary.
This function is only available on vehicles with
the Intelligent Light System.
You can use this function to switch between
symmetrical and asymmetrical dipped beam
(Y page 120).
If you set the dipped-beam headlamps for
driving on the right/left, then motorway
mode and the extended range foglamps are
unavailable.
You can also have the dipped-beam head-
lamps set for driving on the right/left at a
qualified specialist workshop, e.g. a
Mercedes-Benz Service Centre.
Setting the brightness of the ambient
lighting
X Press the =or; button on the steer-
ing wheel to select the Settings
Settings menu.
X Press the :or9 button to select the
Lights Lights submenu.
X Press ato confirm.
X Press the :or9 button to select the
Amb. light +/-
Amb. light +/- function.
You will see the selected setting.
X Change the setting with a.
X Press the :or9 button to adjust the
brightness to a level from Off
Off toLevel 5
Level 5
(bright).
X Press the aor% button to save the
setting.
Activating/deactivating the surround
lighting and exterior lighting delayed
switch-off
If you have activated the Surround light‐ Surround light‐
ing
ing function and the light switch is set to
Ã, the following functions are activated
when it is dark: Menus and submenus
247On-board computer and displays Z
Page 315 of 401
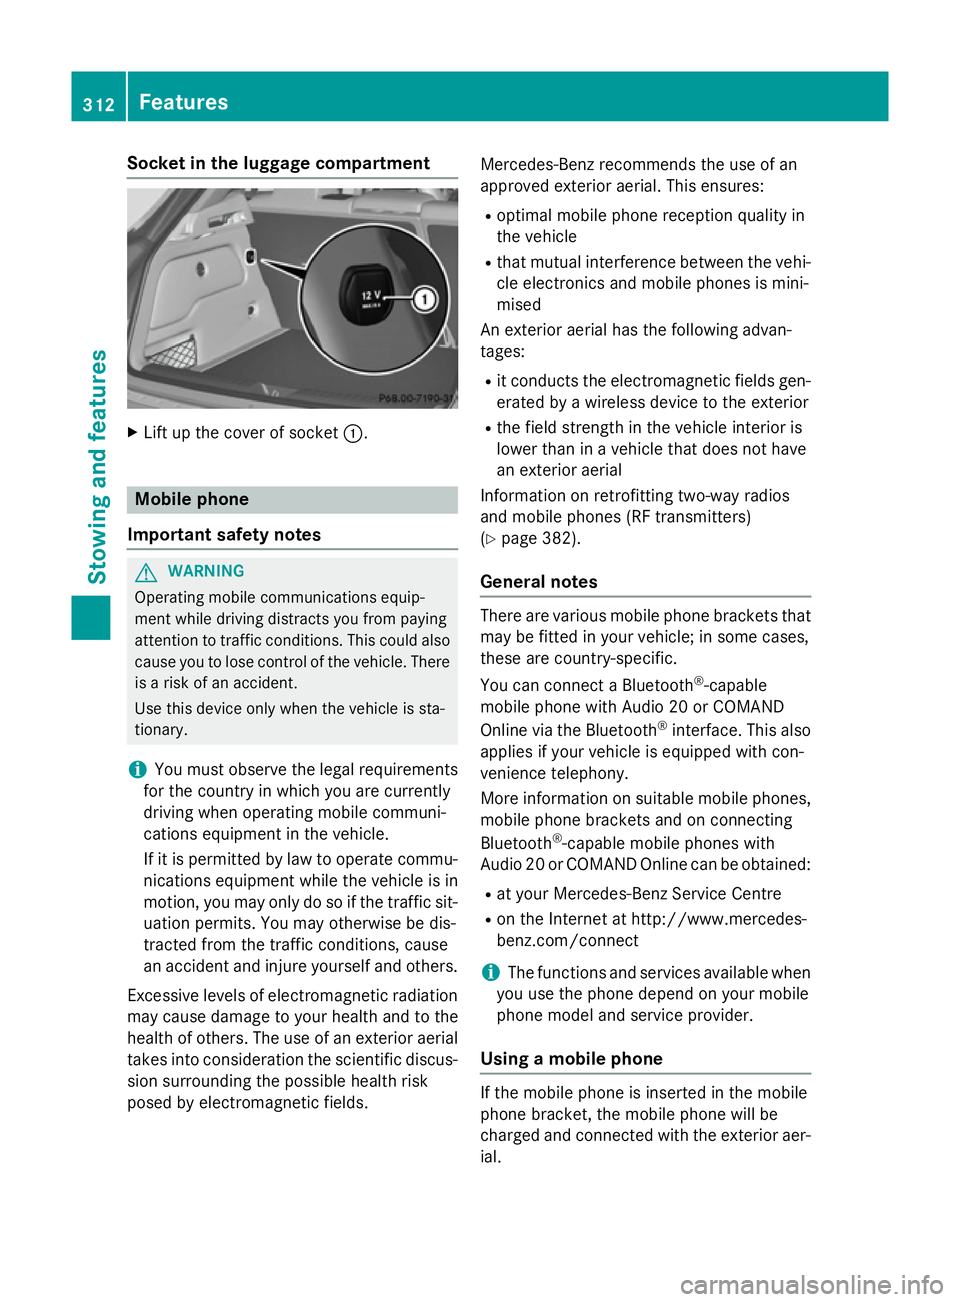
Socket in the luggage compartment
X
Lift up the cover of socket :.Mobile phone
Important safety notes G
WARNING
Operating mobile communications equip-
ment while driving distracts you from paying
attention to traffic conditions. This could also cause you to lose control of the vehicle. There
is a risk of an accident.
Use this device only when the vehicle is sta-
tionary.
i You must observe the legal requirements
for the country in which you are currently
driving when operating mobile communi-
cations equipment in the vehicle.
If it is permitted by law to operate commu-
nications equipment while the vehicle is in
motion, you may only do so if the traffic sit-
uation permits. You may otherwise be dis-
tracted from the traffic conditions, cause
an accident and injure yourself and others.
Excessive levels of electromagnetic radiation
may cause damage to your health and to the
health of others. The use of an exterior aerial takes into consideration the scientific discus-
sion surrounding the possible health risk
posed by electromagnetic fields. Mercedes-Benz recommends the use of an
approved exterior aerial. This ensures:
R optimal mobile phone reception quality in
the vehicle
R that mutual interference between the vehi-
cle electronics and mobile phones is mini-
mised
An exterior aerial has the following advan-
tages:
R it conducts the electromagnetic fields gen-
erated by a wireless device to the exterior
R the field strength in the vehicle interior is
lower than in a vehicle that does not have
an exterior aerial
Information on retrofitting two-way radios
and mobile phones (RF transmitters)
(Y page 382).
General notes There are various mobile phone brackets that
may be fitted in your vehicle; in some cases,
these are country-specific.
You can connect a Bluetooth ®
-capable
mobile phone with Audio 20 or COMAND
Online via the Bluetooth ®
interface. This also
applies if your vehicle is equipped with con-
venience telephony.
More information on suitable mobile phones,
mobile phone brackets and on connecting
Bluetooth ®
-capable mobile phones with
Audio 20 or COMAND Online can be obtained:
R at your Mercedes-Benz Service Centre
R on the Internet at http://www.mercedes-
benz.com/connect
i The functions and services available when
you use the phone depend on your mobile
phone model and service provider.
Using a mobile phone If the mobile phone is inserted in the mobile
phone bracket, the mobile phone will be
charged and connected with the exterior aer-
ial. 312
FeaturesStowing and features