2013 MERCEDES-BENZ B-CLASS SPORTS length
[x] Cancel search: lengthPage 104 of 336
X
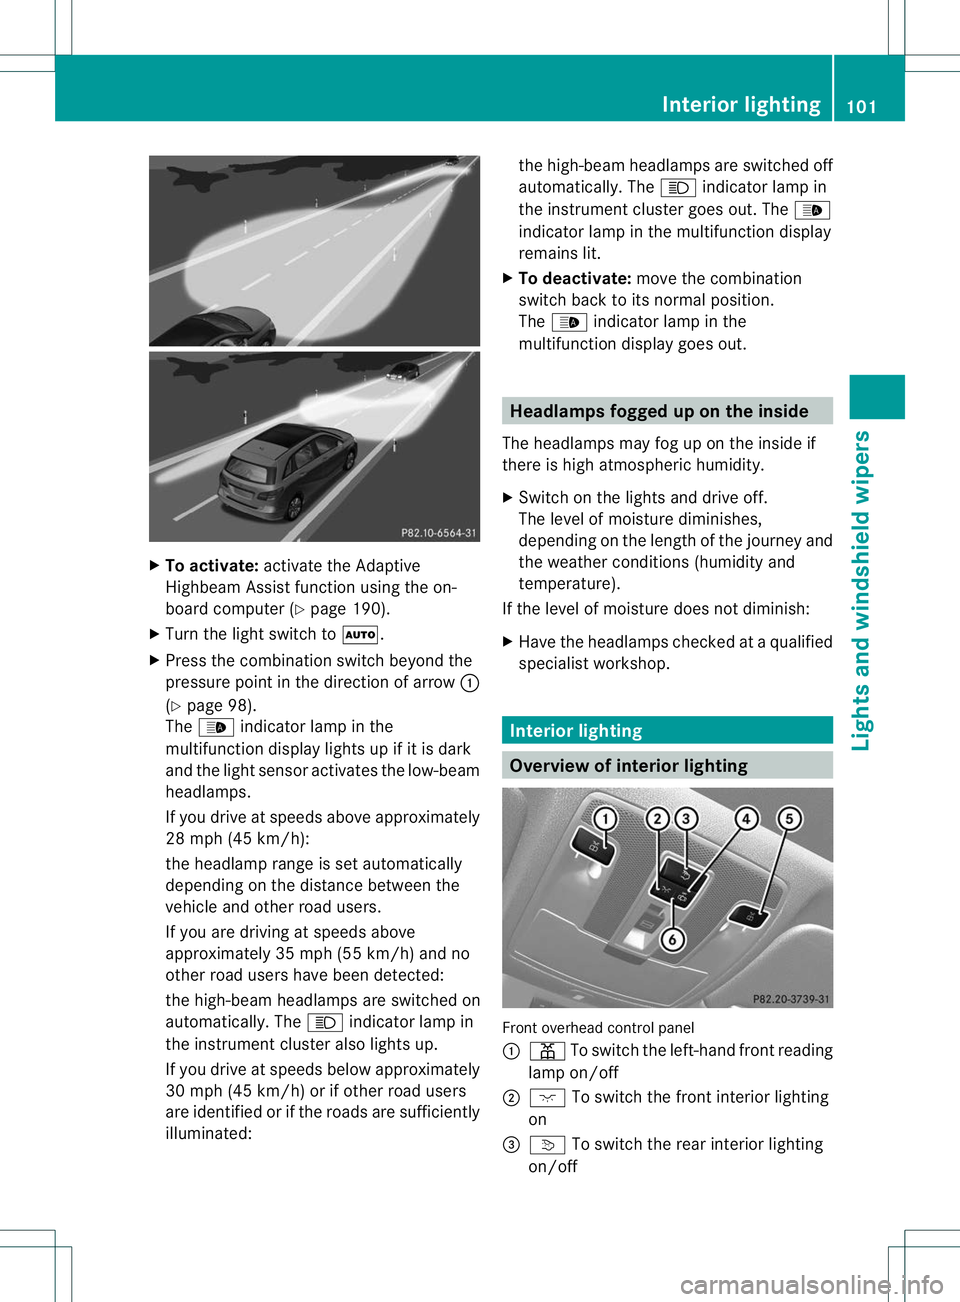
To activate: activate the Adaptive
Highbea mAssist function using the on-
board computer (Y page 190).
X Turn the light switch to Ã.
X Press the combination switch beyond the
pressure point in the direction of arrow :
(Y page 98).
The _ indicator lamp in the
multifunction display lights up if it is dark
and the light sensor activates the low-beam
headlamps.
If you drive at speeds above approximately
28 mph (45 km/h):
the headlamp range is set automatically
depending on the distance between the
vehicle and other road users.
If you are driving at speeds above
approximately 35 mph (55 km/h) and no
other road users have been detected:
the high-beam headlamps are switched on
automatically. The Kindicator lamp in
the instrument cluster also lights up.
If you drive at speeds below approximately
30 mph (45 km/h) or if other road users
are identified or if the roads are sufficiently
illuminated: the high-beam headlamps are switched off
automatically. The
Kindicator lamp in
the instrument cluster goes out. The _
indicator lamp in the multifunction display
remains lit.
X To deactivate: move the combination
switch back to its normal position.
The _ indicator lamp in the
multifunction display goes out. Headlamps fogged up on the inside
The headlamps may fog up on the inside if
there is high atmospheric humidity.
X Switch on the lights and drive off.
The level of moisture diminishes,
depending on the length of the journey and
the weather conditions (humidity and
temperature).
If the level of moisture does not diminish:
X Have the headlamps checked at a qualified
specialist workshop. Interior lighting
Overview of interior lighting
Front overhead control panel
:
p To switch the left-hand front reading
lamp on/off
; c To switch the front interior lighting
on
= v To switch the rear interior lighting
on/off Interior lighting
101Lights and windshield wipers Z
Page 110 of 336
Tail lamp
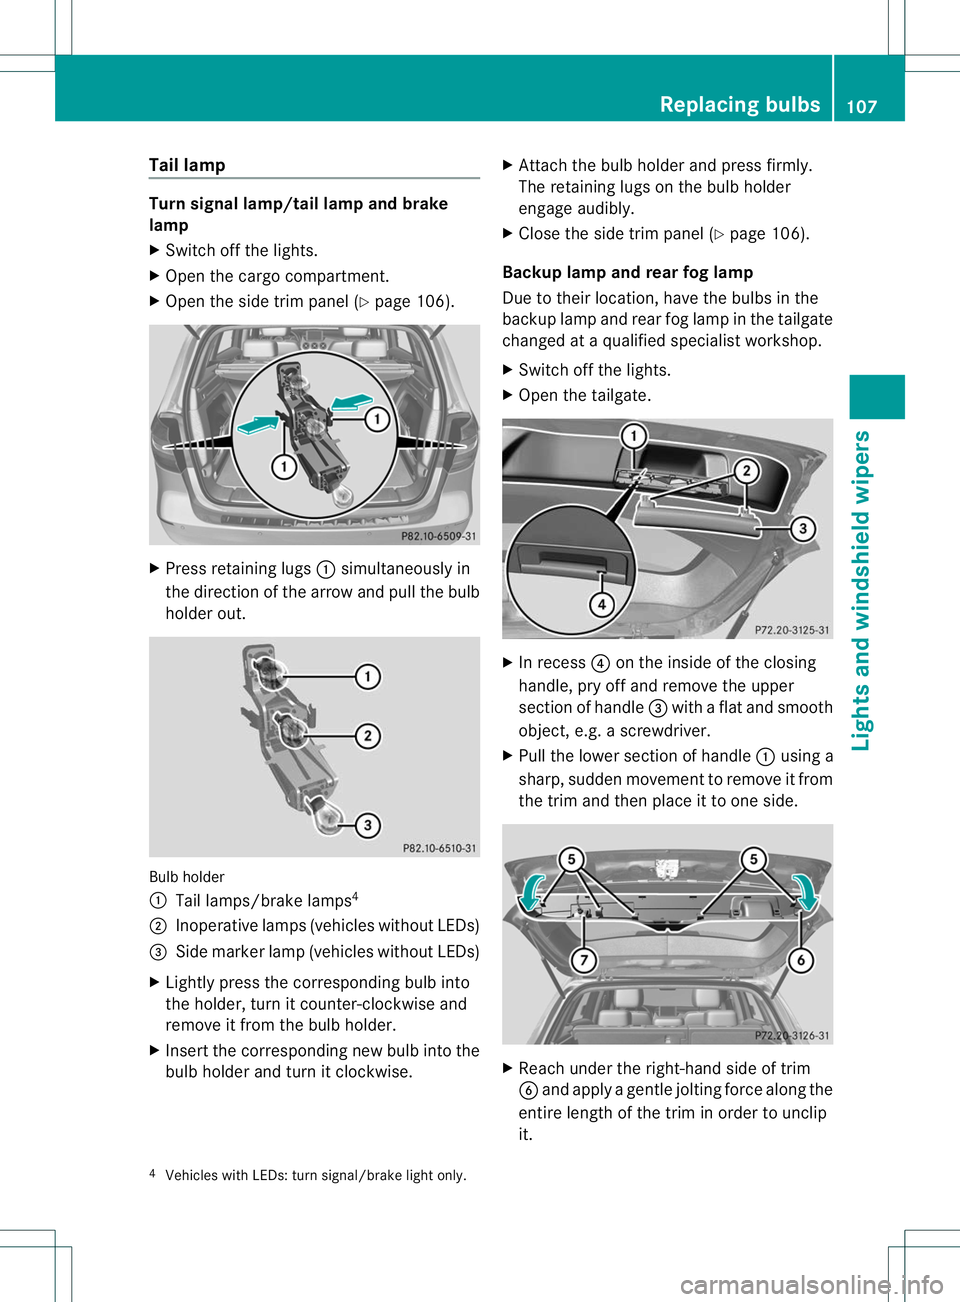
Turn signal lamp/tail lamp and brake
lamp
X
Switch off the lights.
X Open the cargo compartment.
X Open the side trim panel (Y page 106).X
Press retaining lugs :simultaneously in
the direction of the arrow and pull the bulb
holde rout. Bulb holder
:
Tail lamps/brake lamps 4
; Inoperative lamps (vehicles without LEDs)
= Side marke rlamp (vehicle swithout LEDs)
X Lightly press the corresponding bulb into
the holder, tur nitcounter-clockwise and
remove it from the bulb holder.
X Insert the corresponding new bulb into the
bulb holder and turn it clockwise. X
Attach the bulb holder and press firmly.
The retaining lugs on the bulb holder
engage audibly.
X Close the side trim panel (Y page 106).
Backup lamp and rear fog lamp
Due to their location, have the bulbs in the
backup lamp and rear fog lamp in the tailgate
changed at a qualified specialist workshop.
X Switch off the lights.
X Open the tailgate. X
In recess ?on the inside of the closing
handle, pry off and remove the upper
section of handle =with a flat and smooth
object, e.g. a screwdriver.
X Pull the lower section of handle :using a
sharp, sudden movementtor emove it from
the trim and then place it to one side. X
Reach under the right-hand side of trim
B and apply a gentle jolting force along the
entire length of the trim in order to unclip
it.
4 Vehicles with LEDs: turn signal/brake light only. Replacing bulbs
107Lights and windshield wipers Z
Page 146 of 336
engine is switched off. The sounds that can
be heard while this is occurring are normal.
Applying/releasing manually Applying
X
Push handle :.
When the electric parking brake is
engaged, the !red indicator lamp lights
up in the instrument cluster.
i The electric parking brake can also be
applied when the SmartKey is removed.
Releasing
X Turn the SmartKey to position 1in the
ignition lock.
X Pull handle :.
The red !indicator lamp in the
instrument cluster goes out.
i The electric parking brake can only be
released if the SmartKey is in position 1in
the ignition lock.
Applying automatically The electric parking brake is applied
automatically:
R
if DISTRONIC PLUS brings the vehicle to a
standstill or
R if the HOLD function is keeping the vehicle
stationary
In addition, at least one of the following
conditions must be fulfilled:
R the engine is switched off.
R the driver's door is open and the seat belt
is not fastened.
R there is a system malfunction.
R the power supply is insufficient.
R the vehicle is stationary for a lengthy
period.
The red !indicator lamp in the instrument
cluster lights up.
i The electric parking brake is not
automatically engaged if the engine is switched off by the ECO start/stop
function.
Releasing automatically i
The electric parking brake can only be
released automatically on vehicles with
automatic transmission.
Your vehicle's electric parking brake is
automatically released if all of the following
conditions are met:
R the engine is running.
R the transmission is in position Dor R.
R the seat belt has been fastened.
R you depress the accelerator pedal.
If the transmission is in position R, the tailgate
must be closed.
If your seat belt is not fastened, the following
conditions must be fulfilled to automatically
release the electric parkin gbrake:
R the driver's door is closed.
R you shift out of position Por you have
previously drivenf aster than2mph
(3 km/h).
Emergency braking The vehicle can also be braked during an
emergency by using the electric parking
brake.
X
While driving, push handle :of the electric
parking brake (Y page 142).
i The vehicle is braked for as long as
handle :of the electric parking brake is
pressed. The longer electric parking brake
handle :is depressed, the greater the
braking force.
During braking:
R a warning tone sounds.
R the Please Release Parking Brake message appears.
R the red !indicator lamp in the
instrument cluster flashes. Parking
143Driving and parking Z
Page 239 of 336
X
Move the driver's or front-passenger seat
forward if necessary.
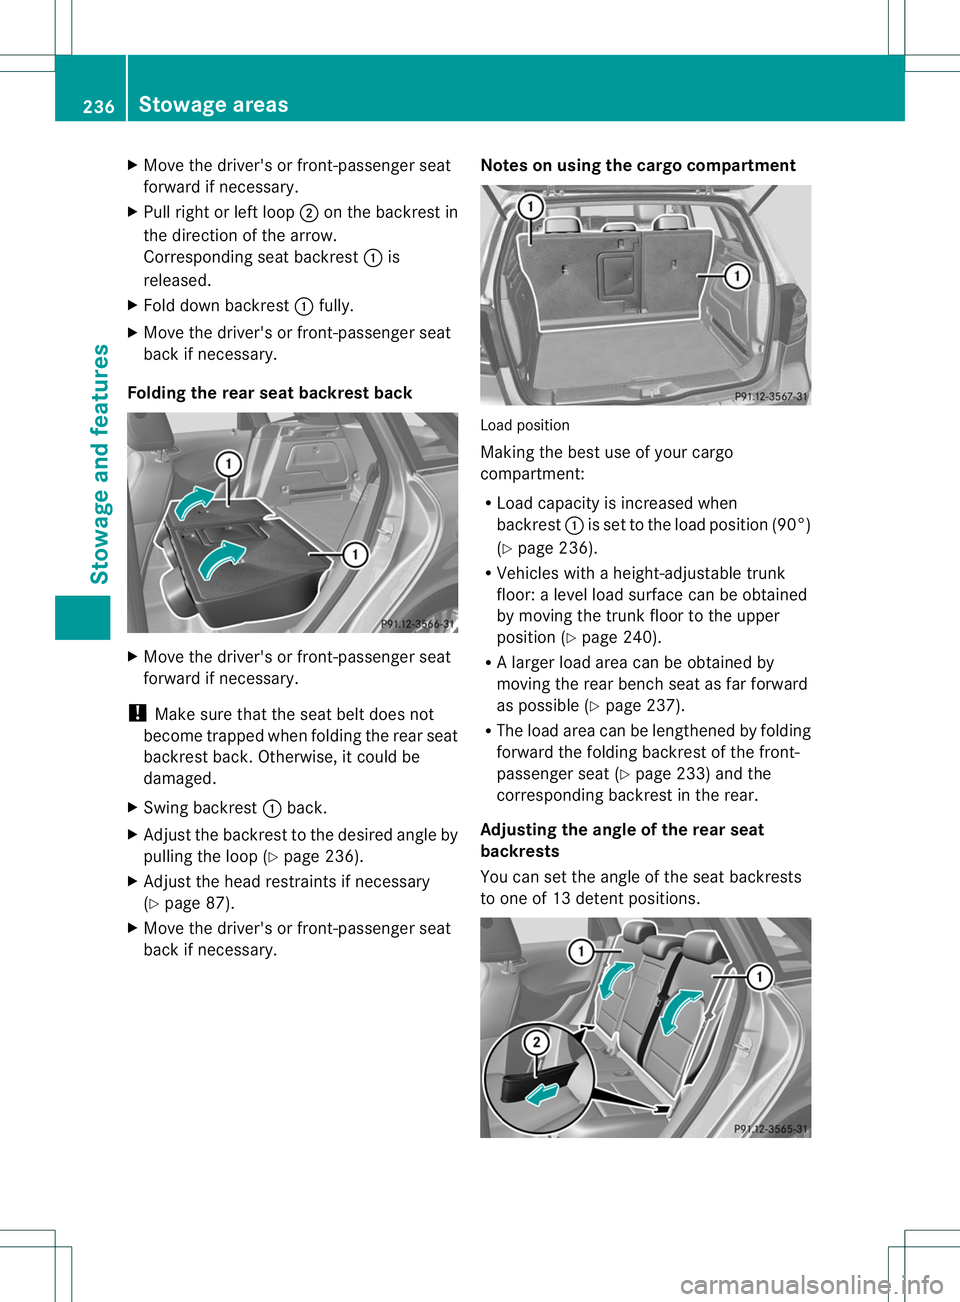
X Pull right or left loop ;on the backrest in
the direction of the arrow.
Corresponding seat backrest :is
released.
X Fold down backrest :fully.
X Move the driver's or front-passenger seat
back if necessary.
Folding the rear seat backrest back X
Move the driver's or front-passenger seat
forward if necessary.
! Make sure that the seat belt does not
become trapped when folding the rear seat
backrest back. Otherwise, it could be
damaged.
X Swing backrest :back.
X Adjust the backrest to the desired angle by
pulling the loop (Y page 236).
X Adjust the head restraints if necessary
(Y page 87).
X Move the driver's or front-passenger seat
back if necessary. Notes on using the cargo compartment Load position
Making the best use of your cargo
compartment:
R
Load capacity is increased when
backrest :is set to the load position (90°)
(Y page 236).
R Vehicles with a height-adjustable trunk
floor: a level load surface can be obtained
by moving the trunk floor to the upper
position (Y page 240).
R Al arge rload area can be obtained by
moving the rear bench seat as far forward
as possible (Y page 237).
R The load area can be lengthened by folding
forward the folding backrest of the front-
passenger seat (Y page 233) and the
corresponding backrest in the rear.
Adjusting the angle of the rear seat
backrests
You can set the angle of the seat backrests
to one of 13 detent positions. 236
Stowage areasStowage and features
Page 284 of 336
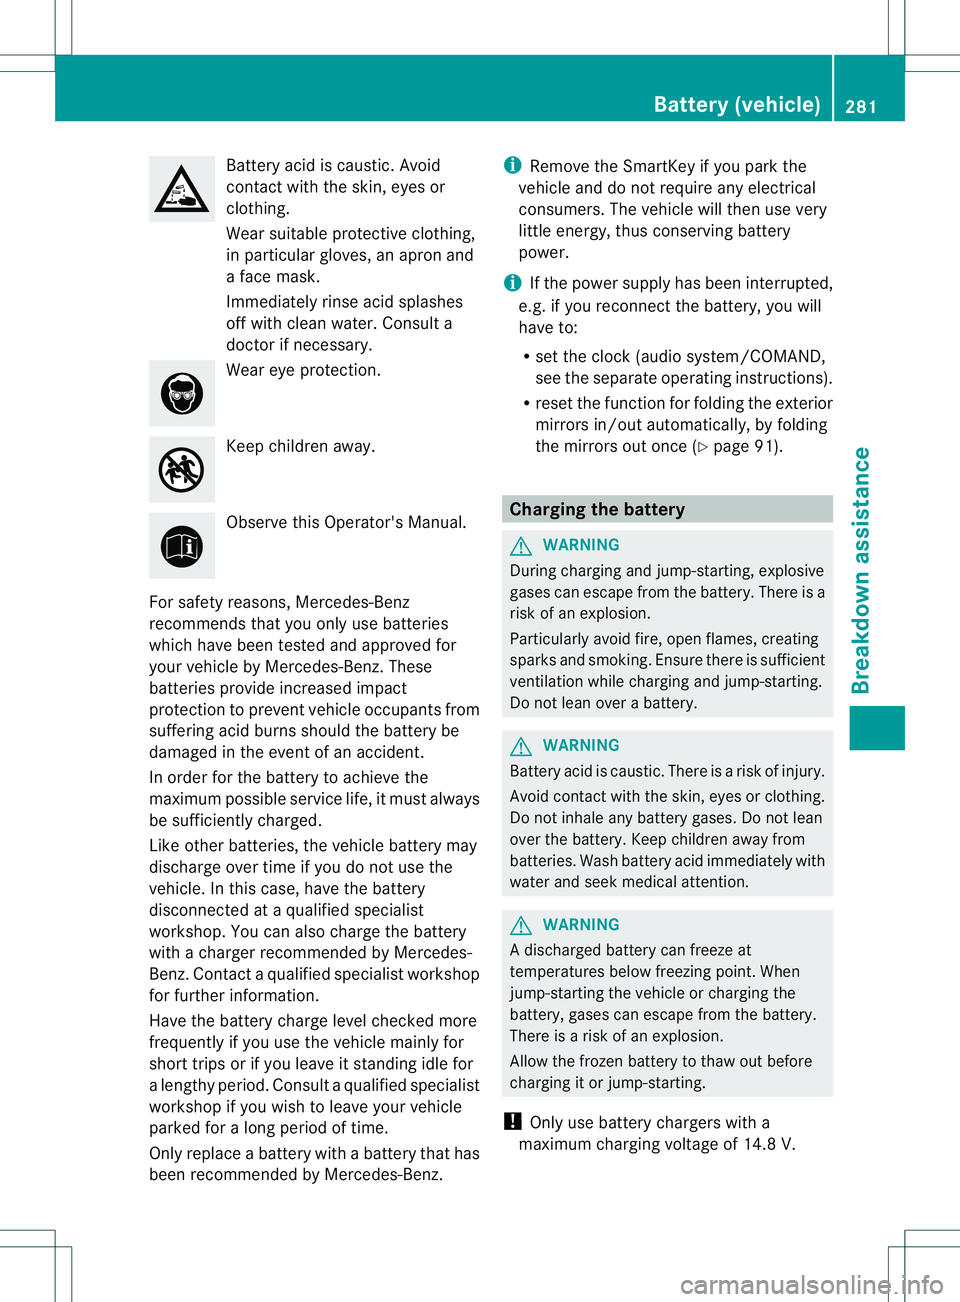
Battery acid is caustic. Avoid
contact with the skin, eyes or
clothing.
Wea
rsuitable protective clothing,
in particular gloves, an apro nand
a face mask.
Immediately rinse acid splashes
off with clean water. Consult a
doctor if necessary. Wear eye protection.
Keep children away.
Observe this Operator's Manual.
For safety reasons, Mercedes-Benz
recommends tha tyou only use batteries
which have been tested and approved for
your vehicle by Mercedes-Benz. These
batteries provide increased impact
protection to prevent vehicle occupants from
suffering acid burns should the battery be
damaged in the event of an accident.
In order for the battery to achieve the
maximum possible service life, it must always
be sufficiently charged.
Like other batteries, the vehicle battery may
discharge over time if you do not use the
vehicle. In this case, have the battery
disconnected at a qualified specialist
workshop. You can also charge the battery
with a charger recommended by Mercedes-
Benz.C ontact a qualified specialist workshop
for further information.
Have the battery charge level checked more
frequently if you use the vehicle mainly for
short trips or if you leave it standing idle for
a lengthy period. Consult a qualified specialist
workshop if you wish to leave your vehicle
parked for a long period of time.
Only replace a battery with a battery that has
been recommended by Mercedes-Benz. i
Remove the SmartKey if you park the
vehicle and do not require any electrical
consumers. The vehicle will then use very
little energy, thus conserving battery
power.
i If the power supply has been interrupted,
e.g. if you reconnect the battery, you will
have to:
R set the clock (audio system/COMAND,
see the separate operating instructions).
R reset the function for folding the exterior
mirrors in/out automatically, by folding
the mirrors out once (Y page 91). Charging the battery
G
WARNING
During charging and jump-starting, explosive
gases can escape from the battery. There is a
risk of an explosion.
Particularly avoid fire, open flames, creating
sparks and smoking. Ensure there is sufficient
ventilation while charging and jump-starting.
Do not lean over a battery. G
WARNING
Battery acid is caustic. There is a risk of injury.
Avoid contact with the skin, eyes or clothing.
Do not inhale any battery gases. Do not lean
over the battery. Keep children away from
batteries. Wash battery acid immediately with
water and seek medical attention. G
WARNING
Ad ischarged battery can freeze at
temperatures below freezing point .When
jump-starting the vehicle or charging the
battery, gases can escape from the battery.
There is a risk of an explosion.
Allow the frozen battery to thaw out before
charging it or jump-starting.
! Only use battery chargers with a
maximum charging voltage of 14.8 V. Battery (vehicle)
281Breakdown assistance Z
Page 286 of 336
Jump-starting
G
WARNING
Battery acid is caustic. There is a risk of injury.
Avoid contact with the skin, eyes or clothing. Do not inhale any battery gases. Do not lean over
the battery. Keep children away from batteries. Wash battery acid immediately with water and
seek medical attention. G
WARNING
During charging and jump-starting, explosive gases can escape from the battery. There is a risk
of an explosion.
Particularly avoid fire, open flames, creating sparks and smoking. Ensure there is sufficient
ventilation while charging and jump-starting. Do not lean over a battery. G
WARNING
During the charging process, a battery produces hydrogen gas. If a short circuit occurs or sparks
are created, the hydrogen gas can ignite. There is a risk of an explosion.
R Make sure that the positive terminal of a connected battery does not come into contact with
vehicle parts.
R Never place metal objects or tools on a battery.
R It is important that you observe the described order of the battery terminals when connecting
and disconnecting a battery.
R When jump-starting, make sure that the battery poles with identical polarity are connected.
R It is particularly important to observe the described order when connecting and disconnecting
the jumper cables.
R Never connect or disconnect the battery terminals while the engine is running. G
WARNING
Non-combusted fuel can collect in the exhaust system and ignite. There is a risk of fire. Avoid
repeated and lengthy starting attempts.
! Avoid repeated and lengthy starting attempts. Otherwise, the catalytic converter could be
damaged by the non-combusted fuel.
Do not start the vehicle using a rapid charging device. If your vehicle's battery is discharged,
the engine can be jump-started from another vehicle or from a second battery using jumper
cables. Observe the following points:
R The battery is not accessible in all vehicles. If the other vehicle's battery is not accessible,
jump-start the vehicle using a second battery or ajump-starting device.
R You may only jump-start the vehicle when the engine and exhaust system are cold.
R Do not start the engine if the battery is frozen. Let the battery thaw first.
R Jump-starting may only be performed from batteries with a nominal voltage of 12 V.
R Only use jumper cables which have a sufficien tcross-section and insulated terminal clamps. Jump-starting
283Breakdown assistance Z
Page 332 of 336
At temperatures below freezing:
X
Fill the washe rfluid reservoir with a mixture
of water and windshield washer fluid, e.g.
MB WinterFit.
Adapt the mixing ratio to the outside
temperature.
R Down to 14 ‡ (Ò10 †): mix 1 part MB
WinterFit to 2 parts water.
R Down to Ò4 ‡ (Ò20 †): mix 1 part MB
WinterFit to 1 part water.
R Down to Ò20.2 ‡ (Ò29 †): mix 2 parts MB
WinterFit to 1 part water.
i Add windshield washer fluid, e.g. MB
SummerFit or MB WinterFit, to the washer
fluid all year round.
Filling capacities Model Capacity
B2
50
BlueEFFICIENCY 3.2 US qt (3.0 l)
Vehicle data
General notes
Please note that for the specified vehicle
data:
R the heights specified may vary as a result
of:
-Tires
- Load
- Condition of the suspension
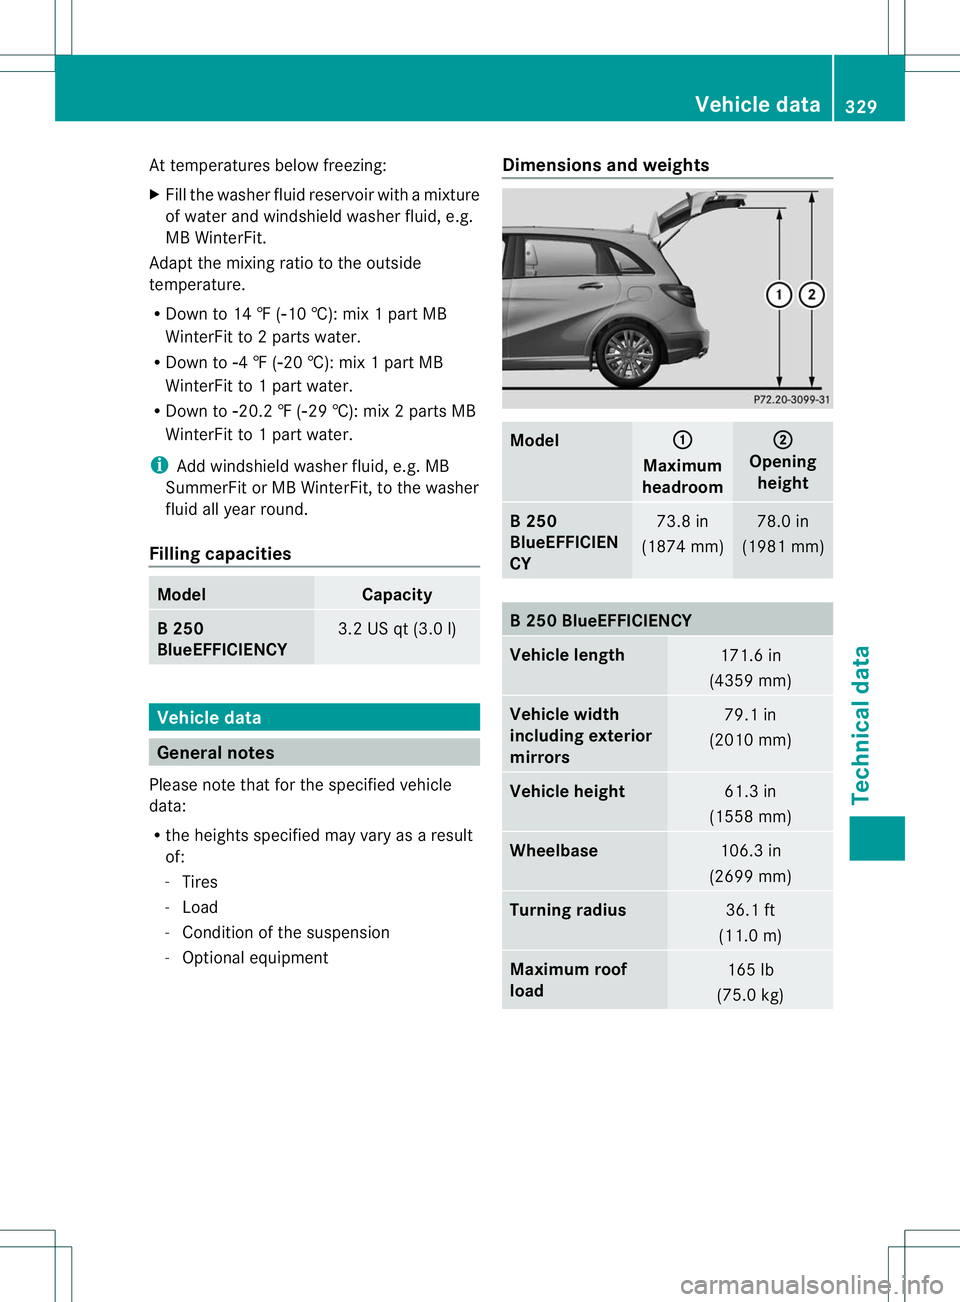
- Optional equipment Dimensions and weights Model :
Maximum
headroom ;
Opening
height B2
50
BlueEFFICIEN
CY 73.8 in
(1874 mm) 78.0 in
(1981 mm) B2
50 BlueEFFICIENCY Vehicle length
171.6 in
(4359 mm) Vehicle width
including exterior
mirrors
79.1 in
(2010 mm) Vehicle height
61.3 in
(1558 mm) Wheelbase
106.3 in
(2699 mm) Turning radius
36.1 ft
(11.0 m) Maximum roof
load
165 lb
(75.0 kg) Vehicle data
329Technical data Z