2013 MERCEDES-BENZ B-CLASS SPORTS clock
[x] Cancel search: clockPage 122 of 336
i
The cooling with air dehumidification
function uses refrigerant R134a. This
refrigerant does not contain
chlorofluorocarbons, and therefore does
not damage the ozone layer.
Activating/deactivating X
To activate: press the¿button.
The indicator lamp in the ¿button lights
up.
X To deactivate: press the¿button.
The indicator lamp in the ¿button goes
out. The cooling with air dehumidification
function has a delayed switch-off feature.
Problems with the cooling with air
dehumidification function When you press the
¿button, the
indicator lamp in the button flashes three
times or remains off. You can no longer switch
on the cooling with air dehumidification
function.
X Visit a qualified specialist workshop. Setting climate control to automatic
G
WARNING
If you switch off the cooling function, the
vehicle will not be cooled when weather
conditions are warm. The windows can fog up
more quickly. Window fogging may impair
visibility and endanger you and others.
The automatic function is only available in
conjunction with 3-zone automatic climate
control.
In automatic mode, the set temperature is
maintained automatically at a constant level.
The system automatically regulates the
temperature of the dispensed air, the airflow
and the air distribution.
Automatic mode will achieve optimal
operation if cooling with air dehumidification is also activated. If desired, cooling with air
dehumidification can be deactivated.
X
Turn the SmartKey to position 2in the
ignition lock.
X Set the desired temperature.
X To activate: press theÃbutton.
The indicator lamp in the Ãbutton lights
up. Automatic air distribution and airflow
are activated.
X To select manually: press the_
button.
or
X Press the KorI button.
The indicator lamp in the Ãbutton goes
out. Automatic air distribution and airflow
are deactivated. Setting the temperature
Climate control You can set the temperature for the entire
vehicle.
X
Turn the SmartKey to position 2in the
ignition lock.
X To increase/reduce: turn control:
clockwise or counter-clockwise
(Y page 115). Only change the temperature
setting in small increments. Start at 22 †.
3-zone automatic climate control Different temperatures can be set for the
driver's and front-passenger sides.
X
Turn the SmartKey to position 2in the
ignition lock.
X To increase/reduce: turn control:or
E clockwise or counter-clockwise
(Y page 117). Only change the temperature
setting in small increments. Start at 22 †. Operating the climate control systems
119Climate control Z
Page 123 of 336
Setting the air distribution
Air distribution settings Climate control
¯
Directs air through the defroster vents
P Directs air through the center and side
air vents
O Directs the airflow through the
footwell air vents
i You can also activate several air
distribution settings simultaneously .To do
this, press multiple air distribution buttons.
The air is then directed through various
vents.
3-zone automatic climate control
¯ Directs air through the defroster vents
P Directs air through the center and side
air vents
O Directs the airflow through the
footwell air vents
b Directs the airflow through the center
and side air vents as well as the
defroster vents
a Directs air through the defroster and
footwell vents
i Regardless of the air distribution setting,
airflow is always directed through the side
air vents. The side air vents can only be
closed if the adjusters are turned clockwise
as far as possible.
Climate control X
Turn the SmartKey to position 2in the
ignition lock.
X Press one or more of the P,O,
¯ buttons.
The corresponding indicator lamp lights up
briefly. 3-zone automatic climate control X
Turn the SmartKey to position 2in the
ignition lock.
X Press the ÉorË button until the
desired symbol appears in the display. Setting the airflow
Climate control X
Turn the SmartKey to position 2in the
ignition lock.
X To increase/reduce: turn controlA
clockwise or counter-clockwise
(Y page 115).
3-zone automatic climate control X
Turn the SmartKey to position 2in the
ignition lock.
X To increase/reduce: press theKor
I button. Switching the ZONE function on/off
This function is only available with 3-zone
automatic climate control.
X To activate: press theábutton.
The indicator lamp in the ábutton lights
up.
The temperature setting for the driver's
side is not adopted for the front-passenger
side.
X To deactivate: press theábutton.
The indicator lamp in the ábutton goes
out.
The temperature setting for the driver's
side is adopted for the front-passenger
side. 120
Operating the climate control systemsClimate control
Page 124 of 336
Defrosting the windshield
You can use this function to defrost the
windshield or to defrost thei nside of the
windshield and the side windows.
i You should only select the defrosting
functio nuntil the windshield is clear again.
X Turn the SmartKey to position 2in the
ignition lock.
X To activate: press the¬button.
The indicator lamp in the ¬button lights
up.
The climate control system switches to the
following functions:
R high airflow
R high temperature
R aird istribution to the windshield and
front side windows
R air-recirculation mode off
i The "defrosting" function automatically
sets the blower output to the optimum
defrosting effect .Asar esult, the airflow
may increase or decrease automatically
after the button is pressed.
i You can manually adjust the blower
output when the defrosting function is
active.
R Dual-zone automatic climate control:
turn airflow control Aclockwise or
counter-clockwise (Y page 115).
R 3-zone automatic climate control:
press the óorô button.
X To deactivate: press the¬button.
The indicator lamp in the ¬button goes
out. The previously selected settings are
restored. Air-recirculation mode remains
deactivated.
or
X Press the Ãbutton 7
.
The indicator lamp in the ¬button goes
out. Airflow and air distribution are set to
automatic mode. or
X
Dual-zone automatic climate control:
turn temperature control :clockwise or
counter-clockwise (Y page 115).
3-zone automatic climate control: turn
temperature controls :orE clockwise
or counter-clockwise (Y page 117). Defrosting the windows
Windows fogged up on the inside Climate control
X
Activate the ¿cooling with air
dehumidification function.
X If the windows continue to fog up, activate
the defrosting function (Y page 121).
i You should only select this setting until
the windshield is clear again.
3-zone automatic climate control
X Activate the ¿cooling with air
dehumidification function.
X Activate automatic mode Ã.
X If the windows continue to fog up, activate
the defrosting function (Y page 121).
i You should only select this setting until
the windshield is clear again.
Windows fogged up on the outside X
Activate the windshield wipers.
X Set the air distribution to PorO.
i You should only select this setting until
the windshield is clear again.
7 3-zone automatic climate control only. Operating the climate control systems
121Climate control Z
Page 126 of 336
stationary vehicle for up to 30 minutes after
the engine has been switched off. The heating
time depends on the temperature that has
been set.
i
The blower will run at a low speed
regardless of the airflow setting.
i If you activate the residual heat function
at high temperatures, only the ventilation
will be activated. The blower runs at
medium speed.
X Turn the SmartKey to position 0in the
ignition lock or remove it.
X To activate: press theÌbutton.
The indicator lamp in the Ìbutton lights
up.
X To deactivate: press theÌbutton.
The indicator lamp in the Ìbutton goes
out.
i Residual heat is deactivated
automatically:
R after approximately 30 minutes
R when the ignition is switched on
R if the battery voltage drops
R when the auxiliary heating is activated Setting the air vents
Important safety notes
G
WARNING
Very hot or very cold air can flow from the air
vents. This could cause burns or frostbite to
bare skin in the immediate vicinity of the
vents. Keep bare skin away from these air
vents. If necessary, direct the airflow away to
a different area of the vehicle interior. In order to ensure the direct flow of fresh air
through the air vents into the vehicle interior,
please observe the following notes:
R
keep the air inlet between the windshield
and the hood free of blockages, such as ice,
snow or leaves.
R never cover the air vents or air intake grilles
in the vehicle interior.
i You can move the adjusters for the air
vents vertically or horizontally to set the
direction of the airflow.
i For optimal climate control in the vehicle,
open the air vents completely and set the
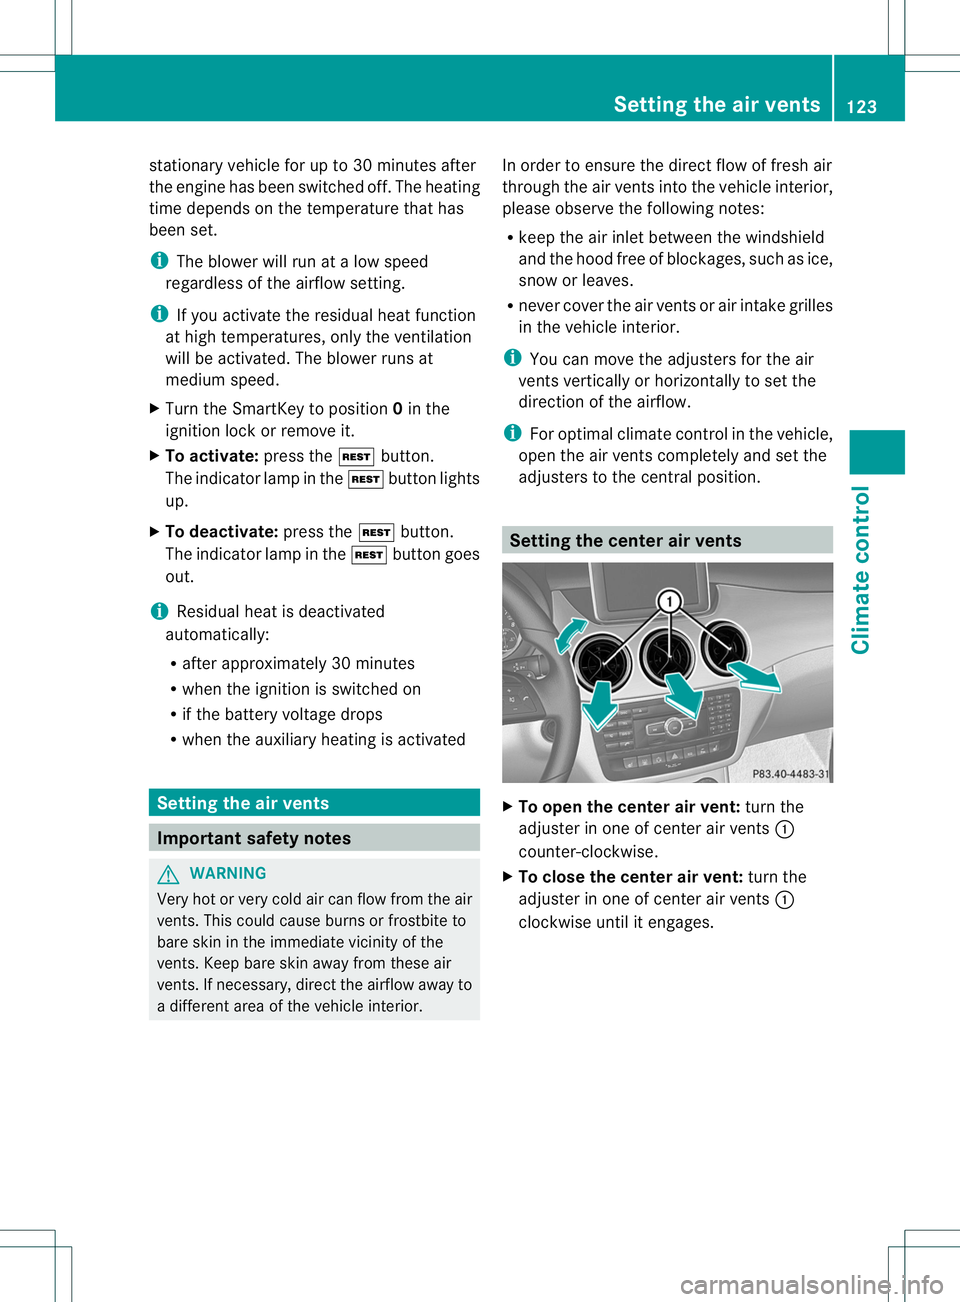
adjusters to the central position. Setting the center air vents
X
To open the center air vent: turn the
adjuster in one of center air vents :
counter-clockwise.
X To close the center air vent: turn the
adjuster in one of center air vents :
clockwise until it engages. Setting the air vents
123Climate control Z
Page 127 of 336
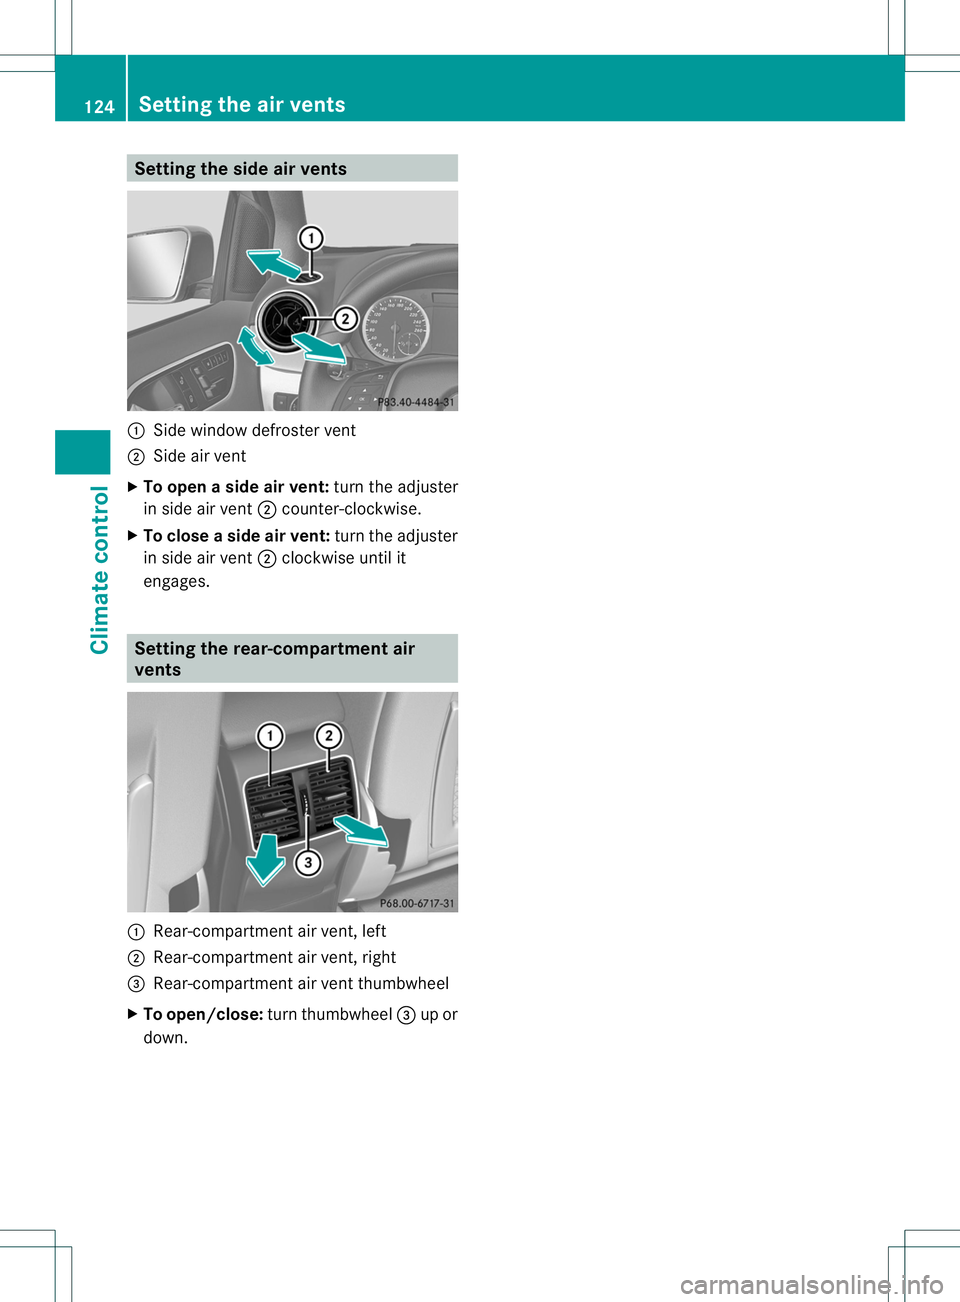
Setting the side air vents
:
Side window defroster vent
; Side air vent
X To open aside air vent: turn the adjuster
in side air vent ;counter-clockwise.
X To close aside air vent: turn the adjuster
in side air vent ;clockwise until it
engages. Setting the rear-compartment air
vents
:
Rear-compartment air vent, left
; Rear-compartment air vent, right
= Rear-compartment air vent thumbwheel
X To open/close: turn thumbwheel =up or
down. 124
Setting the air ventsClimate control
Page 143 of 336
!
Overfilling the fuel tank could damage the
fuel system.
! Take care not to spill any fuel on painted
surfaces. You could otherwise damage the
paintwork.
! Use a filter when refueling from a fuel can.
Otherwise, the fuel lines and/or injection
system could be blocked by particles from
the fuel can.
If you overfill the fuel tank, fuel could spray
out when the fuel pump nozzle is removed.
Further information on fuel and on fuel grades
can be found in the "Fuel" section
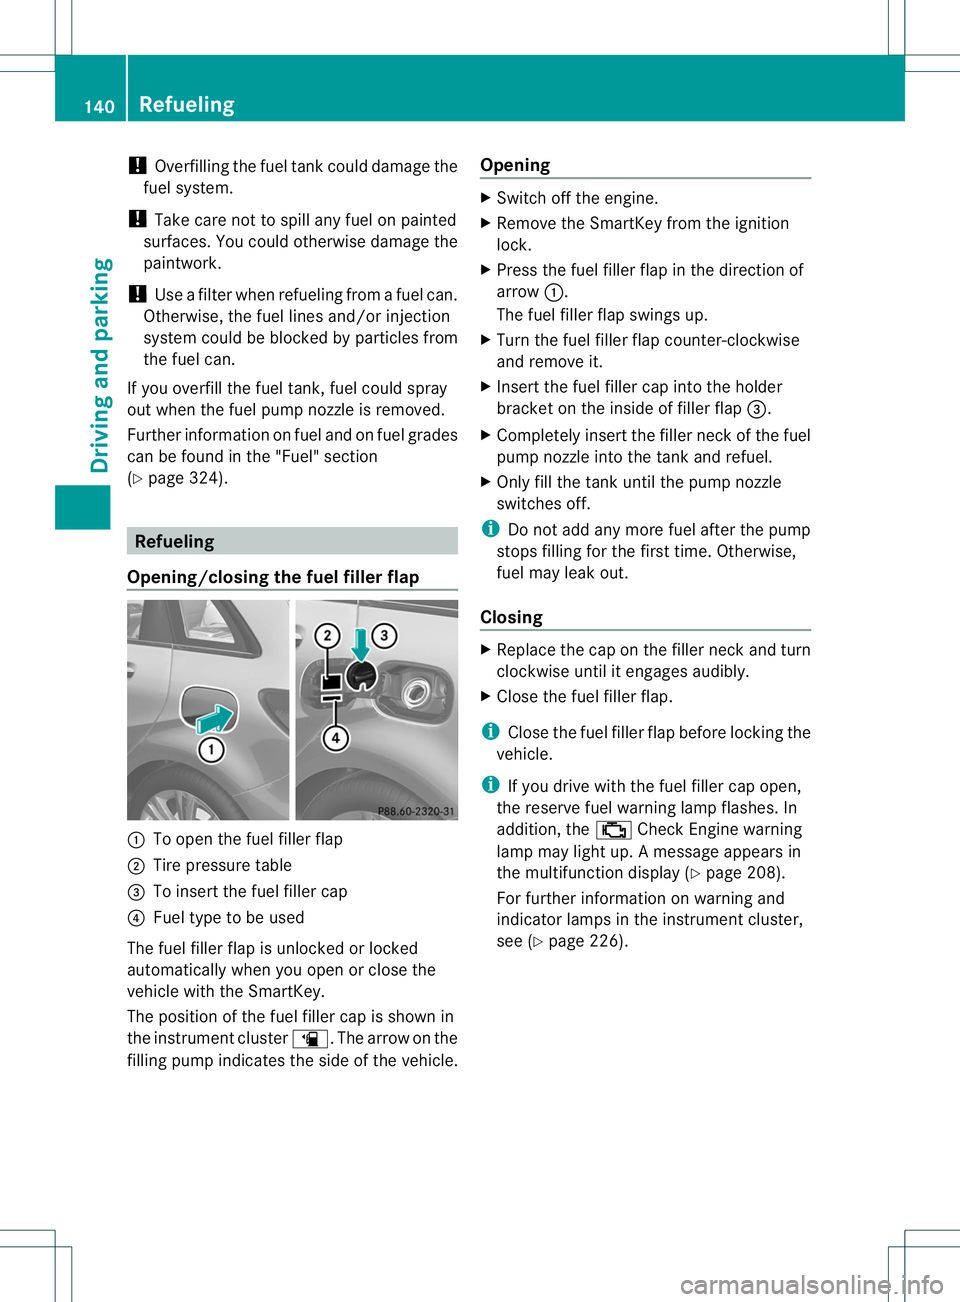
(Y page 324). Refueling
Opening/closing the fuel filler flap :
To open the fuel filler flap
; Tire pressure table
= To insert the fuel filler cap
? Fuel type to be used
The fuel filler flap is unlocked or locked
automatically when you open or close the
vehicle with the SmartKey.
The position of the fuel filler cap is shown in
the instrument cluster æ.The arrow on the
filling pump indicates the side of the vehicle. Opening X
Switch off the engine.
X Remove the SmartKey from the ignition
lock.
X Press the fuel filler flap in the direction of
arrow :.
The fuel filler flap swings up.
X Turn the fuel filler flap counter-clockwise
and remove it.
X Insert the fuel filler cap into the holder
bracket on the inside of filler flap =.
X Completely insert the filler neck of the fuel
pump nozzle into the tank and refuel.
X Only fill the tank until the pump nozzle
switches off.
i Do not add any more fuel after the pump
stops filling for the first time. Otherwise,
fuel may leak out.
Closing X
Replace the cap on the filler neck and turn
clockwise until it engages audibly.
X Close the fuel filler flap.
i Close the fuel filler flap before locking the
vehicle.
i If you drive with the fuel filler cap open,
the reserve fuel warning lamp flashes. In
addition, the ;Check Engine warning
lamp may light up. Amessage appears in
the multifunction display (Y page 208).
For further information on warning and
indicator lamps in the instrument cluster,
see (Y page 226). 140
RefuelingDriving and parking
Page 182 of 336
X
Turn the brightness control knob clockwise
or counter-clockwise.
If the light switch is set to Ã,Tor
L, the brightness is dependent upon
the brightness of the ambient light.
i The light sensor in the instrument cluster
automatically controls the brightness of
the multifunction display.
In daylight, the displays in the instrument
cluster are not illuminated. Coolant temperature display
G
WARNING
Driving when your engine is overheated can
cause some fluids which may have leaked into
the engine compartment to catch fire. You
could be seriously burned.
Steam from an overheated engine can cause
serious burns which can occur just by opening
the engine hood. Stay away from the engine
if you see or hear steam coming from it.
Stop the vehicle in a safe location away from
other traffic. Turn off the engine, get out of the
vehicle and do not stand near the vehicle until
the engine has cooled down.
! Adisplay message is shown if the coolant
temperature is too high.
If the coolant temperature is over
248 ‡(120 †), do not continue driving. The
engine will otherwise be damaged.
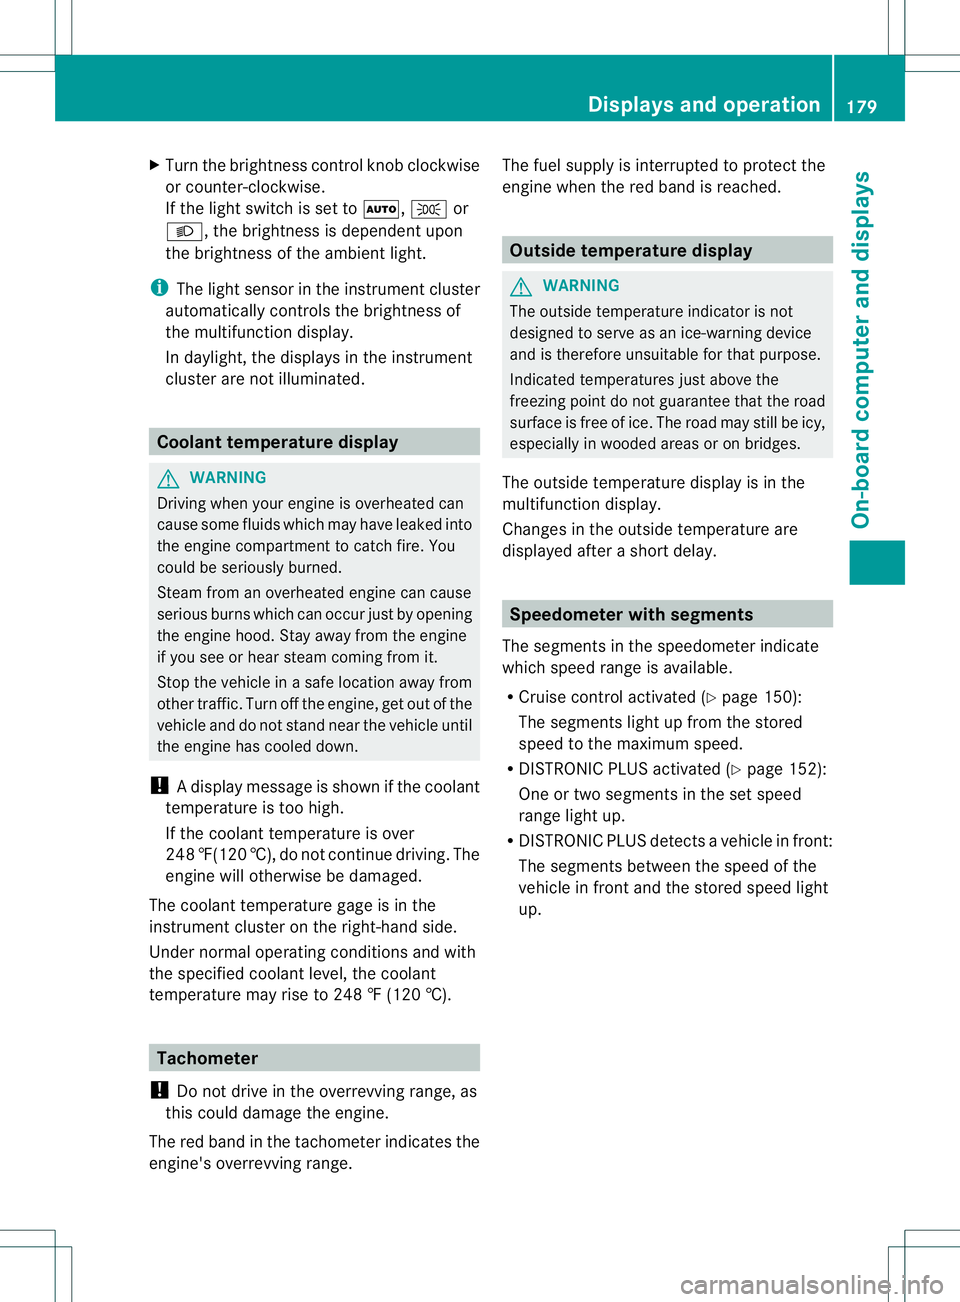
The coolan ttemperature gage is in the
instrument cluster on the right-hand side.
Under normal operating conditions and with
the specified coolant level, the coolant
temperature may rise to 248 ‡ (120 †). Tachometer
! Do not drive in the overrevving range, as
this could damage the engine.
The red band in the tachometer indicates the
engine's overrevving range. The fuel supply is interrupted to protec
tthe
engine when the red band is reached. Outside temperature display
G
WARNING
The outside temperature indicator is not
designed to serve as an ice-warning device
and is therefore unsuitable for that purpose.
Indicated temperatures just above the
freezing point do not guarantee that the road
surface is free of ice. The road may still be icy,
especially in wooded areas or on bridges.
The outside temperature display is in the
multifunction display.
Changes in the outside temperature are
displayed after a short delay. Speedometer with segments
The segments in the speedometer indicate
which speed range is available.
R Cruise control activated (Y page 150):
The segments light up from the stored
speed to the maximum speed.
R DISTRONIC PLUS activated (Y page 152):
One or two segments in the set speed
range light up.
R DISTRONIC PLUS detectsav ehicle in front:
The segments between the speed of the
vehicle in fron tand the stored speed light
up. Displays and operation
179On-board computer and displays Z
Page 265 of 336
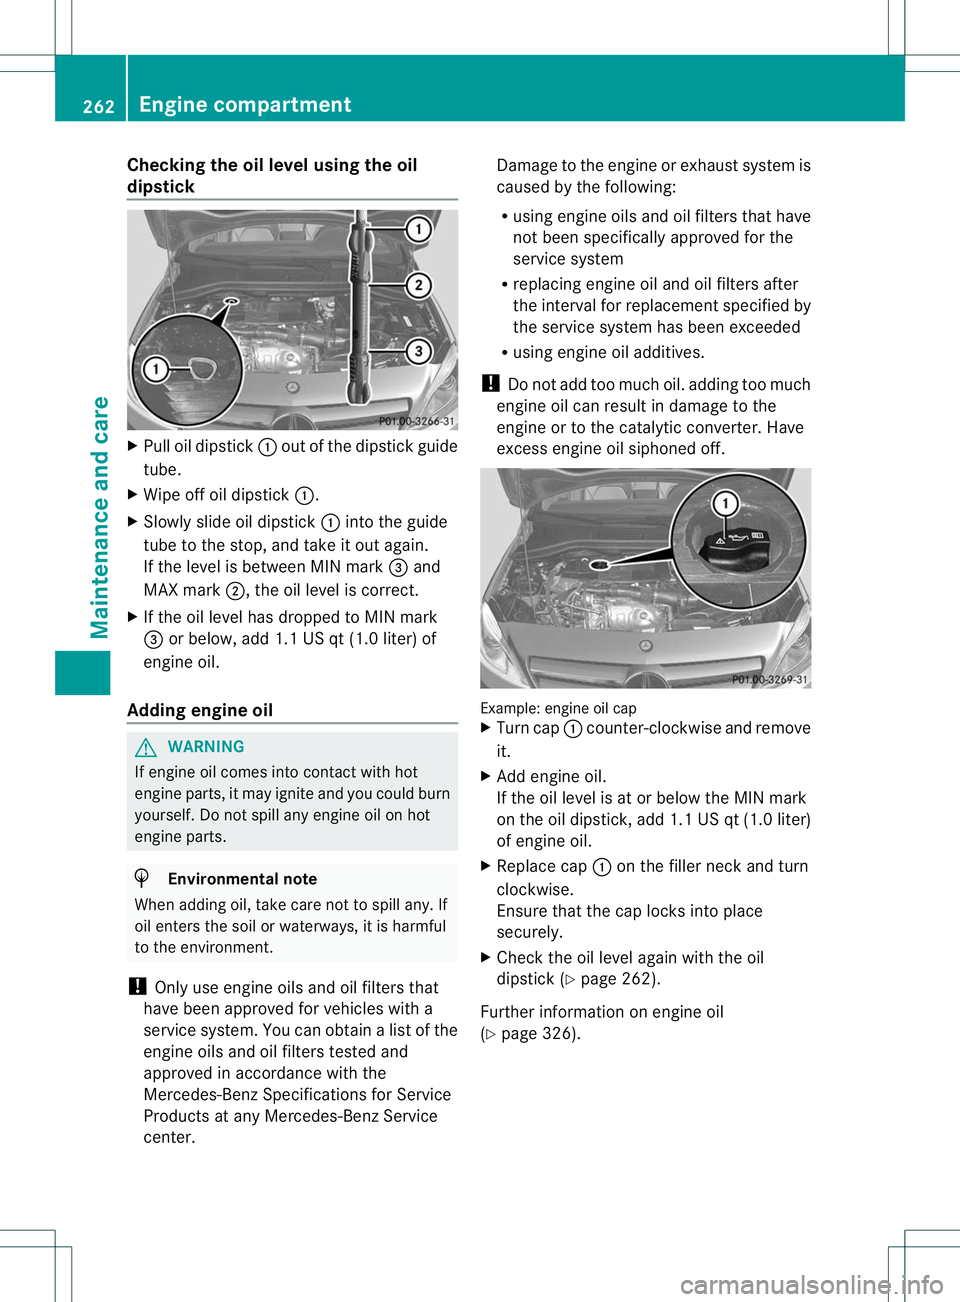
Checking the oil level using the oil
dipstick
X
Pull oil dipstick :out of the dipstick guide
tube.
X Wipe off oil dipstick :.
X Slowly slide oil dipstick :into the guide
tube to the stop, and take it out again.
If the level is between MIN mark =and
MAX mark ;, the oil level is correct.
X If the oil level has dropped to MIN mark
= or below, add 1.1 US qt (1.0 liter) of
engine oil.
Adding engine oil G
WARNING
If engine oil comes into contact with hot
engine parts, it may ignite and you could burn
yourself. Do no tspill any engine oil on hot
engine parts. H
Environmental note
When adding oil, take care not to spill any. If
oil enters the soil or waterways, it is harmful
to the environment.
! Only use engine oils and oil filters that
have been approved for vehicles with a
service system. You can obtain a list of the
engine oils and oil filters tested and
approved in accordance with the
Mercedes-Benz Specifications for Service
Products at any Mercedes-Benz Service
center. Damage to the engine or exhaust system is
caused by the following:
R
using engine oils and oil filters that have
not been specifically approved for the
service system
R replacing engine oil and oil filters after
the interval for replacements pecified by
the service system has been exceeded
R using engine oil additives.
! Do not add too much oil. adding too much
engine oil can result in damage to the
engine or to the catalytic converter. Have
excess engine oil siphoned off. Example: engine oil cap
X
Turn cap :counter-clockwise and remove
it.
X Add engine oil.
If the oil level is at or below the MIN mark
on the oil dipstick, add 1.1 US qt (1.0 liter)
of engine oil.
X Replace cap :on the filler neck and turn
clockwise.
Ensure that the cap locks into place
securely.
X Check the oil level againw ith the oil
dipstick (Y page 262).
Further information on engine oil
(Y page 326). 262
Engine compartmentMaintenance and care