2013 LINCOLN MKZ HYBRID height
[x] Cancel search: heightPage 42 of 475

assemblies (slide bar-if equipped),
shoulder belt height adjusters (if
equipped), shoulder belt guide on seat
back (if equipped), rear inflatable
safety belts (if equipped), child safety
seat LATCH and tether anchors, and
attaching hardware, should be
inspected after a collision. Read the
child restraint manufacturer's
instructions for additional inspection
and maintenance information specific
to the child restraint.
Ford Motor Company recommends
that all safety belt assemblies in use
in vehicles involved in a collision be
replaced. However, if the collision was
minor and an authorized dealer finds
that the belts do not show damage
and continue to operate properly, they
do not need to be replaced. Safety
belt assemblies not in use during a
collision should also be inspected and
replaced if either damage or improper
operation is noted.
Properly care for safety belts. See
Vehicle Care (page 294).
40
MKZ (CC9) Safety Belts
Page 86 of 475

AUTOMATIC HIGH BEAM
CONTROL (IF EQUIPPED)
The system will automatically turn on
your high beams if it is dark enough
and no other traffic is present. When
it detects the headlights of an
approaching vehicle, the tail lamps of
the preceding vehicle or street lighting,
the system will turn off the high
beams before they distract other
drivers. The low beams remain on.
Note: If it appears that automatic
control of the high beams is not
functioning properly, check the
windshield in front of the camera for a
blockage. A clear view of the road is
required for proper system operation.
Have any windshield damage in the
area of the camera ’s field-of-view
repaired.
Note: If the system detects a blockage
such as bird droppings, bug splatter,
snow or ice, and you do not observe
changes, the system will go into low
beam mode until you clear the
blockage. A message may also appear
in the instrument cluster display noting
the front camera is blocked. Note:
Typical road dust, dirt and water
spots will not affect the performance
of the automatic high beam system .
However, in cold or inclement weather
conditions, you will notice a decrease
in the availability of the high beam
system, especially at start up. If you
want to change the beam state
independently of the system, you may
switch the high beams on or off using
the multifunction switch. Automatic
control will resume when conditions
are correct.
Note: Modification of the vehicle ride
height such as using much larger tires,
may degrade feature performance.
A camera sensor, centrally mounted
behind the windshield of your vehicle,
continuously monitors conditions to
decide when to switch the high beams
off and on.
Once the system is active, the high
beams will switch on if:
• the ambient light level is low
enough
• there is no traffic in front of the
vehicle
• the vehicle speed is greater than
25 mph (40 km/h)
The high beams will switch off if:
• the system detects the headlamps
of an approaching vehicle or the
tail lamps of a preceding vehicle.
• vehicle speed falls below
16 mph
(25 km/h)
• the ambient light level is high
enough that high beams are not
required
84
MKZ (CC9) Lighting
Page 293 of 475

6.
Install the air cleaner cover.
7. Tighten the 5 bolts to the air cleaner cover.
ADJUSTING THE
HEADLAMPS
Vertical Aim Adjustment
The headlamps on your vehicle are
properly aimed at the assembly plant.
If your vehicle has been in an accident,
the alignment of your headlamps
should be checked by your authorized
dealer.
Headlamp Aiming Target 8 feet (2.4 meters)
A
Center height of lamp to
ground
B
25 feet (7.6 meters)
C
Horizontal reference line
D Vertical Aim Adjustment
Procedure
1.
Park the vehicle directly in front of
a wall or screen on a level surface,
approximately 25 feet (7.6 meters)
away.
2. Measure the height of the headlamp bulb center from the
ground and mark an 8 foot (2.4
meter) horizontal reference line on
the vertical wall or screen at this
height.
Note: To see a clearer light pattern for
adjusting, you may want to block the
light from one headlamp while
adjusting the other.
3. Turn on the low beam headlamps to illuminate the wall or screen and
open the hood. 4. On the wall or screen you will
observe a flat zone of high
intensity light located at the top of
the right hand portion of the beam
pattern. If the top edge of the high
intensity light zone is not at the
horizontal reference line, the
headlamp will need to be adjusted.
291
MKZ (CC9) MaintenanceE142592 E142465
Page 319 of 475

B.
215: Indicates the nominal
width of the tire in millimeters
from sidewall edge to sidewall
edge. In general, the larger the
number, the wider the tire.
C. 65:
Indicates the aspect ratio
which gives the tire's ratio of
height to width.
D. R:
Indicates a radial type tire.
E. 15:
Indicates the wheel or rim
diameter in inches. If you change
your wheel size, you will have to
purchase new tires to match the
new wheel diameter.
F. 95:
Indicates the tire's load
index. It is an index that relates to
how much weight a tire can carry.
You may find this information in
your owner ’s manual. If not,
contact a local tire dealer.
Note: You may not find this
information on all tires because it
is not required by federal law.
G. H:
Indicates the tire's speed
rating. The speed rating denotes
the speed at which a tire is
designed to be driven for extended
periods of time under a standard
condition of load and inflation
pressure. The tires on your vehicle
may operate at different
conditions for load and inflation
pressure. These speed ratings may
need to be adjusted for the
difference in conditions. The
ratings range from 81 mph (130
km/h) to 186 mph (299 km/h).
These ratings are listed in the
following chart. Note:
You may not find this
information on all tires because it
is not required by federal law. mph ( km/h)
Letter
rating
81 mph (130 km/h)
M
87 mph (140 km/h)
N
99 mph (159 km/h)
Q
106 mph (171 km/h)
R
112 mph (180 km/h)
S
118 mph (190 km/h)
T
124 mph (200 km/h)
U
130 mph (210 km/h)
H
149 mph (240 km/h)
V
168 mph (270 km/h)
W
186 mph (299 km/h)
Y
Note: For tires with a maximum
speed capability over 149 mph
(240 km/h), tire manufacturers
sometimes use the letters ZR. For
those with a maximum speed
capability over 186 mph (299
km/h), tire manufacturers always
use the letters ZR.
H. U.S. DOT Tire Identification
Number:
This begins with the
letters DOT and indicates that the
tire meets all federal standards.
The next two numbers or letters
are the plant code designating
where it was manufactured, the
next two are the tire size code and
317
MKZ (CC9) Wheels and Tires
Page 322 of 475

T type tires have some additional
information beyond those of P
type tires; these differences are
described below:
A.
T: Indicates a type of tire,
designated by the Tire and Rim
Association, that is intended for
temporary service on cars, sport
utility vehicles, minivans and light
trucks.
B. 145:
Indicates the nominal
width of the tire in millimeters
from sidewall edge to sidewall
edge. In general, the larger the
number, the wider the tire. C.
80:
Indicates the aspect ratio
which gives the tire's ratio of
height to width. Numbers of 70 or
lower indicate a short sidewall.
D. D:
Indicates a diagonal type tire.
R:
Indicates a radial type tire.
E. 16:
Indicates the wheel or rim
diameter in inches. If you change
your wheel size, you will have to
purchase new tires to match the
new wheel diameter.
Location of the Tire Label
You will find a Tire Label
containing tire inflation pressure
by tire size and other important
information located on the B-Pillar
or the edge of the driver ’s door.
Inflating Your Tires
Safe operation of your vehicle
requires that your tires are
properly inflated. Remember that
a tire can lose up to half of its air
pressure without appearing flat.
Every day before you drive, check
your tires. If one looks lower than
the others, use a tire gauge to
check pressure of all tires and
adjust if required.
At least once a month and before
long trips, inspect each tire and
check the tire pressure with a tire
gauge (including spare, if
equipped). Inflate all tires to the
inflation pressure recommended
by Ford Motor Company.
320
MKZ (CC9) Wheels and TiresA
BCDE
E142545
Page 325 of 475

Inspecting Your Tires and
Wheel Valve Stems
Periodically inspect the tire treads
for uneven or excessive wear and
remove objects such as stones,
nails or glass that may be wedged
in the tread grooves. Check the tire
and valve stems for holes, cracks,
or cuts that may permit air
leakage and repair or replace the
tire and replace the valve stem.
Inspect the tire sidewalls for
cracking, cuts, bruises and other
signs of damage or excessive
wear. If internal damage to the tire
is suspected, have the tire
demounted and inspected in case
it needs to be repaired or replaced.
For your safety, tires that are
damaged or show signs of
excessive wear should not be used
because they are more likely to
blow out or fail.
Improper or inadequate vehicle
maintenance can cause tires to
wear abnormally. Inspect all your
tires, including the spare,
frequently, and replace them if
one or more of the following
conditions exist:
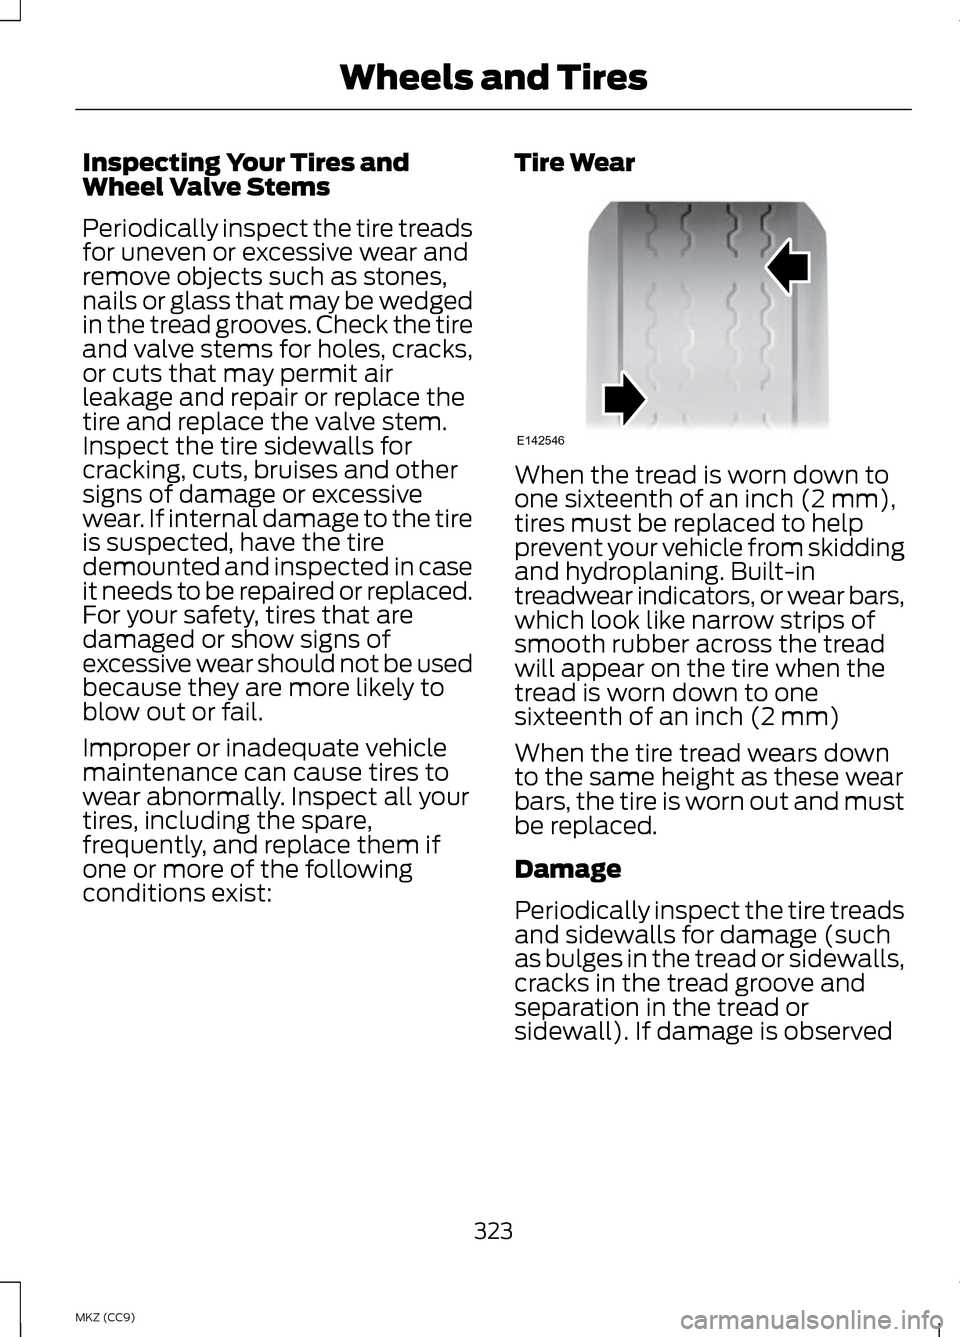
Tire Wear When the tread is worn down to
one sixteenth of an inch (2 mm),
tires must be replaced to help
prevent your vehicle from skidding
and hydroplaning. Built-in
treadwear indicators, or wear bars,
which look like narrow strips of
smooth rubber across the tread
will appear on the tire when the
tread is worn down to one
sixteenth of an inch (2 mm)
When the tire tread wears down
to the same height as these wear
bars, the tire is worn out and must
be replaced.
Damage
Periodically inspect the tire treads
and sidewalls for damage (such
as bulges in the tread or sidewalls,
cracks in the tread groove and
separation in the tread or
sidewall). If damage is observed
323
MKZ (CC9) Wheels and TiresE142546
Page 470 of 475

Remote Control.....................................53
Car Finder...................................................... 54
Intelligent Access Key...............................53
Remote Start............................................... 54
Replacing the Battery...............................53
Sounding a Panic Alarm..........................54
Remote Start.........................................141 Automatic Settings...................................141
Heated and Cooled Devices.................142
Last Settings............................................... 142
Repairing Minor Paint Damage
...............................................295
Replacement Parts Recommendation
...............................12
Collision Repairs.......................................... 12
Scheduled Maintenance and Mechanical Repairs................................12
Warranty on Replacement Parts...........12
Replacing a Lost Key or Remote Control...................................................56
Reporting Safety Defects (Canada Only)....................................................264
Reporting Safety Defects (U.S. Only)....................................................264
Roadside Assistance........................250 Vehicles Sold In Canada : Getting
Roadside Assistance...........................251
Vehicles Sold In Canada : Using Roadside Assistance...........................251
Vehicles Sold In The U.S.: Getting Roadside Assistance.........................250
Vehicles Sold In The U.S. : Using Roadside Assistance.........................250
Roadside Emergencies
....................250
Running-In See: Breaking-In........................................247
Running Out of Fuel
............................173
Refilling With a Portable Fuel
Container................................................. 174S
Safety Belt Height Adjustment.......36
Safety Belt Minder
................................38
Belt-Minder®............................................... 38
Safety Belts
..............................................31
Principle of Operation................................31
Safety Belt Warning Lamp and Indicator Chime
...................................37
Conditions of operation...........................37
Safety Precautions
..............................172
Scheduled Maintenance.................444
Engine Coolant and Motor/Electronics
Coolant Change Record....................457
Exceptions.................................................. 457
General Maintenance Information........................................... 444
Normal Scheduled Maintenance.........................................448
Special Operating Conditions.............453
Seats........................................................143
Security.....................................................72
Settings..................................................355 Clock ............................................................. 356
Display......................................................... 356
Settings....................................................... 358
Sound........................................................... 357
Vehicle.......................................................... 357
Side Airbags
............................................47
Side Curtain Airbags............................48
Sitting in the Correct Position.........143
Snow Chains See: Using Snow Chains.......................328
Special Notices
.......................................13
New Vehicle Limited Warranty...............13
Special Instructions....................................13
Speed Control See: Cruise Control..................................210
Stability Control
...................................197
Principle of Operation.............................197
468
MKZ Hybrid (CC9) Index