Page 8 of 1168

15
Introduction
Biodiesel
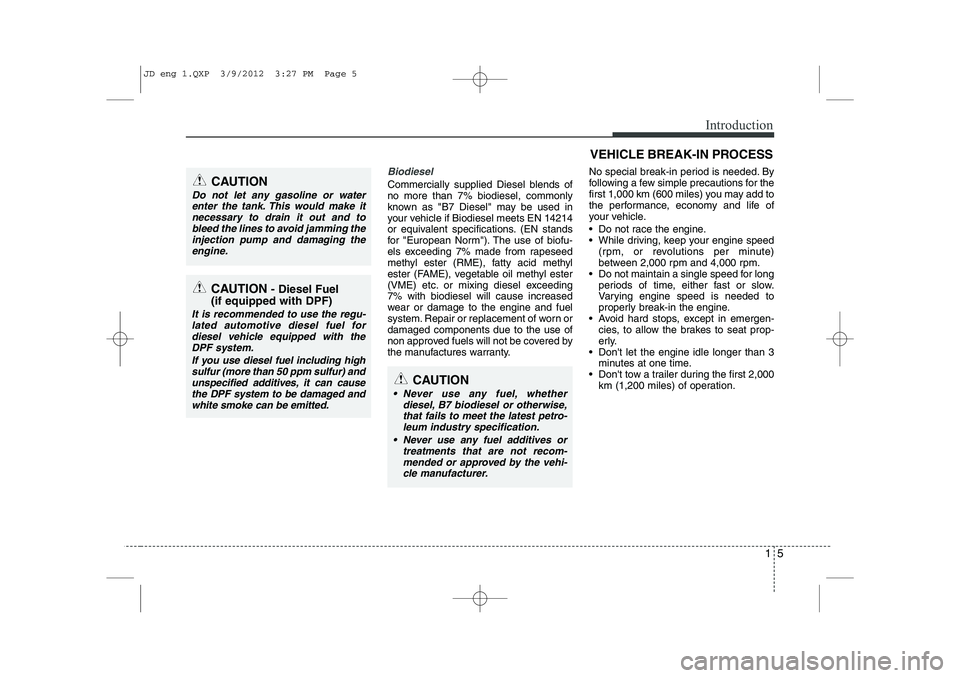
Commercially supplied Diesel blends of no more than 7% biodiesel, commonly
known as "B7 Diesel" may be used in
your vehicle if Biodiesel meets EN 14214
or equivalent specifications. (EN stands
for "European Norm"). The use of biofu-
els exceeding 7% made from rapeseed
methyl ester (RME), fatty acid methyl
ester (FAME), vegetable oil methyl ester
(VME) etc. or mixing diesel exceeding7% with biodiesel will cause increased
wear or damage to the engine and fuel
system. Repair or replacement of worn ordamaged components due to the use of
non approved fuels will not be covered by
the manufactures warranty.No special break-in period is needed. By
following a few simple precautions for the
first 1,000 km (600 miles) you may add to
the performance, economy and life of
your vehicle.
Do not race the engine.
While driving, keep your engine speed
(rpm, or revolutions per minute)
between 2,000 rpm and 4,000 rpm.
Do not maintain a single speed for long periods of time, either fast or slow.
Varying engine speed is needed to
properly break-in the engine.
Avoid hard stops, except in emergen-
cies, to allow the brakes to seat prop-
erly.
Don't let the engine idle longer than 3 minutes at one time.
Don't tow a trailer during the first 2,000 km (1,200 miles) of operation.CAUTION
Do not let any gasoline or water
enter the tank. This would make it
necessary to drain it out and tobleed the lines to avoid jamming theinjection pump and damaging the engine.
CAUTION - Diesel Fuel
(if equipped with DPF)
It is recommended to use the regu- lated automotive diesel fuel for
diesel vehicle equipped with theDPF system.
If you use diesel fuel including highsulfur (more than 50 ppm sulfur) andunspecified additives, it can cause
the DPF system to be damaged andwhite smoke can be emitted.
CAUTION
Never use any fuel, whether diesel, B7 biodiesel or otherwise,that fails to meet the latest petro-leum industry specification.
Never use any fuel additives or treatments that are not recom-mended or approved by the vehi- cle manufacturer.
VEHICLE BREAK-IN PROCESS
JD eng 1.QXP 3/9/2012 3:27 PM Page 5
Page 11 of 1168
Your vehicle at a glance
2
2
EXTERIOR OVERVIEW (FRONT)
1. Front removable towing hook .................6-29
2. Front windshield wiper ..........................4-118
3. Outside rearview mirror ..........................4-43
4. Door lock ................................................4-17
5. Head lamp ............................................4-111
6. Front fog lamp.......................................4-115
7. Hood ......................................................4-28
8. Tire and wheel ........................................7-53
OJD012001
❈ The actual shape may differ from the illustration.
JD eng 2.qxp 7/21/2012 12:00 PM Page 2
Page 12 of 1168
23
Your vehicle at a glance
EXTERIOR OVERVIEW (REAR)
1. Roof antenna ........................................4-169
2. Rear window defroster..........................4-126
3. Rear wiper ............................................4-121
4. Door lock ................................................4-17
5. Rear parking assist system ....................4-90
6. Child-protector rear door lock .................4-21
7. Fuel filler .................................................4-30
8. Rear towing hook....................................6-29
9. Rear combination lamp
10. Tailgate handle switch .........................4-22
11. High mounted stop lamp
12. Rearview camera................................4-109OJD012002
❈ The actual shape may differ from the illustration.
JD eng 2.qxp 7/21/2012 12:00 PM Page 3
Page 32 of 1168
Safety system of your vehicle
16
3
5. Remove the headrest from the rear
seatback.
6. Stow the headrest by inserting the headrest poles into the holder on the bottom of the seat cushion. 7. Fold the rear seatback forward and
down firmly. 8. To use the rear seat, reposition the
headrest on the seatback and adjust itto the desired position.
9. Lift and push the seatback backward firmly until it clicks into place. Make
sure the seatback is locked in place
(red invisible).
OJD032020OJD032021OJD032022
JD eng 3.QXP 7/17/2012 11:07 AM Page 16
Page 48 of 1168

Safety system of your vehicle
32
3
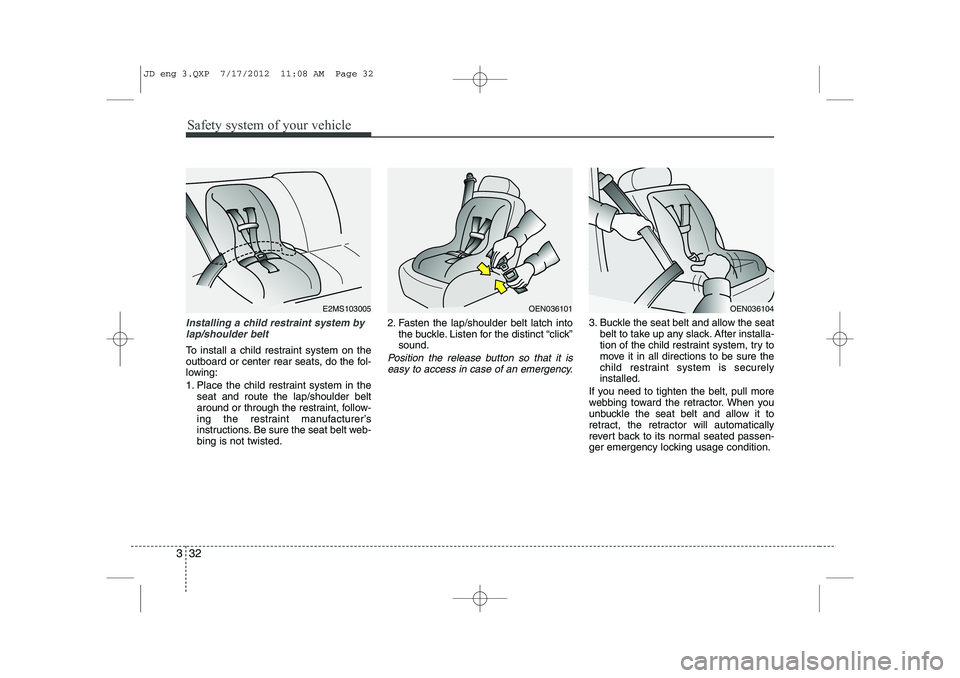
Installing a child restraint system by
lap/shoulder belt
To install a child restraint system on the
outboard or center rear seats, do the fol-
lowing:
1. Place the child restraint system in the seat and route the lap/shoulder belt
around or through the restraint, follow-
ing the restraint manufacturer’s
instructions. Be sure the seat belt web-bing is not twisted. 2. Fasten the lap/shoulder belt latch into
the buckle. Listen for the distinct “click”sound.Position the release button so that it is
easy to access in case of an emergency.
3. Buckle the seat belt and allow the seat belt to take up any slack. After installa-
tion of the child restraint system, try to
move it in all directions to be sure the
child restraint system is securelyinstalled.
If you need to tighten the belt, pull more
webbing toward the retractor. When you
unbuckle the seat belt and allow it to
retract, the retractor will automatically
revert back to its normal seated passen-
ger emergency locking usage condition.
OEN036101OEN036104E2MS103005
JD eng 3.QXP 7/17/2012 11:08 AM Page 32
Page 96 of 1168

417
Features of your vehicle
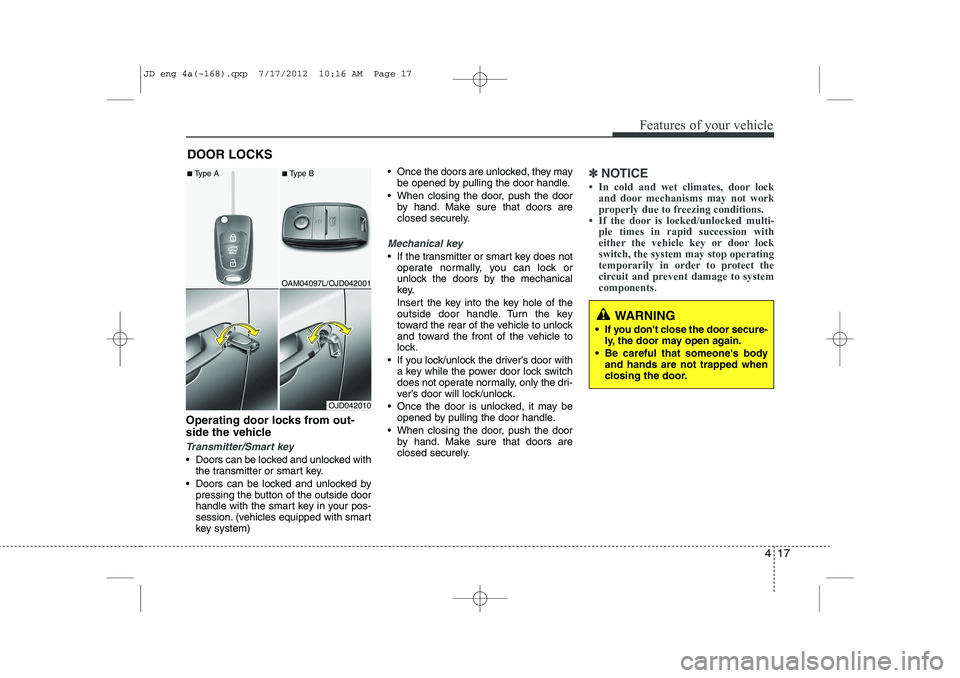
Operating door locks from out-
side the vehicle
Transmitter/Smart key
Doors can be locked and unlocked withthe transmitter or smart key.
Doors can be locked and unlocked by pressing the button of the outside door
handle with the smart key in your pos-
session. (vehicles equipped with smart
key system) Once the doors are unlocked, they may
be opened by pulling the door handle.
When closing the door, push the door by hand. Make sure that doors are
closed securely.
Mechanical key
If the transmitter or smart key does notoperate normally, you can lock or
unlock the doors by the mechanical
key.
Insert the key into the key hole of the
outside door handle. Turn the key
toward the rear of the vehicle to unlock
and toward the front of the vehicle to
lock.
If you lock/unlock the driver’s door with a key while the power door lock switch
does not operate normally, only the dri-
ver’s door will lock/unlock.
Once the door is unlocked, it may be opened by pulling the door handle.
When closing the door, push the door by hand. Make sure that doors are
closed securely.
✽✽ NOTICE
Page 120 of 1168
441
Features of your vehicle
Comfort mode
The steering wheel becomes lighter. The
comfort mode is usually used when driv-
ing in downtown or parking the vehicle.
Also, the comfort mode helps weak peo-
ple to drive easily.
Sport mode
The steering wheel becomes heavier.
The sport mode is usually used when
driving in highway.
CAUTION
For your safety, if you press thesteering mode button while oper-
ating the steering wheel, the LCDdisplay will change, but the steer-ing effort will not change immedi- ately. After operating the steering
wheel, the steering effort will change automatically to theselected mode.
Be careful when changing the steering mode while driving.
When the electronic power steer- ing is not working properly, theflex steering wheel will not work.
OJD042169
OJD042191
■
Normal vision
■■SuperSupervisionvisionOJD042168
OJD042193
■Normal vision
■■SuperSupervisionvision
JD eng 4a(~168).qxp 7/17/2012 10:18 AM Page 41
Page 121 of 1168

Features of your vehicle
42
4
Inside rearview mirror
Adjust the rearview mirror so that the
center view through the rear window is
seen. Make this adjustment before you
start driving.
Day/night rearview mirror
(if equipped)
Make this adjustment before you start
driving and while the day/night lever is in
the day position.
Pull the day/night lever toward you to
reduce glare from the headlights of vehi-
cles behind you during night driving.
Remember that you lose some rearviewclarity in the night position.
Electric chromic mirror (ECM)
(if equipped)
The electric rearview mirror automatical- ly controls the glare from the headlights
of the car behind you in nighttime or low
light driving conditions. The sensormounted in the mirror senses the light
level around the vehicle, and automati-cally controls the headlight glare from
vehicles behind you.
When the engine is running, the glare is
automatically controlled by the sensor
mounted in the rearview mirror.
Whenever the shift lever is shifted into R
(Reverse), the mirror will automatically
go to the brightest setting in order to
improve the drivers view behind the vehi-
cle.
MIRRORS
WARNING -
Rear visibility
Do not place objects in the rear
seat or cargo area which would
interfere with your vision out the
rear window.
CAUTION
When cleaning the mirror, use a paper towel or similar materialdampened with glass cleaner. Do not spray glass cleaner directly on
the mirror as that may cause the liq- uid cleaner to enter the mirror hous-ing.
WARNING
Do not adjust the rearview mirror
while the vehicle is moving. This
could result in loss of control, and
an accident which could cause
death, serious injury or property
damage.
WARNING
Do not modify the inside mirror and
do not install a wide mirror. It could
result in injury, during an accident
or deployment of the air bag.
OMD040031
D
DDDaaaayyyy
NNNNiiiigggghhhhtttt
JD eng 4a(~168).qxp 7/17/2012 10:18 AM Page 42