2013 KIA CEED wheel
[x] Cancel search: wheelPage 1024 of 1168
619
What to do in an emergency
7. Pressure gauge for displaying thetyre inflation pressure
8. Button for reducing tyre inflation pressure
9. Hose to connect compressor and sealant bottle or compressor and wheel
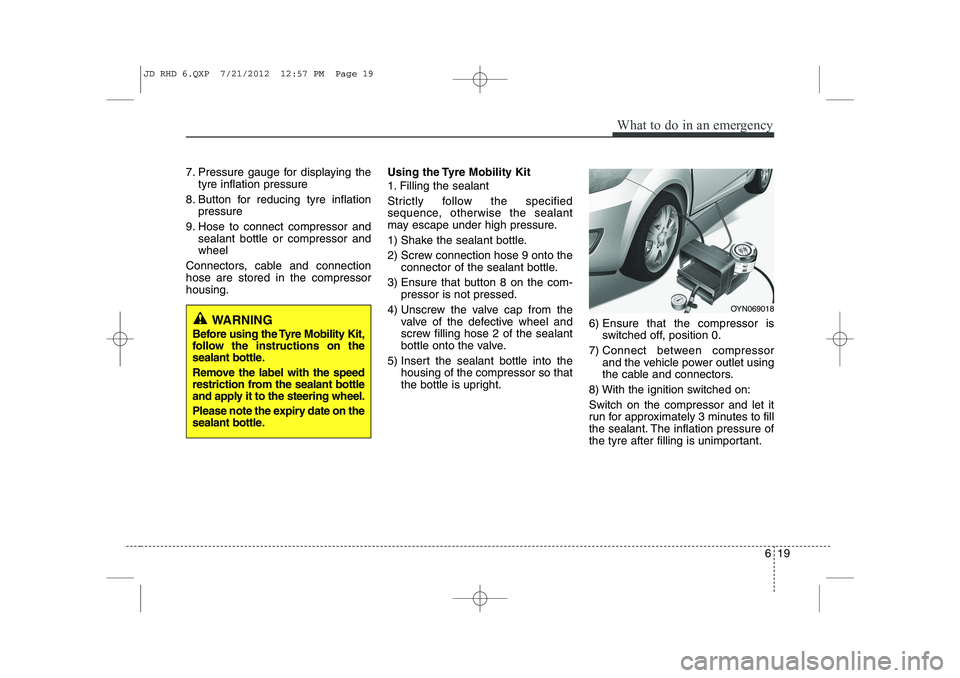
Connectors, cable and connectionhose are stored in the compressorhousing. Using the Tyre Mobility Kit
1. Filling the sealant
Strictly follow the specified
sequence, otherwise the sealant
may escape under high pressure.
1) Shake the sealant bottle.
2) Screw connection hose 9 onto the
connector of the sealant bottle.
3) Ensure that button 8 on the com- pressor is not pressed.
4) Unscrew the valve cap from the valve of the defective wheel and
screw filling hose 2 of the sealant
bottle onto the valve.
5) Insert the sealant bottle into the housing of the compressor so that
the bottle is upright. 6) Ensure that the compressor is
switched off, position 0.
7) Connect between compressor and the vehicle power outlet using
the cable and connectors.
8) With the ignition switched on: Switch on the compressor and let it
run for approximately 3 minutes to fill
the sealant. The inflation pressure of
the tyre after filling is unimportant.
OYN069018
WARNING
Before using the Tyre Mobility Kit,
follow the instructions on the
sealant bottle.
Remove the label with the speed
restriction from the sealant bottle
and apply it to the steering wheel.
Please note the expiry date on the
sealant bottle.
JD RHD 6.QXP 7/21/2012 12:57 PM Page 19
Page 1027 of 1168
What to do in an emergency
22
6
Technical Data
System voltage: DC 12 V
Working voltage: DC 10 - 15 V
Amperage rating: max. 15 A
Suitable for use at temperatures:
-30 ~ +70°C (-22 ~ +158°F)
Max. working pressure: 6 bar (87 psi)
Size (for 15´´, 16´´ wheel)
Compressor: 170 x 150 x 60 mm (6.7 x 5.9 x 2.4 in.)
Sealant bottle: 85 x 77 ø mm (3.3 x 3.0 ø in.)
Compressor weight: 0.8 kg (1.8 lbs)
Sealant volume: 200 ml (12.2 cu. in.)
Size (for 17´´ wheel)
Compressor: 168 x 150 x 68 mm (6.6 x 5.9 x 2.7 in.)
Sealant bottle: 104 x ø 85 mm (4.1 x ø 3.3 in.)
Compressor weight: 1.05 kg (2.31 lbs)
Sealant volume: 300 ml (18.3 cu. in.) ❈
Sealing compound and spare
parts can be obtained and
replaced at an authorised vehicle
or tyre dealer. Empty sealing com-
pound bottles may be disposed of
at home. Liquid residue from thesealing compound should be dis-
posed of by your vehicle or tyredealer or in accordance with local
waste disposal regulations.CAUTION - TPMS (if equipped )
When using Tyre Mobility Kit,
the tyre sealant can damage thetyre pressure sensor. After using the Tyre Mobility Kit, werecommend that the tyre pres-sure sensor be checked by an authorised Kia dealer.
JD RHD 6.QXP 7/21/2012 12:57 PM Page 22
Page 1029 of 1168
What to do in an emergency
24
6
TPMS malfunctions may occur for a
variety of reasons, including theinstallation of replacement or alter-
nate tyres or wheels on the vehicle
that prevent the TPMS from function-
ing properly. Always check theTPMS malfunction telltale afterreplacing one or more tyres or
wheels on your vehicle to ensure that
the replacement or alternate tyres
and wheels allow the TPMS to con-
tinue to function properly.
✽✽
NOTICE
If any of the below happens, we rec- ommend that the system be checked
by an authorised Kia dealer.
1.The low tyre pressure telltale/ TPMS malfunction indicator do
not illuminate for 3 seconds whenthe ignition switch is turned to theON position.
2. The TPMS malfunction indicator remains illuminated after blinking
for approximately 1 minute.
3. The Low tyre pressure position telltale remains illuminated.
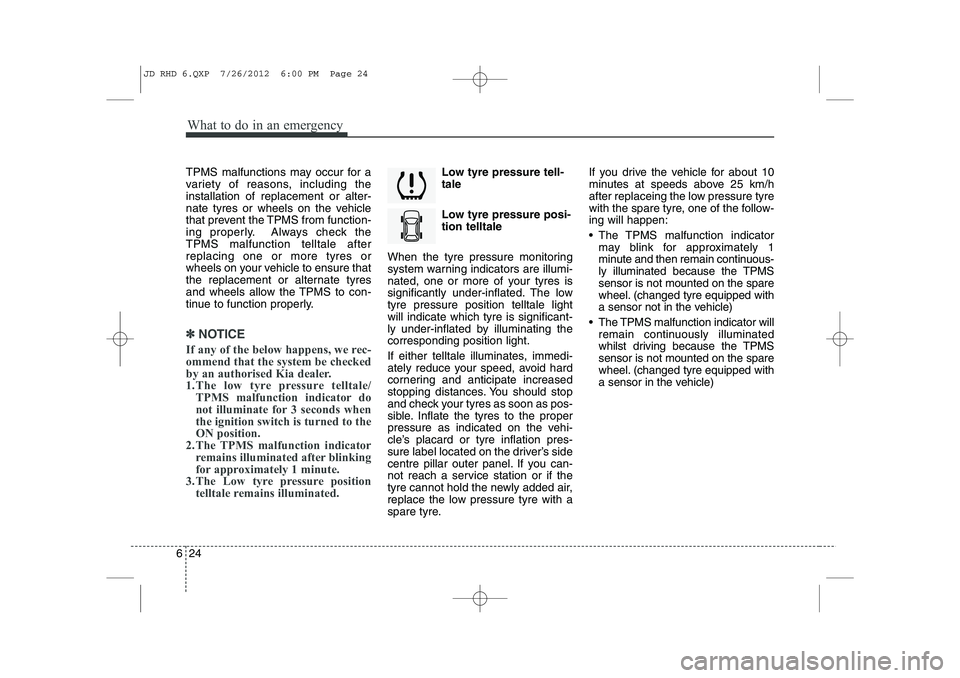
Low tyre pressure tell- tale
Low tyre pressure posi- tion telltale
When the tyre pressure monitoring
system warning indicators are illumi-
nated, one or more of your tyres is
significantly under-inflated. The lowtyre pressure position telltale lightwill indicate which tyre is significant-
ly under-inflated by illuminating thecorresponding position light.
If either telltale illuminates, immedi-
ately reduce your speed, avoid hard
cornering and anticipate increased
stopping distances. You should stop
and check your tyres as soon as pos-
sible. Inflate the tyres to the proper
pressure as indicated on the vehi-
cle’s placard or tyre inflation pres-
sure label located on the driver’s side
centre pillar outer panel. If you can-
not reach a service station or if the
tyre cannot hold the newly added air,
replace the low pressure tyre with a
spare tyre. If you drive the vehicle for about 10
minutes at speeds above 25 km/h
after replaceing the low pressure tyre
with the spare tyre, one of the follow-ing will happen:
The TPMS malfunction indicator
may blink for approximately 1
minute and then remain continuous-
ly illuminated because the TPMSsensor is not mounted on the spare
wheel. (changed tyre equipped with
a sensor not in the vehicle)
The TPMS malfunction indicator will remain continuously illuminated
whilst driving because the TPMSsensor is not mounted on the spare
wheel. (changed tyre equipped with
a sensor in the vehicle)
JD RHD 6.QXP 7/26/2012 6:00 PM Page 24
Page 1031 of 1168
What to do in an emergency
26
6
Changing a tyre with TPMS
If you have a flat tyre, the low Tyre
Pressure and Position telltales will
come on. We recommend that the
system be checked by an authorised
Kia dealer. Each wheel is equipped with a tyre pressure sensor mounted inside the
tyre behind the valve stem. You must
use TPMS specific wheels. It is rec-
ommended that you have your tyres
serviced by an authorised Kia dealer. If you drive the vehicle for about 10
minutes at speeds above 25 km/h
after replaceing the low pressure tyre
with the spare tyre, one of the follow-ing will happen:
The TPMS malfunction indicator
may blink for approximately 1
minute and then remain continuous-
ly illuminated because the TPMSsensor is not mounted on the spare
wheel. (changed tyre equipped with
a sensor not in the vehicle)
The TPMS malfunction indicator will remain continuously illuminated
whilst driving because the TPMSsensor is not mounted on the spare
wheel. (changed tyre equipped with
a sensor in the vehicle)CAUTION
The TPMS malfunction indica-
tor may blink for approximate-ly 1 minute and then remaincontinuously illuminated if thevehicle is moving around elec- tric power supply cables orradios transmitter such as atpolice stations, government and public offices, broadcast-ing stations, military installa-tions, airports, or transmitting towers, etc. This can interferewith normal operation of theTyre Pressure Monitoring System (TPMS).
The TPMS malfunction indica- tor may blink for approximate-ly 1 minute and then remaincontinuously illuminated if snow chains are used or someseparate electronic devicessuch as notebook computer, mobile charger, remote starteror navigation etc., are used inthe vehicle. This can interfere with normal operation of theTyre Pressure MonitoringSystem (TPMS).
CAUTION
We recommend that you use thesealant approved by Kia.
The sealant on the tyre pressuresensor and wheel shall be elem-inated when you replace the tyre with a new one.
JD RHD 6.QXP 7/21/2012 12:57 PM Page 26
Page 1033 of 1168
What to do in an emergency
28
6
TOWING
Towing service
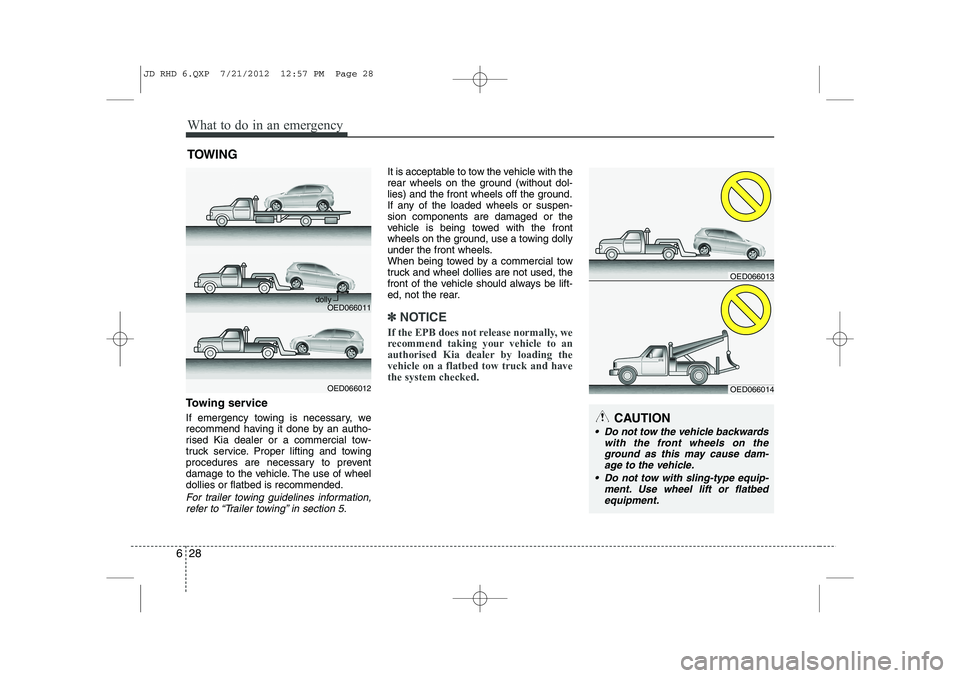
If emergency towing is necessary, we
recommend having it done by an autho-
rised Kia dealer or a commercial tow-
truck service. Proper lifting and towing
procedures are necessary to prevent
damage to the vehicle. The use of wheeldollies or flatbed is recommended.
For trailer towing guidelines information, refer to “Trailer towing” in section 5.
It is acceptable to tow the vehicle with the
rear wheels on the ground (without dol-
lies) and the front wheels off the ground.
If any of the loaded wheels or suspen-sion components are damaged or the
vehicle is being towed with the front
wheels on the ground, use a towing dolly
under the front wheels.
When being towed by a commercial tow
truck and wheel dollies are not used, the
front of the vehicle should always be lift-
ed, not the rear.
✽✽ NOTICE
If the EPB does not release normally, we
recommend taking your vehicle to an
authorised Kia dealer by loading thevehicle on a flatbed tow truck and havethe system checked.
CAUTION
Do not tow the vehicle backwards with the front wheels on the
ground as this may cause dam-age to the vehicle.
Do not tow with sling-type equip- ment. Use wheel lift or flatbedequipment.
OED066011
OED066012
dolly
OED066014
OED066013
JD RHD 6.QXP 7/21/2012 12:57 PM Page 28
Page 1034 of 1168
629
What to do in an emergency
When towing your vehicle in an emer- gency without wheel dollies :
1. Set the ignition switch in the ACC posi-tion.
2. Place the transaxle shift lever in N (Neutral).
3. Release the parking brake.
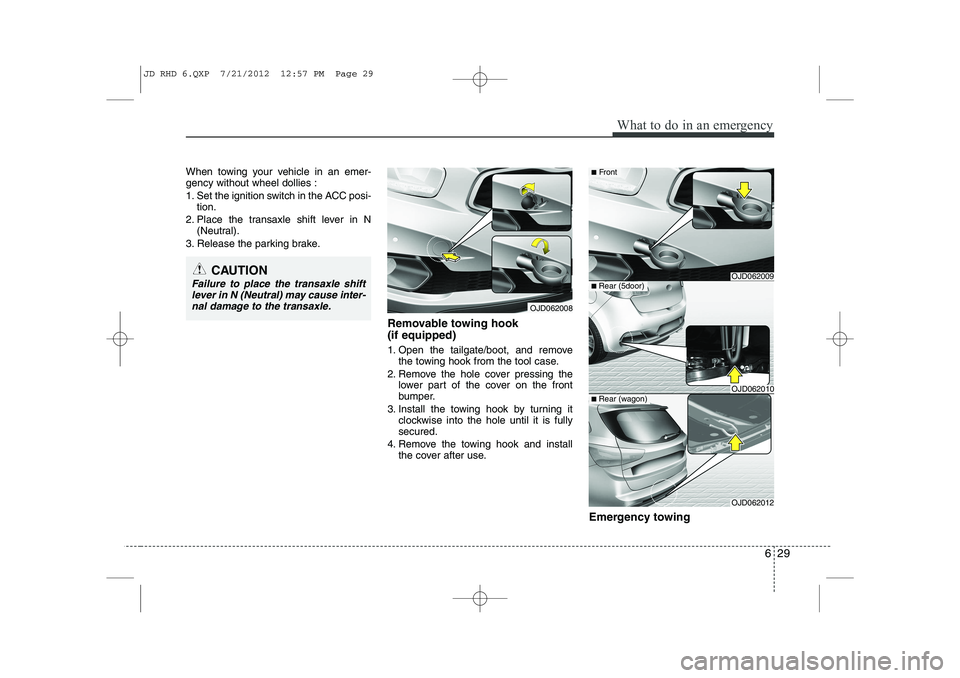
Removable towing hook (if equipped)
1. Open the tailgate/boot, and removethe towing hook from the tool case.
2. Remove the hole cover pressing the lower part of the cover on the front
bumper.
3. Install the towing hook by turning it clockwise into the hole until it is fullysecured.
4. Remove the towing hook and install the cover after use.
Emergency towing
CAUTION
Failure to place the transaxle shiftlever in N (Neutral) may cause inter-
nal damage to the transaxle.
OJD062008
■ Rear (5door)
OJD062012
■Rear (wagon)
■ Front
OJD062009
OJD062010
JD RHD 6.QXP 7/21/2012 12:57 PM Page 29
Page 1035 of 1168
What to do in an emergency
30
6
If towing is necessary, we recommend
you to have it done by an authorised
Kia dealer or a commercial tow truck
service.
If towing service is not available in an
emergency, your vehicle may be tem-
porarily towed using a cable or chain
secured to the emergency towing hook
under the front (or rear) of the vehicle.
Use extreme caution when towing the
vehicle. A driver must be in the vehicle to
steer it and operate the brakes.
Towing in this manner may be done only
on hard-surfaced roads for a short dis-
tance and at low speed. Also, the wheels,
axles, power train, steering and brakes
must all be in good condition.
Do not use the towing hooks to pull a
vehicle out of mud, sand or other con-
ditions from which the vehicle cannot
be driven out under its own power.
Avoid towing a vehicle heavier than the vehicle doing the towing.
The drivers of both vehicles should com- municate with each other frequently. Before emergency towing, check that
the hook is not broken or damaged.
Fasten the towing cable or chain securely to the hook.
Do not jerk the hook. Apply steady and even force.
To avoid damaging the hook, do not pull from the side or at a vertical angle.
Always pull straight ahead.CAUTION
Attach a towing strap to the tow
hook.
Using a portion of the vehicle other than the tow hooks for tow-ing may damage the body of yourvehicle.
Use only a cable or chain specifi- cally intended for use in towingvehicles. Securely fasten thecable or chain to the towing hookprovided.WARNING
Use extreme caution when towing
the vehicle.
Avoid sudden starts or erratic driving maneuvers which would
place excessive stress on the
emergency towing hook and tow-
ing cable or chain. The hook and
towing cable or chain may break
and cause serious injury or dam-
age.
If the disabled vehicle is unable to be moved, do not forcibly con-
tinue the towing. We recommend
that you contact an authorised
Kia dealer or a commercial tow
truck service for assistance.
Tow the vehicle as straight ahead as possible.
Keep away from the vehicle dur- ing towing.
JD RHD 6.QXP 7/21/2012 12:57 PM Page 30
Page 1036 of 1168
631
What to do in an emergency
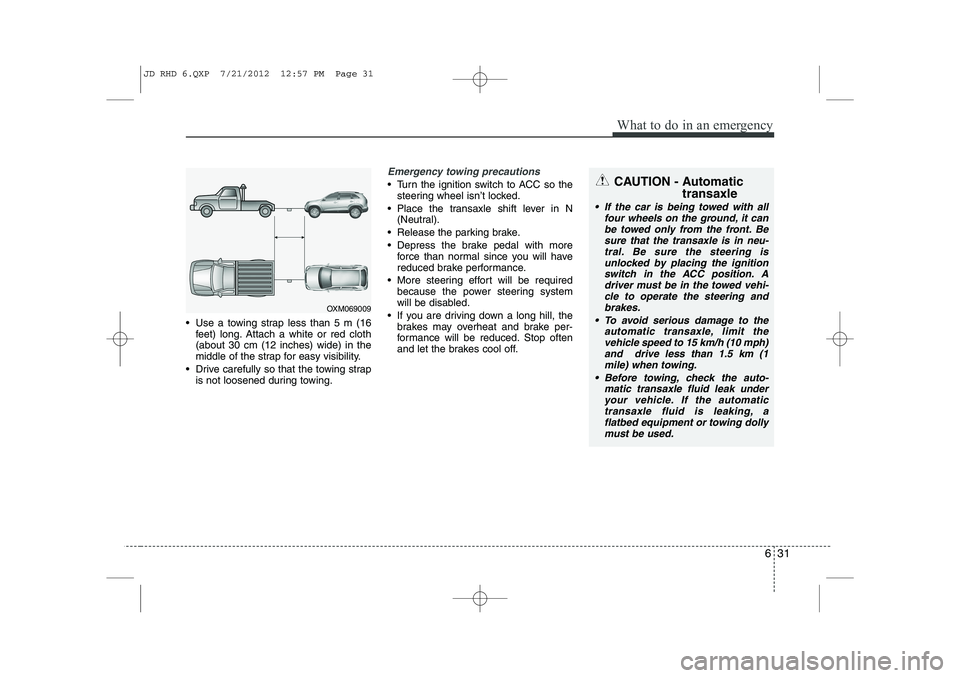
Use a towing strap less than 5 m (16feet) long. Attach a white or red cloth (about 30 cm (12 inches) wide) in the
middle of the strap for easy visibility.
Drive carefully so that the towing strap is not loosened during towing.
Emergency towing precautions
Turn the ignition switch to ACC so thesteering wheel isn’t locked.
Place the transaxle shift lever in N (Neutral).
Release the parking brake.
Depress the brake pedal with more force than normal since you will have
reduced brake performance.
More steering effort will be required because the power steering system
will be disabled.
If you are driving down a long hill, the brakes may overheat and brake per-
formance will be reduced. Stop often
and let the brakes cool off.
OXM069009
CAUTION - Automatic
transaxle
If the car is being towed with allfour wheels on the ground, it can
be towed only from the front. Be sure that the transaxle is in neu-tral. Be sure the steering isunlocked by placing the ignition
switch in the ACC position. Adriver must be in the towed vehi- cle to operate the steering and
brakes.
To avoid serious damage to the automatic transaxle, limit thevehicle speed to 15 km/h (10 mph) and drive less than 1.5 km (1
mile) when towing.
Before towing, check the auto- matic transaxle fluid leak underyour vehicle. If the automatic
transaxle fluid is leaking, a flatbed equipment or towing dollymust be used.
JD RHD 6.QXP 7/21/2012 12:57 PM Page 31