2013 HYUNDAI TUCSON ECU
[x] Cancel search: ECUPage 65 of 397
Safety features of your vehicle
48
3
(Continued)
Accident statistics show that chil-
dren are safer if they are
restrained in the rear, as opposed
to the front seat. It is recommend-
ed that child restraints be secured
in a rear seat, including an infant
riding in a rear-facing infant seat,
a child riding in a forward-facing
child seat and an older child rid- ing in a booster seat.
Air bags can only be used once – have an authorized HYUNDAI
dealer replace the air bag imme-
diately after deployment.
The occupant classification sys- tem may not work properly if
water, coffee or any other liquid
including rain gets on the seat.
Keep the front seat dry at all times.
Do not place an electronic device such as a laptop computer on the
front passenger seat. Its elec-
tronic field may cause the OCS to
switch to the "on" condition and
thus allow the passenger air bag
to deploy needlessly in a colli-
sion, increasing your repaircosts.(Continued)
If the front passenger seat isoccupied by a child who is not in
a CRS, the "PASSENGER AIR
BAG OFF" indicator may or may
not be on and the passenger air
bag may or may not deploy in a
collision. Have the child move to a
rear seat to increase their safety.
Do not modify or replace the front passenger seat. Don't place any-
thing on or attach anything such
as a blanket or seat heater to the
front passenger seat. This can
adversely affect the occupant
classification system.
Do not place sharp objects on the front passenger seat. These may
damage the occupant classifica-
tion system, if they puncture the seat cushion.
Do not use accessory seat cov- ers on the front seats.
(Continued)WARNING
Even though your vehicle is equipped with the occupant clas-
sification system, never install a
child restraint system in the front
passenger's seat. A deploying air
bag can forcefully strike a childresulting in serious injuries or
death. Any child age 12 and under should ride in the rear seat.
Children too large for child
restraints should use the avail-
able lap/shoulder belts. No mat-
ter what type of crash, children of
all ages are safer when restrainedin the rear seat.
If the "PASSENGER AIR BAG OFF" indicator is illuminated
when the front passenger's seat
is occupied by an adult and
he/she sits properly (sitting
upright with the seatback in an
upright position, centered on the seat cushion with their seat belt
on, legs comfortably extended
and their feet on the floor), have
that person sit in the rear seat.
(Continued)
Page 72 of 397
355
Safety features of your vehicle
Curtain air bag
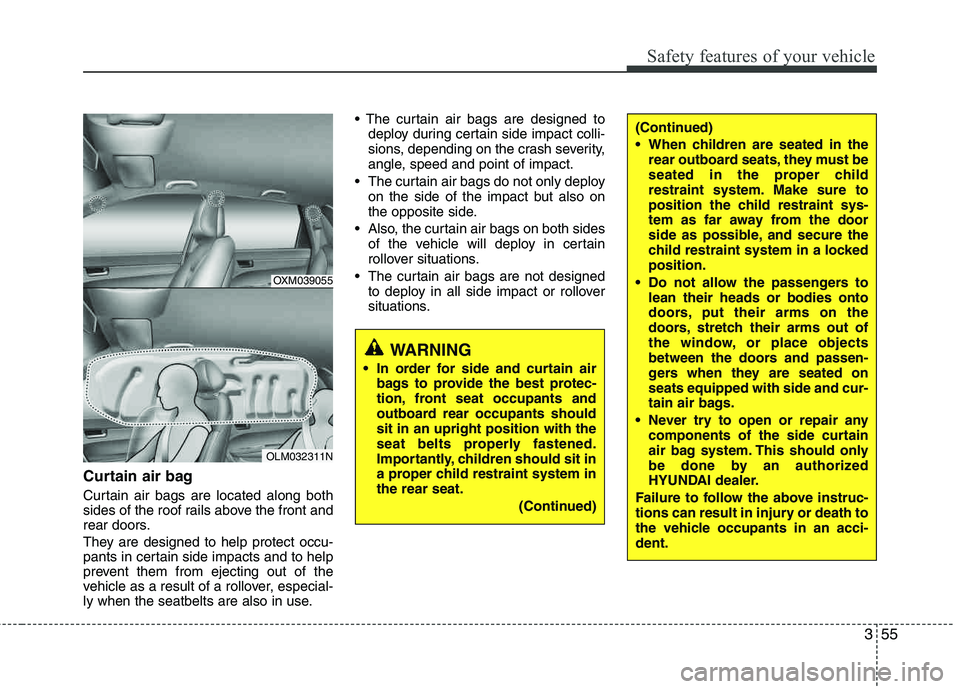
Curtain air bags are located along both
sides of the roof rails above the front and
rear doors.
They are designed to help protect occu-
pants in certain side impacts and to help
prevent them from ejecting out of the
vehicle as a result of a rollover, especial-
ly when the seatbelts are also in use.
deploy during certain side impact colli-
sions, depending on the crash severity,
angle, speed and point of impact.
The curtain air bags do not only deploy on the side of the impact but also on
the opposite side.
Also, the curtain air bags on both sides of the vehicle will deploy in certain
rollover situations.
The curtain air bags are not designed to deploy in all side impact or rollover
situations.
WARNING
In order for side and curtain air bags to provide the best protec-
tion, front seat occupants and
outboard rear occupants shouldsit in an upright position with the
seat belts properly fastened.
Importantly, children should sit in
a proper child restraint system inthe rear seat.
(Continued)
(Continued)
When children are seated in therear outboard seats, they must be
seated in the proper child
restraint system. Make sure to
position the child restraint sys-
tem as far away from the door
side as possible, and secure the
child restraint system in a locked position.
Do not allow the passengers to lean their heads or bodies onto
doors, put their arms on the
doors, stretch their arms out of
the window, or place objects
between the doors and passen-
gers when they are seated on seats equipped with side and cur-
tain air bags.
Never try to open or repair any components of the side curtain
air bag system. This should only
be done by an authorized
HYUNDAI dealer.
Failure to follow the above instruc-
tions can result in injury or death to
the vehicle occupants in an acci- dent.
OXM039055
OLM032311N
Page 95 of 397
415
Features of your vehicle
Operating door locks from out-
side the vehicle
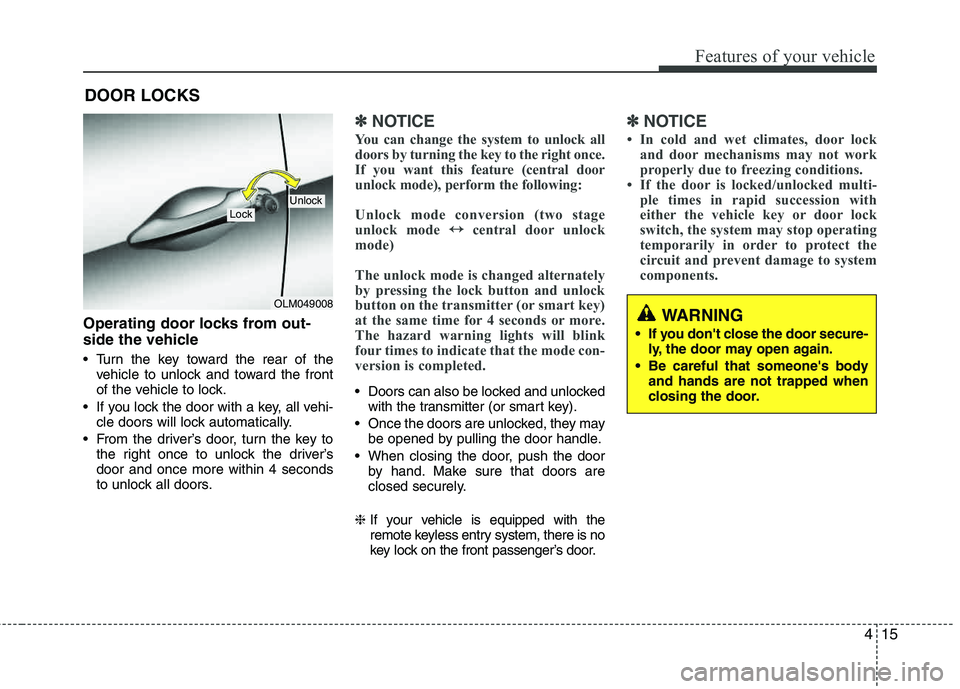
Turn the key toward the rear of thevehicle to unlock and toward the front
of the vehicle to lock.
If you lock the door with a key, all vehi- cle doors will lock automatically.
From the driver’s door, turn the key to the right once to unlock the driver’sdoor and once more within 4 seconds
to unlock all doors.
✽✽ NOTICE
You can change the system to unlock all
doors by turning the key to the right once.
If you want this feature (central door
unlock mode), perform the following:
Unlock mode conversion (two stage
unlock mode ↔
↔
central door unlock
mode)
The unlock mode is changed alternately
by pressing the lock button and unlock
button on the transmitter (or smart key)
at the same time for 4 seconds or more.
The hazard warning lights will blink
four times to indicate that the mode con-
version is completed.
Doors can also be locked and unlocked with the transmitter (or smart key).
Once the doors are unlocked, they may be opened by pulling the door handle.
When closing the door, push the door by hand. Make sure that doors are
closed securely.
❈ If your vehicle is equipped with the
remote keyless entry system, there is no
key lock on the front passenger’s door.
✽✽
NOTICE
In cold and wet climates, door lock and door mechanisms may not work
properly due to freezing conditions.
If the door is locked/unlocked multi- ple times in rapid succession with
either the vehicle key or door lock
switch, the system may stop operating
temporarily in order to protect the
circuit and prevent damage to system
components.
DOOR LOCKS
OLM049008
LockUnlock
WARNING
If you don't close the door secure- ly, the door may open again.
Be careful that someone's body and hands are not trapped when
closing the door.
Page 99 of 397
419
Features of your vehicle
Opening the tailgate
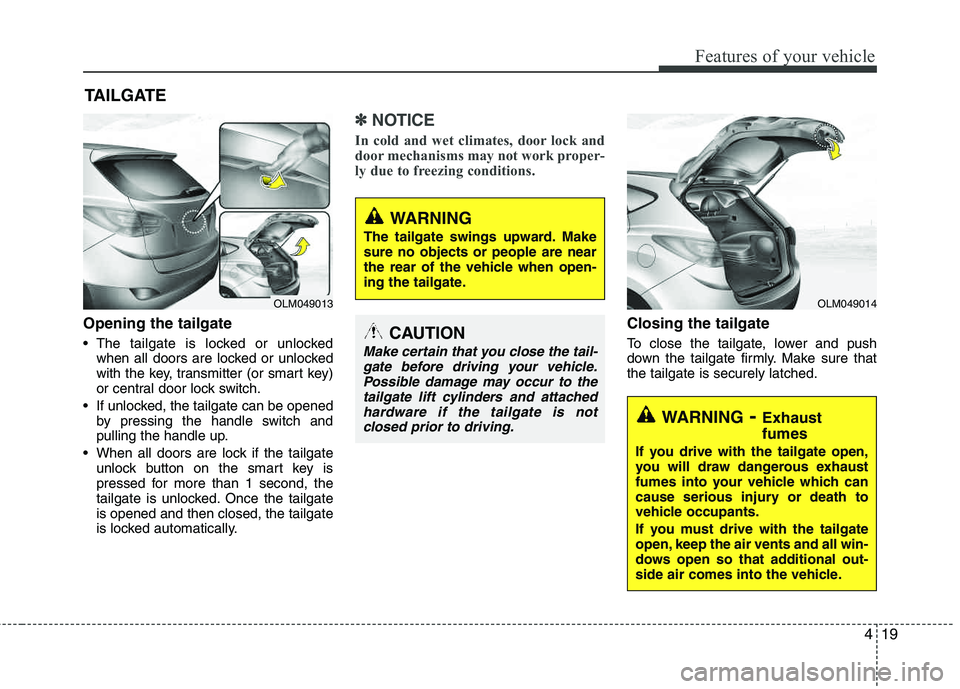
The tailgate is locked or unlockedwhen all doors are locked or unlocked
with the key, transmitter (or smart key)
or central door lock switch.
If unlocked, the tailgate can be opened by pressing the handle switch and
pulling the handle up.
When all doors are lock if the tailgate unlock button on the smart key is
pressed for more than 1 second, the
tailgate is unlocked. Once the tailgate is opened and then closed, the tailgate
is locked automatically.
✽✽ NOTICE
In cold and wet climates, door lock and
door mechanisms may not work proper-
ly due to freezing conditions.
Closing the tailgate
To close the tailgate, lower and push
down the tailgate firmly. Make sure thatthe tailgate is securely latched.
TAILGATE
OLM049013OLM049014
WARNING
The tailgate swings upward. Make sure no objects or people are near
the rear of the vehicle when open-
ing the tailgate.
CAUTION
Make certain that you close the tail- gate before driving your vehicle.Possible damage may occur to thetailgate lift cylinders and attached
hardware if the tailgate is notclosed prior to driving.
WARNING- Exhaust fumes
If you drive with the tailgate open,
you will draw dangerous exhaust
fumes into your vehicle which can
cause serious injury or death to
vehicle occupants.
If you must drive with the tailgate
open, keep the air vents and all win-
dows open so that additional out-
side air comes into the vehicle.
Page 107 of 397

427
Features of your vehicle
Opening the fuel filler door
The fuel filler door must be opened from
inside the vehicle by pulling up the fuel
filler door opener lever.
✽✽NOTICE
If the fuel filler door does not open
because ice has formed around it, tap
lightly or push on the door to break the
ice and release the door. Do not pry on
the door. If necessary, spray around the
door with an approved de-icer fluid (do
not use radiator anti-freeze) or move the
vehicle to a warm place and allow the ice
to melt.
1. Stop the engine.
2. To open the fuel filler door, pull the fuel filler door opener up.
3. Pull the fuel filler door (1) out to fully open.
4. To remove the cap, turn the fuel filler cap (2) counterclockwise.
5. Refuel as needed.
Closing the fuel filler door
1. To install the cap, turn it clockwise until it “clicks” one time. This indicates that the cap is securely tightened.
2. Close the fuel filler door and push it lightly making sure that it is securely closed.
FUEL FILLER DOOR
OSA047022OLM042028N
WARNING - Refueling
If pressurized fuel sprays out, it
can cover your clothes or skin
and thus subject you to the risk
of fire and burns. Always remove
the fuel cap carefully and slowly.
If the cap is venting fuel or if you
hear a hissing sound, wait until
the condition stops before com-
pletely removing the cap.
Do not "top off" after the nozzle automatically shuts off whenrefueling.
Tighten the cap until it clicks one time, otherwise the Check Engine light will illuminate.
Always check that the fuel cap is installed securely to prevent fuel
spillage in the event of an acci- dent.
Page 108 of 397

Features of your vehicle
28
4
(Continued)
Use only approved portable plas-
tic fuel containers designed to
carry and store gasoline.
Do not use cellular phones while refueling. Electric current and/or
electronic interference from cel-
lular phones can potentially
ignite fuel vapors causing a fire.
When refueling, always shut the engine off. Sparks produced byelectrical components related to
the engine can ignite fuel vapors
causing a fire. Once refueling is
complete, check to make sure thefiller cap and filler door are
securely closed, before starting
the engine.
DO NOT use matches or a lighter and DO NOT SMOKE or leave a lit
cigarette in your vehicle while at
a gas station especially during
refueling. Automotive fuel is
highly flammable and can, when
ignited, result in fire.
(Continued)(Continued)
Do not get back into a vehicleonce you have begun refueling
since you can generate static
electricity by touching, rubbing
or sliding against any item or fab-
ric (polyester, satin, nylon, etc.)
capable of producing static elec-
tricity. Static electricity discharge
can ignite fuel vapors resulting in
rapid burning. If you must re-
enter the vehicle, you should
once again eliminate potentially
dangerous static electricity dis-
charge by touching a metal part
of the vehicle, away from the fuel
filler neck, nozzle or other gaso-
line source.
When using an approved portable fuel container, be sure toplace the container on the
ground prior to refueling. Static
electricity discharge from the
container can ignite fuel vapors
causing a fire. Once refueling has
begun, contact with the vehicleshould be maintained until the
filling is complete.
(Continued)WARNING - Refueling dan-
gers
Automotive fuels are flammable
materials. When refueling, please
note the following guidelines care-
fully. Failure to follow these guide-
lines may result in severe personal
injury, severe burns or death by fire
or explosion.
Read and follow all warningsposted at the gas station facility.
Before refueling, note the loca- tion of the Emergency Gasoline
Shut-Off, if available, at the gas
station facility.
Before touching the fuel nozzle, you should eliminate potentially
dangerous static electricity dis-
charge by touching another metal
part of the vehicle, a safe dis-
tance away from the fuel filler
neck, nozzle, or other gas source.
(Continued)
Page 109 of 397
429
Features of your vehicle
(Continued)
If a fire breaks out during refuel-ing, leave the vicinity of the vehi-
cle, and immediately contact the
manager of the gas station and
then contact the local fire depart-
ment or 911. Follow any safety
instructions they provide.CAUTION
Make sure to refuel your vehicle
according to the "Fuel require-ments" suggested in section 1.
If the fuel filler cap requires replacement, use only a genuineHYUNDAI cap or the equivalentspecified for your vehicle. An
incorrect fuel filler cap can result in a serious malfunction of thefuel system or emission control
system.
Do not spill fuel on the exterior surfaces of the vehicle. Any typeof fuel spilled on painted surfaces
may damage the paint.
After refueling, make sure the fuel cap is installed securely to pre-
vent fuel spillage in the event ofan accident.
Page 110 of 397
Features of your vehicle
30
4
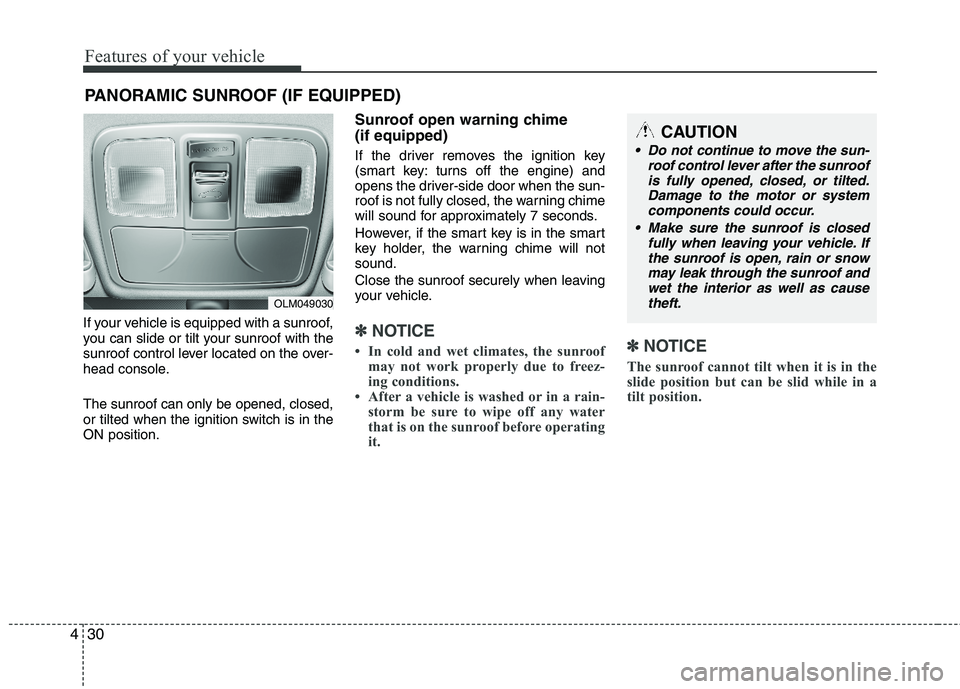
If your vehicle is equipped with a sunroof,
you can slide or tilt your sunroof with the
sunroof control lever located on the over-
head console. The sunroof can only be opened, closed,
or tilted when the ignition switch is in the ON position.
Sunroof open warning chime (if equipped)
If the driver removes the ignition key
(smart key: turns off the engine) and
opens the driver-side door when the sun-
roof is not fully closed, the warning chime
will sound for approximately 7 seconds.
However, if the smart key is in the smart
key holder, the warning chime will not sound.
Close the sunroof securely when leaving
your vehicle.
✽✽
NOTICE
In cold and wet climates, the sunroof may not work properly due to freez-
ing conditions.
After a vehicle is washed or in a rain- storm be sure to wipe off any water
that is on the sunroof before operating
it. ✽✽
NOTICE
The sunroof cannot tilt when it is in the
slide position but can be slid while in a
tilt position.
PANORAMIC SUNROOF (IF EQUIPPED)
OLM049030
CAUTION
Do not continue to move the sun- roof control lever after the sunroofis fully opened, closed, or tilted.
Damage to the motor or systemcomponents could occur.
Make sure the sunroof is closed fully when leaving your vehicle. If
the sunroof is open, rain or snowmay leak through the sunroof and wet the interior as well as cause
theft.