Page 194 of 433
193
Features
This chapter describes how to operate technology features.
Audio System
About Your Audio System ................ 194
USB Adapter Cable .......................... 195
Auxiliary Input Jack .......................... 195
Audio System Theft Protection ......... 196
Audio System Basic Operation........ 197
Audio Remote Controls .................... 198
Adjusting the Sound ........................ 199
Playing the AM/FM Radio ................. 200
Playing the XM® Radio
*................... 204
Playing a CD .................................... 207
Playing CD Library ............................ 211
Playing an iPod®............................... 217Playing a USB Flash Drive ................. 221
Playing Bluetooth® Audio................. 225
Audio Error Messages
CD Player ......................................... 230
iPod®/USB Flash Drive....................... 231
General Information on the Audio
System
XM® Radio Service
*......................... 232
Recommended CDs ......................... 233
Compatible iPod
® and USB Flash Drives ... 235
Rear Entertainment System
*........... 236
HomeLink® Universal Transceiver
*.. 252Bluetooth® HandsFreeLink®
Using HFL ........................................ 254
HFL Menus ...................................... 256
Compass
*.......................................... 277
* Not available on all models
Page 195 of 433
194Features
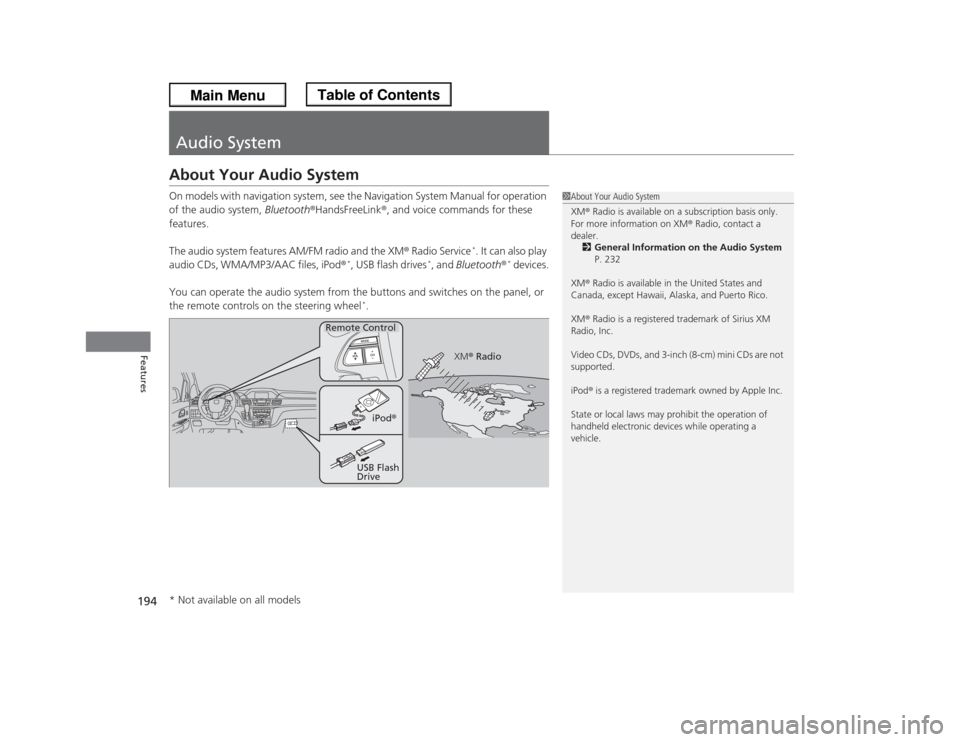
Audio SystemAbout Your Audio SystemOn models with navigation system, see the Navigation System Manual for operation
of the audio system, Bluetooth®HandsFreeLink®, and voice commands for these
features.
The audio system features AM/FM radio and the XM® Radio Service
*. It can also play
audio CDs, WMA/MP3/AAC files, iPod®
*, USB flash drives
*, and Bluetooth®
* devices.
You can operate the audio system from the buttons and switches on the panel, or
the remote controls on the steering wheel
*.
1About Your Audio System
XM® Radio is available on a subscription basis only.
For more information on XM® Radio, contact a
dealer.
2General Information on the Audio System
P. 232
XM® Radio is available in the United States and
Canada, except Hawaii, Alaska, and Puerto Rico.
XM® Radio is a registered trademark of Sirius XM
Radio, Inc.
Video CDs, DVDs, and 3-inch (8-cm) mini CDs are not
supported.
iPod® is a registered trademark owned by Apple Inc.
State or local laws may prohibit the operation of
handheld electronic devices while operating a
vehicle.
Remote Control
iPod®
USB Flash
DriveXM® Radio
* Not available on all models
Page 199 of 433
198
uuAudio System Basic OperationuAudio Remote Controls
Features
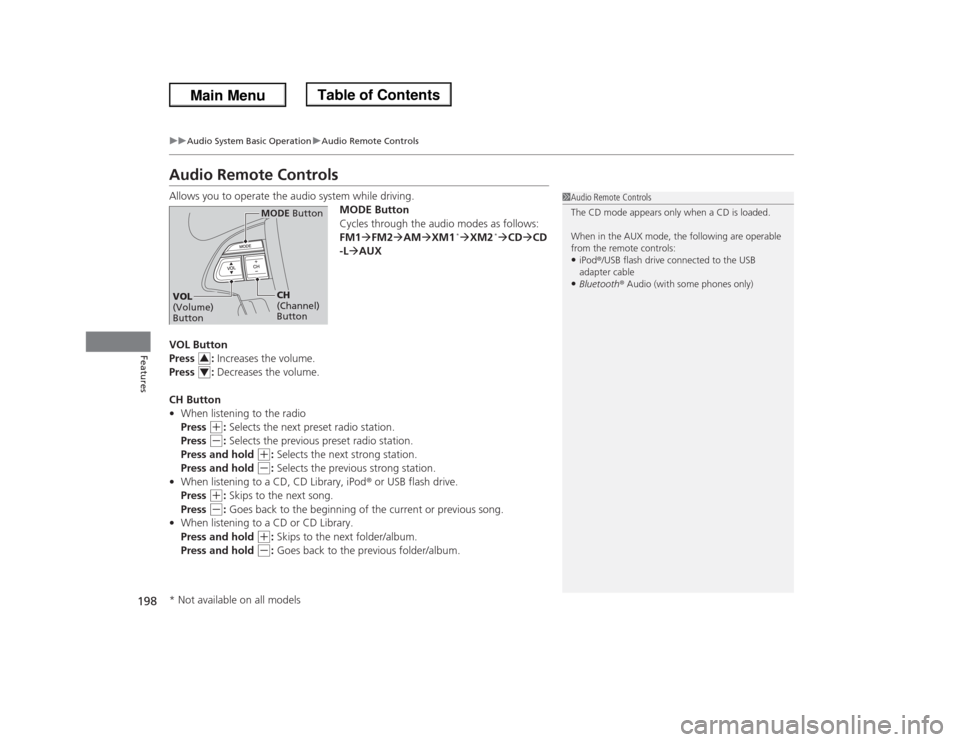
Audio Remote ControlsAllows you to operate the audio system while driving.
MODE Button
Cycles through the audio modes as follows:
FM1�FM2�AM�XM1
*�XM2
*�CD�CD
-L�AUX
VOL Button
Press : Increases the volume.
Press : Decreases the volume.
CH Button
•When listening to the radio
Press
(+
: Selects the next preset radio station.
Press
(-
: Selects the previous preset radio station.
Press and hold
(+
: Selects the next strong station.
Press and hold
(-
: Selects the previous strong station.
•When listening to a CD, CD Library, iPod® or USB flash drive.
Press
(+
: Skips to the next song.
Press
(-
: Goes back to the beginning of the current or previous song.
•When listening to a CD or CD Library.
Press and hold
(+
: Skips to the next folder/album.
Press and hold
(-
: Goes back to the previous folder/album.
1Audio Remote Controls
The CD mode appears only when a CD is loaded.
When in the AUX mode, the following are operable
from the remote controls:•iPod®/USB flash drive connected to the USB
adapter cable•Bluetooth® Audio (with some phones only)
MODE Button
CH
(Channel)
Button
VOL
(Volume)
Button
34
* Not available on all models
Page 203 of 433
uuAudio System Basic OperationuPlaying the AM/FM Radio
202Features
Use the auto select feature to scan both bands and store the strongest station in
each preset.
1.Press the SETUP button.
2.Rotate to select Auto Select, then press
.
3.Select PUSH TO START or ON, then press
.
To turn off auto select, press again. This
restores the presets you originally set.■
Auto Select
1Playing the AM/FM Radio
The ST indicator appears on the display indicating
stereo FM broadcasts.
Stereo reproduction in AM is not available.
Switching the Audio Mode
Press the MODE button on the steering wheel.
2Audio Remote Controls P. 198
You can store six AM stations and twelve FM stations
into the preset button memory. FM1 and FM2 let you
store six stations each.
Auto Select function scans and stores up to six AM
stations and twelve FM stations with a strong signal
into the preset button memory.
If you do not like the stations auto select has stored,
you can manually store your preferred frequencies.
Page 204 of 433
203
uuAudio System Basic OperationuPlaying the AM/FM Radio
Features
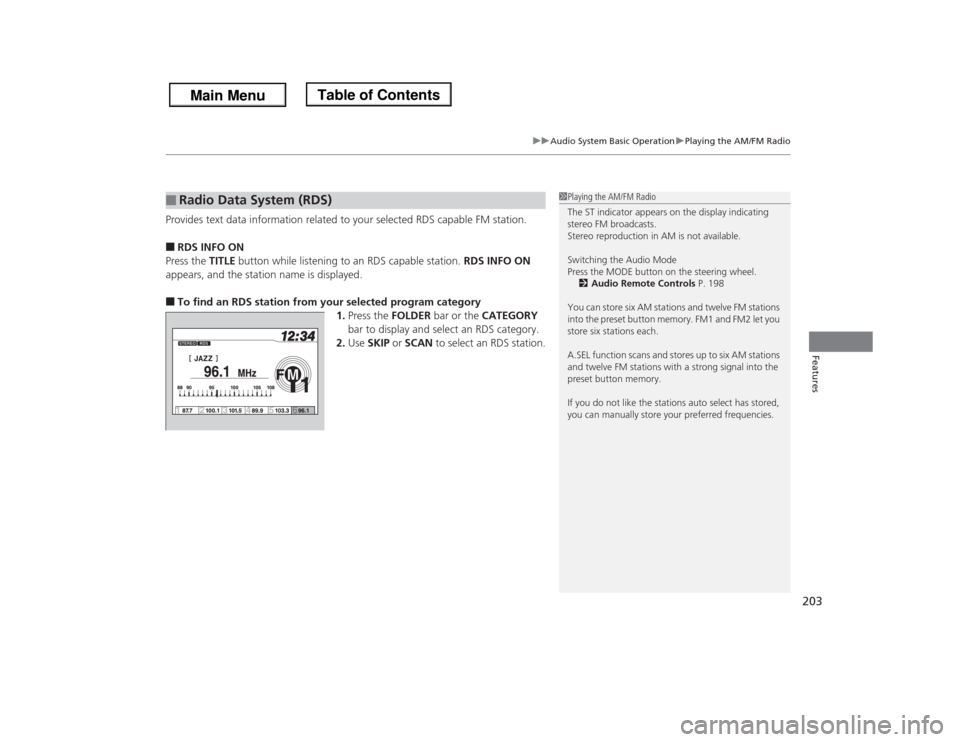
Provides text data information related to your selected RDS capable FM station.■RDS INFO ON
Press the TITLE button while listening to an RDS capable station. RDS INFO ON
appears, and the station name is displayed.■To find an RDS station from your selected program category
1.Press the FOLDER bar or the CATEGORY
bar to display and select an RDS category.
2.Use SKIP or SCAN to select an RDS station.■
Radio Data System (RDS)
1Playing the AM/FM Radio
The ST indicator appears on the display indicating
stereo FM broadcasts.
Stereo reproduction in AM is not available.
Switching the Audio Mode
Press the MODE button on the steering wheel.
2Audio Remote Controls P. 198
You can store six AM stations and twelve FM stations
into the preset button memory. FM1 and FM2 let you
store six stations each.
A.SEL function scans and stores up to six AM stations
and twelve FM stations with a strong signal into the
preset button memory.
If you do not like the stations auto select has stored,
you can manually store your preferred frequencies.
Page 238 of 433
Continued
237
uuRear Entertainment System
*uOperating the System
Features
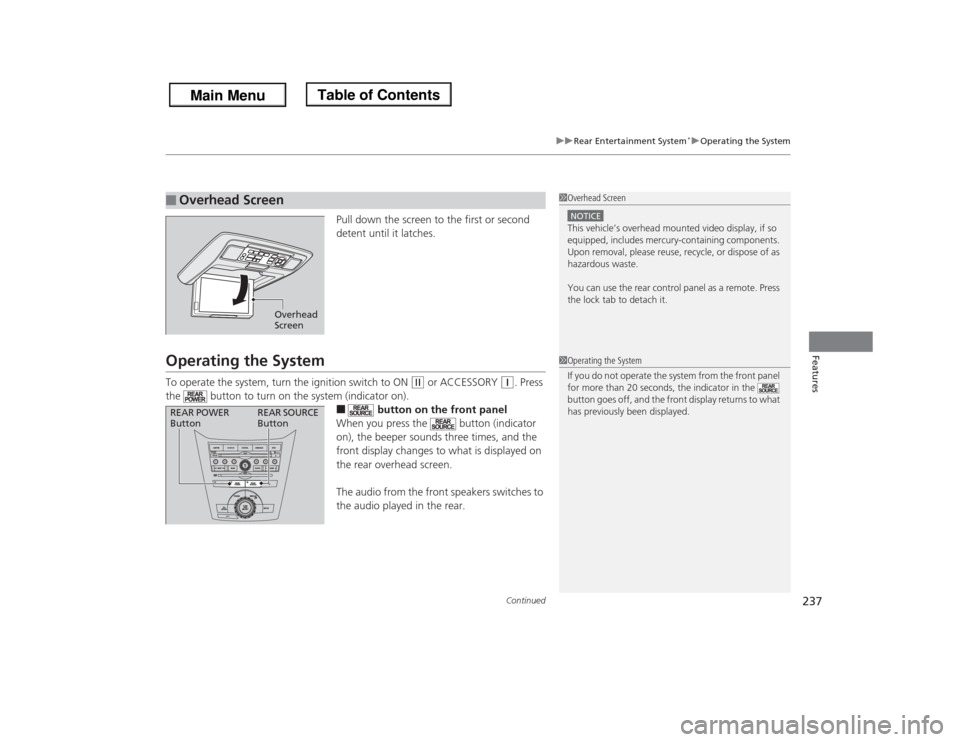
Pull down the screen to the first or second
detent until it latches.
Operating the SystemTo operate the system, turn the ignition switch to ON
(w
or ACCESSORY
(q
. Press
the button to turn on the system (indicator on).
■
button on the front panel
When you press the button (indicator
on), the beeper sounds three times, and the
front display changes to what is displayed on
the rear overhead screen.
The audio from the front speakers switches to
the audio played in the rear.
■
Overhead Screen
1Overhead ScreenNOTICEThis vehicle’s overhead mounted video display, if so
equipped, includes mercury-containing components.
Upon removal, please reuse, recycle, or dispose of as
hazardous waste.
You can use the rear control panel as a remote. Press
the lock tab to detach it.
Overhead
Screen
1Operating the System
If you do not operate the system from the front panel
for more than 20 seconds, the indicator in the
button goes off, and the front display returns to what
has previously been displayed.
REAR POWER
ButtonREAR SOURCE
Button
Page 247 of 433
246
uuRear Entertainment System
*uOperating the System
Features
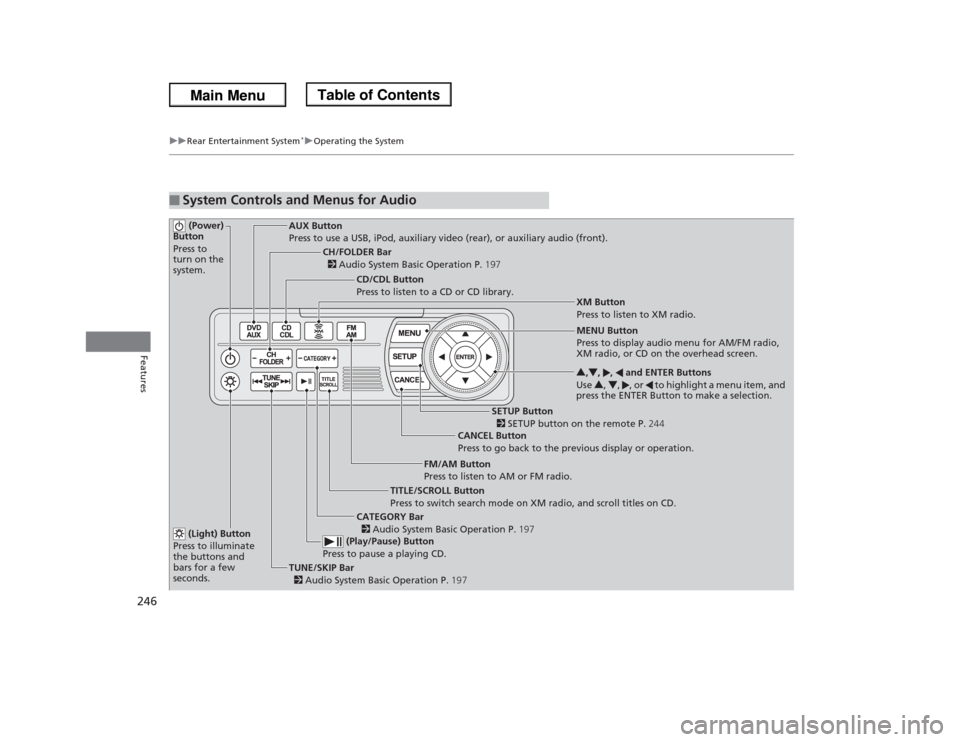
■
System Controls and Menus for Audio (Power)
Button
Press to
turn on the
system.
AUX Button
Press to use a USB, iPod, auxiliary video (rear), or auxiliary audio (front).
(Light) Button
Press to illuminate
the buttons and
bars for a few
seconds.TUNE/SKIP Bar
2 Audio System Basic Operation P.197 (Play/Pause) Button
Press to pause a playing CD.
TITLE/SCROLL Button
Press to switch search mode on XM radio, and scroll titles on CD.CANCEL Button
Press to go back to the previous display or operation.3,4, , and ENTER Buttons
Use 3, 4, , or to highlight a menu item, and
press the ENTER Button to make a selection.
CATEGORY Bar
2 Audio System Basic Operation P.197
CH/FOLDER Bar
2 Audio System Basic Operation P.197
CD/CDL Button
Press to listen to a CD or CD library.
FM/AM Button
Press to listen to AM or FM radio.
SETUP Button
2 SETUP button on the remote P.244 XM Button
Press to listen to XM radio.
MENU Button
Press to display audio menu for AM/FM radio,
XM radio, or CD on the overhead screen.
Page 253 of 433
252Features
HomeLink® Universal Transceiver
*
The HomeLink® Universal Transceiver can be programmed to operate up to three
remote controlled devices around your home, such as garage doors, lighting, or
home security systems.
Refer to the safety information that comes with your garage door opener to test that
the safety features are functioning properly. If you do not have the safety
information, contact the manufacturer.
Before programming HomeLink, make sure that people and objects are out of the
way of the garage or gate to prevent potential injury or damage.
When programming a garage door opener, park just outside the garage door’s
path.Training HomeLink
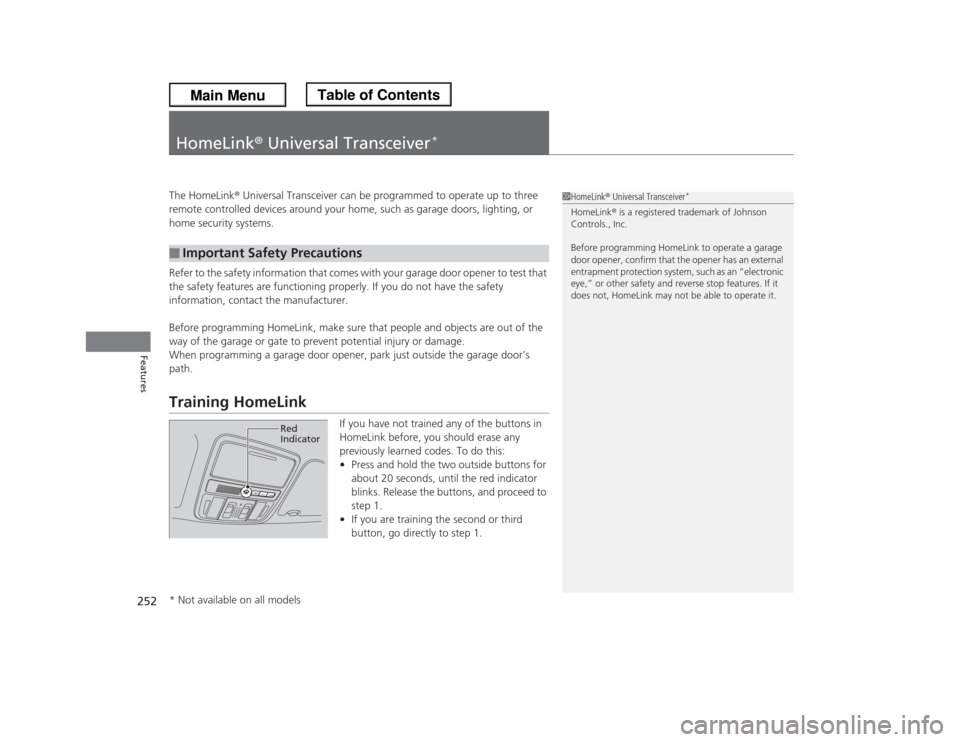
If you have not trained any of the buttons in
HomeLink before, you should erase any
previously learned codes. To do this:
•Press and hold the two outside buttons for
about 20 seconds, until the red indicator
blinks. Release the buttons, and proceed to
step 1.
•If you are training the second or third
button, go directly to step 1.
■
Important Safety Precautions
1HomeLink® Universal Transceiver
*
HomeLink® is a registered trademark of Johnson
Controls., Inc.
Before programming HomeLink to operate a garage
door opener, confirm that the opener has an external
entrapment protection system, such as an “electronic
eye,” or other safety and reverse stop features. If it
does not, HomeLink may not be able to operate it.
Red
Indicator
* Not available on all models