Page 60 of 267

58System Setup
Clock AdjustmentHINFO button
Clock/Wallpaper
Clock Adjustment
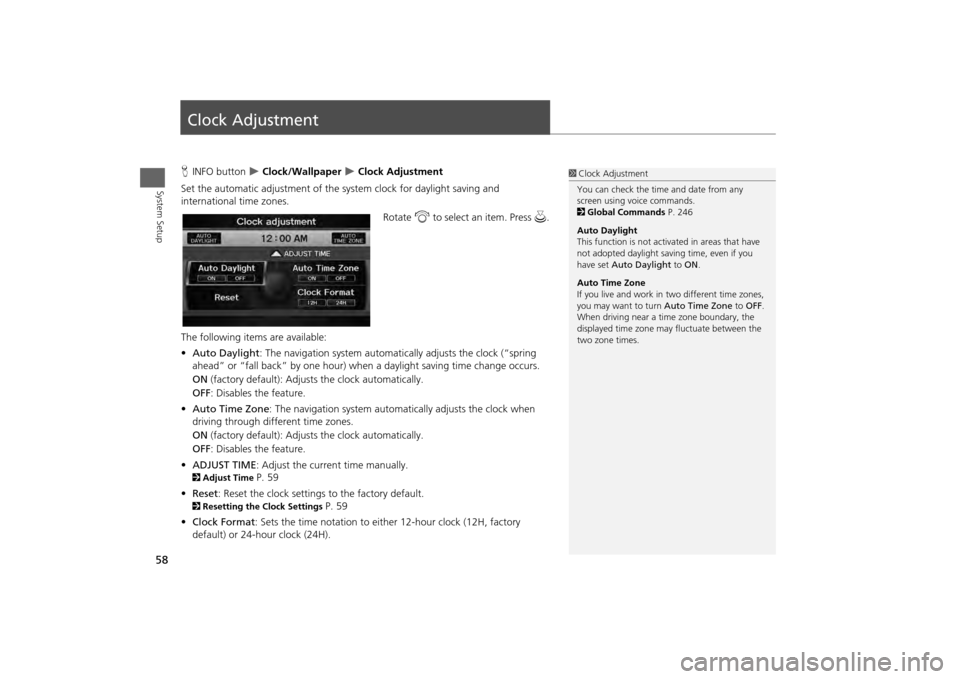
Set the automatic adjustment of the system clock for daylight saving and
international time zones.
Rotate i to select an item. Press u .
The following item s are available:
• Auto Daylight : The navigation system automati cally adjusts the clock (“spring
ahead” or “fall back” by one hour) when a daylight saving time change occurs.
ON (factory default): Adjust s the clock automatically.
OFF : Disables the feature.
• Auto Time Zone : The navigation system automati cally adjusts the clock when
driving through different time zones.
ON (factory default): Adjust s the clock automatically.
OFF : Disables the feature.
• ADJUST TIME : Adjust the current time manually.
2Adjust Time
P. 59
• Reset : Reset the clock settings to the factory default.
2Resetting the Clock Settings
P. 59
• Clock Format : Sets the time notation to either 12-hour clock (12H, factory
default) or 24-hour clock (24H).
1 Clock Adjustment
You can check the time and date from any
screen using voice commands.
2 Global Commands P. 246
Auto Daylight
This function is not activated in areas that have
not adopted daylight saving time, even if you
have set Auto Daylight to ON .
Auto Time Zone
If you live and work in two different time zones,
you may want to turn Auto Time Zone to OFF.
When driving near a time zone boundary, the
displayed time zone ma y fluctuate between the
two zone times.
Page 61 of 267
59
Clock Adjustment
Adjust Time
System Setup
Adjust TimeHINFO button
Clock/Wallpaper
Clock Adjustment
Adjust Time
Adjust the current time (hours and minutes).
1.Move w or y to select HOUR or
MINUTE .
2. Rotate i to adjust the value.
3. Move r to select OK.
Resetting the Clock SettingsHINFO button
Clock/Wallpaper
Clock Adjustment
Reset
Reset the Auto Daylight and Auto Time Zone settings to the factory defaults.
Page 62 of 267
60
Clock Adjustment
Setting the Clock Type
System Setup
Setting the Clock TypeHINFO button
Clock/Wallpaper
Clock Type
Set the design of the clock screen. 1.Move w or y to select Type or
Background.
2. Rotate i to select an option to
change the design.
3. Move r to select OK.
Page 65 of 267

63
Vehicle
Correct Vehicle Position
System Setup
Correct Vehicle PositionHINFO button
Setup
Other
Vehicle
Correct Vehicle Position
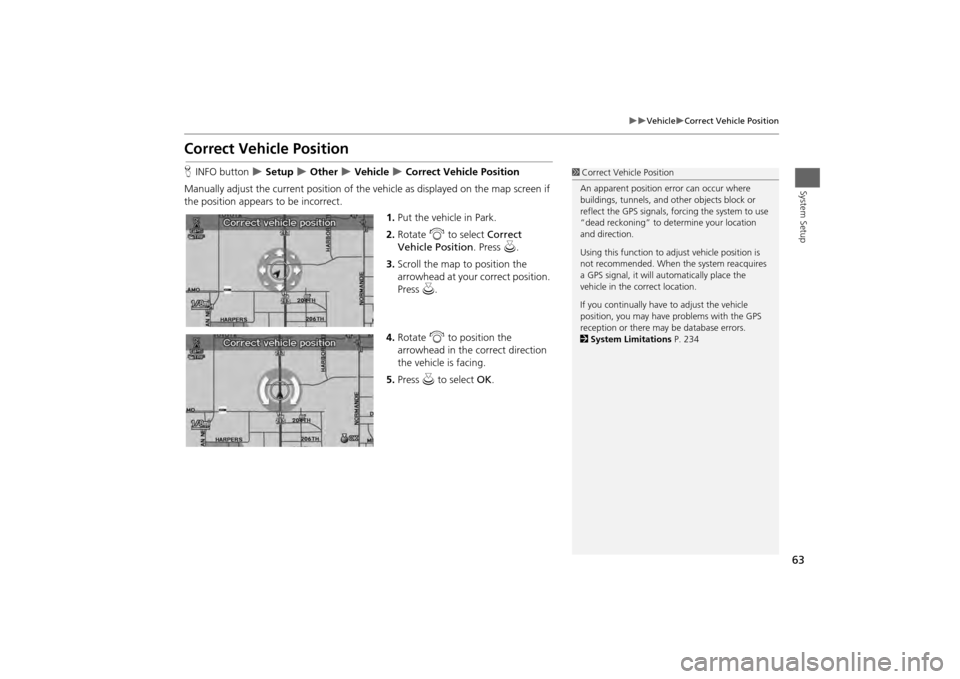
Manually adjust the current position of the vehicle as displayed on the map screen if
the position appears to be incorrect. 1.Put the vehicle in Park.
2. Rotate i to select Correct
Vehicle Position. Press u.
3. Scroll the map to position the
arrowhead at your correct position.
Press u.
4. Rotate i to position the
arrowhead in the correct direction
the vehicle is facing.
5. Press u to select OK.
1Correct Vehicle Position
An apparent position error can occur where
buildings, tunnels, and ot her objects block or
reflect the GPS signals, forcing the system to use
“dead reckoning” to determine your location
and direction.
Using this function to ad just vehicle position is
not recommended. When the system reacquires
a GPS signal, it will automatically place the
vehicle in the correct location.
If you continually have to adjust the vehicle
position, you may have problems with the GPS
reception or there may be database errors.
2 System Limitations P. 234
Page 66 of 267
64System Setup
Data ResetReset Factory Default SettingsHINFO button
Setup
Other
Reset Factory Default
Reset all the settings on the Setup screens and multi-view rear camera brightness
settings to their factory default.
Rotate i to select Yes. Press u to
reset the settings.
1 Reset Factory Default Settings
When you transfer the vehicle to a third party,
reset all settings to default and delete all
personal data.
The following settings are reset:•Brightness, Contrast, Black Level, Volume,
Interface Dial Feedback, Brightness (multi-view
rear camera)•Basic Settings: Units, Voice Recognition Tutor•Routing & Guidance: Rer outing, Unverified
Area Routing, Edit Wayp oint Search Area,
Guidance Mode, Street Name Guidance,
Guidance Screen Interruption•Clock Adjustment: Auto Daylight, Auto Time
Zone, Time, Clock Format•Vehicle: Off-road Tracking•Color: Map Color, Menu Color•Wallpaper Settings: Wallpaper Type, Clock
Type
Page 162 of 267

160Audio
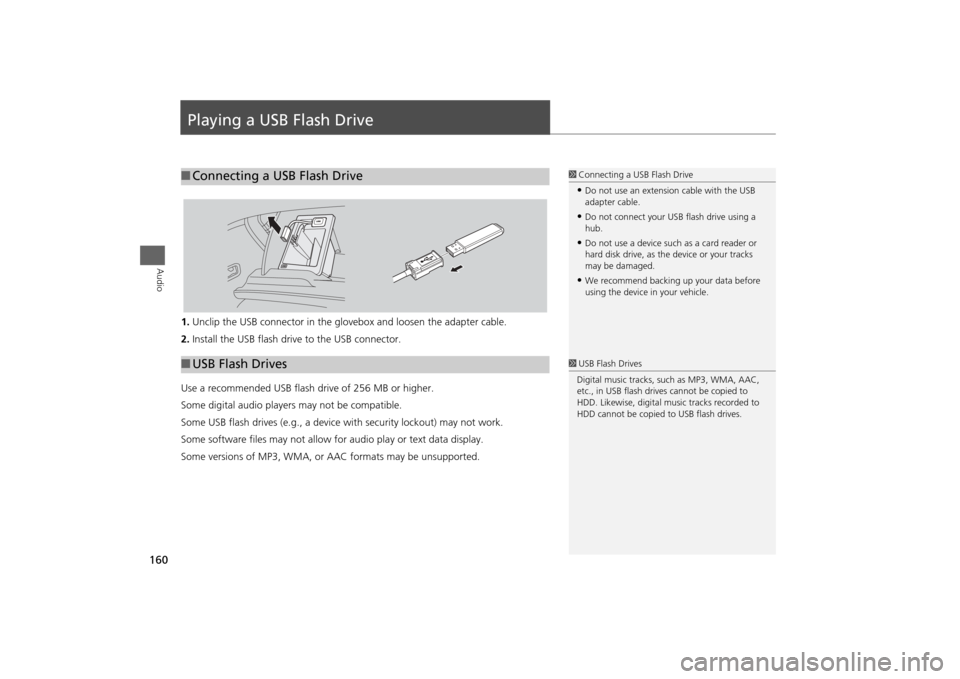
Playing a USB Flash Drive1.Unclip the USB connector in the glov ebox and loosen the adapter cable.
2. Install the USB flash drive to the USB connector.
Use a recommended USB flash drive of 256 MB or higher.
Some digital audio players may not be compatible.
Some USB flash drives (e.g., a device with security lockout) may not work.
Some software files may not allow for audio play or text data display.
Some versions of MP3, WMA, or AAC formats may be unsupported.■ Connecting a USB Flash Drive
1 Connecting a USB Flash Drive•Do not use an extension cable with the USB
adapter cable.•Do not connect your US B flash drive using a
hub.•Do not use a device such as a card reader or
hard disk drive, as th e device or your tracks
may be damaged.•We recommend backing up your data before
using the device in your vehicle.
■ USB Flash Drives
1 USB Flash Drives
Digital music tracks, such as MP3, WMA, AAC,
etc., in USB flash drives cannot be copied to
HDD. Likewise, digital music tracks recorded to
HDD cannot be copied to USB flash drives.
Page 210 of 267
208
Wireless Headphones
Replacing the Batteries
Rear Entertainment System
Replacing the Batteries
1.Insert a coin in the slot and twist it
slightly to pry the cover away from
the earpiece.
2. Pull the cover outward, and pivot it
out of the way.
3. Remove the battery.
4. Install the new battery in the
earpiece as shown in the diagram
next to the battery slot.
Battery Type: AAA battery
5. Slide the cover back into place on
the earpiece, then press down on
the back edge to lock it in place.
1Replacing th e Batteries
The battery is under the cover on the left
earpiece.
An improperly disposed of battery can hurt the
environment. Always c onfirm local regulations
for battery disposal.
Coin
Cover
Battery
Page 225 of 267

223
Troubleshooting
Guidance, Routing
Troubleshooting
Guidance, Routing
Problem
Solution
The navigation system does not route me the same
way I would go or the same way as other mapping
systems.
The navigation system attempts to generate the optimal route. You can change the
route preferences used when calculating a route. 2Changing the Route Preference
P. 91
The street I’m on is not shown on the map screen.
The mapping database is constantly undergoing revision. You can access the most
recent information on the internet. 2Map Coverage
P. 237
The vehicle position icon is not following the road and
the “GPS icon” text in th e upper left hand corner of
the screen is white or missing.
• Check that the GPS antenna (located in the dashboard) is not blocked. For best reception, remove items from the dashboard, such as radar detectors, cell phones,
or loose articles.
• Metallic tinting or other aftermarket devi ces can interfere with the GPS reception.
Please consult your dealer. 2 GPS System
P. 234
The blue highlighted route and voice guidance
stopped or turned into a blue/pink dashed line before I
got to my destination.
Your route has entered an unverified area. 2Unverified Area Routing
P. 51
How do I stop the map from rotating as I drive along?
Press the MAP/GUID E button. Select Map Information > North-up , or say d
“Display north-up” to change the map orientation.
Sometimes, I cannot select between the North-up and
Heading-up map orientations.
The Heading-up map orientation can only be shown in the lower scales (1/20 - 1 mile
scales). 2Map Scale and Functions
P. 111
The “time to destination” display sometimes increases
even though I am getting closer to my destination.
If your speed reduces due to slower traffic, the navigation system updates the “time to
destination” based on your actual road speed to give you a better estimate of arrival
time.
The vehicle position icon on the map “lags” a short
distance behind, especially when I arrive at an
intersection.
This is normal. The navigation system is un aware of the width of intersections. Large
differences in vehicle position can indicate a temporary loss of the GPS signal. 2 GPS System
P. 234
Continued