2013 HONDA ODYSSEY USB
[x] Cancel search: USBPage 131 of 267
129
Audio
This section describes how to operate the audio system. You can play
music from a wide array of media s ources, and control the audio system
using the audio buttons, the Interface Dial, or voice control.
Audio System .................................................. 130
About Your Audio System .............................. 130
Auxiliary Input Jack ......... .......................... ..... 131
Audio System Theft Protection ....................... 131
Playing FM/AM Radio ..................................... 132
Selecting FM/AM Mode.................................. 132
Audio Screen Control ..................................... 132
Audio Menu .................................................. 133
Radio Data System (RDS) ................................ 134
Playing XM® Radio ......................................... 136
Selecting XM Mode........................................ 136
Audio Screen Control ..................................... 136
Audio Menu .................................................. 137
Note Function ................................................ 138
XM® Radio Service ........................................ 140
Playing a Disc ................................................... 141
Selecting Disc Mode ....................................... 141
Audio Screen Control ..................................... 141 Audio Menu ................................................... 142
Playing MP3/WMA/AAC Discs ........................ 143
Recommended Discs ...................................... 144
Playing Hard Disc Drive (HDD) Audio ............ 145
Selecting HDD Mode ...................................... 145
Audio Screen Control ..................................... 146
Audio Menu ................................................... 146
Recording a Music CD to HDD........................ 148
Searching for Music........................................ 150
Adding a Track to a User Playlist ..................... 151
Editing a Playlist ............................................. 151
Displaying Music Information ......................... 153
Updating Gracenote® Album Info .................. 154
Playing an iPod® ............................................. 155
Selecting iPod® Mode .................................... 156
Audio Screen Control ..................................... 156
Audio Menu ................................................... 157
Searching for Music........................................ 158 Searching for Music Using Song By Voice™
(SBV) ............................................................... 159
Playing a USB Flash Drive ............................... 160
Selecting USB Mode....................................... 161
Audio Screen Control..................................... 161
Audio Menu .................................................. 162
Playing Tracks in Folders................................. 163
Playing Bluetooth® Audio ............................. 164
Selecting Bluetooth® Audio Mode ................. 164
Switching to HFL Mode .................................. 165
Audio Screen Control..................................... 165
Adjusting the Sound ....................................... 166
Audio Remote Controls .................................. 167
Steering Wheel Controls ................................ 167
Page 132 of 267
130Audio
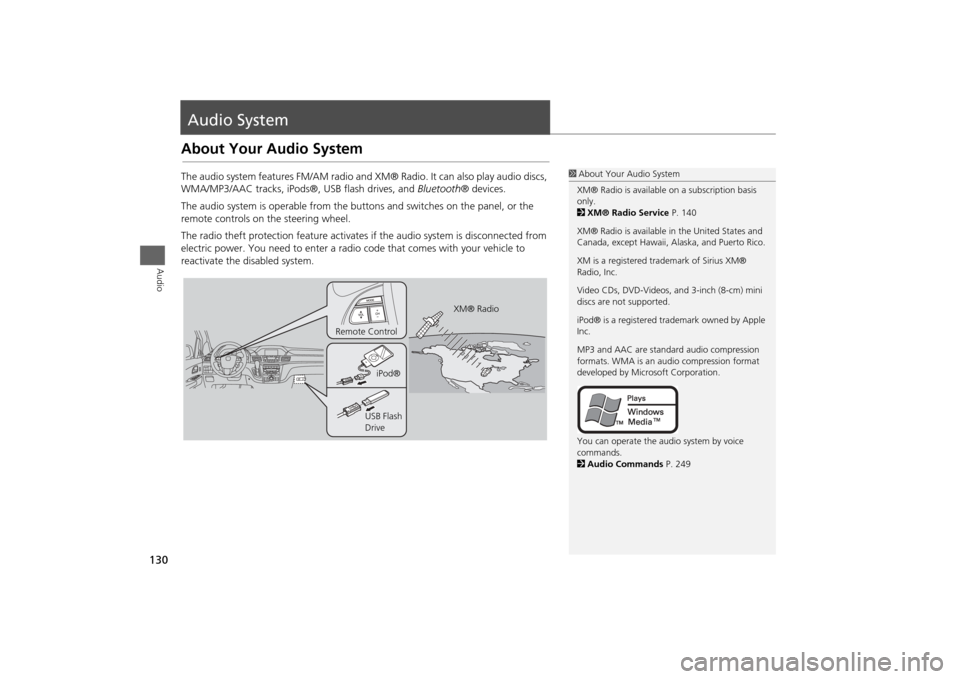
Audio SystemAbout Your Audio SystemThe audio system features FM/AM radio and XM® Radio. It can also play audio discs,
WMA/MP3/AAC tracks, iPods®, USB flash drives, and Bluetooth® devices.
The audio system is operable from the butto ns and switches on the panel, or the
remote controls on the steering wheel.
The radio theft protection feature activates if the audio system is disconnected from
electric power. You need to enter a radio code that comes with your vehicle to
reactivate the disabled system.
1 About Your Audio System
XM® Radio is available on a subscription basis
only.
2 XM® Radio Service P. 140
XM® Radio is available in the United States and
Canada, except Ha waii, Alaska, and Puerto Rico.
XM is a registered trademark of Sirius XM®
Radio, Inc.
Video CDs, DVD-Videos, and 3-inch (8-cm) mini
discs are not supported.
iPod® is a registered tra demark owned by Apple
Inc.
MP3 and AAC are standard audio compression
formats. WMA is an audio compression format
developed by Micr osoft Corporation.
You can operate the audio system by voice
commands.
2 Audio Commands P. 249
XM® Radio
Remote Control
iPod®
USB Flash
Drive
Page 133 of 267
131
Audio System
Auxiliary Input Jack
Audio
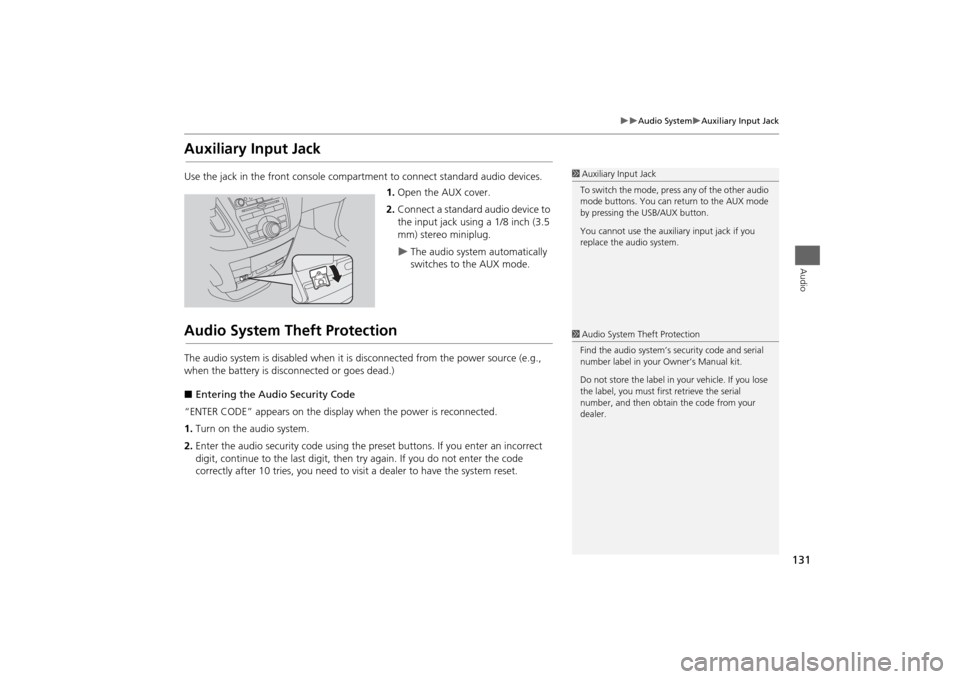
Auxiliary Input JackUse the jack in the front console compartment to connect standard audio devices.
1. Open the AUX cover.
2. Connect a standard audio device to
the input jack using a 1/8 inch (3.5
mm) stereo miniplug.
The audio system automatically
switches to the AUX mode.
Audio System Theft ProtectionThe audio system is disabled when it is disconnected from the power source (e.g.,
when the battery is disc onnected or goes dead.)
■ Entering the Audio Security Code
“ENTER CODE” appears on the displa y when the power is reconnected.
1. Turn on the audio system.
2. Enter the audio security code using the pr eset buttons. If you enter an incorrect
digit, continue to the last digit, then try again. If you do not enter the code
correctly after 10 tries, you need to vi sit a dealer to have the system reset.
1Auxiliary Input Jack
To switch the mode, press any of the other audio
mode buttons. You can return to the AUX mode
by pressing the USB/AUX button.
You cannot use the auxili ary input jack if you
replace the audio system.1 Audio System Theft Protection
Find the audio system’s se curity code and serial
number label in your Owner’s Manual kit.
Do not store the label in y our vehicle. If you lose
the label, you must first retrieve the serial
number, and then obtain the code from your
dealer.
Page 156 of 267

154
Playing Hard Disc Drive (HDD) Audio
Updating Gracenote® Album Info
Audio
Updating Gracenote® Album InfoHAUDIO button (in HDD or DISC mode)
AUDIO MENU
HDD Setup
Update the Gracenote® Album Info (Gra cenote® Media Database) that is included
with the navigation system.
1.Insert the update disc into the disc
slot or connect the USB flash drive
that includes the update.
2. Rotate i to select Gracenote
Info. Update . Press u.
3. Rotate i to select USB or Disc
update source media. Press u.
4. Rotate i to select Yes on the
confirmation screen. Press u.
The system updates the
Gracenote information.
5. Rotate i to select OK on the
confirmation screen. Press u.
1Updating Gracenote® Album Info
To acquire updated files:•Consult your dealer.•U.S.: Visit automobiles.honda.com.•Canada: Visit www.hondanavi.ca.
Once you perform an update, any information
you edited before will be overwritten or erased.
Maximum capacity Remaining capacity
Gracenote version
number
Page 157 of 267

155Audio
Playing an iPod®1.Unclip the USB connector in the glov ebox and loosen the adapter cable.
2. Install the iPod® dock connector to the USB connector.■Connecting an iPod®
1 Connecting an iPod®•Do not use an extension cable with the USB
adapter cable.•Do not connect your iPod® using a hub.•Do not use a device such as a card reader or
hard disk drive, as th e device or your tracks
may be damaged.•We recommend backing up your data before
using the device in your vehicle.•Displayed messages ma y vary depending on
the device model and software version.
Your audio system ma y not work with all
software versions of these devices.
If the audio system do es not recognize your
iPod®, try reconne cting it a few times or reboot
the device.
■ Model Compatibility
Model
iPod (5th generation)
iPod classic 80GB/160GB (launch in 2007)iPod classic 120GB (launch in 2008)
iPod nanoiPod touch
Page 158 of 267
156
Playing an iPod®
Selecting iPod® Mode
Audio
Selecting iPod® Mode1.Connect the iPod® to the USB adapter cable in the console compartment.
2. Press the USB/AUX button until you get to iPod® mode.
3. Select a track using the iPod® menu on the screen.
The current track number and total number of tracks are displayed on the
display.
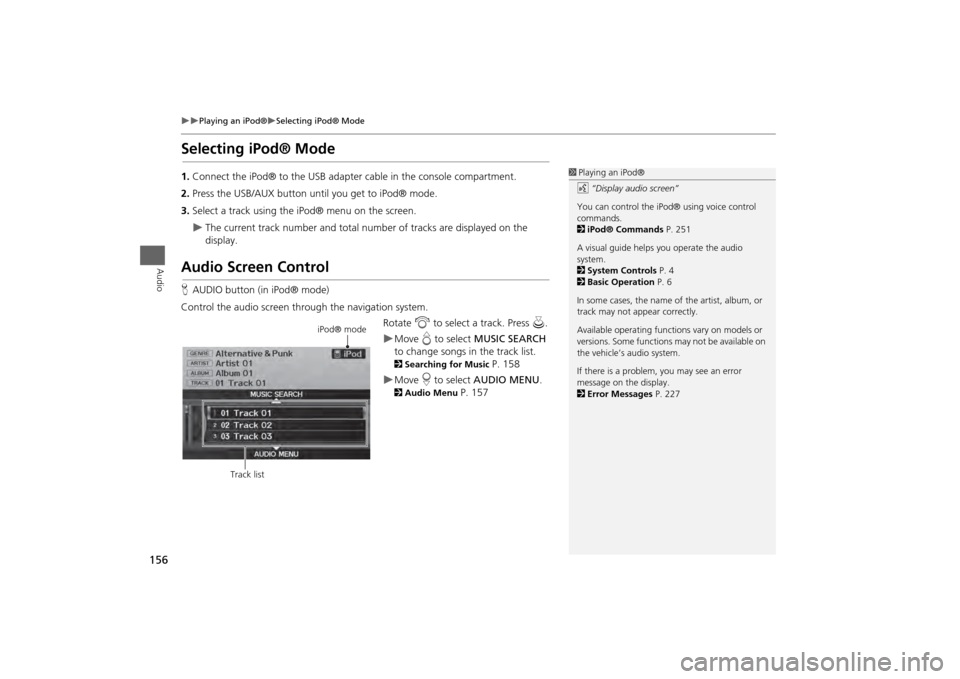
Audio Screen ControlHAUDIO button (in iPod® mode)
Control the audio screen through the navigation system. Rotate i to select a track. Press u.
Move e to select MUSIC SEARCH
to change songs in the track list. 2Searching for Music
P. 158
Move r to select AUDIO MENU . 2Audio Menu
P. 157
1Playing an iPod®
d “Display audio screen”
You can control the iPod® using voice control
commands.
2 iPod® Commands P. 251
A visual guide helps you operate the audio
system.
2 System Controls P. 4
2 Basic Operation P. 6
In some cases, the name of the artist, album, or
track may not appear correctly.
Available operating functi ons vary on models or
versions. Some functions may not be available on
the vehicle’s audio system.
If there is a problem, you may see an error
message on the display.
2 Error Messages P. 227
iPod® mode
Track list
Page 162 of 267
160Audio
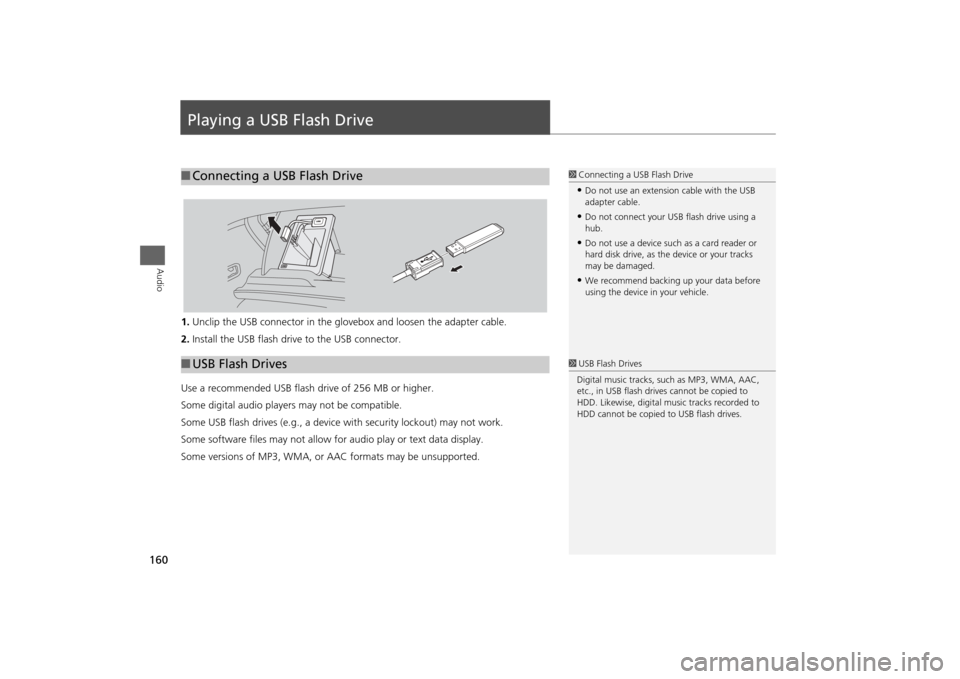
Playing a USB Flash Drive1.Unclip the USB connector in the glov ebox and loosen the adapter cable.
2. Install the USB flash drive to the USB connector.
Use a recommended USB flash drive of 256 MB or higher.
Some digital audio players may not be compatible.
Some USB flash drives (e.g., a device with security lockout) may not work.
Some software files may not allow for audio play or text data display.
Some versions of MP3, WMA, or AAC formats may be unsupported.■ Connecting a USB Flash Drive
1 Connecting a USB Flash Drive•Do not use an extension cable with the USB
adapter cable.•Do not connect your US B flash drive using a
hub.•Do not use a device such as a card reader or
hard disk drive, as th e device or your tracks
may be damaged.•We recommend backing up your data before
using the device in your vehicle.
■ USB Flash Drives
1 USB Flash Drives
Digital music tracks, such as MP3, WMA, AAC,
etc., in USB flash drives cannot be copied to
HDD. Likewise, digital music tracks recorded to
HDD cannot be copied to USB flash drives.
Page 163 of 267
161
Playing a USB Flash Drive
Selecting USB Mode
Audio
Selecting USB Mode1.Connect the USB flash drive to the USB adapter cable in the console
compartment.
2. Press the USB/AUX button until you get to USB mode.
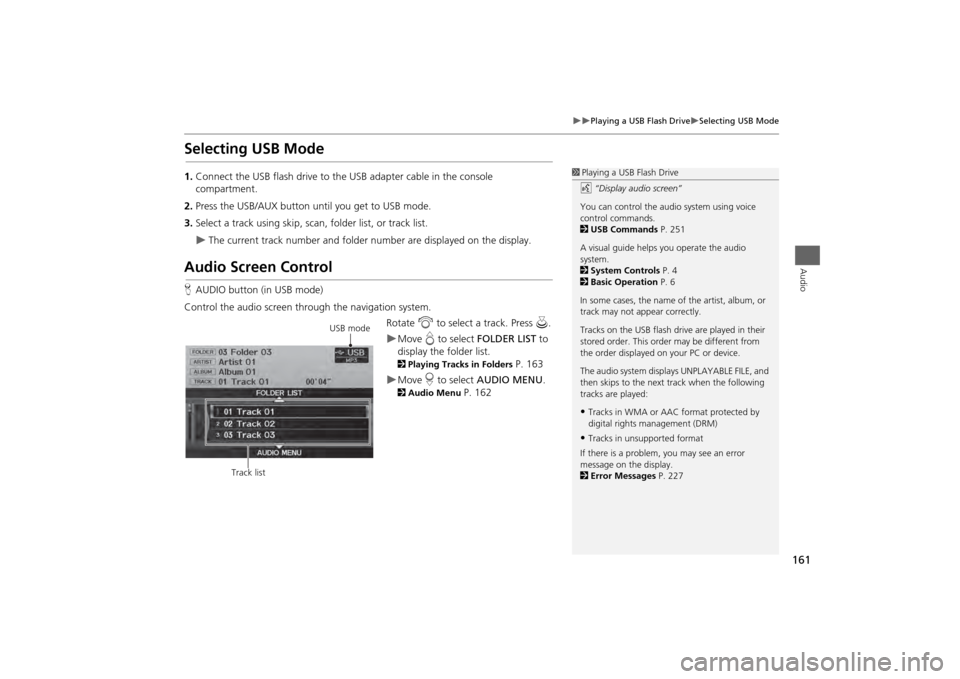
3. Select a track using skip, scan, folder list, or track list.
The current track number and folder number are displayed on the display.
Audio Screen ControlHAUDIO button (in USB mode)
Control the audio screen through the navigation system. Rotate i to select a track. Press u .
Move e to select FOLDER LIST to
display the folder list. 2 Playing Tracks in Folders
P. 163
Move r to select AUDIO MENU . 2Audio Menu
P. 162
1Playing a USB Flash Drive
d “Display audio screen”
You can control the audio system using voice
control commands.
2 USB Commands P. 251
A visual guide helps you operate the audio
system.
2 System Controls P. 4
2 Basic Operation P. 6
In some cases, the name of the artist, album, or
track may not appear correctly.
Tracks on the USB flash drive are played in their
stored order. This orde r may be different from
the order displayed on your PC or device.
The audio system displa ys UNPLAYABLE FILE, and
then skips to the next track when the following
tracks are played:•Tracks in WMA or AAC format protected by
digital rights management (DRM)•Tracks in unsupported format
If there is a problem, you may see an error
message on the display.
2 Error Messages P. 227
USB mode
Track list