Page 451 of 573

uuBrakinguBrake System
450
Driving
Your vehicle is equipped with disc brakes at all four wheels. A vacuum power assist
helps reduce the effort needed on the brake pedal. The brake assist system increases
the stopping force when you depress the brake pedal hard in an emergency
situation. The anti-lock brake system (ABS) helps you retain steering control when
braking very hard. 2 Brake Assist System P. 452
2 ABS (Anti-lock Brake System) P. 451
■Foot Brake1Foot Brake
Check the brakes after driving through deep water,
or if there is a buildup of road surface water. If
necessary, dry the brakes by lightly depressing the
pedal several times.
If you hear a continuous metallic friction sound when
applying the brakes, the brake pads need to be
replaced. Have the vehicle checked by a dealer.
Constantly using the brake pedal while going down a
long hill builds up heat, which reduces the brake
effectiveness. Apply engine braking by taking your
foot off the accelerator pedal and downshifting to a
lower gear.
Do not rest your foot on the brake pedal while
driving, as it will lightly apply the brakes and cause
them to lose effectiveness over time and reduce pad
life. It will also confuse drivers behind you.
Main MenuTable of contents
Page 452 of 573

451
uuBrakinguABS (Anti-lock Brake System)
Driving
ABS (Anti-lock Brake System)
Helps prevent the wheels from locking up, and helps you retain steering control by
pumping the brakes rapidly, much faster than you.
The electronic brake distribution (EBD) system, which is part of the ABS, also
balances the front-to-rear braking distribution according to vehicle loading.
You should never pump the brake pedal. Let the ABS work for you by always
keeping firm, steady pressure on the brake pedal. This is sometimes referred to as
“stomp and steer.” ■ABS operation
The brake pedal may pulsate slightly when the ABS is working. Keep holding the
pedal firmly down. On dry pavement, you will need to press on the brake pedal very
hard before the ABS activates. However, you may feel the ABS activate immediately
if you are trying to stop on snow or ice.
When the vehicle speed goes under 6 mph (10 km/h), the ABS stops.
■ABS1ABS (Anti-lock Brake System)
NOTICEThe ABS may not function correctly if you use an
incorrect tire type and size.
When the ABS indicator comes on while driving,
there may be a problem with the system.
While normal braking is not affected, there is a
possibility of the ABS not operating. Have the vehicle checked by a dealer immediately.
The ABS does not reduce the time or distance it takes
to stop the vehicle. It only helps with steering control
during hard braking.
In the following cases, your vehicle may need more
stopping distance than a vehicle without the ABS: • When driving on rough road surfaces, including
when driving on uneven surfaces, such as gravel or
snow.
• When tire chains are installed.
You may hear a motor sound coming from the
engine compartment while system checks are being
performed immediately after starting the engine or
while driving. This is normal.
Main MenuTable of contents
Page 456 of 573

455
Driving
Multi-View Rear Camera
About Your Multi-View Rear Camera
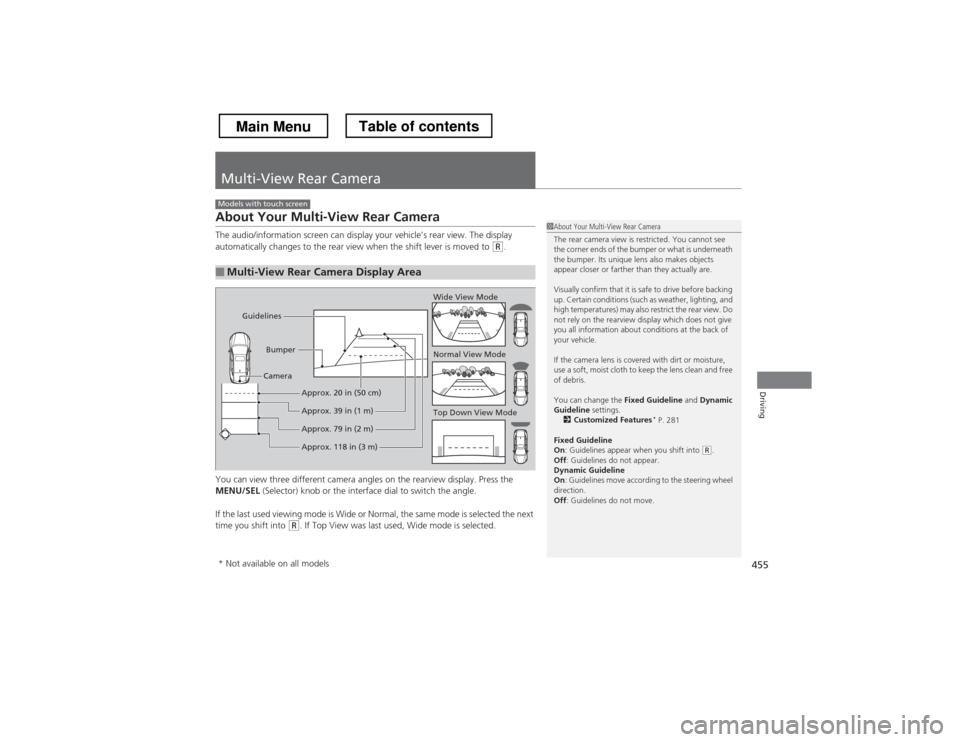
The audio/information screen can display your vehicle’s rear view. The display
automatically changes to the rear view when the shift lever is moved to
(R.
You can view three different camera angles on the rearview display. Press the
MENU/SEL (Selector) knob or the interface dial to switch the angle.
If the last used viewing mode is Wide or Normal, the same mode is selected the next
time you shift into
(R . If Top View was last used, Wide mode is selected.
■Multi-View Rear Camera Display Area
Models with touch screen
1About Your Multi-View Rear Camera
The rear camera view is restricted. You cannot see
the corner ends of the bumper or what is underneath
the bumper. Its unique lens also makes objects
appear closer or farther than they actually are.
Visually confirm that it is safe to drive before backing
up. Certain conditions (such as weather, lighting, and
high temperatures) may also restrict the rear view. Do
not rely on the rearview display which does not give
you all information about conditions at the back of your vehicle.
If the camera lens is covered with dirt or moisture,
use a soft, moist cloth to keep the lens clean and free
of debris.
You can change the Fixed Guideline and Dynamic
Guideline settings.
2 Customized Features *
P. 281
Fixed Guideline On : Guidelines appear when you shift into
(R.
Off : Guidelines do not appear.
Dynamic Guideline On : Guidelines move according to the steering wheel
direction. Off : Guidelines do not move.
Top Down View Mode
Normal View Mode
Wide View Mode
Guidelines
Bumper
Camera
Approx. 118 in (3 m)
Approx. 79 in (2 m)
Approx. 39 in (1 m)
Approx. 20 in (50 cm)
* Not available on all models
Main MenuTable of contents
Page 483 of 573
482
uuMaintenance Under the HooduPower Steering Fluid Check*
Maintenance
Power Steering Fluid Check *
We recommend that you check the power steering fluid level every time you refuel.
Check when the engine is not running. 1.Look at the side of the reservoir. The fluid
should be between the UPPER LEVEL and
LOWER LEVEL .
2. Add power steering fluid if necessary to the
UPPER LEVEL mark.
uInspect the system for a leak. If the fluid
level goes below the LOWER LEVEL
frequently, have the system inspected as
soon as possible.
Specified flui d: Honda Power Steering Fluid
1Power Steering Fluid Check *
NOTICETurning the steering wheel to full left or right lock
and holding it there can damage the power steering
pump.
NOTICEPour the fluid slowly and carefully so you do not spill
any. Clean up any spills immediately; it could damage
components in the engine compartment.
4-cylinder models
LOWER
LEVEL
UPPER LEVEL
* Not available on all models
Main MenuTable of contents
Page 486 of 573
485
uuReplacing Light BulbsuHeadlight Bulbs
Maintenance
1.Turn the steering wheel all the way to the
opposite side from the light being replaced.
Passenger side: Turn the steering wheel
to the left.
Driver side: Turn the steering wheel to the
right.
2. Remove the holding clip and screw, and
pull the inner fender back.
3. Push the tab to remove the coupler.
4. Rotate the old bulb to the left to remove.
5. Insert a new bulb into the headlight
assembly and turn it to the right.
6. Insert the coupler into the connector of the
bulb.
■Low Beam Headlights1Headlight Bulbs
Insert a flat-tip screwdriver, lift and remove the
central pin to remove the clip.
Insert the clip with the central pin raised, and push until it is flat.
Central pin
Push until the
pin is flat.
Holding
Clip
Screw
TabCoupler
Bulb
Main MenuTable of contents
Page 488 of 573
487
uuReplacing Light BulbsuFog Light Bulbs
Maintenance
1.Turn the steering wheel all the way to the right.
2. Remove the holding clips and screw, and
pull the inner fender back.
3. Push the tab to remove the coupler.
4. Rotate the old bulb to the left to remove.
5. Insert a new bulb into the headlight
assembly and turn it to the right.
6. Insert the coupler into the connector of the
bulb.1Fog Light Bulbs
Remove the clip by using a flat-tip screwdriver.
2 Low Beam Headlights P. 485Holding Clip
ScrewDriver side
Bulb
Coupler
Tab
Main MenuTable of contents
Page 489 of 573
488
uuReplacing Light BulbsuFront Side Marker Light Bulb
Maintenance
Front Side Marker Light Bulb
When replacing, use the following bulbs.1.Turn the steering wheel all the way to the
opposite side from the light being replaced.
Passenger side: Turn the steering wheel
to the left.
Driver side: Turn the steering wheel to the
right.
2. Remove the holding clips and screw, and
pull the inner fender back.
3. Turn the socket to the left and remove it,
then remove the old bulb.
4. Insert a new bulb.
Front Side Marker Light: 5 W
1Front Side Marker Light Bulb
Remove the clip by using a flat-tip screwdriver.
2 Low Beam Headlights P. 485
Holding Clip
Screw
BulbSocket
Main MenuTable of contents
Page 498 of 573

497
Maintenance
Checking and Maintaining Tires
Checking Tires
To safely operate your vehicle, your tires must be of the proper type and size, in
good condition with adequate tread, and properly inflated. ■Inflation guidelines
Properly inflated tires provide the best combination of handling, tread life, and comfort.
Refer to the driver’s doorjamb label or sp ecification’s page for the specified pressure.
Underinflated tires wear unevenly, adversely affect handling and fuel economy, and
are more likely to fail from overheating.
Overinflated tires make your vehicle ride harshly, are more prone to road hazards, and wear unevenly.
Every day before you drive, look at each of the tires. If one looks lower than the
others, check the pressure with a tire gauge.
At least once a month or before long trips, use a gauge to measure the pressure in
all tires, including the spare. Even tires in good condition can lose 1 to 2 psi (10 to
20 kPa, 0.1 to 0.2 kgf/cm 2
) per month.
■ Inspection guidelines
Every time you check inflation, also examine the tires and valve stems.
Look for:• Bumps or bulges on the side or in the tread. Replace the tire if you find any cuts,
splits, or cracks in the side of the tire. Replace it if you see fabric or cord.
• Remove any foreign objects and inspect for air leaks.
• Uneven tread wear. Have a dealer check the wheel alignment.
• Excessive tread wear.
2 Wear Indicators P. 502
• Cracks or other damage around valve stem.
1Checking Tires
Measure the air pressure when tires are cold. This
means the vehicle has been parked for at least three
hours, or driven less than 1 mile (1.6 km). If
necessary, add or release air until the specified
pressure is reached.
If checked when hot, tire pressure can be as much as
4–6 psi (30–40 kPa, 0.3–0.4 kgf/cm 2
) higher than if
checked when cold.
Have a dealer check the tires if you feel a consistent
vibration while driving. New tires and any that have
been removed and reinstalled should be properly balanced.
3WARNING
Using tires that are excessively worn or
improperly inflated can cause a crash in
which you can be seriously hurt or killed.
Follow all instruction s in this owner