Page 62 of 325
61
uuChild SafetyuSafety of Larger Children
Safe Driving
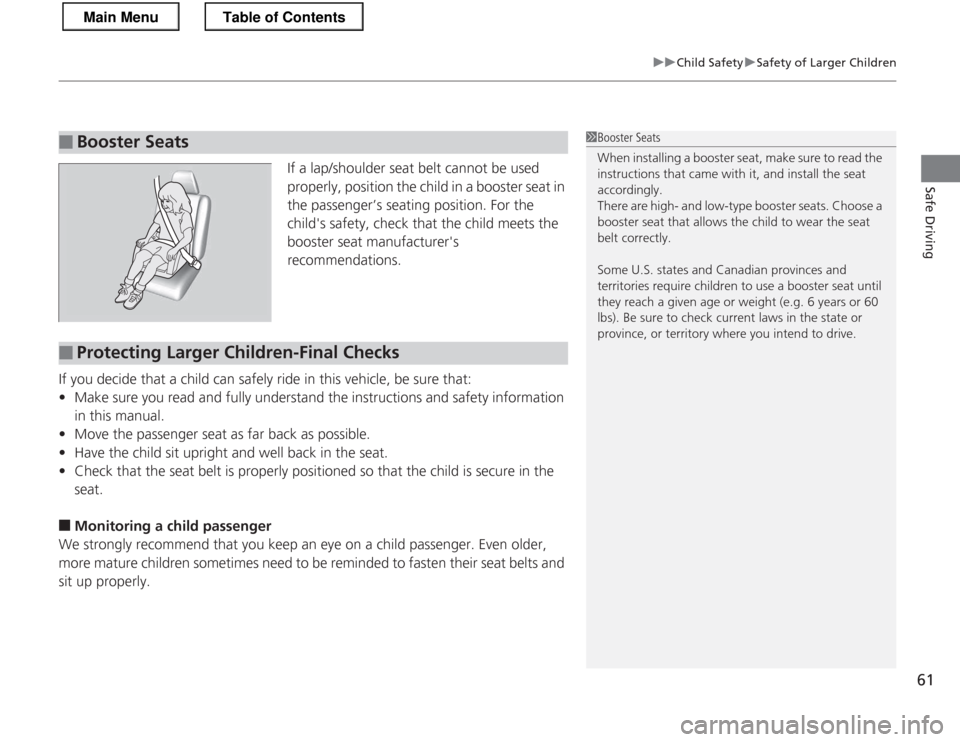
If a lap/shoulder seat belt cannot be used
properly, position the child in a booster seat in
the passenger’s seating position. For the
child's safety, check that the child meets the
booster seat manufacturer's
recommendations.
If you decide that a child can safely ride in this vehicle, be sure that:
• Make sure you read and fully understand the instructions and safety information
in this manual.
• Move the passenger seat as far back as possible.
• Have the child sit upright and well back in the seat.
• Check that the seat belt is properly positioned so that the child is secure in the seat.
■ Monitoring a child passenger
We strongly recommend that you keep an eye on a child passenger. Even older,
more mature children sometimes need to be reminded to fasten their seat belts and
sit up properly.
■Booster Seats1Booster Seats
When installing a booster seat, make sure to read the
instructions that came with it, and install the seat
accordingly.
There are high- and low-type booster seats. Choose a booster seat that allows the child to wear the seat
belt correctly.
Some U.S. states and Canadian provinces and
territories require children to use a booster seat until
they reach a given age or weight (e.g. 6 years or 60
lbs). Be sure to check current laws in the state or
province, or territory where you intend to drive.
■Protecting Larger Children-Final Checks
Main MenuTable of Contents
Page 105 of 325
104
Controls
Opening and Closing the Hatch
Precautions for Opening/Closing the Hatch
Always make sure individuals and objects are clear of the hatch before opening or
closing it. ■Opening the hatch
• Open the hatch all the way.
uIf it is not fully opened, the hatch may come down accidentally by its own
weight.
• Be careful when it is windy. The wind may cause the hatch to close.
■ Closing the hatch
Keep the hatch closed while driving to:
uAvoid possible damage.
uPrevent exhaust gas from leaking into the vehicle.
2 Carbon Monoxide Gas P. 62
1Precautions for Opening/Closing the Hatch
Be careful not to hit your head on the hatch or to put
your hands between the hatch and the cargo area
when closing the hatch.
When you are storing or picking up luggage from the
cargo area while the engine is idling, do not stand in
front of the exhaust pipe. You may get burned.
Do not allow any passenger in the cargo space.
They may get hurt during hard braking, a sudden
acceleration, or a crash.
Main MenuTable of Contents
Page 131 of 325

uuInterior Lights/Interior Convenience ItemsuInterior Convenience Items
130
Controls
Rear trays to store small items are located on
the rear cargo console.
To access the rear cargo console, open the
door, slide the seat by pulling up on the bar, then pull up on the seat-back adjustment lever. ■ Separator
Folding down the separator will create more cargo area. 1. Remove any items from the rear trays.
2. Pull up the release handle on the top of the
separator.
■Rear Cargo Console1Rear Cargo Console
Make sure all items on the rear trays are secured.
They could be thrown around and cause injury during a crash.
To return the sepa rator upright, push it backwards
until it locks.
Make sure that the fol ded separator does not press
against the passenger seat, as this could cause the
weight sensors to work improperly.
2 Side Airbag Off Indicator P. 48
Make sure all items in the cargo area are
secured. Loose items can fly forward if you have
to brake hard.
3WARNING
This vehicle is not equipped with rear seats
or seatbelts.
Sitting in this area may result in injury or
death, and may violate state laws.
Only the driver and one front seat
passenger may be safely seated in this vehicle.
Trays
Bar
Seat-back Adjustment
Lever
Release Handle
Separator
Main MenuTable of Contents
Page 132 of 325
Continued131
uuInterior Lights/Interior Convenience ItemsuInterior Convenience Items
Controls
The cargo cover can be used to conceal your
parcels and protect them from direct sunlight. ■To extend:
Pull the handle on the center edge, then clip
the mounting rods in the hooks on both sides
of the hatch opening. ■ To retract:
Slip the rods out of the hooks, then slowly roll
it back until it is completely retracted. ■ To remove:
Push either end of the housing inward, then
lift it out of its position.
■Cargo Cover1Cargo Cover
Do not access parcels in the cargo area while driving.
This may cause injury if you have to brake hard.
Do not stack objects higher than the top of the seat
in the cargo area. They could block your view and be
thrown about the vehicle during a sudden stop.
To prevent cargo cover damage: • Do not place items on the cargo cover.
• Do not put weight on the cargo cover.
Handle
Mounting Rod
Hook
Main MenuTable of Contents
Page 176 of 325
175
uuBefore DrivinguMaximum Load Limit
Continued
Driving
Maximum Load Limit
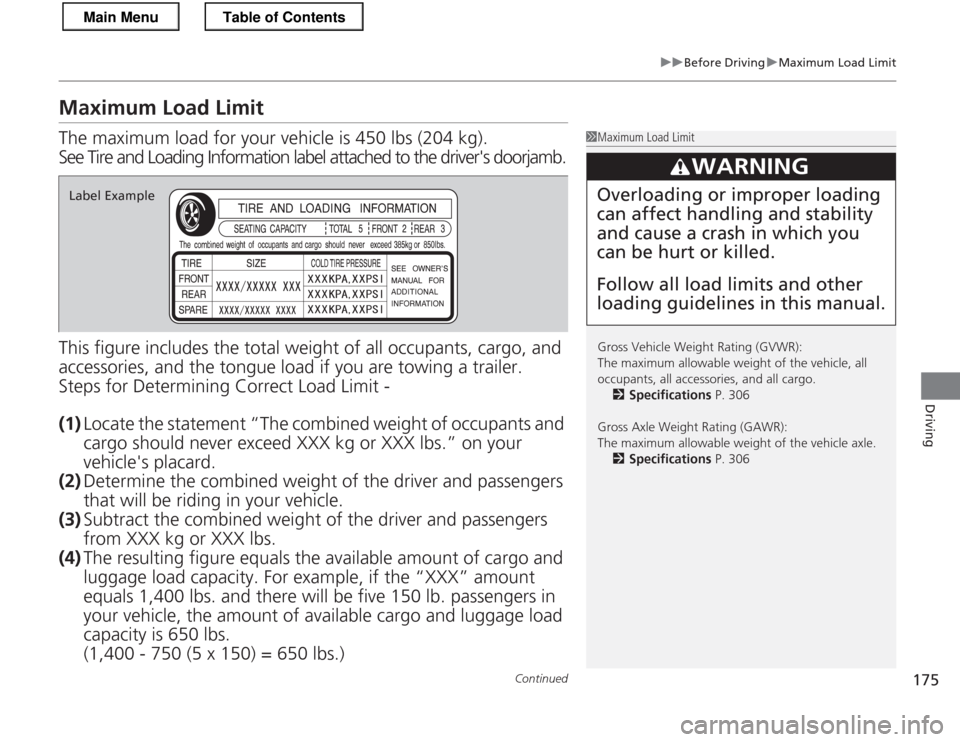
The maximum load for your vehicle is 450 lbs (204 kg).
See Tire and Loading Information label attached to the driver's doorjamb.
This figure includes the total weight of all occupants, cargo, and
accessories, and the tongue load if you are towing a trailer.
Steps for Determining Correct Load Limit -
(1) Locate the statement “The combined weight of occupants and
cargo should never exceed XXX kg or XXX lbs.” on your vehicle's placard.
(2) Determine the combined weight of the driver and passengers
that will be riding in your vehicle.
(3) Subtract the combined weight of the driver and passengers
from XXX kg or XXX lbs.
(4) The resulting figu re equals the availabl e amount of cargo and
luggage load capacity. For example, if the “XXX” amount equals 1,400 lbs. an d there will be five 15 0 lb. passengers in
your vehicle, the amount of available carg o and luggage load
capacity is 650 lbs.(1,400 - 750 (5 x 150) = 650 lbs.)
1Maximum Load Limit
Gross Vehicle Weight Rating (GVWR):
The maximum allowable weight of the vehicle, all
occupants, all accessories, and all cargo. 2 Specifications P. 306
Gross Axle Weight Rating (GAWR):
The maximum allowable weight of the vehicle axle. 2 Specifications P. 306
3WARNING
Overloading or improper loading can affect handling and stability and cause a crash in which you can be hurt or killed. Follow all load limits and other loading guidelines in this manual.Label Example
Main MenuTable of Contents
Page 177 of 325
176
uuBefore DrivinguMaximum Load Limit
Driving
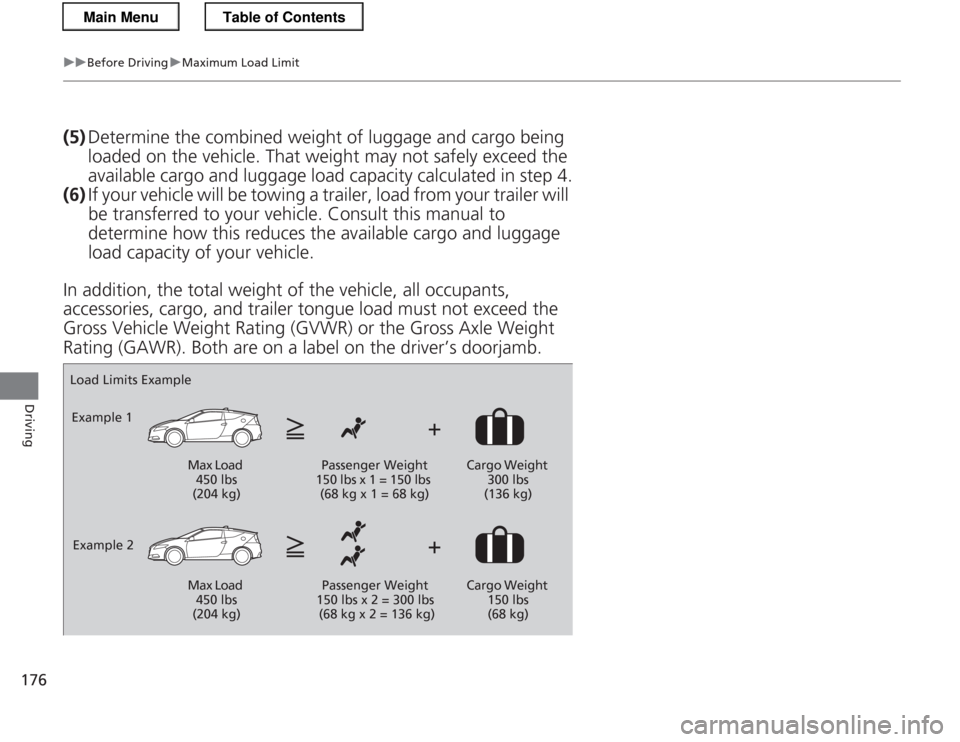
(5)Determine the combined weight of luggage and cargo being
loaded on the vehicle. That weight may not safely exceed the available cargo and luggage load capacity calculated in step 4.
(6) If your vehicle will be towing a trailer, load from your trailer will
be transferred to your vehicle. Co nsult this manual to
determine how this reduces the available cargo and luggage load capacity of your vehicle.
In addition, the total weight of the vehicle, all occupants, accessories, cargo, and trailer tongue load must not exceed the
Gross Vehicle Weight Rating (GVWR) or the Gross Axle Weight
Rating (GAWR). Both are on a lab el on the driver’s doorjamb.
Load Limits Example
Example 1
Max Load 450 lbs
(204 kg) Passenger Weight
150 lbs x 1 = 150 lbs
(68 kg x 1 = 68 kg) Cargo Weight
300 lbs
(136 kg)
Example 2 Max Load 450 lbs
(204 kg) Passenger Weight
150 lbs x 2 = 300 lbs
(68 kg x 2 = 136 kg) Cargo Weight
150 lbs (68 kg)
Main MenuTable of Contents
Page 220 of 325
219
Driving
Fuel Economy
Improving Fuel Economy
Fuel economy depends on several conditions, including driving conditions, your
driving habits, the condition of your vehicle, and loading. Depending on these and
other conditions, you may or may not achieve the rated fuel economy of this vehicle.
You can optimize your fuel economy with proper maintenance of your vehicle.
Always maintain your vehicle in accordance with the messages displayed on the
multi-information display. • Use the recommended viscosity engine oil, displaying the API Certification Seal.
• Maintain the specified tire pressure.
• Do not load the vehicle with excess cargo.
• Keep your vehicle clean. A buildup of snow or mud on your vehicle's underside adds weight and increases wind resistance.
■Maintenance and Fuel Economy
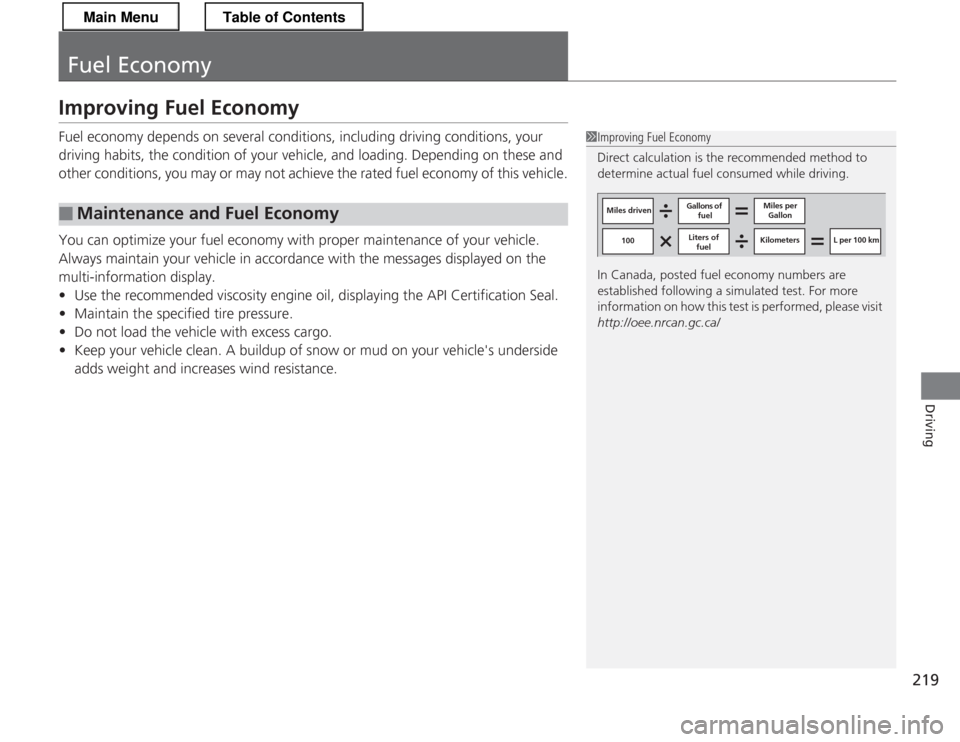
1Improving Fuel Economy
Direct calculation is the recommended method to
determine actual fuel consumed while driving.
In Canada, posted fuel economy numbers are
established following a simulated test. For more
information on how this test is performed, please visit http://oee.nrcan.gc.ca/
Miles driven Gallons of
fuel Miles per
Gallon
100 Liters of
fuel Kilometers L per 100 km
Main MenuTable of Contents
Page 255 of 325

254
uuChecking and Maintaining TiresuTire and Loading Information Label
Maintenance
Tire and Loading Information Label
The label attached to the driver’s doorjamb provides necessary tire and loading
information.
Tire LabelingThe tires that came on your vehicle have a
number of markings. Those you should be
aware of are described below.
Whenever tires are replaced, they should be replaced with tires of the same size.
1Tire and Loading Information Label
The tire and loading information label attached to the driver’s doorjamb contains:
aThe number of people your vehicle can carry.
bThe total weight your vehicle can carry. Do not
exceed this weight.
cThe original tire sizes for front, rear, and spare.
dThe proper cold tire pressure for front, rear, and spare.
Label
Example
Example Tire Size
Tire Identification
Number (TIN)
Maximum
Tire Load
Maximum
Tire Pressure
Tire Size
■Tire Size
1Tire Size
Following is an example of tire size with an
explanation of what each component means. P195/55 R16 86V
P: Vehicle type (P indicates passenger vehicle).
195: Tire width in millimeters.
55: Aspect ratio (the tire’s section height as a percentage of its width).
R: Tire construction code (R indicates radial).
16: Rim diameter in inches.
86: Load index (a numerical code associated with the
maximum load the tire can carry).
V: Speed symbol (an alphabetical code indicating the maximum speed rating).
Main MenuTable of Contents