Page 22 of 346
Quick Reference Guide21
Handling the Unexpected
(P295)
Flat Tire
(P297)
●Park in a safe location and repair the flat
tire using the temporary tire repair kit.
●Park in a safe location and replace the
flat tire with the compact spare tire in the
trunk.
Indicators Come On (P317)
●Identify the indicator and consult the
owner’s manual.Models with an optional compact spare tire
Engine Won’t Start
(P311)
●If the battery is dead, jump start using a
booster battery.
Blown Fuse
(P321)
●Check for a blown fuse if an electrical
device does not operate.
Overheating
(P315)
●Park in a safe location. If you do not see
steam under the hood, open the hood,
and let the engine cool down.
Emergency Towing
(P324)
●Call a professional towing service if you
need to tow your vehicle.
Page 232 of 346

231
uuWhen DrivinguForward Collision Warning (FCW)
*
Driving
FCW may not activate or may not detect a vehicle in front of your vehicle, and may activate even when you are aware of a vehicle ahead
of you, or when there is no vehicle ahead under the following conditions.■FCW Limitations
Condition
●The distance between your vehicle and the vehicle ahead of you is too short.●A vehicle cuts in front of you at a slow speed, and it brakes suddenly.●A vehicle suddenly crosses in front of you.●When either your vehicle or the vehicle ahead of you accelerates rapidly.●The vehicle ahead of you is a motorcycle, a small vehicle, or a unique vehicle such as a tractor.●When you drive off-road or on a mountain road, or curved and winding road for an extended period that makes it difficult for the camera to properly
detect a vehicle in front of you.●When there are pedestrians or animals in front of your vehicle.●When you drive in bad weather (rain, fog, etc.).●A heavy load in the rear or modifications to the suspension tilts your vehicle.●An abnormal tire condition is detected (wrong tire size, flat tire, etc.).●When the windshield is blocked by dirt, mud, leaves, wet snow, etc.●When the temperature inside the system is high.●A sudden change between light and dark such as an entrance or exit of a tunnel.●You drive into the sunlight (e.g. at dawn or dusk).●When the windshield is dirty or cloudy.●When streetlights are perceived as the taillight of a vehicle in front of yours.●When driving at night, the vehicle ahead of you is running with either taillight bulb burned out.●When you drive in the shadows of trees, buildings, etc.
Page 235 of 346

uuWhen DrivinguLane Departure Warning (LDW)
*
234Driving
LDW may not activate or may not recognize lanes, and may activate even when
keeping in the middle of a lane under the following conditions.■LDW Limitations
Condition
●When you drive in bad weather (rain, fog, etc.).●A heavy load in the rear or modifications to the suspension tilts your vehicle.●An abnormal tire condition is detected (wrong tire size, flat tire, etc.).●When the windshield is blocked by dirt, mud, leaves, wet snow, etc.●When the temperature inside the system is high.●A sudden change between light and dark such as an entrance or exit of a tunnel.●You drive into the sunlight (e.g. at dawn or dusk).●When the windshield is dirty or cloudy.●When you drive in the shadows of trees, buildings, etc.●When you drive on a wet road surface following another vehicle.uThe camera may perceive the tire tracks in the water as lane lines.
●When there is snow or wheel tracks on the side of the road.●When the road has many repaired area or an erased lane line.●When the vehicle is running over painted signs or crosswalk markings.●When you drive in a lane with worn-out lane markings.
1LDW Camera
If the Camera Too Hot message appears:•Use the climate control system to cool down the
interior and, if necessary, the defroster mode when
windows are fogged.•Start driving the vehicle to lower the windshield
temperature, which cools down the area around
the LDW camera.
Page 273 of 346
uuReplacing Light BulbsuDaytime Running Light Bulbs
272Maintenance
1.Remove the holding clip using a flat-tip
screwdriver, then remove the upper part of
the windshield washer reservoir.
2.Push the tab to remove the coupler.
3.Rotate the old bulb to the left to remove.
4.Insert a new bulb into the headlight
assembly and turn it to the right.
5.Insert the coupler into the connector of the
bulb.
Daytime Running Light BulbsDaytime running light bulbs are LED type. Have an authorized Honda dealer inspect
and replace the light assembly.■Low Beam Headlights
1Low Beam Headlights
Insert a flat-tip screwdriver, lift and remove the
central pin to remove the clip.
Insert the clip with the central pin raised, and push
until it is flat.
Central pin
Push until the
pin is flat.
Clip
Passenger’s side
Coupler
Driver’s and passenger’s side
Page 276 of 346
275
uuReplacing Light BulbsuBack-Up Light Bulbs
Maintenance
Back-Up Light BulbsWhen replacing, use the following bulbs.
1.Remove the screw from the center of the
fastener using a Phillips-head screwdriver.
2.Remove the holding clips using a flat-tip
screwdriver, then pull the lining back.
2Rear Turn Signal Light Bulbs P. 274
3.Turn the socket to the left and remove it.
4.Remove the old bulb and insert a new bulb.
Taillight BulbsTaillight bulbs in the trunk lid are LED type. Have an authorized Honda dealer inspect
and replace the light assembly.Back-Up Light: 16 WLining
Fastener
ClipBulb
Socket
Page 299 of 346
uuIf a Tire Goes FlatuTemporarily Repairing a Flat Tire
298Handling the Unexpected
1.Open the trunk floor lid.
2.Take the kit out of the case.
uPlace the kit face up, on flat ground near
the flat tire, and away from traffic. Do
not place the kit on its side.
1Getting Ready to Temporarily Repair the Flat Tire
When making a temporary repair, carefully read the
instruction manual provided with the kit.
In cold temperatures, the sealant may not flow easily.
In this situation, warm it up for five minutes before
using.
Page 301 of 346

uuIf a Tire Goes FlatuTemporarily Repairing a Flat Tire
300Handling the Unexpected
4.Plug in the compressor to the accessory
power socket.
uBe careful not to pinch the cord in a
door or window.
5.Start the engine.
uKeep the engine running while injecting
sealant and air.
2Carbon Monoxide Gas P. 64
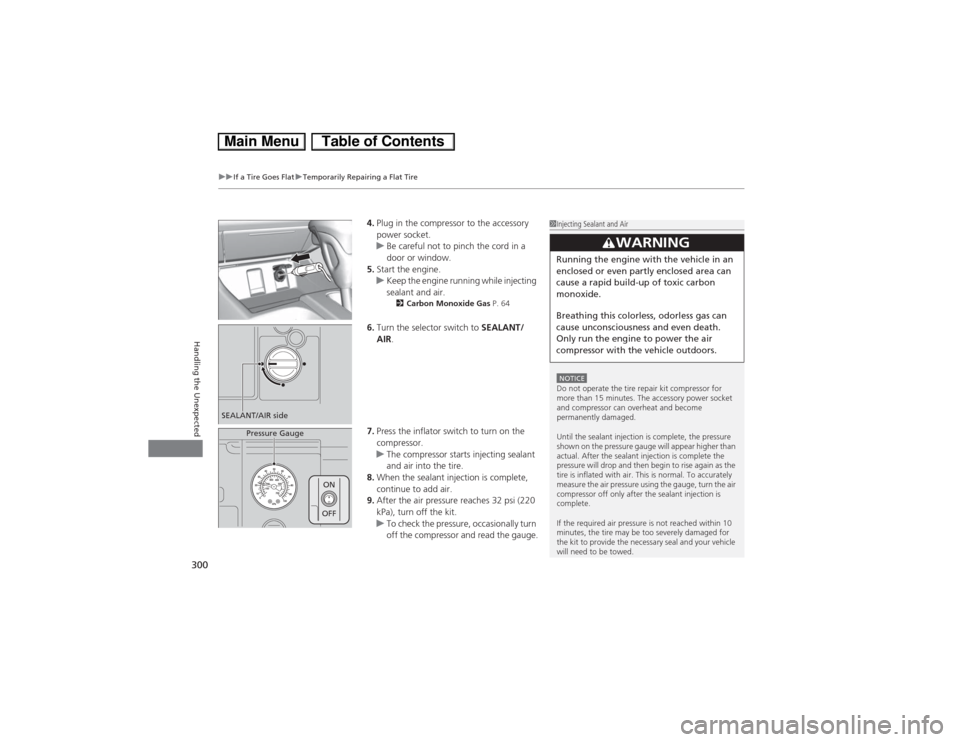
6.Turn the selector switch to SEALANT/
AIR.
7.Press the inflator switch to turn on the
compressor.
uThe compressor starts injecting sealant
and air into the tire.
8.When the sealant injection is complete,
continue to add air.
9.After the air pressure reaches 32 psi (220
kPa), turn off the kit.
uTo check the pressure, occasionally turn
off the compressor and read the gauge.
1Injecting Sealant and AirNOTICEDo not operate the tire repair kit compressor for
more than 15 minutes. The accessory power socket
and compressor can overheat and become
permanently damaged.
Until the sealant injection is complete, the pressure
shown on the pressure gauge will appear higher than
actual. After the sealant injection is complete the
pressure will drop and then begin to rise again as the
tire is inflated with air. This is normal. To accurately
measure the air pressure using the gauge, turn the air
compressor off only after the sealant injection is
complete.
If the required air pressure is not reached within 10
minutes, the tire may be too severely damaged for
the kit to provide the necessary seal and your vehicle
will need to be towed.
3
WARNING
Running the engine with the vehicle in an
enclosed or even partly enclosed area can
cause a rapid build-up of toxic carbon
monoxide.
Breathing this colorless, odorless gas can
cause unconsciousness and even death.
Only run the engine to power the air
compressor with the vehicle outdoors.
SEALANT/AIR side
Pressure Gauge
ON
OFF
Page 303 of 346

uuIf a Tire Goes FlatuTemporarily Repairing a Flat Tire
302Handling the Unexpected
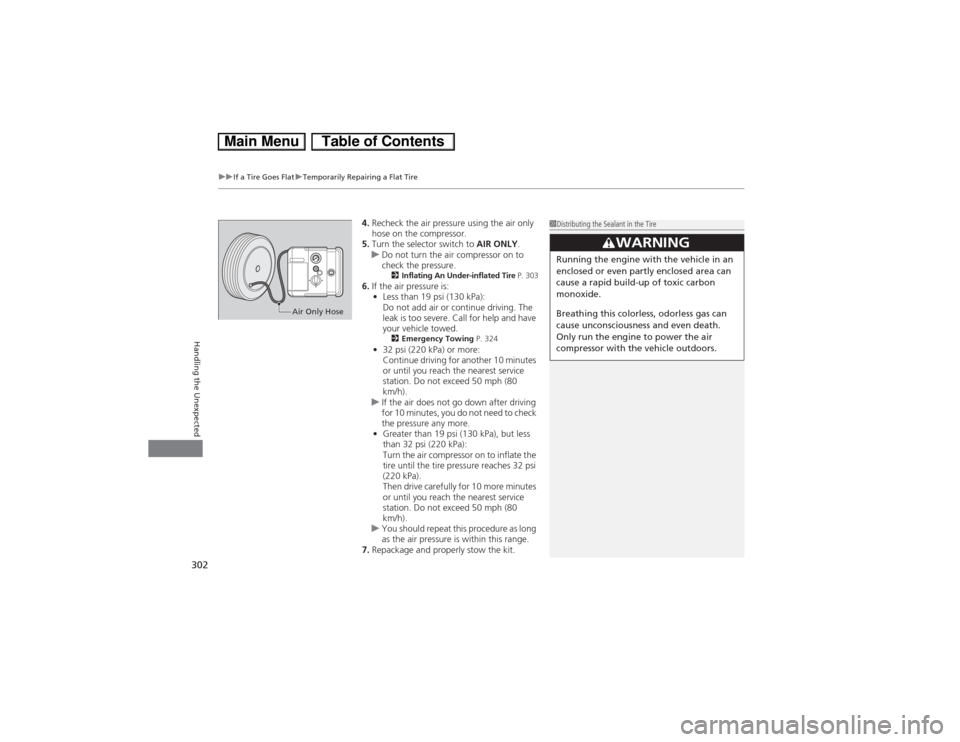
4.Recheck the air pressure using the air only
hose on the compressor.
5.Turn the selector switch to AIR ONLY.
uDo not turn the air compressor on to
check the pressure.
2Inflating An Under-inflated Tire P. 303
6.If the air pressure is:
•Less than 19 psi (130 kPa):
Do not add air or continue driving. The
leak is too severe. Call for help and have
your vehicle towed.
2Emergency Towing P. 324
•32 psi (220 kPa) or more:
Continue driving for another 10 minutes
or until you reach the nearest service
station. Do not exceed 50 mph (80
km/h).
uIf the air does not go down after driving
for 10 minutes, you do not need to check
the pressure any more.
•Greater than 19 psi (130 kPa), but less
than 32 psi (220 kPa):
Turn the air compressor on to inflate the
tire until the tire pressure reaches 32 psi
(220 kPa).
Then drive carefully for 10 more minutes
or until you reach the nearest service
station. Do not exceed 50 mph (80
km/h).
uYou should repeat this procedure as long
as the air pressure is within this range.
7.Repackage and properly stow the kit.
1Distributing the Sealant in the Tire
3
WARNING
Running the engine with the vehicle in an
enclosed or even partly enclosed area can
cause a rapid build-up of toxic carbon
monoxide.
Breathing this colorless, odorless gas can
cause unconsciousness and even death.
Only run the engine to power the air
compressor with the vehicle outdoors.
Air Only Hose