Page 281 of 346
280
uuChecking and Maintaining TiresuTire and Loading Information Label
Maintenance
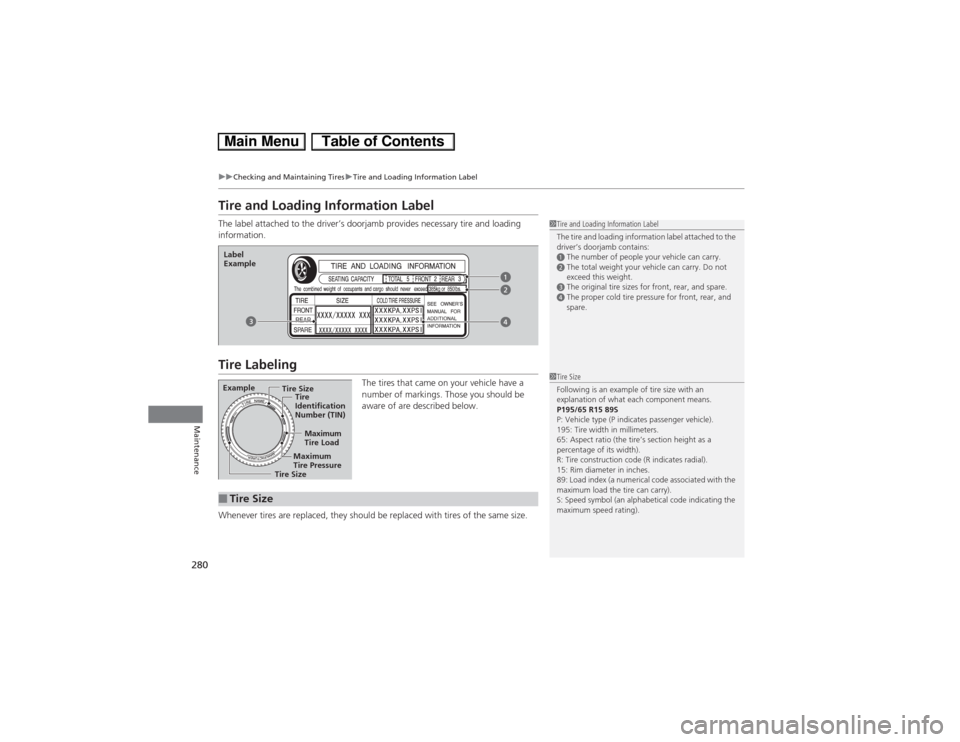
Tire and Loading Information LabelThe label attached to the driver’s doorjamb provides necessary tire and loading
information.Tire Labeling
The tires that came on your vehicle have a
number of markings. Those you should be
aware of are described below.
Whenever tires are replaced, they should be replaced with tires of the same size.
1Tire and Loading Information Label
The tire and loading information label attached to the
driver’s doorjamb contains:aThe number of people your vehicle can carry.bThe total weight your vehicle can carry. Do not
exceed this weight.cThe original tire sizes for front, rear, and spare.dThe proper cold tire pressure for front, rear, and
spare.
Label
ExampleExample
Tire Size
Tire
Identification
Number (TIN)
Maximum
Tire Load
Maximum
Tire Pressure
Tire Size■Tire Size
1Tire Size
Following is an example of tire size with an
explanation of what each component means.
P195/65 R15 89S
P: Vehicle type (P indicates passenger vehicle).
195: Tire width in millimeters.
65: Aspect ratio (the tire’s section height as a
percentage of its width).
R: Tire construction code (R indicates radial).
15: Rim diameter in inches.
89: Load index (a numerical code associated with the
maximum load the tire can carry).
S: Speed symbol (an alphabetical code indicating the
maximum speed rating).
Page 282 of 346
281
uuChecking and Maintaining TiresuTire Labeling
Maintenance
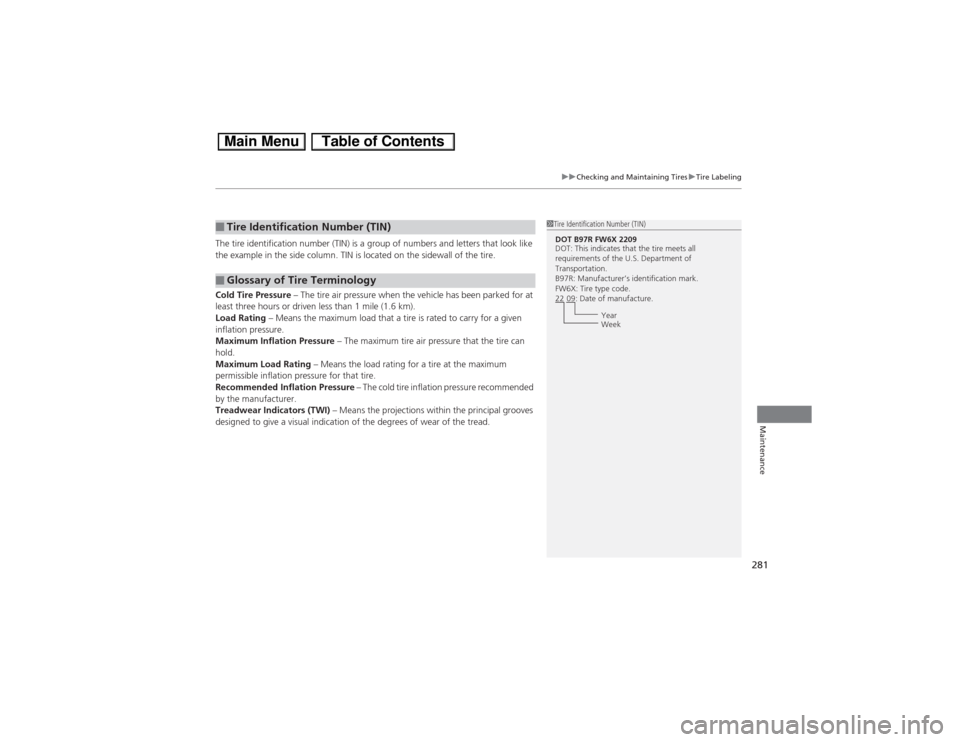
The tire identification number (TIN) is a group of numbers and letters that look like
the example in the side column. TIN is located on the sidewall of the tire.
Cold Tire Pressure – The tire air pressure when the vehicle has been parked for at
least three hours or driven less than 1 mile (1.6 km).
Load Rating – Means the maximum load that a tire is rated to carry for a given
inflation pressure.
Maximum Inflation Pressure – The maximum tire air pressure that the tire can
hold.
Maximum Load Rating – Means the load rating for a tire at the maximum
permissible inflation pressure for that tire.
Recommended Inflation Pressure – The cold tire inflation pressure recommended
by the manufacturer.
Treadwear Indicators (TWI) – Means the projections within the principal grooves
designed to give a visual indication of the degrees of wear of the tread.■Tire Identification Number (TIN)■Glossary of Tire Terminology
1Tire Identification Number (TIN)DOT B97R FW6X 2209
DOT: This indicates that the tire meets all
requirements of the U.S. Department of
Transportation.
B97R: Manufacturer’s identification mark.
FW6X: Tire type code.
22 09: Date of manufacture.
Year
Week
Page 285 of 346
284
uuChecking and Maintaining TiresuWear Indicators
Maintenance
Wear Indicators
The groove where the wear indicator is
located is 1/16 inch (1.6 mm) shallower than
elsewhere on the tire. If the tread has worn so
that the indicator is exposed, replace the tire.
Worn out tires have poor traction on wet
roads.
Tire Service LifeThe life of your tires is dependent on many factors, including driving habits, road
conditions, vehicle loading, inflation pressure, maintenance history, speed, and
environmental conditions (even when the tires are not in use).
In addition to regular inspections and inflation pressure maintenance, it is
recommended that you have annual inspections performed once the tires reach five
years old. All tires, including the spare, should be removed from service after 10
years from the date of manufacture, regardless of their condition or state of wear.
Example of a Wear
Indicator mark
Page 286 of 346
285
uuChecking and Maintaining TiresuTire and Wheel Replacement
Maintenance
Tire and Wheel ReplacementReplace your tires with radials of the same size, load range, speed rating, and
maximum cold tire pressure rating (as shown on the tire’s sidewall). Using tires of a
different size or construction can cause the ABS and vehicle stability assist (VSA®)
system to work incorrectly.
It is best to replace all four tires at the same time. If that isn’t possible, replace the
front or rear tires in pairs.
Make sure that the wheel’s specifications match those of the original wheels.
If you replace a wheel, only use TPMS specified wheels approved for your vehicle.
1Tire and Wheel Replacement
3
WARNING
Installing improper tires on your vehicle can
affect handling and stability. This can cause
a crash in which you can be seriously hurt or
killed.
Always use the size and type of tires
recommended in this owner’s manual.
U.S. models only
Page 296 of 346

295
Handling the Unexpected
This chapter explains how to handle unexpected troubles.
Tools
Types of Tools .................................. 296
If a Tire Goes Flat
Temporarily Repairing a Flat Tire....... 297
Changing a Flat Tire ......................... 305
Engine Does Not Start
Checking the Engine ........................ 311
Jump Starting.................................... 312
Shift Lever Does Not Move.............. 314
Overheating
How to Handle Overheating ............. 315Indicator, Coming On/Blinking
If the Low Oil Pressure Indicator Comes
On................................................ 317If the 12 Volt Battery Charging System
Indicator Comes On ....................... 317
If the Malfunction Indicator Lamp Comes
On or Blinks ..................................... 318
If the Brake System Indicator (Red) Comes
On...................................................... 319If the EPS System Indicator Comes On .. 319If the IMA Indicator Comes On......... 320If the Low Tire Pressure/TPMS Indicator
Comes On or Blinks ....................... 320
Fuses
Fuse Locations ................................. 321
Inspecting and Changing Fuses ........ 323
Emergency Towing........................... 324
Page 298 of 346

297
Continued
Handling the Unexpected
If a Tire Goes FlatTemporarily Repairing a Flat TireThis vehicle is not equipped with a spare tire. If the tire has a large cut or is otherwise
severely damaged, you will need to have the vehicle towed. If the tire only has a
small puncture, from a nail for instance, you can use the temporary tire repair kit so
that you can drive to the nearest service station for a more permanent repair.
If a tire goes flat while driving, grasp the steering wheel firmly, and brake gradually
to reduce speed. Then stop in a safe place.
1.Park the vehicle on firm, level, and non-slippery surface and apply the parking
brake.
2.Put the shift lever in
(P.
3.Turn on the hazard warning lights and turn the ignition switch to LOCK
(0.
■Getting Ready to Temporarily Repair the Flat Tire
1Temporarily Repairing a Flat Tire
The kit should not be used in the following situations.
Instead, contact a dealer or a roadside assistant to
have the vehicle towed.•The tire sealant has expired.•More than two tires are punctured.•The puncture or cut is larger than 3/16 inch (4 mm).•The tire side wall is damaged or the puncture is
outside the tire contact area.•Damage has been caused by driving with the tire
extremely under inflated.•The tire bead is no longer seated.•The rim is damaged.
Do not remove a nail or screw that punctured the
tire. If you remove it from the tire, you may not be
able to repair the puncture using the kit.NOTICEDo not use a puncture-repairing agent other than the
one provided in the kit that came with your vehicle. If
a different agent is used, you may permanently
damage the tire pressure sensor.
When the puncture is:
Kit Use
Smaller than 3/16 inch
(4mm)
Yes
Larger than 3/16 inch
(4mm)
No
Contact
Area
Pressure Gauge
Sealant/Air Hose (Clear)
Tire Sealant
Expiration Date
Pressure Relief
Button
Instruction
Manual
Air Only Hose (Black)
SEALANT/AIR sideAIR ONLY side
Inflator Switch
Repair Notification Label
Power Plug
Speed Restriction Label
Selector Switch
Page 301 of 346
uuIf a Tire Goes FlatuTemporarily Repairing a Flat Tire
300Handling the Unexpected
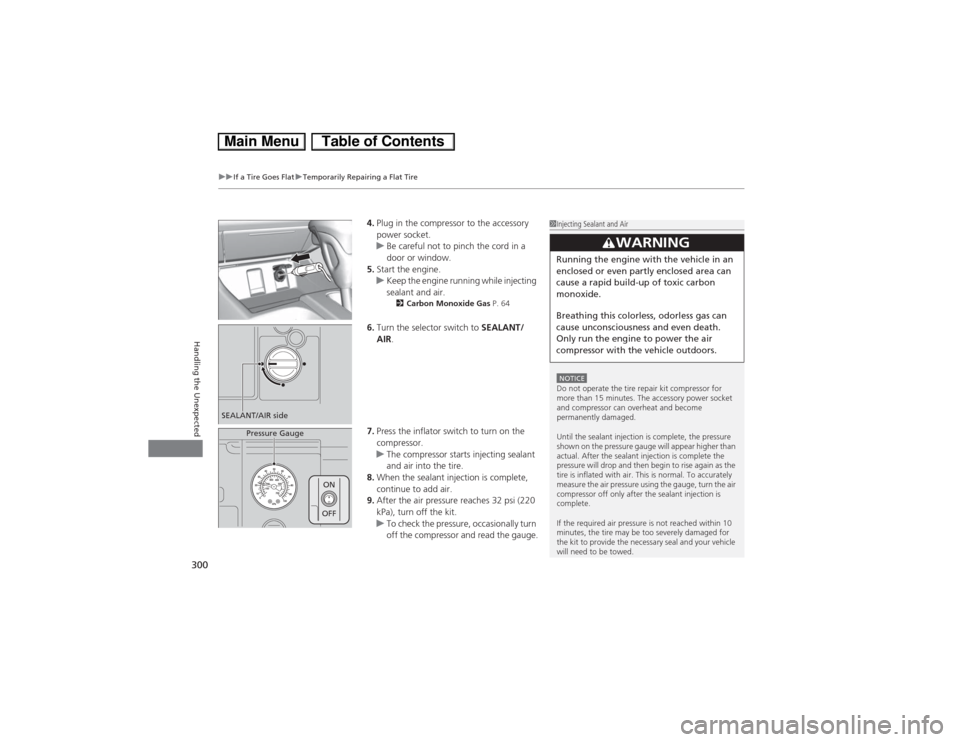
4.Plug in the compressor to the accessory
power socket.
uBe careful not to pinch the cord in a
door or window.
5.Start the engine.
uKeep the engine running while injecting
sealant and air.
2Carbon Monoxide Gas P. 64
6.Turn the selector switch to SEALANT/
AIR.
7.Press the inflator switch to turn on the
compressor.
uThe compressor starts injecting sealant
and air into the tire.
8.When the sealant injection is complete,
continue to add air.
9.After the air pressure reaches 32 psi (220
kPa), turn off the kit.
uTo check the pressure, occasionally turn
off the compressor and read the gauge.
1Injecting Sealant and AirNOTICEDo not operate the tire repair kit compressor for
more than 15 minutes. The accessory power socket
and compressor can overheat and become
permanently damaged.
Until the sealant injection is complete, the pressure
shown on the pressure gauge will appear higher than
actual. After the sealant injection is complete the
pressure will drop and then begin to rise again as the
tire is inflated with air. This is normal. To accurately
measure the air pressure using the gauge, turn the air
compressor off only after the sealant injection is
complete.
If the required air pressure is not reached within 10
minutes, the tire may be too severely damaged for
the kit to provide the necessary seal and your vehicle
will need to be towed.
3
WARNING
Running the engine with the vehicle in an
enclosed or even partly enclosed area can
cause a rapid build-up of toxic carbon
monoxide.
Breathing this colorless, odorless gas can
cause unconsciousness and even death.
Only run the engine to power the air
compressor with the vehicle outdoors.
SEALANT/AIR side
Pressure Gauge
ON
OFF
Page 302 of 346
Continued
301
uuIf a Tire Goes FlatuTemporarily Repairing a Flat Tire
Handling the Unexpected
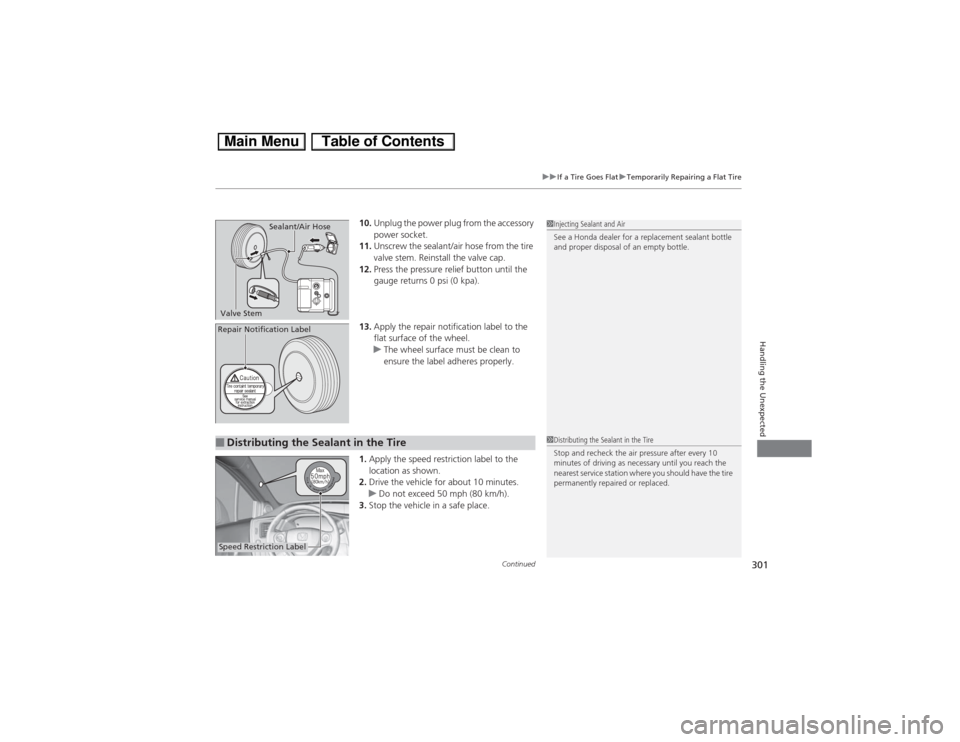
10.Unplug the power plug from the accessory
power socket.
11.Unscrew the sealant/air hose from the tire
valve stem. Reinstall the valve cap.
12.Press the pressure relief button until the
gauge returns 0 psi (0 kpa).
13.Apply the repair notification label to the
flat surface of the wheel.
uThe wheel surface must be clean to
ensure the label adheres properly.
1.Apply the speed restriction label to the
location as shown.
2.Drive the vehicle for about 10 minutes.
uDo not exceed 50 mph (80 km/h).
3.Stop the vehicle in a safe place.
1Injecting Sealant and Air
See a Honda dealer for a replacement sealant bottle
and proper disposal of an empty bottle.
Valve StemSealant/Air HoseRepair Notification Label■Distributing the Sealant in the Tire
1Distributing the Sealant in the Tire
Stop and recheck the air pressure after every 10
minutes of driving as necessary until you reach the
nearest service station where you should have the tire
permanently repaired or replaced.
Speed Restriction Label