2013 FORD F250 flat tire
[x] Cancel search: flat tirePage 383 of 577

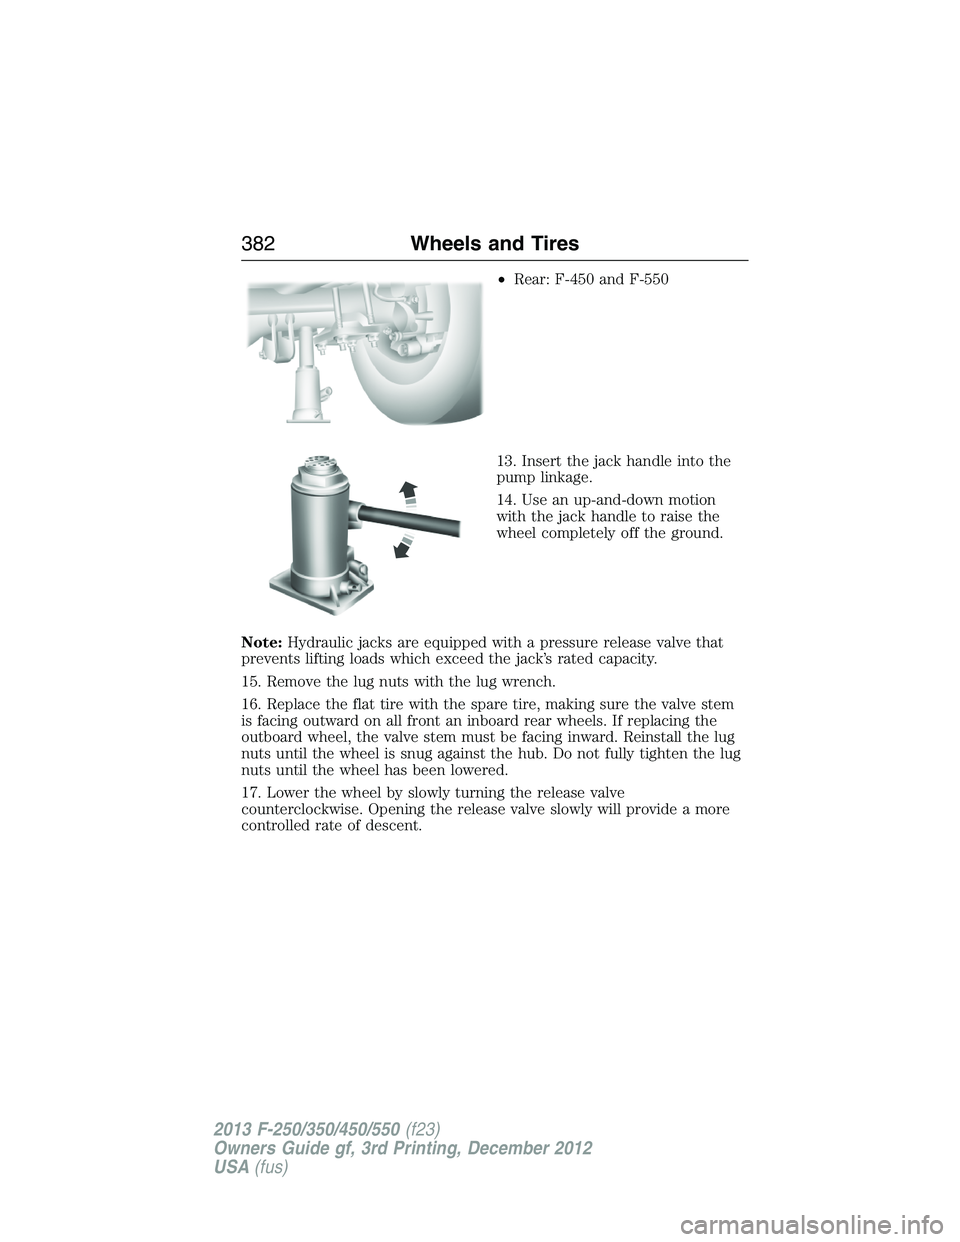
•Rear: F-450 and F-550
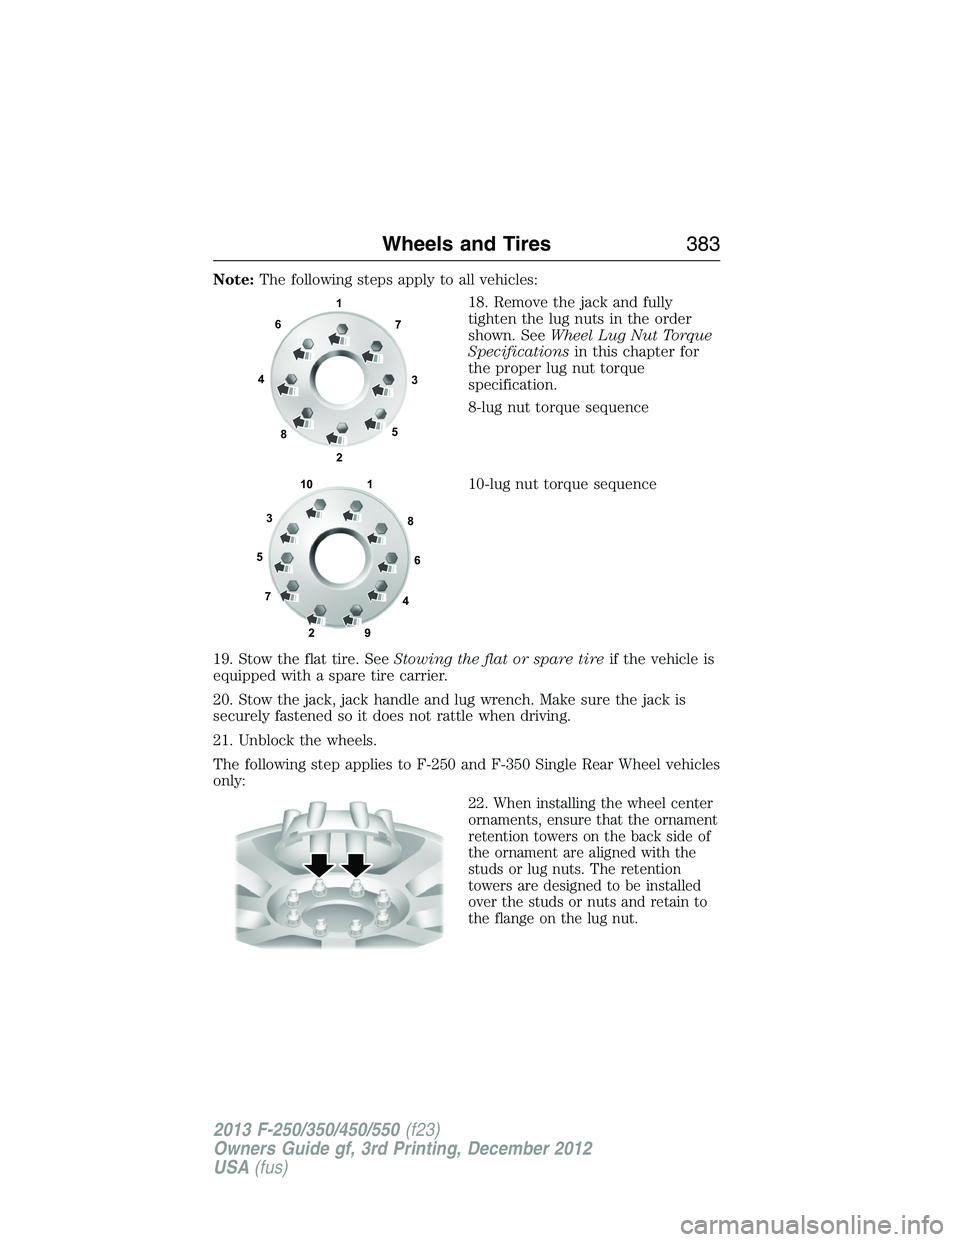
13. Insert the jack handle into the
pump linkage.
14. Use an up-and-down motion
with the jack handle to raise the
wheel completely off the ground.
Note:Hydraulic jacks are equipped with a pressure release valve that
prevents lifting loads which exceed the jack’s rated capacity.
15. Remove the lug nuts with the lug wrench.
16. Replace the flat tire with the spare tire, making sure the valve stem
is facing outward on all front an inboard rear wheels. If replacing the
outboard wheel, the valve stem must be facing inward. Reinstall the lug
nuts until the wheel is snug against the hub. Do not fully tighten the lug
nuts until the wheel has been lowered.
17. Lower the wheel by slowly turning the release valve
counterclockwise. Opening the release valve slowly will provide a more
controlled rate of descent.
382Wheels and Tires
2013 F-250/350/450/550(f23)
Owners Guide gf, 3rd Printing, December 2012
USA(fus)
Page 384 of 577

Note:The following steps apply to all vehicles:
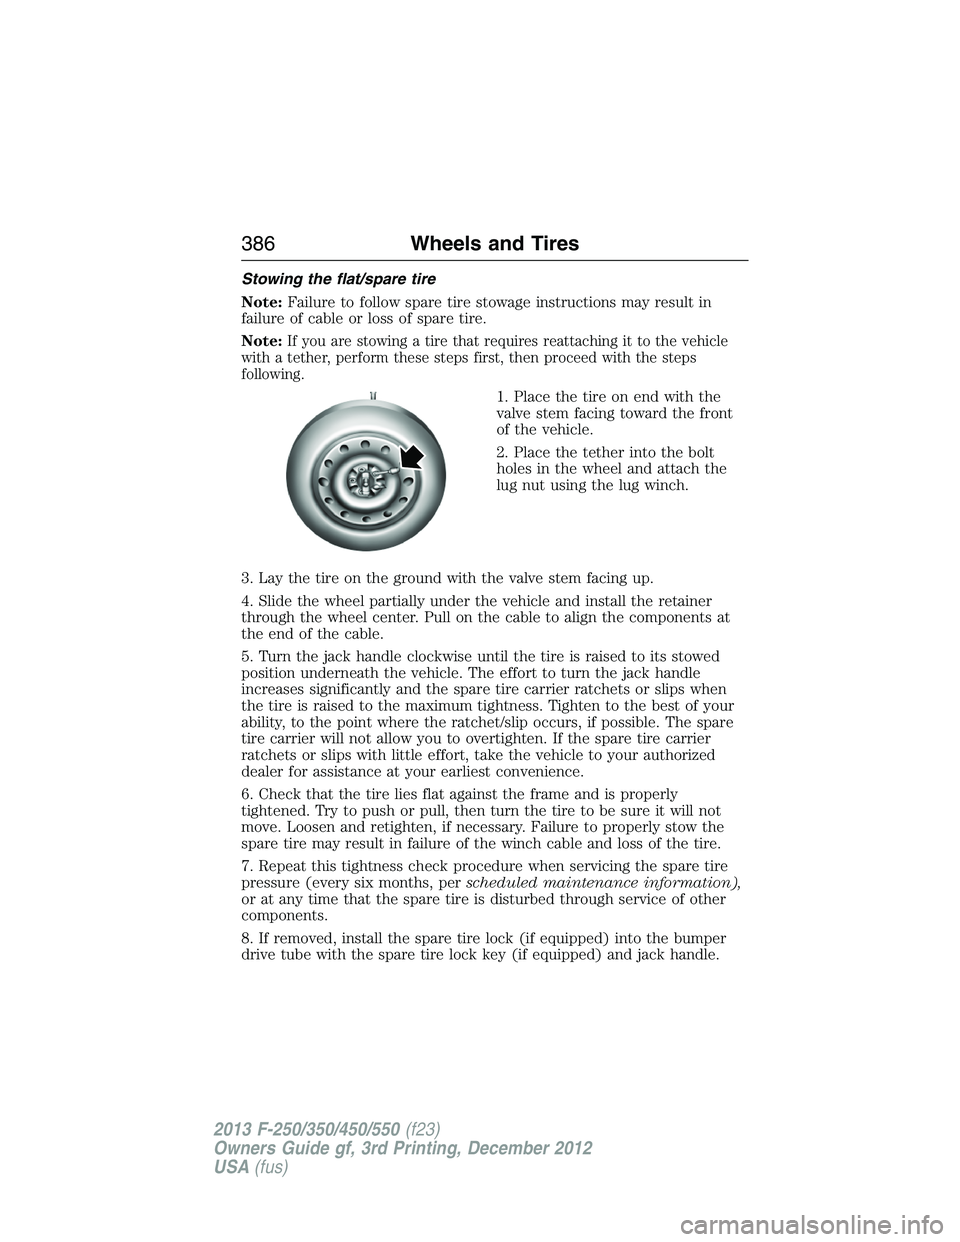
18. Remove the jack and fully
tighten the lug nuts in the order
shown. SeeWheel Lug Nut Torque
Specificationsin this chapter for
the proper lug nut torque
specification.
8-lug nut torque sequence
10-lug nut torque sequence
19. Stow the flat tire. SeeStowing the flat or spare tireif the vehicle is
equipped with a spare tire carrier.
20. Stow the jack, jack handle and lug wrench. Make sure the jack is
securely fastened so it does not rattle when driving.
21. Unblock the wheels.
The following step applies to F-250 and F-350 Single Rear Wheel vehicles
only:
22.
When installing the wheel center
ornaments, ensure that the ornament
retention towers on the back side of
the ornament are aligned with the
studs or lug nuts. The retention
towers are designed to be installed
over the studs or nuts and retain to
the flange on the lug nut.
1
3 4
27 6
5
8
1
2 3
4 5
6
78
9 10
Wheels and Tires383
2013 F-250/350/450/550(f23)
Owners Guide gf, 3rd Printing, December 2012
USA(fus)
Page 387 of 577

Stowing the flat/spare tire
Note:Failure to follow spare tire stowage instructions may result in
failure of cable or loss of spare tire.
Note:
If you are stowing a tire that requires reattaching it to the vehicle
with a tether, perform these steps first, then proceed with the steps
following.
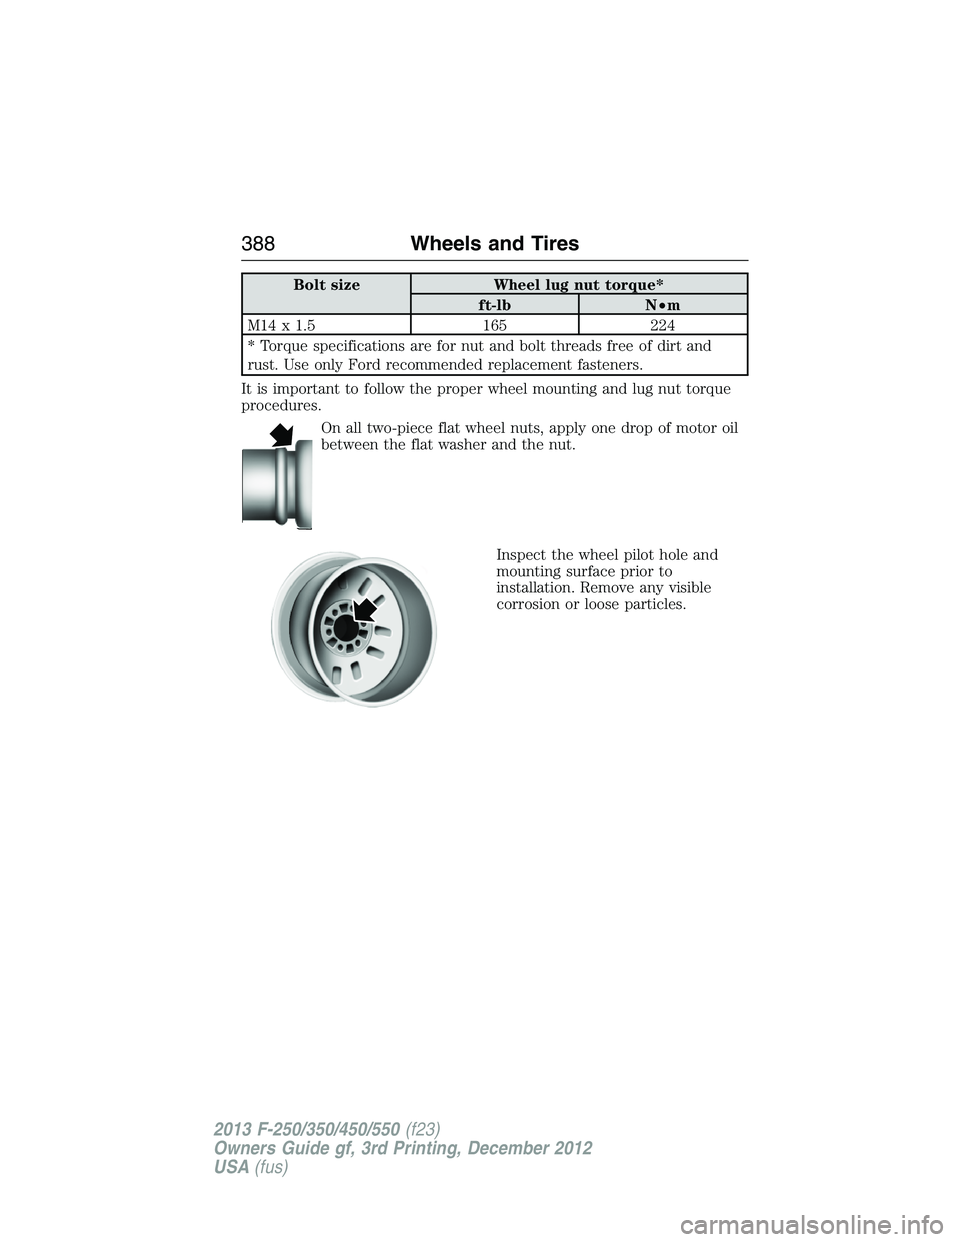
1. Place the tire on end with the
valve stem facing toward the front
of the vehicle.
2. Place the tether into the bolt
holes in the wheel and attach the
lug nut using the lug winch.
3. Lay the tire on the ground with the valve stem facing up.
4. Slide the wheel partially under the vehicle and install the retainer
through the wheel center. Pull on the cable to align the components at
the end of the cable.
5. Turn the jack handle clockwise until the tire is raised to its stowed
position underneath the vehicle. The effort to turn the jack handle
increases significantly and the spare tire carrier ratchets or slips when
the tire is raised to the maximum tightness. Tighten to the best of your
ability, to the point where the ratchet/slip occurs, if possible. The spare
tire carrier will not allow you to overtighten. If the spare tire carrier
ratchets or slips with little effort, take the vehicle to your authorized
dealer for assistance at your earliest convenience.
6. Check that the tire lies flat against the frame and is properly
tightened. Try to push or pull, then turn the tire to be sure it will not
move. Loosen and retighten, if necessary. Failure to properly stow the
spare tire may result in failure of the winch cable and loss of the tire.
7. Repeat this tightness check procedure when servicing the spare tire
pressure (every six months, perscheduled maintenance information),
or at any time that the spare tire is disturbed through service of other
components.
8. If removed, install the spare tire lock (if equipped) into the bumper
drive tube with the spare tire lock key (if equipped) and jack handle.
386Wheels and Tires
2013 F-250/350/450/550(f23)
Owners Guide gf, 3rd Printing, December 2012
USA(fus)
Page 388 of 577

TECHNICAL SPECIFICATIONS
Wheel Lug Nut Torque Specifications
WARNING:When a wheel is installed, always remove any
corrosion, dirt or foreign materials present on the mounting
surfaces of the wheel or the surface of the wheel hub, brake drum or
brake disc that contacts the wheel. Make sure that any fasteners that
attach the rotor to the hub are secured so they do not interfere with
the mounting surfaces of the wheel. Installing wheels without correct
metal-to-metal contact at the wheel mounting surfaces can cause the
wheel nuts to loosen and the wheel to come off while the vehicle is in
motion, resulting in loss of control.
On vehicles equipped with single rear wheels, retighten the lug nuts to
the specified torque at 100 miles (160 kilometers) after any wheel
disturbance (such as tire rotation, changing a flat tire, wheel removal).
On vehicles equipped with dual rear wheels, retighten the wheel lug nuts
to the specified torque at 100 miles (160 kilometers), and again at
500 miles (800 kilometers) of new vehicle operation and after any wheel
disturbance (such as tire rotation, changing a flat tire, wheel removal).
Wheels and Tires387
2013 F-250/350/450/550(f23)
Owners Guide gf, 3rd Printing, December 2012
USA(fus)
Page 389 of 577

Bolt size Wheel lug nut torque*
ft-lb N•m
M14 x 1.5 165 224
* Torque specifications are for nut and bolt threads free of dirt and
rust. Use only Ford recommended replacement fasteners.
It is important to follow the proper wheel mounting and lug nut torque
procedures.
On all two-piece flat wheel nuts, apply one drop of motor oil
between the flat washer and the nut.
Inspect the wheel pilot hole and
mounting surface prior to
installation. Remove any visible
corrosion or loose particles.
388Wheels and Tires
2013 F-250/350/450/550(f23)
Owners Guide gf, 3rd Printing, December 2012
USA(fus)
Page 402 of 577

Roadside Assistance
Exclusive 24/7 roadside assistance, including:
•Towing, flat-tire change and battery jump starts
•Out of fuel and lock-out assistance
•Travel Expense reimbursement for lodging, meals and rental car
•Destination assistance for taxi, shuttle, rental car coverage and
emergency transportation
Transferable Coverage
If you sell your vehicle before your Ford Extended Service Plan coverage
expires, you can transfer any remaining coverage to the new owner.
Whenever you sell your vehicle, prospective buyers may have a higher
degree of confidence that vehicle was properly maintained with Ford
ESP, thereby improving resale value!
Avoid the Rising cost of vehicle maintenance
Ford ESP also offers a Premium Maintenance Plan that covers all
scheduled maintenance, and select items that routinely wear out.
The coverage is prepaid, so you never have to worry about affording
vehicle maintenance. It covers regular checkups, routine inspections,
preventative care and replacement items that require periodic attention
for normal wear:
•Windshield Wiper Blades
•Spark Plugs (except in California)
•The clutch Disc
•Brake pads and linings
•Shock Absorbers
•Belts and Hoses
•Diesel Exhaust Fluid Replenishment
Contact your selling dealership today so they can customize a Genuine
Ford Extended Service Plan that fits your driving lifestyle and budget.
Ford Extended Service Plan401
2013 F-250/350/450/550(f23)
Owners Guide gf, 3rd Printing, December 2012
USA(fus)
Page 576 of 577

heated ......................................163
memory seat .....................63, 160
SecuriCode keyless entry
system ..........................................75
SecuriLock passive anti-theft
system ..........................................77
Selecting your media source
(USB, Line in, BT audio) .........454
Sending new text messages .....504
Setting a destination ................537
Setting a destination
by voice .....................................537
Settings ......................................520
Setting the clock .......136–137, 520
Side air curtain ...........................57
Side-curtain airbags system .......57
SIRIUS® satellite radio ............487
SIRIUS satellite radio voice
commands .................................489
SIRIUS Travel Link ...................512
SIRIUS Travel Link voice
commands .................................514
Snowplowing ...............16, 272–274
SOS Post Crash Alert .................47
Spark plugs,
specifications .....................389, 395
Special notice ..............................17
ambulance conversions ............16
four-wheel drive vehicles .......275
Stability system .........................228
Starting a flex fuel vehicle .......185
Starting your vehicle ........183, 185
jump starting ..........................279
Steering wheel ............................80controls ......................................80
tilting .........................................80
Supplemental Restraint System
(SRS) (see airbags) ....................48
Supported media file types ......497
Supported player, media
formats and metadata
information ................................497
SYNC® AppLink™ ...................449
SYNC® customer support ........421
SYNC® Services ................445, 508
System settings .........................524
T
Tailgate ......................................248
Tail lamps
bulb replacement ............329–330
Temperature control
(see Climate control) ..............146,
148, 534
Text messaging .................432, 504
Text messaging (sending,
downloading, deleting) .....433, 435
Tilt steering wheel ......................80
Tires ...........................345–346, 371
alignment ................................361
care ..........................................345
changing ..........................371, 376
checking the pressure ............355
inflating ...................................353
label .........................................352
replacing ..................................359
rotating ....................................362
safety practices .......................360
sidewall information ...............348
snow tires and chains ............363
spare tire .................................372
Index575
2013 F-250/350/450/550(f23)
Owners Guide gf, 3rd Printing, December 2012
USA(fus)