2013 FORD EXPLORER instrument panel
[x] Cancel search: instrument panelPage 7 of 576

Washer fluid check....................................337
Battery.............................................337
Checking the wiper blades...............................339
Air filter(s)..........................................341
Adjusting the headlamps................................342
Changing a bulb......................................344
Bulb specification chart.................................349
Vehicle Care 350
Cleaning products.....................................350
Cleaning the exterior...................................350
Waxing.............................................352
Repairing minor paint damage............................352
Cleaning the engine...................................352
Cleaning the windows and wiper blades.....................353
Cleaning the interior...................................353
Cleaning the instrument panel and instrument cluster lens.......354
Cleaning leather seats..................................355
Cleaning the alloy wheels...............................355
Vehicle storage.......................................356
Wheels and Tires 359
Tire care...........................................362
Using snow chains.....................................377
Tire Pressure Monitoring System (TPMS)....................378
Changing a road wheel.................................383
Technical specifications.................................391
Wheel lug nut torque..................................391
Capacities and Specifications 392
Part numbers........................................397
Vehicle identification number.............................397
Vehicle certification label................................398
Transmission code designation............................399
Table of Contents7
2013 Explorer(exp)
Owners Guide gf, 1st Printing
USA(fus)
Page 52 of 576
•Recline the seat slightly (one or two degrees) from the upright
position.
After all occupants have adjusted their seats and put on safety belts, it’s
very important that they continue to sit properly. A properly seated
occupant sits upright, leaning against the seat back, and centered on the
seat cushion, with their feet comfortably extended on the floor. Sitting
improperly can increase the chance of injury in a crash event. For
example, if an occupant slouches, lies down, turns sideways, sits forward,
leans forward or sideways, or puts one or both feet up, the chance of
injury during a crash is greatly increased.
Children and Airbags
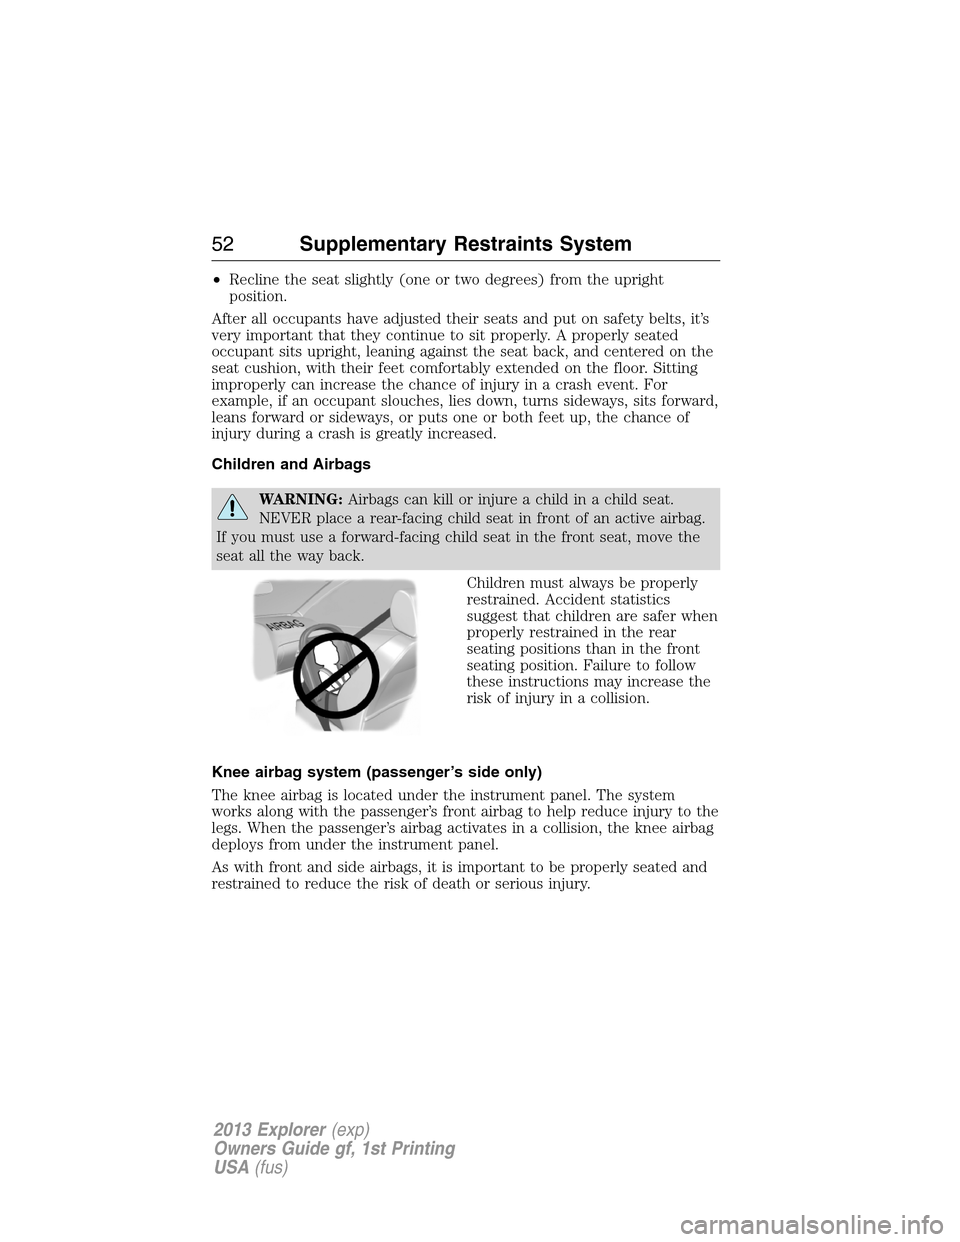
WARNING:Airbags can kill or injure a child in a child seat.
NEVER place a rear-facing child seat in front of an active airbag.
If you must use a forward-facing child seat in the front seat, move the
seat all the way back.
Children must always be properly
restrained. Accident statistics
suggest that children are safer when
properly restrained in the rear
seating positions than in the front
seating position. Failure to follow
these instructions may increase the
risk of injury in a collision.
Knee airbag system (passenger’s side only)
The knee airbag is located under the instrument panel. The system
works along with the passenger’s front airbag to help reduce injury to the
legs. When the passenger’s airbag activates in a collision, the knee airbag
deploys from under the instrument panel.
As with front and side airbags, it is important to be properly seated and
restrained to reduce the risk of death or serious injury.
52Supplementary Restraints System
2013 Explorer(exp)
Owners Guide gf, 1st Printing
USA(fus)
Page 53 of 576
FRONT PASSENGER SENSING SYSTEM
WARNING:Even with Advanced Restraints Systems, children 12
and under should be properly restrained in a rear seating
position.
WARNING:Sitting improperly out of position or with the seat
back reclined too far can take off weight from the seat cushion
and affect the decision of the front passenger sensing system, resulting
in serious injury or death in a crash.
Always sit upright against your seatback, with your feet on the floor.
WARNING:Any alteration/modification to the front passenger
seat may affect the performance of the front passenger sensing
system.
This system works with sensors that are part of the front passenger’s
seat and safety belt to detect the presence of a properly-seated occupant
and determine if the front passenger’s frontal airbag should be enabled
(may inflate) or not.
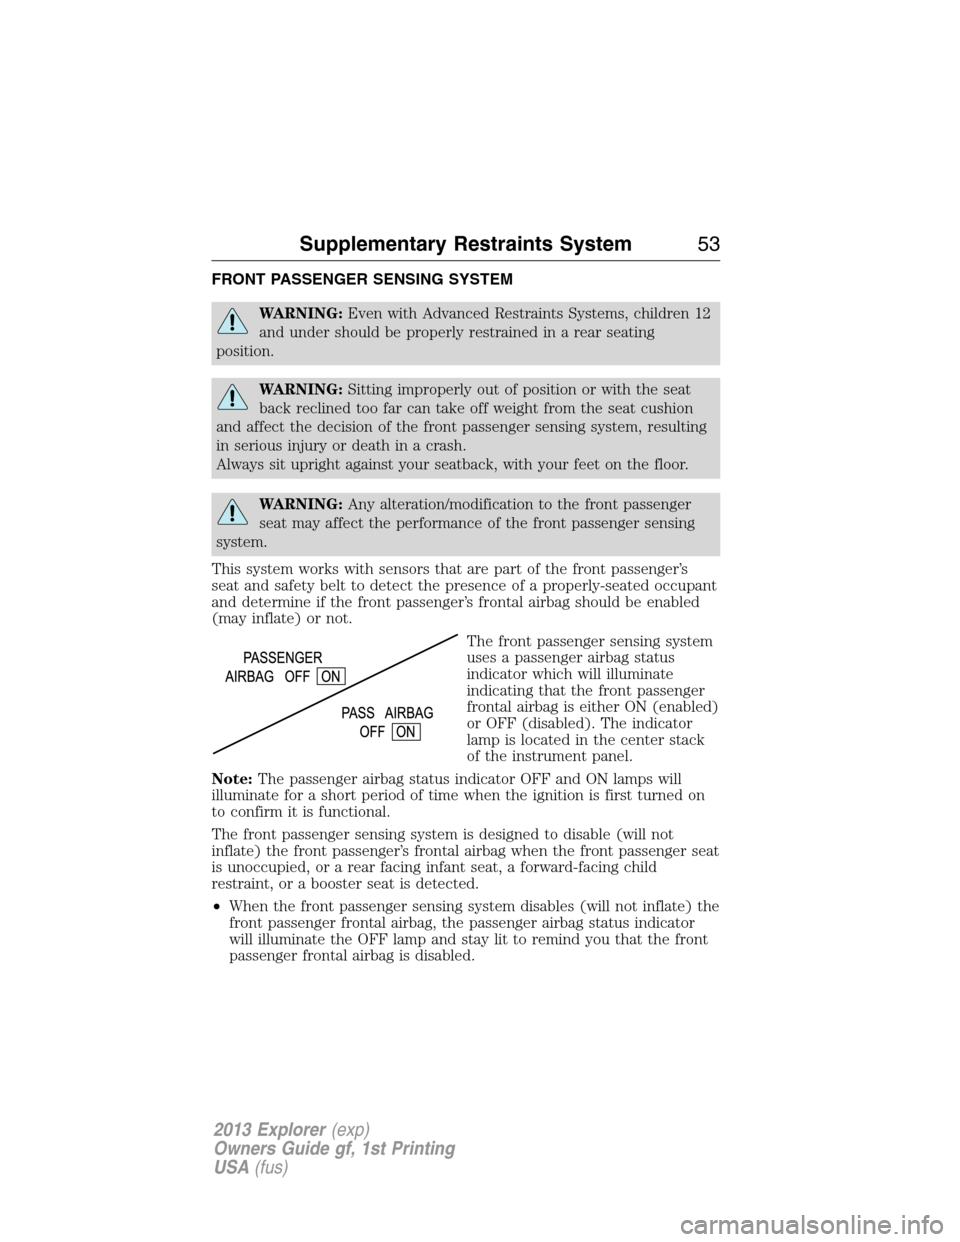
The front passenger sensing system
uses a passenger airbag status
indicator which will illuminate
indicating that the front passenger
frontal airbag is either ON (enabled)
or OFF (disabled). The indicator
lamp is located in the center stack
of the instrument panel.
Note:The passenger airbag status indicator OFF and ON lamps will
illuminate for a short period of time when the ignition is first turned on
to confirm it is functional.
The front passenger sensing system is designed to disable (will not
inflate) the front passenger’s frontal airbag when the front passenger seat
is unoccupied, or a rear facing infant seat, a forward-facing child
restraint, or a booster seat is detected.
•When the front passenger sensing system disables (will not inflate) the
front passenger frontal airbag, the passenger airbag status indicator
will illuminate the OFF lamp and stay lit to remind you that the front
passenger frontal airbag is disabled.
Supplementary Restraints System53
2013 Explorer(exp)
Owners Guide gf, 1st Printing
USA(fus)
Page 67 of 576

Remote Starting the Engine
Note:Each button press must be done within three seconds of each
other. The vehicle will not remote start if this sequence is not followed
and the horn will not chirp.
The label on your transmitter details
the starting procedure. To remote
start the engine:
1. Press the lock button to lock all the doors.
2. Press the remote start button twice. The exterior lamps will flash
twice.
The horn will chirp if the system fails to start (unless quiet start is on).
Quiet start will run the blower fan at a slower speed to reduce noise. It
can be switched on or off. Refer to theInformation Displayschapter.
Note:If the vehicle has been remote started and is equipped with an
integrated keyhead transmitter, you must turn the ignition on before
driving the vehicle. If equipped with an intelligent access transmitter, you
must press the START/STOP button on the instrument panel once while
applying the brake pedal before driving the vehicle.
The power windows will be inhibited during the remote start and the
radio will not turn on automatically.
The parking lamps will remain on and the engine will run for 5, 10, or
15 minutes, depending on the setting. Refer to theInformation Displays
chapter to select the duration of the remote start system.
Keys and Remote Control67
2013 Explorer(exp)
Owners Guide gf, 1st Printing
USA(fus)
Page 81 of 576

Power Liftgate (If Equipped)
WARNING:Make sure all persons are clear of the power liftgate
area before using the power liftgate control.
WARNING:Keep keys out of reach of children. Do not allow
children to play near an open or moving power liftgate.
Note:Cycling the ignition while the liftgate is power closing and is near
the latch may cause the liftgate to reverse to full open position. Make
sure that the liftgate is closed before operating or moving the vehicle,
especially in an enclosure, like a garage or a parking structure. The
liftgate or its components could be damaged.
Note:Do not drive with the liftgate open without first disabling the
power function and securing the liftgate to the vehicle.
Note:In case of operation in extreme cold -40°F (-40°C), or on extreme
inclines, manual operation of the liftgate is suggested.
The power liftgate can be enabled or disabled using the information
display. The remote control and instrument panel button will still operate
the liftgate regardless of the setting.
Opening and Closing the Power Liftgate
Note:The liftgate movement direction can be reversed with a second
press of the instrument panel, or the control button on the liftgate, or a
second double press of the transmitter button.
The liftgate will only operate with the vehicle in P (Park).
A chime will sound three times as the liftgate begins to power close. A
single chime indicates a problem with the close request, caused by:
•the ignition is on and the transmission is not in P (Park);
•or the battery voltage is below the minimum operating voltage;
•or the vehicle speed is at or above 3 mph (5 km/h).
If the liftgate reverses and starts to close after an open request, a fast
continuous chime indicates excessive load on the gate or a possible strut
failure. See your authorized dealer if you still have a fast chime after the
load is removed.
To open or close from the instrument panel:Press the
instrument panel button.
Locks81
2013 Explorer(exp)
Owners Guide gf, 1st Printing
USA(fus)
Page 83 of 576
The new open liftgate height will now be recalled when the power
liftgate is opened. To change the programmed height, repeat the above
procedure. Once the power liftgate is opened it can be manually moved
to a different height.
When operating the power liftgate after a lower height than full-open has
been programmed, the liftgate can be fully opened by manually pushing
it upward to the maximum open position.
Obstacle Detection
When closing:The system will reverse to full open when it detects an
obstacle. A chime will sound three times as the liftgate begins to reopen.
Remove the obstacle to close the liftgate can be closed under power.
Note:Entering the vehicle while the liftgate is closing can cause the
vehicle to bounce and activate obstacle detection. To prevent this, allow
the power liftgate to fully close before entering the vehicle. Before
driving off, check the instrument cluster for a liftgate or door ajar
message and/or warning indicator. Driving off without first checking for
the liftgate or door ajar message and/or warning indicator could result in
the liftgate being left open, unintentionally, while you are driving.
When opening:The system will stop and a chime will sound three times
when it detects an obstacle. Remove the obstacle to operate the liftgate.
Resetting the Power Liftgate
The liftgate may not operate properly and may need to be reset if any of
these conditions occur:
•a low voltage or dead battery
•disconnected battery
•the liftgate is manually closed and left ajar (unlatched)
To reset the power liftgate:
1. Disconnect the battery for 20 seconds then, reconnect the battery.
2. Manually close and fully latch the liftgate.
3. Power open the liftgate by using the transmitter, or the instrument
panel control button.
Locks83
2013 Explorer(exp)
Owners Guide gf, 1st Printing
USA(fus)
Page 98 of 576
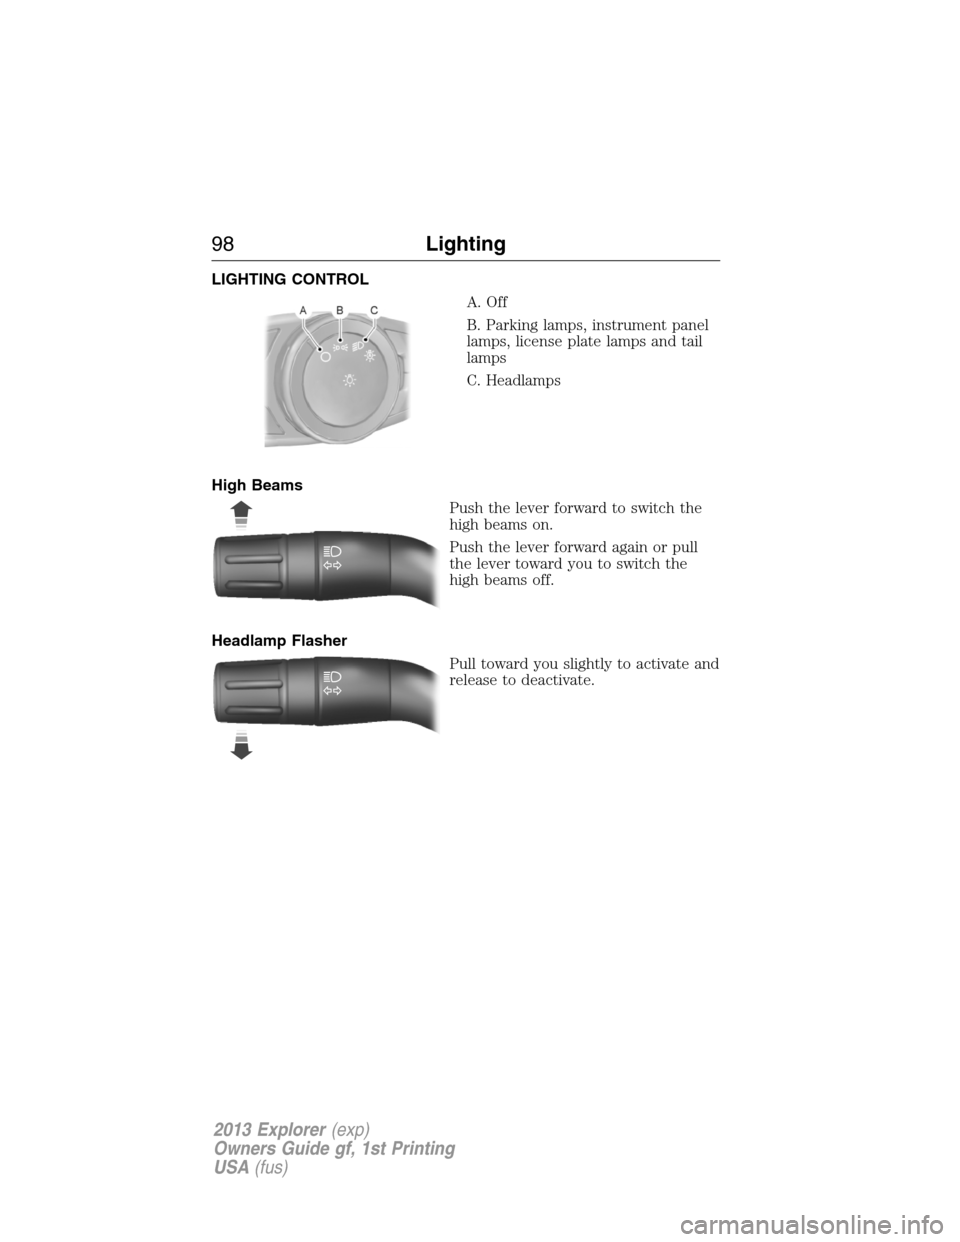
LIGHTING CONTROL
A. Off
B. Parking lamps, instrument panel
lamps, license plate lamps and tail
lamps
C. Headlamps
High Beams
Push the lever forward to switch the
high beams on.
Push the lever forward again or pull
the lever toward you to switch the
high beams off.
Headlamp Flasher
Pull toward you slightly to activate and
release to deactivate.
98Lighting
2013 Explorer(exp)
Owners Guide gf, 1st Printing
USA(fus)
Page 104 of 576
•Press the control. This will turn on the interior courtesy lights. The
lights will remain on until the control is pressed again.
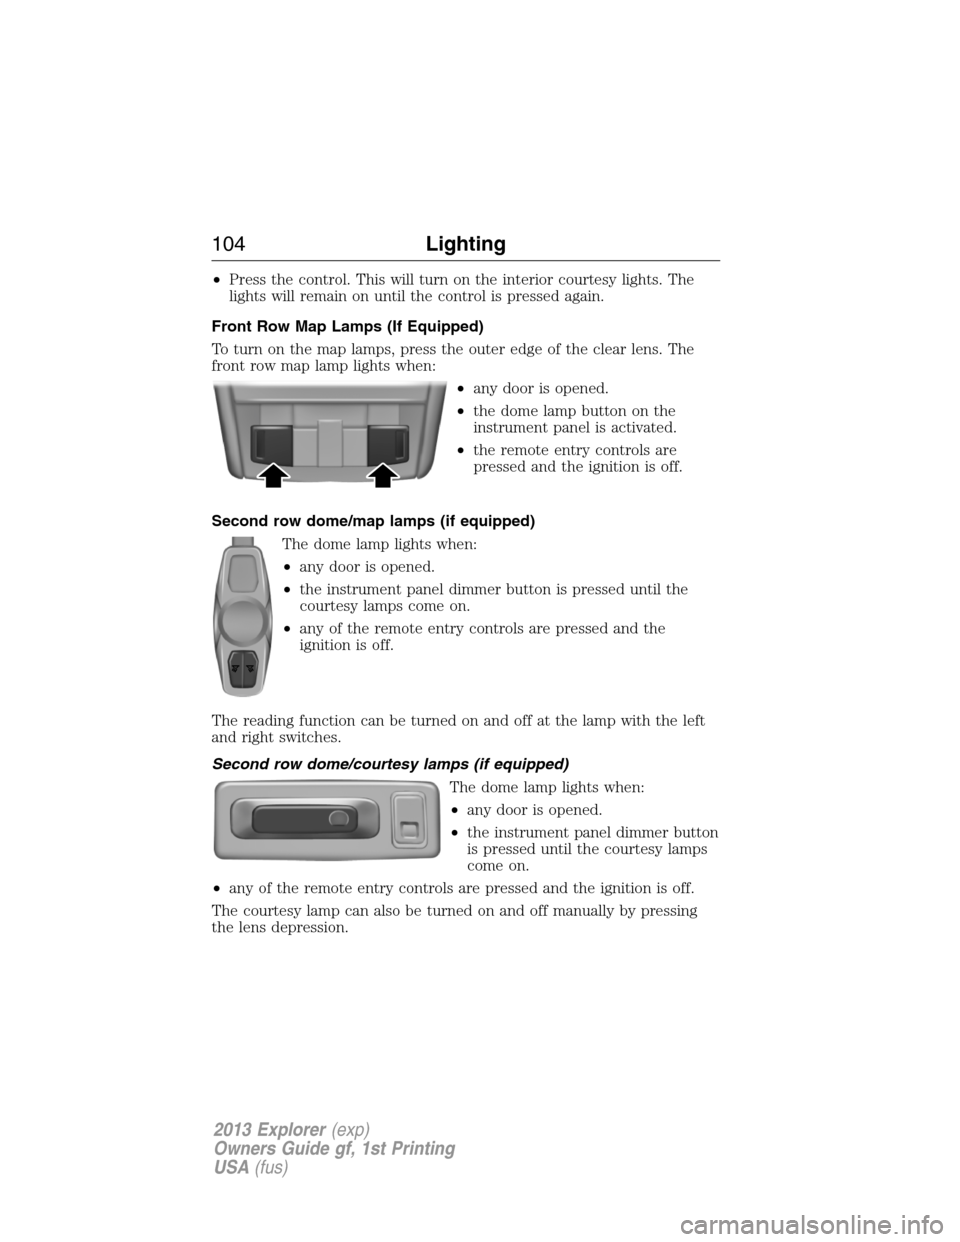
Front Row Map Lamps (If Equipped)
To turn on the map lamps, press the outer edge of the clear lens. The
front row map lamp lights when:
•any door is opened.
•the dome lamp button on the
instrument panel is activated.
•the remote entry controls are
pressed and the ignition is off.
Second row dome/map lamps (if equipped)
The dome lamp lights when:
•any door is opened.
•the instrument panel dimmer button is pressed until the
courtesy lamps come on.
•any of the remote entry controls are pressed and the
ignition is off.
The reading function can be turned on and off at the lamp with the left
and right switches.
Second row dome/courtesy lamps (if equipped)
The dome lamp lights when:
•any door is opened.
•the instrument panel dimmer button
is pressed until the courtesy lamps
come on.
•any of the remote entry controls are pressed and the ignition is off.
The courtesy lamp can also be turned on and off manually by pressing
the lens depression.
104Lighting
2013 Explorer(exp)
Owners Guide gf, 1st Printing
USA(fus)