Page 58 of 576
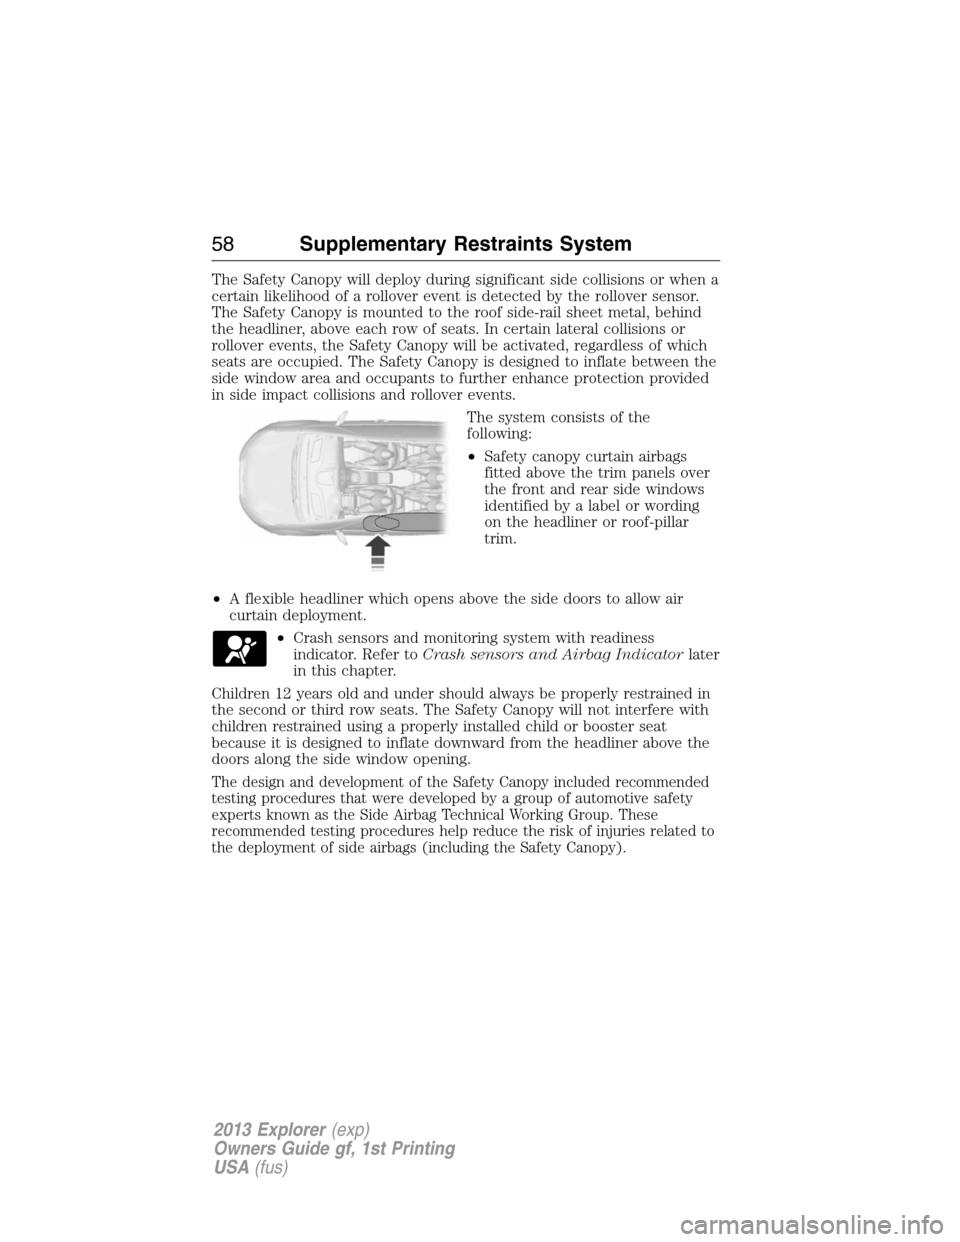
The Safety Canopy will deploy during significant side collisions or when a
certain likelihood of a rollover event is detected by the rollover sensor.
The Safety Canopy is mounted to the roof side-rail sheet metal, behind
the headliner, above each row of seats. In certain lateral collisions or
rollover events, the Safety Canopy will be activated, regardless of which
seats are occupied. The Safety Canopy is designed to inflate between the
side window area and occupants to further enhance protection provided
in side impact collisions and rollover events.
The system consists of the
following:
•Safety canopy curtain airbags
fitted above the trim panels over
the front and rear side windows
identified by a label or wording
on the headliner or roof-pillar
trim.
•A flexible headliner which opens above the side doors to allow air
curtain deployment.
•Crash sensors and monitoring system with readiness
indicator. Refer toCrash sensors and Airbag Indicatorlater
in this chapter.
Children 12 years old and under should always be properly restrained in
the second or third row seats. The Safety Canopy will not interfere with
children restrained using a properly installed child or booster seat
because it is designed to inflate downward from the headliner above the
doors along the side window opening.
The design and development of the Safety Canopy included recommended
testing procedures that were developed by a group of automotive safety
experts known as the Side Airbag Technical Working Group. These
recommended testing procedures help reduce the risk of injuries related to
the deployment of side airbags (including the Safety Canopy).
58Supplementary Restraints System
2013 Explorer(exp)
Owners Guide gf, 1st Printing
USA(fus)
Page 80 of 576
LIFTGATE
WARNING:It is extremely dangerous to ride in a cargo area,
inside or outside of a vehicle. In a collision, people riding in these
areas are more likely to be seriously injured or killed. Do not allow
people to ride in any area of your vehicle that is not equipped with
seats and safety belts. Be sure everyone in your vehicle is in a seat and
using a safety belt properly.
Manual Liftgate
WARNING:Make sure that the liftgate is closed to prevent
exhaust fumes from being drawn into the vehicle. This will also
prevent passengers and cargo from falling out. If you must drive with
the liftgate door open, keep the vehicle well ventilated so outside air
comes into the vehicle.
Note:Be careful when opening or closing the liftgate in a garage or
other enclosed area to avoid damaging the liftgate.
Note:Do not hang anything (bike rack, etc.) from the spoiler, glass or
liftgate. This could damage the liftgate and its components.
Note:Do not leave the liftgate open while driving. This could damage
the liftgate and its components.
The liftgate area is only intended for cargo, not passengers.
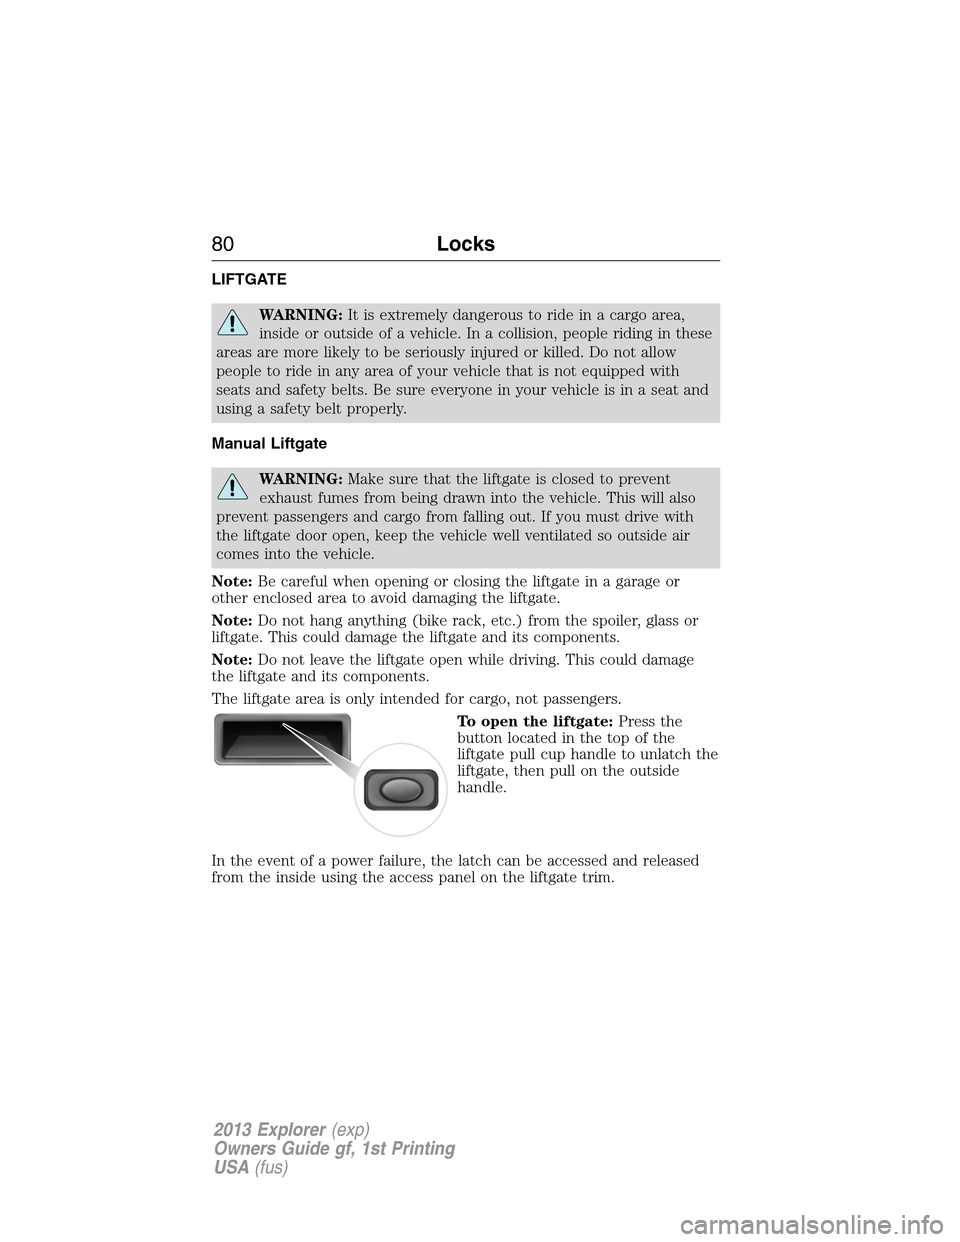
To open the liftgate:Press the
button located in the top of the
liftgate pull cup handle to unlatch the
liftgate, then pull on the outside
handle.
In the event of a power failure, the latch can be accessed and released
from the inside using the access panel on the liftgate trim.
80Locks
2013 Explorer(exp)
Owners Guide gf, 1st Printing
USA(fus)
Page 90 of 576
ADJUSTING THE STEERING WHEEL
WARNING:Do not adjust the steering wheel when your vehicle
is moving.
Note:Make sure that you are sitting in the correct position. Refer to
Sitting In the Correct Positionin theSeatschapter.
1. Unlock the steering column.
2. Adjust the steering wheel to the
desired position.
3. Lock the steering column.
Power Tilt and Telescope Steering Column (If Equipped)
WARNING:Do not adjust the steering wheel when your vehicle
is moving.
Note:Make sure that you are sitting in the correct position. Refer to
Sitting In the Correct Positionin theSeatschapter.
90Steering Wheel
2013 Explorer(exp)
Owners Guide gf, 1st Printing
USA(fus)
Page 91 of 576

Use the control on the side of the
steering column to adjust the
position.
To adjust:
•tilt: use the top or bottom of the control
•telescope: use the front or rear of the control.
Easy Entry and Exit Feature
The column will move to the full up and in position when the ignition is
turned off and this feature is activated through the information display.
The column will return to the previous setting when the ignition is
turned on.
Memory Feature
The steering column positions are saved when doing a memory set
function and can be recalled with the memory feature. Refer to theSeats
chapter.
Pressing the adjustment control during memory recall will cancel the
operation. The column will respond to the adjustment control.
The steering column is designed to set a stopping position just short of
the end of the column position to prevent damage to the steering
column. A new stopping position will be set if the steering column
encounters an object while tilting.
To reset the steering column to its normal stopping position:
1. Press the steering column control again after encountering the new
stopping position.
2. Continue pressing the control until it reaches the end of the column
position.
A new stopping position will be set. The steering column will stop just
short of the end of the column position the next time it is tilted.
Steering Wheel91
2013 Explorer(exp)
Owners Guide gf, 1st Printing
USA(fus)
Page 95 of 576
ADJUSTABLE PEDALS (IF EQUIPPED)
WARNING:Never adjust the accelerator and brake pedal with
feet on the pedals while the vehicle is moving.
The control is located on the left side of the steering column. Press and
hold the appropriate control to move the pedals.
A. Farther
B. Closer
The pedal positions are saved when doing a memory set function and can
be recalled with the memory feature. Refer to theSeatschapter.
The pedals should only be adjusted when the vehicle is parked.
AB
Pedals95
2013 Explorer(exp)
Owners Guide gf, 1st Printing
USA(fus)
Page 109 of 576
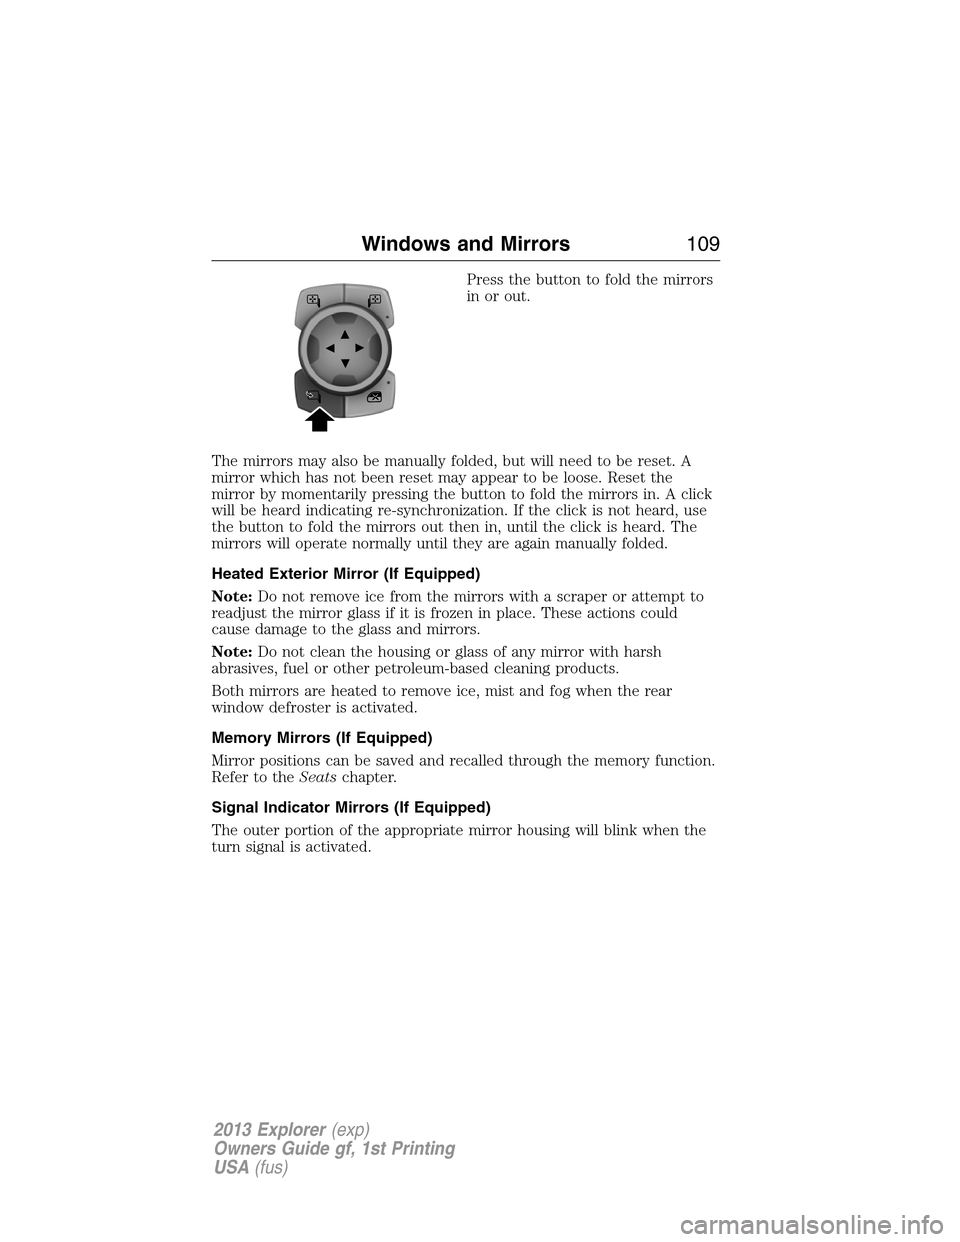
Press the button to fold the mirrors
in or out.
The mirrors may also be manually folded, but will need to be reset. A
mirror which has not been reset may appear to be loose. Reset the
mirror by momentarily pressing the button to fold the mirrors in. A click
will be heard indicating re-synchronization. If the click is not heard, use
the button to fold the mirrors out then in, until the click is heard. The
mirrors will operate normally until they are again manually folded.
Heated Exterior Mirror (If Equipped)
Note:Do not remove ice from the mirrors with a scraper or attempt to
readjust the mirror glass if it is frozen in place. These actions could
cause damage to the glass and mirrors.
Note:Do not clean the housing or glass of any mirror with harsh
abrasives, fuel or other petroleum-based cleaning products.
Both mirrors are heated to remove ice, mist and fog when the rear
window defroster is activated.
Memory Mirrors (If Equipped)
Mirror positions can be saved and recalled through the memory function.
Refer to theSeatschapter.
Signal Indicator Mirrors (If Equipped)
The outer portion of the appropriate mirror housing will blink when the
turn signal is activated.
Windows and Mirrors109
2013 Explorer(exp)
Owners Guide gf, 1st Printing
USA(fus)
Page 164 of 576
GENERAL OPERATING TIPS
Manual Heating and Air Conditioning System
•To reduce fog build-up on the windshield during humid weather, select
Defrost. Temperature and/or fan speed can also be increased to
improve clearing.
•To reduce humidity build-up inside the vehicle, do not drive with the
system off or with recirculated air engaged.
•Do not put objects under the front seats that will interfere with the
airflow to the back seats.
•Remove any snow, ice or leaves from the air intake area at the base of
the windshield.
•To improve the A/C cool down, drive with the windows slightly open
for 2-3 minutes after start up or until the vehicle has been aired out.
•A small amount of air may be felt from the floor vent regardless of the
air distribution setting that is selected.
During extreme high ambient temperatures when idling stationary for
extended periods of time in gear, it is recommended to run the A/C in
the MAX A/C mode, adjust the blower fan speed to the lowest setting
and put the vehicle’s transmission into the P (Park) position (vehicles
equipped with an automatic transmission) to continue to receive cool air
from your A/C system.
For maximum cooling performance MAX A/C in AUTO, press MAX A/C.
1. Move temperature control to the coolest setting.
2. Set the fan to the highest speed initially, then adjust to maintain comfort.
For maximum cooling performance in panel or panel/floor modes:
1. Move temperature control to the coolest setting.
2. Select A/C and recirculated air to provide colder airflow.
3. Set the fan to the highest speed initially, then adjust to maintain comfort.
To aid in side window defogging/demisting in cold weather:
1. Select Floor/Panel.
2. Select A/C.
3. Adjust the temperature control to maintain comfort.
4. Set the fan speed to the highest setting.
5. Direct the outer instrument panel vents towards the side windows.
6. To increase airflow to the outer instrument panel vents, close the
vents located in the middle of the instrument panel.
164Climate Control
2013 Explorer(exp)
Owners Guide gf, 1st Printing
USA(fus)
Page 165 of 576
Dual Zone Automatic Temperature Control
•To reduce fog build-up on the windshield during humid weather, select
Defrost. Temperature and/or fan speed can also be increased to
improve clearing.
•To reduce humidity build-up inside the vehicle, do not drive with the
system off or with recirculated air engaged.
•Do not put objects under the front seats that will interfere with the
airflow to the back seats.
•Remove any snow, ice or leaves from the air intake area at the base of
the windshield.
•To improve the A/C cool down, drive with the windows slightly open
for 2-3 minutes after start up or until the vehicle has been aired out.
•A small amount of air may be felt from the floor vent regardless of the
air distribution setting that is selected.
During extreme high ambient temperatures when idling stationary for
extended periods of time in gear, it is recommended to run the A/C in
the MAX A/C mode, adjust the blower fan speed to the lowest setting
and put the vehicle’s transmission into the P (Park) position (vehicles
equipped with an automatic transmission) to continue to receive cool air
from your A/C system.
For maximum cooling performance MAX A/C in AUTO, press MAX A/C.
For maximum cooling performance MAX A/C in manual override control
1. Choose Panel, A/C, and recirc controls.
2. Set the temperature to LO.
3. Set the fan to the highest blower setting.
To aid in side window defogging/demisting in cold or humid weather:
1. Select Floor/Panel.
2. Select A/C.
3. Adjust the temperature control to maintain comfort.
4. Set the fan speed to the highest setting.
5. Direct the outer instrument panel vents towards the side windows.
6. To increase airflow to the outer instrument panel vents, close the
vents located in the middle of the instrument panel.
Climate Control165
2013 Explorer(exp)
Owners Guide gf, 1st Printing
USA(fus)