Page 3 of 576
Automatic high beam control.............................101
Front fog lamps......................................102
Directionindicators....................................103
Interior lamps........................................103
Windows and Mirrors 106
Power windows.......................................106
Exteriormirrors......................................108
Interiormirrors.......................................111
Sun visors..........................................111
Moonroof...........................................112
Instrument Cluster 114
Gauges.............................................114
Warning lamps and indicators............................115
Audible warnings and indicators..........................121
Information Displays 122
Controls............................................122
Trip computer........................................125
Information messages..................................133
Audio System 144
MyFord™ system.....................................146
Auxiliary input jack....................................152
USBport ...........................................154
Satellite radio information...............................155
Climate Control 158
Manual heating and air conditioning........................158
Dual automatic temperature control........................160
Auxiliary passenger climate control........................163
Rear window defroster.................................166
Cabin air filter.......................................166
Table of Contents3
2013 Explorer(exp)
Owners Guide gf, 1st Printing
USA(fus)
Page 64 of 576
Intelligent Access Transmitter
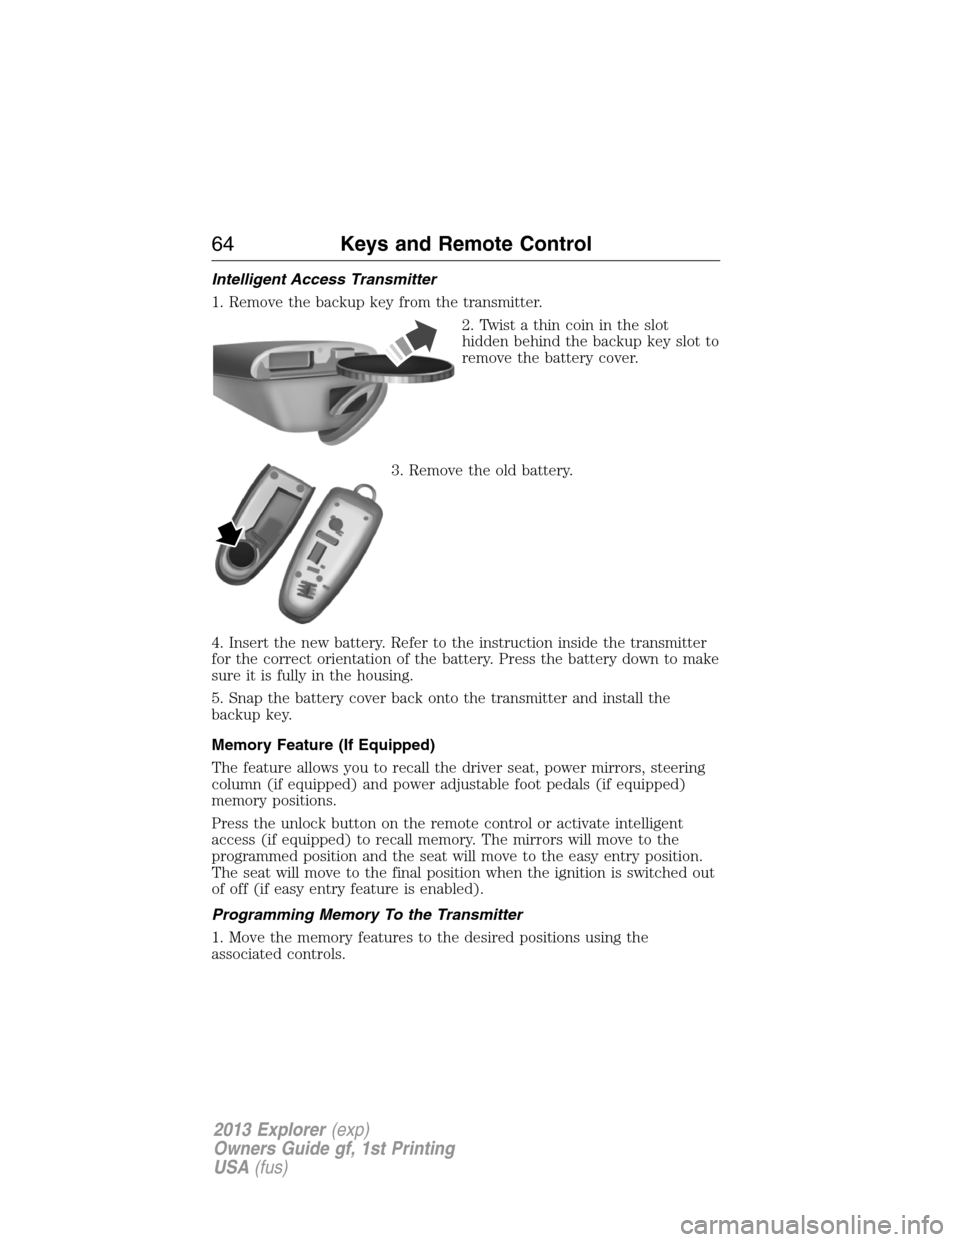
1. Remove the backup key from the transmitter.
2. Twist a thin coin in the slot
hidden behind the backup key slot to
remove the battery cover.
3. Remove the old battery.
4. Insert the new battery. Refer to the instruction inside the transmitter
for the correct orientation of the battery. Press the battery down to make
sure it is fully in the housing.
5. Snap the battery cover back onto the transmitter and install the
backup key.
Memory Feature (If Equipped)
The feature allows you to recall the driver seat, power mirrors, steering
column (if equipped) and power adjustable foot pedals (if equipped)
memory positions.
Press the unlock button on the remote control or activate intelligent
access (if equipped) to recall memory. The mirrors will move to the
programmed position and the seat will move to the easy entry position.
The seat will move to the final position when the ignition is switched out
of off (if easy entry feature is enabled).
Programming Memory To the Transmitter
1. Move the memory features to the desired positions using the
associated controls.
64Keys and Remote Control
2013 Explorer(exp)
Owners Guide gf, 1st Printing
USA(fus)
Page 96 of 576

WINDSHIELD WIPERS
Note:Fully defrost the windshield in icy conditions before turning on
the windshield wipers.
Rotate the end of the control away
from you to increase the speed of
the wipers. Rotate toward you to
decrease the speed of the wipers.
Press the stalk down and release for
a single swipe of the wipers.
Speed Dependent Wipers (If Equipped)
The wiper speed will adjust with the vehicle speed when intermittent
wipe is selected. A faster vehicle speed will result in a shorter time
between wipes.
RAIN-SENSING WIPERS (IF EQUIPPED)
Note:Wet road conditions may result in inconsistent or unexpected
wiping or smearing. Lower the sensitivity, switch to normal or high-speed
wiping or turn the wipers off to reduce smearing.
Note:Turn off the wipers before entering a car wash.
Use the rotary control to adjust the
sensitivity to one of the interval
moisture settings. The wipers will
not cycle until moisture is detected
on the windshield. The wiper speed
will vary based on the amount of
moisture detected on the windshield
and the sensitivity setting. The
wipers will continue to wipe as long as moisture is detected.
This feature can be turned on or off using the information display.
Keep the outside of the windshield clean, especially the area around the
interior mirror where the sensor is located, or sensor performance may
be affected.
2
1
0
2
1
0
96Wipers and Washers
2013 Explorer(exp)
Owners Guide gf, 1st Printing
USA(fus)
Page 106 of 576
POWER WINDOWS
WARNING:Do not leave children unattended in the vehicle and
do not let children play with the power windows. They may
seriously injure themselves.
WARNING:When closing the power windows, you should verify
they are free of obstructions and make sure that children and
pets are not in the proximity of the window openings.
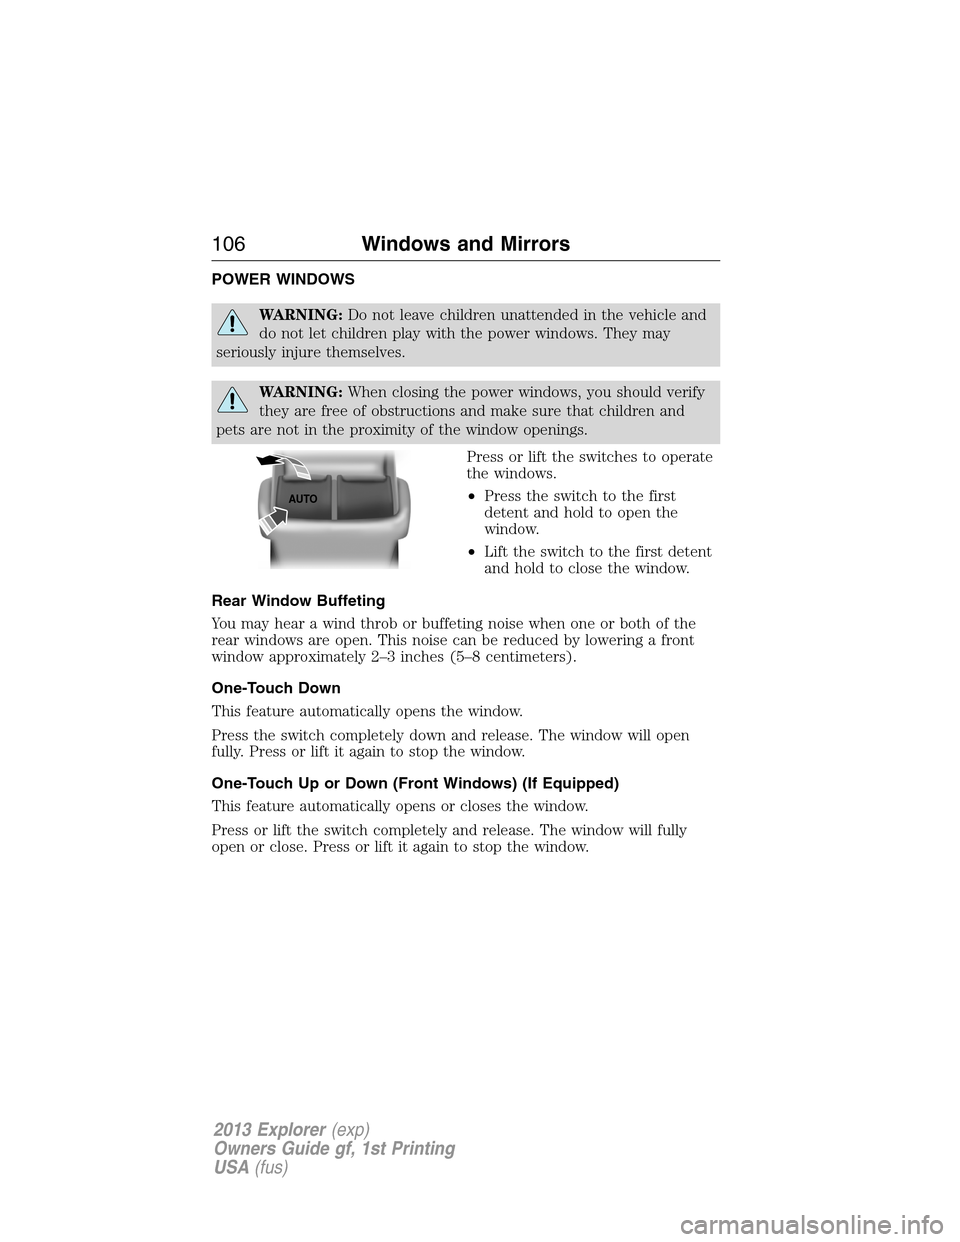
Press or lift the switches to operate
the windows.
•Press the switch to the first
detent and hold to open the
window.
•Lift the switch to the first detent
and hold to close the window.
Rear Window Buffeting
You may hear a wind throb or buffeting noise when one or both of the
rear windows are open. This noise can be reduced by lowering a front
window approximately 2–3 inches (5–8 centimeters).
One-Touch Down
This feature automatically opens the window.
Press the switch completely down and release. The window will open
fully. Press or lift it again to stop the window.
One-Touch Up or Down (Front Windows) (If Equipped)
This feature automatically opens or closes the window.
Press or lift the switch completely and release. The window will fully
open or close. Press or lift it again to stop the window.
AUTO
106Windows and Mirrors
2013 Explorer(exp)
Owners Guide gf, 1st Printing
USA(fus)
Page 107 of 576
Window Lock
Press the control to lock or unlock
the rear window controls.
Bounce-Back
The window will stop automatically while closing and reverse some
distance if there is an obstacle in the way.
Overriding the Bounce-Back Feature
Pull up the window switch and hold within two seconds of the window
reaching the bounce-back position. The window will travel up with no
bounce-back protection. The window will stop if the switch is released
before the window is fully closed.
Accessory Delay
You can use the window switches for several minutes after you turn the
ignition off, or until either front door is opened.
Windows and Mirrors107
2013 Explorer(exp)
Owners Guide gf, 1st Printing
USA(fus)
Page 108 of 576
EXTERIOR MIRRORS
Power Exterior Mirrors
WARNING:Do not adjust the mirror while the vehicle is in
motion.
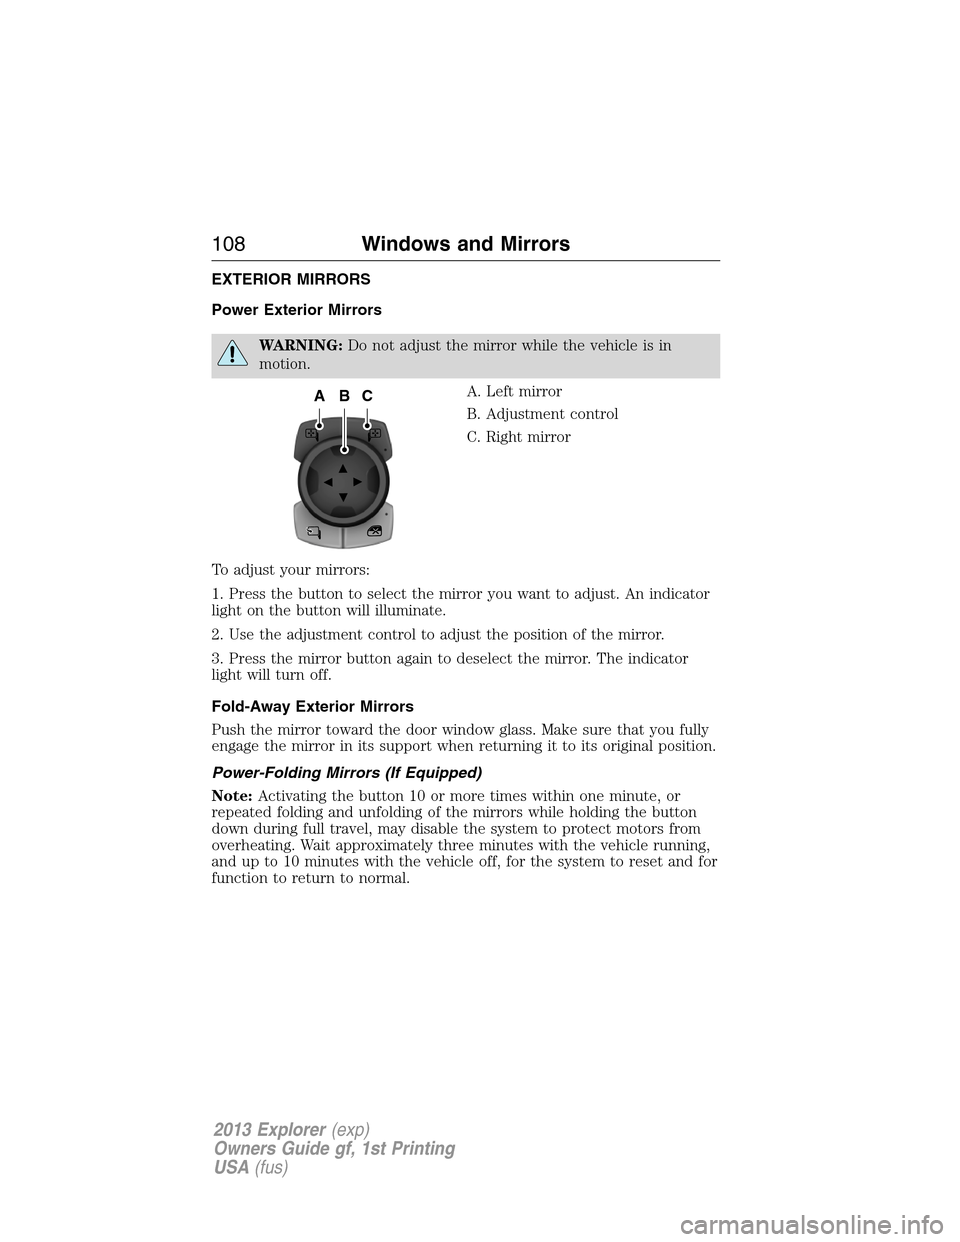
A. Left mirror
B. Adjustment control
C. Right mirror
To adjust your mirrors:
1. Press the button to select the mirror you want to adjust. An indicator
light on the button will illuminate.
2. Use the adjustment control to adjust the position of the mirror.
3. Press the mirror button again to deselect the mirror. The indicator
light will turn off.
Fold-Away Exterior Mirrors
Push the mirror toward the door window glass. Make sure that you fully
engage the mirror in its support when returning it to its original position.
Power-Folding Mirrors (If Equipped)
Note:Activating the button 10 or more times within one minute, or
repeated folding and unfolding of the mirrors while holding the button
down during full travel, may disable the system to protect motors from
overheating. Wait approximately three minutes with the vehicle running,
and up to 10 minutes with the vehicle off, for the system to reset and for
function to return to normal.
ACB
108Windows and Mirrors
2013 Explorer(exp)
Owners Guide gf, 1st Printing
USA(fus)
Page 109 of 576
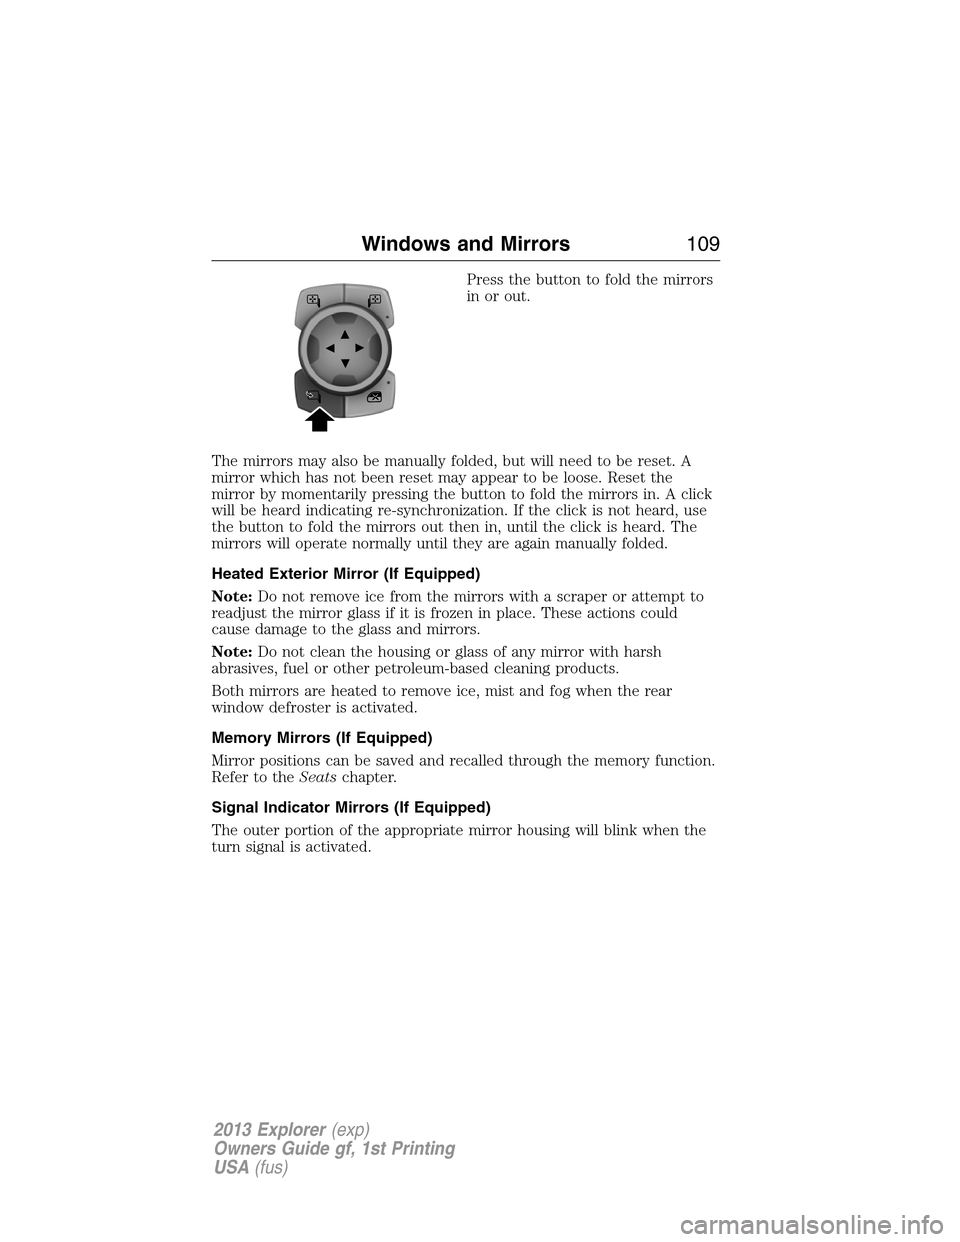
Press the button to fold the mirrors
in or out.
The mirrors may also be manually folded, but will need to be reset. A
mirror which has not been reset may appear to be loose. Reset the
mirror by momentarily pressing the button to fold the mirrors in. A click
will be heard indicating re-synchronization. If the click is not heard, use
the button to fold the mirrors out then in, until the click is heard. The
mirrors will operate normally until they are again manually folded.
Heated Exterior Mirror (If Equipped)
Note:Do not remove ice from the mirrors with a scraper or attempt to
readjust the mirror glass if it is frozen in place. These actions could
cause damage to the glass and mirrors.
Note:Do not clean the housing or glass of any mirror with harsh
abrasives, fuel or other petroleum-based cleaning products.
Both mirrors are heated to remove ice, mist and fog when the rear
window defroster is activated.
Memory Mirrors (If Equipped)
Mirror positions can be saved and recalled through the memory function.
Refer to theSeatschapter.
Signal Indicator Mirrors (If Equipped)
The outer portion of the appropriate mirror housing will blink when the
turn signal is activated.
Windows and Mirrors109
2013 Explorer(exp)
Owners Guide gf, 1st Printing
USA(fus)
Page 110 of 576
Integrated Blind Spot Mirrors (If Equipped)
WARNING:Objects in the blind spot mirror are closer than they
appear.
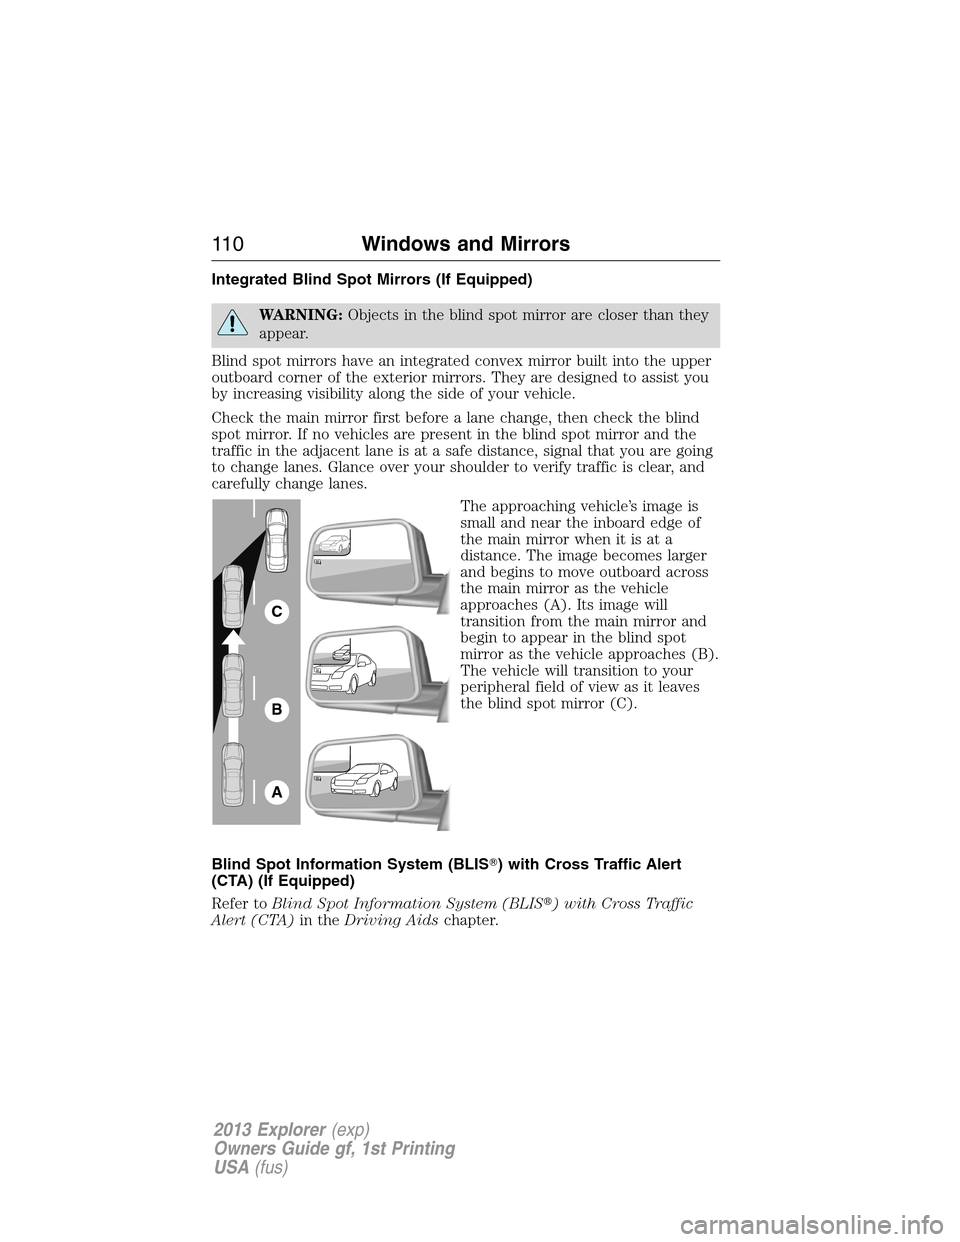
Blind spot mirrors have an integrated convex mirror built into the upper
outboard corner of the exterior mirrors. They are designed to assist you
by increasing visibility along the side of your vehicle.
Check the main mirror first before a lane change, then check the blind
spot mirror. If no vehicles are present in the blind spot mirror and the
traffic in the adjacent lane is at a safe distance, signal that you are going
to change lanes. Glance over your shoulder to verify traffic is clear, and
carefully change lanes.
The approaching vehicle’s image is
small and near the inboard edge of
the main mirror when it is at a
distance. The image becomes larger
and begins to move outboard across
the main mirror as the vehicle
approaches (A). Its image will
transition from the main mirror and
begin to appear in the blind spot
mirror as the vehicle approaches (B).
The vehicle will transition to your
peripheral field of view as it leaves
the blind spot mirror (C).
Blind Spot Information System (BLIS�) with Cross Traffic Alert
(CTA) (If Equipped)
Refer toBlind Spot Information System (BLIS�) with Cross Traffic
Alert (CTA)in theDriving Aidschapter.
A
B
C
11 0Windows and Mirrors
2013 Explorer(exp)
Owners Guide gf, 1st Printing
USA(fus)