2013 DODGE VIPER tow
[x] Cancel search: towPage 3 of 100

INTRODUCTION/WELCOME
WELCOME FROM CHRYSLER
GROUP LLC..................2
CONTROLS AT A GLANCE
DRIVER COCKPIT ...............4
INSTRUMENT CLUSTER ...........6
GETTING STARTED
KEYFOB ....................8
ENGINE STARTING/STOPPING .......9
THEFT ALARM .................9
SEATBELT ...................10
SUPPLEMENTAL RESTRAINT
SYSTEM (SRS) — AIR BAGS ........10
CHILD RESTRAINTS .............11
FRONT SEATS ................14
ADJUSTABLE PEDALS ...........16
ADJUSTABLE FOOT REST ..........16
TILT / TELESCOPING STEERING
COLUMN ...................17
OPERATING YOUR VEHICLE
ENGINE BREAK-IN RECOMMENDATIONS —
SRT 10 VERSIONS .............18
TURN SIGNALS/WIPER/WASHER/HIGH
BEAMS LEVER ................19
HEADLIGHT SWITCH ............20
SPEED CONTROL ...............20
MANUAL TRANSMISSION 1 TO 4 SKIP
SHIFT .....................21
AUTOMATIC TEMPERATURE
CONTROL (ATC) ...............22
PARKVIEW
®REAR BACK-UP CAMERA . . 23
ELECTRONICS
YOUR VEHICLE'S SOUND SYSTEM ....24
IDENTIFYING YOUR RADIO .........26
Uconnect™ Access (Available on Uconnect™
8.4A and Uconnect™ 8.4AN) ........27
Uconnect™ 8.4A ...............30
Uconnect™ 8.4AN ..............43
STEERING WHEEL AUDIO CONTROLS . . 58
ELECTRONIC VEHICLE INFORMATION
CENTER (EVIC) ................58
PROGRAMMABLE FEATURES .......59
UNIVERSAL GARAGE DOOR OPENER
(HomeLink
®) .................61
POWER OUTLETS ..............63
UTILITY
TRAILER TOWING WEIGHTS
(MAXIMUM TRAILER WEIGHT
RATINGS)...................64
RECREATIONAL TOWING
(BEHIND MOTORHOME, ETC.) ......64
SRT
LAUNCH MODE................65
ELECTRONIC CONTROL DAMPING
SYSTEM ....................66
PERFORMANCE FEATURES ........67
SUMMER/THREE-SEASON TIRES .....67
WHAT TO DO IN EMERGENCIES
INSTRUMENT CLUSTER WARNING
LIGHTS....................68
IF YOUR ENGINE OVERHEATS .......71
TIREFIT KIT .................72
JUMP-STARTING ...............78
TOWING A DISABLED VEHICLE ......80
FREEING A STUCK VEHICLE ........80
EVENT DATA RECORDER (EDR) ......81
MAINTAINING YOUR VEHICLE
ENGINE COMPARTMENT..........82
FLUIDS AND CAPACITIES ..........83
MAINTENANCE CHART ...........84
SRT – MAINTENANCE RECORD ......85
FUSES .....................86
TIRE PRESSURES ..............89
WHEEL AND WHEEL TRIM CARE .....90
EXTERIOR BULBS ..............90
CONSUMER ASSISTANCE
CHRYSLER GROUP LLC
CUSTOMER CENTER ............91
CHRYSLER CANADA INC.
CUSTOMER CENTER ............91
ASSISTANCE FOR THE HEARING
IMPAIRED ...................91
PUBLICATIONS ORDERING ........91
REPORTING SAFETY DEFECTS IN
THE 50 UNITED STATES AND
WASHINGTON, D.C. .............92
MOPAR ACCESSORIES
AUTHENTIC ACCESSORIES
BY MOPAR®.................93
INDEX....................94
FAQ (How To?)
FREQUENTLY ASKED QUESTIONS ....96
TABLE OF CONTENTS
Page 18 of 100

ADJUSTABLE PEDALS
• The adjustable pedal switch is located tothe left side of the steering column.
• Press the switch forward to move the pedals forward (toward the front of the
vehicle).
• Press the switch rearward to move the pedals rearward (toward the driver).
CAUTION!
Do not place any article under the adjustable pedals or impede its ability to move, as it
may cause damage to the pedal controls. Pedal travel may become limited if movement
is stopped by an obstruction in the adjustable pedal's path.
WARNING!
Do not adjust the pedals while the vehicle is moving. You could lose control and have
a collision. Always adjust the pedals while the vehicle is parked.
ADJUSTABLE FOOT REST
• The adjustable foot rest can be adjustedforward or rearward and rotated upward
or downward to allow for greater driving
comfort.
• To adjust the pedal:
1. Adjust the seat and steering column to a comfortable position.
2. Using a 13 mm socket wrench, loosen the nut on the pedal.
3. Slide the pedal either forward or rear- ward and rotate it upward or downward
as desired.
4. Tighten the nut, being careful not to over tighten it.
GETTING STARTED
16
Page 19 of 100

TILT / TELESCOPING STEERING COLUMN
• The tilt release lever is located below themultifunction lever on the left side of the
steering column.
• To tilt the column, simply pull the re- lease lever rearward toward you and then
move the steering wheel upward or down-
ward as desired.
• Push the release lever forward to lock the column firmly in place.
WARNING!
Do not adjust the steering wheel while driving. The tilt adjustment must be locked
while driving. Adjusting the steering wheel while driving or driving without the tilt
adjustment locked could cause the driver to lose control of the vehicle. Failure to follow
this warning may result in you and others being severely injured or killed.
GETTING STARTED
17
Page 29 of 100
Uconnect™ Access (Available on Uconnect™ 8.4A and
Uconnect™ 8.4AN)
• With Uconnect™ Access, owners now have emergency and remote vehicle featuresand apps. In-vehicle features include 9-1-1 Call, and Roadside Assistance Call. Your
vehicle is also capable of remote vehicle features such as Remote Start, Remote Door
Lock/Unlock, and Remote Horn and Lights , once you are registered and have
downloaded the Uconnect™ Access Mobile App on a compatible smartphone.
• Your vehicle comes with an included trial period for use of the Uconnect™ Access features. To activate the trial, you must first register with Uconnect™. See the simple
registration steps below. Once registered, Uconnect™ Access customers can purchase
additional features and Apps as they become available. After the trial period, you
can subscribe for continued service . For Uconnect™ customer support, visit
www.Uconnect-Phone.com or call 1–877–855–8400. (U.S. Residents). Canadian
Residents call, 1-800-465–2001 (English) or 1-800-387-9983 (French).
Uconnect™ Access In-Vehicle Features
Uconnect™ Access in-vehicle features do not require that you have a compatible smart-
phone. Instead, they work by using the built-in 3G Cellular Connection. For additional
information, contact Uconnect™ Customer Care at 855-792-4241, or visit Owner Connect
at driveSRT.com/MoparOwnerConnect.
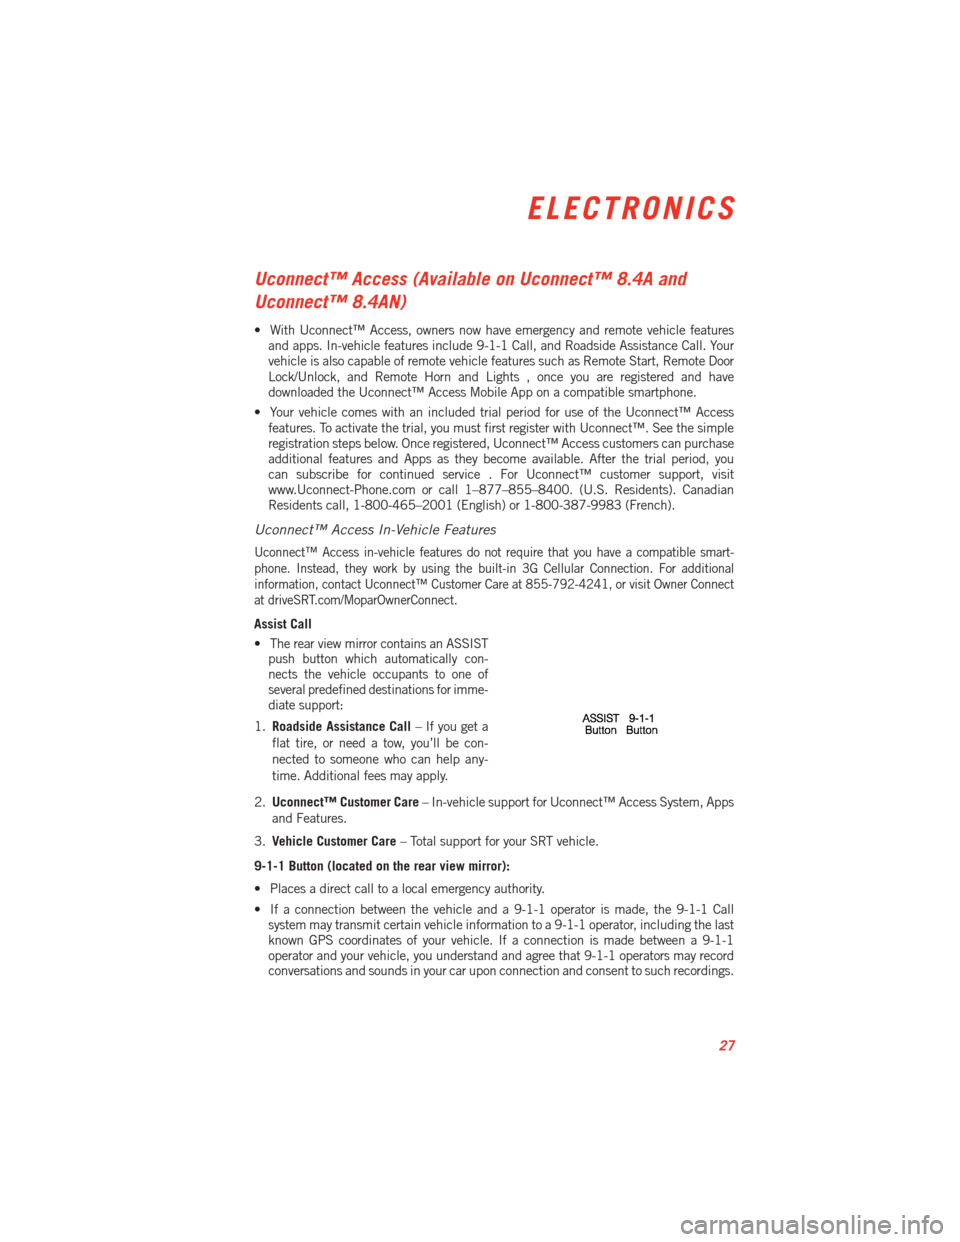
Assist Call
•
The rear view mirror contains an ASSIST
push button which automatically con-
nects the vehicle occupants to one of
several predefined destinations for imme-
diate support:
1. Roadside Assistance Call – If you get a
flat tire, or need a tow, you’ll be con-
nected to someone who can help any-
time. Additional fees may apply.
2. Uconnect™ Customer Care – In-vehicle support for Uconnect™ Access System, Apps
and Features.
3. Vehicle Customer Care – Total support for your SRT vehicle.
9-1-1 Button (located on the rear view mirror):
• Places a direct call to a local emergency authority.
• If a connection between the vehicle and a 9-1-1 operator is made, the 9-1-1 Call system may transmit certain vehicle information to a 9-1-1 operator, including the last
known GPS coordinates of your vehicle. If a connection is made between a 9-1-1
operator and your vehicle, you understand and agree that 9-1-1 operators may record
conversations and sounds in your car upon connection and consent to such recordings.
ELECTRONICS
27
Page 42 of 100
Complete the pairing procedure
• A PIN code should appear on radio touch screen as well as on mobile device.
• Please ensure that these codes are the same, and if so accept the pairing on both.
• Pairing procedure is now complete.
Select the mobile phone's priority level
• When the pairing process has successfully completed, the system will prompt you tochoose whether or not this is your favorite phone. Selecting Yes will make this phone the
highest priority. This phone will take precedence over other paired phones within range.
Only one phone can be paired at a time.
• You are now ready to make hands-free calls. Press the Uconnect™ Phone button on your steering wheel to begin.
Making A Phone Call
• Press the Uconnect™ Phone button.
• (After the BEEP), say “dial” then the number (or “call” then the name as listed in your phone; see Phonebook).
NOTE:
You can also initiate a call by using the touch-screen on the Phone main screen.
Receiving A Call – Accept (And End)
•When an incoming call rings/is announced on Uconnect™, press the Phone button.
• To end a call, press the Phone button.
Mute (Or Unmute) Microphone During Call
• During a call, touch the mute soft-key on the Phone main screen to mute and unmute the call.
Transfer Ongoing Call Between Handset And Vehicle
• During a call, touch the Transfer soft-key on the Phone main screen to transfer anon-going call between handset and vehicle.
Common Phone Commands (Examples)
• “Call John Smith”
• “Call John Smith mobile”
• “Dial 1 248 555 1212
• “Call Emergency”
• “Call Towing Assistance”
• “Redial”
ELECTRONICS
40
Page 44 of 100
WARNING!
• Any voice commanded system should be used only in safe driving conditionsfollowing applicable laws regarding phone use. Your attention should be focused on
safely operating the vehicle. Failure to do so may result in a collision causing you
and others to be severely injured or killed.
• In an emergency, to use Uconnect™ Phone, your mobile phone must be:
• turned on,
• paired to Uconnect™ Phone,
• and have network coverage.
Uconnect™ VOICE COMMAND
• If the Uconnect™ Voice Commandbutton exists on your steering wheel, then
you have the Voice Command feature.
• The Voice Command feature lets you keep your hands on the steering wheel, and your eyes on the road, and control navigation and media sources.
• When you press the Voice Command button
located on the steering wheel,
you will hear a beep. The beep is your signal to give a command. If you do not know
what commands to say, you can say "help" and the system will provide options to you.
If you ever wish to interrupt the system while it lists options, press the Voice Command
button
, listen for the BEEP, and say your command.
• You can “chain” commands together for faster results. Say, "Navigate to 1234 Main Street Hometown, California".
Changing The Volume
• Start a dialogue by pressing the Voice Command button
, then say a command
(for example, “help”).
• Use the radio ON/OFF VOLUME rotary knob to adjust the volume to a comfortable level while the Voice Command system is speaking. The volume setting for Voice Command
is different than the audio system.
• Refer to the Understand The Features Of Your Vehicle section of your vehicle's Owner's Manual on the DVD for further details.
Common Voice Commands (Examples)
Switch Modes “FM”
“Satellite” “AM”
“Change Source to iPod”
“Change Source to SD Card”
Radio (FM, AM) “95.5”
“95.5 FM”
“Go to preset 5”
Player “Play Album 'Greatest Hits”
“Play Artist 'Scott Joplin” “Play Genre 'Rock” “Play Song
'Maple Leaf Rag”
ELECTRONICS
42
Page 56 of 100
Making A Phone Call
• Press the Uconnect™ Phone button.
• (After the BEEP), say “dial” then the number (or “call” then the name as listed in your phone; see Phonebook).
NOTE:
You can also initiate a call by using the touch-screen on the Phone main screen.
Receiving A Call – Accept (And End)
•When an incoming call rings/is announced on Uconnect™, press the Phone button.
• To end a call, press the Phone button.
Mute (Or Unmute) Microphone During Call
• During a call, touch the mute soft-key on the Phone main screen to mute and unmute the call.
Transfer Ongoing Call Between Handset And Vehicle
• During a call, touch the Transfer soft-key on the Phone main screen to transfer anon-going call between handset and vehicle.
Common Phone Commands (Examples)
• “Call John Smith”
• “Call John Smith mobile”
• “Dial 1 248 555 1212
• “Call Emergency”
• “Call Towing Assistance”
• “Redial”
Phonebook
• Uconnect™ radios will automatically download your phonebook from your pairedphone, if this feature is supported by your phone. Entries are updated each time that
the phone is connected. If your phone book entries do not appear, check the settings on
your phone. Some phones require you to enable this feature manually.
• Your phonebook can be browsed on your radio screen, but editing can only be done on your phone. To browse, touch the Phone soft-key, then the Phonebook soft-key.
• Favorite phonebook entries can be saved as Favorites for quicker access. Favorites are shown at the top of your main phone screen.
ELECTRONICS
54
Page 59 of 100
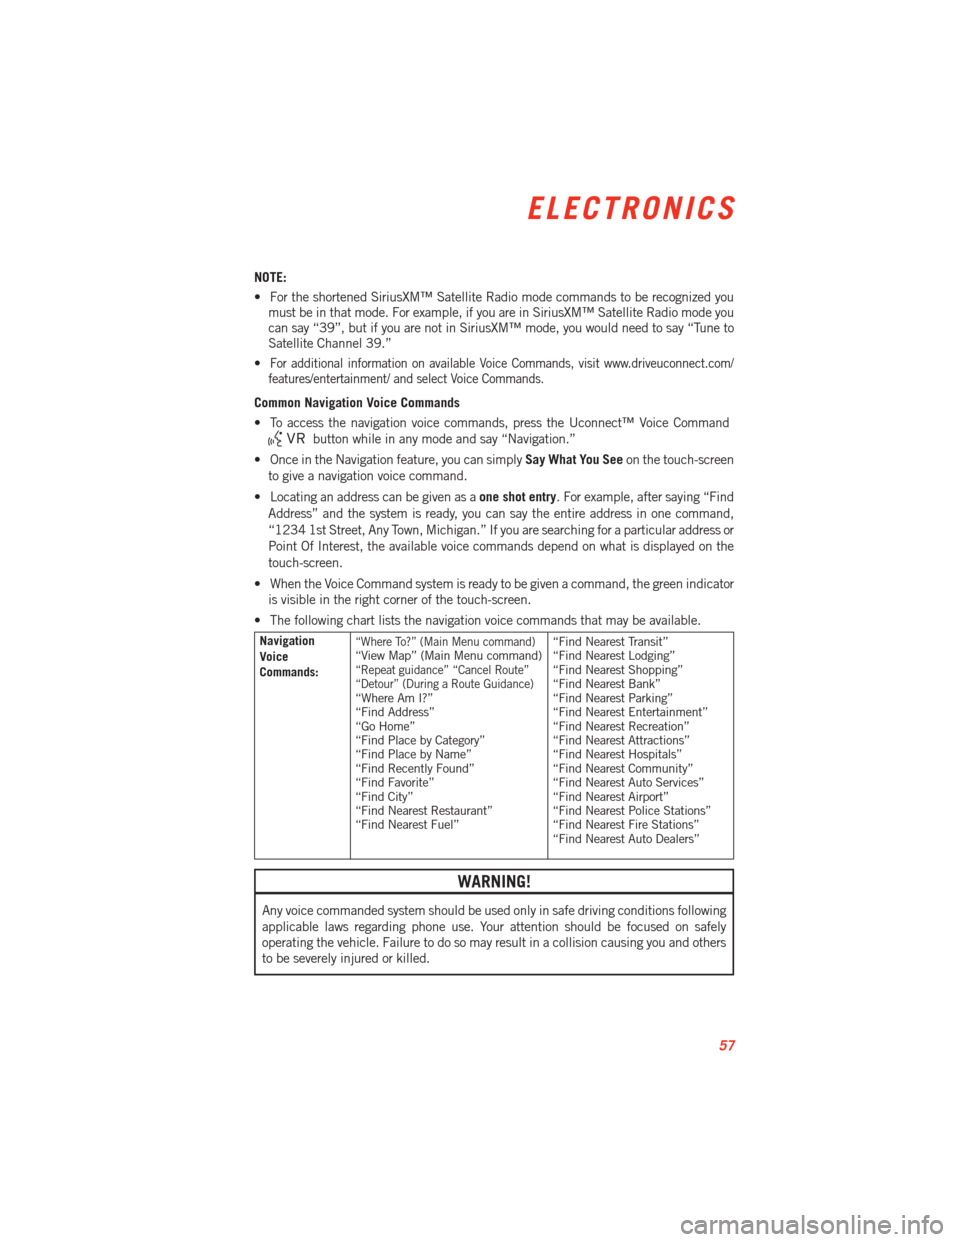
NOTE:
• For the shortened SiriusXM™ Satellite Radio mode commands to be recognized youmust be in that mode. For example, if you are in SiriusXM™ Satellite Radio mode you
can say “39”, but if you are not in SiriusXM™ mode, you would need to say “Tune to
Satellite Channel 39.”
•
For additional information on available Voice Commands, visit www.driveuconnect.com/
features/entertainment/ and select Voice Commands.
Common Navigation Voice Commands
• To access the navigation voice commands, press the Uconnect™ Voice Command
button while in any mode and say “Navigation.”
• Once in the Navigation feature, you can simply Say What You Seeon the touch-screen
to give a navigation voice command.
• Locating an address can be given as a one shot entry. For example, after saying “Find
Address” and the system is ready, you can say the entire address in one command,
“1234 1st Street, Any Town, Michigan.” If you are searching for a particular address or
Point Of Interest, the available voice commands depend on what is displayed on the
touch-screen.
• When the Voice Command system is ready to be given a command, the green indicator is visible in the right corner of the touch-screen.
• The following chart lists the navigation voice commands that may be available.
Navigation
Voice
Commands:“Where To?” (Main Menu command)“View Map” (Main Menu command)“Repeat guidance” “Cancel Route”
“Detour” (During a Route Guidance)
“Where Am I?”
“Find Address”
“Go Home”
“Find Place by Category”
“Find Place by Name”
“Find Recently Found”
“Find Favorite”
“Find City”
“Find Nearest Restaurant”
“Find Nearest Fuel” “Find Nearest Transit”
“Find Nearest Lodging”
“Find Nearest Shopping”
“Find Nearest Bank”
“Find Nearest Parking”
“Find Nearest Entertainment”
“Find Nearest Recreation”
“Find Nearest Attractions”
“Find Nearest Hospitals”
“Find Nearest Community”
“Find Nearest Auto Services”
“Find Nearest Airport”
“Find Nearest Police Stations”
“Find Nearest Fire Stations”
“Find Nearest Auto Dealers”
WARNING!
Any voice commanded system should be used only in safe driving conditions following
applicable laws regarding phone use. Your attention should be focused on safely
operating the vehicle. Failure to do so may result in a collision causing you and others
to be severely injured or killed.
ELECTRONICS
57