2013 DODGE VIPER service
[x] Cancel search: servicePage 12 of 100

SEAT BELT
• Be sure everyone in your vehicle is in a seat and using a seat belt properly.
• Position the lap belt across your thighs, below your abdomen. To remove slack in the lapportion, pull up a bit on the shoulder belt. To loosen the lap belt if it is too tight, tilt the
latch plate and pull on the lap belt. A snug belt reduces the risk of sliding under the belt
in a collision.
• Position the shoulder belt on your chest so that it is comfortable and not resting on your neck. The retractor will withdraw any slack in the belt.
• A shoulder belt placed behind you will not protect you from injury during a collision. You are more likely to hit your head in a collision if you do not wear your shoulder belt.
The lap and shoulder belt are meant to be used together.
• A belt that is too loose will not protect you properly. In a sudden stop you could move too far forward, increasing the possibility of injury. Wear your seat belt snugly.
• A frayed or torn belt could rip apart in a collision and leave you with no protection. Inspect the belt system periodically, checking for cuts, frays, or loose parts. Damaged
parts must be replaced immediately. Do not disassemble or modify the system. Seat
belt assemblies must be replaced after a collision if they have been damaged (bent
retractor, torn webbing, etc.).
• The seat belts for both front seating positions are equipped with pretensioning devices that are designed to remove slack from the seat belt in the event of a collision.
• A deployed pretensioner or a deployed air bag must be replaced immediately.
WARNING!
In a collision, you and your passengers can suffer much greater injuries if you are not
buckled up properly. You can strike the interior of your vehicle or other passengers, or
you can be thrown out of the vehicle. Always be sure you and others in your vehicle are
buckled up properly.
SUPPLEMENTAL RESTRAINT SYSTEM (SRS) — AIR BAGS
• This vehicle has Advanced Front Air Bags for both the driver and right front passenger as a supplement to the seat belt restraint system. The Advanced Front Air Bags will not
deploy in every type of collision.
• Advanced Front Air Bags are designed to provide additional protection by supplement- ing the seat belts in certain frontal collisions depending on several factors, including
the severity and type of collision. Advanced Front Air Bags are not expected to reduce
the risk of injury in rear, side, or rollover collisions.
• If the Air Bag Warning Light
is not on during starting, stays on, or turns on while
driving, have the vehicle serviced by an authorized service center immediately.
• Refer to the Owner's Manual on the DVD for further details regarding the Supplemental Restraint System (SRS).
GETTING STARTED
10
Page 29 of 100

Uconnect™ Access (Available on Uconnect™ 8.4A and
Uconnect™ 8.4AN)
• With Uconnect™ Access, owners now have emergency and remote vehicle featuresand apps. In-vehicle features include 9-1-1 Call, and Roadside Assistance Call. Your
vehicle is also capable of remote vehicle features such as Remote Start, Remote Door
Lock/Unlock, and Remote Horn and Lights , once you are registered and have
downloaded the Uconnect™ Access Mobile App on a compatible smartphone.
• Your vehicle comes with an included trial period for use of the Uconnect™ Access features. To activate the trial, you must first register with Uconnect™. See the simple
registration steps below. Once registered, Uconnect™ Access customers can purchase
additional features and Apps as they become available. After the trial period, you
can subscribe for continued service . For Uconnect™ customer support, visit
www.Uconnect-Phone.com or call 1–877–855–8400. (U.S. Residents). Canadian
Residents call, 1-800-465–2001 (English) or 1-800-387-9983 (French).
Uconnect™ Access In-Vehicle Features
Uconnect™ Access in-vehicle features do not require that you have a compatible smart-
phone. Instead, they work by using the built-in 3G Cellular Connection. For additional
information, contact Uconnect™ Customer Care at 855-792-4241, or visit Owner Connect
at driveSRT.com/MoparOwnerConnect.
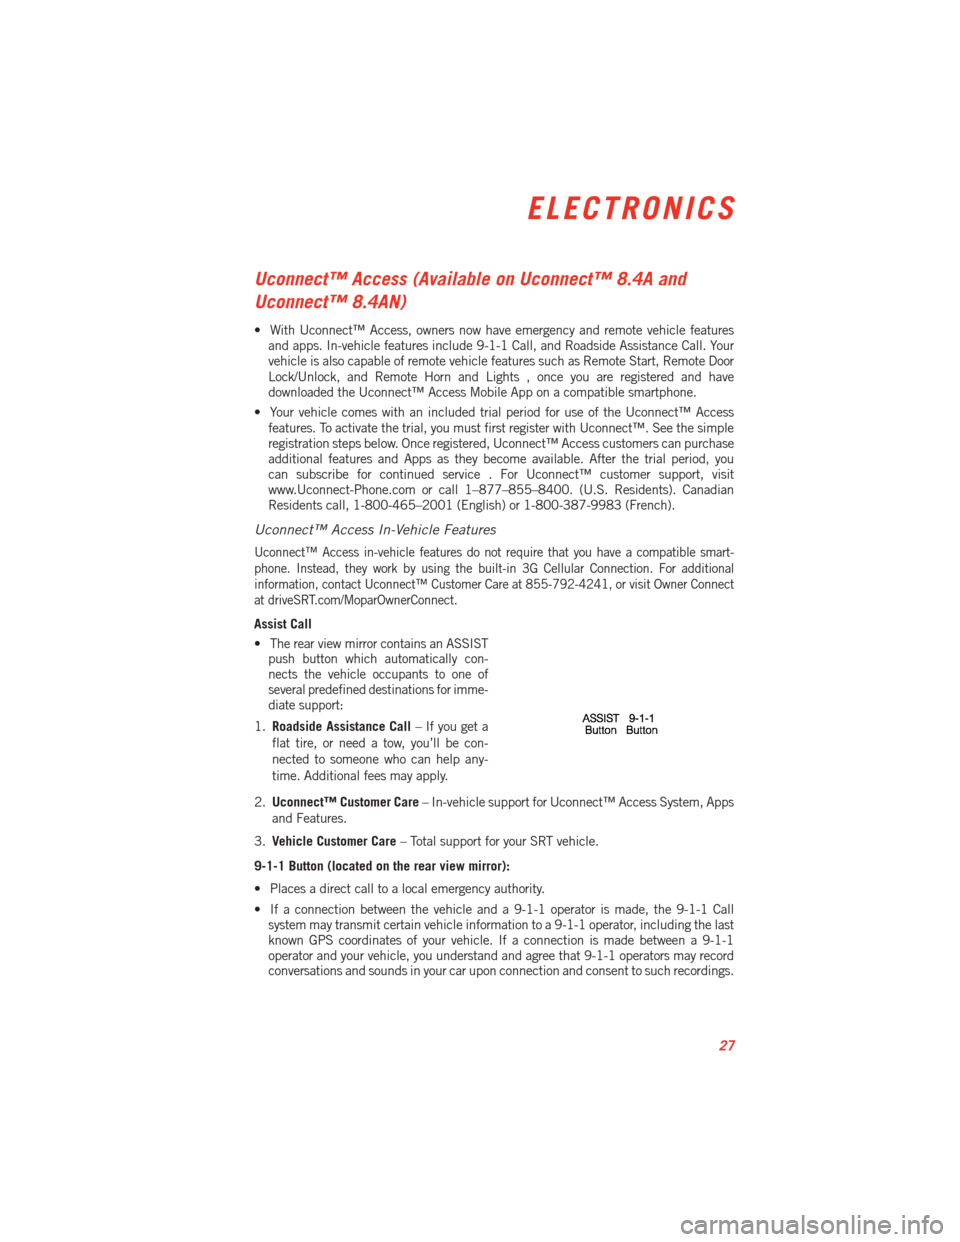
Assist Call
•
The rear view mirror contains an ASSIST
push button which automatically con-
nects the vehicle occupants to one of
several predefined destinations for imme-
diate support:
1. Roadside Assistance Call – If you get a
flat tire, or need a tow, you’ll be con-
nected to someone who can help any-
time. Additional fees may apply.
2. Uconnect™ Customer Care – In-vehicle support for Uconnect™ Access System, Apps
and Features.
3. Vehicle Customer Care – Total support for your SRT vehicle.
9-1-1 Button (located on the rear view mirror):
• Places a direct call to a local emergency authority.
• If a connection between the vehicle and a 9-1-1 operator is made, the 9-1-1 Call system may transmit certain vehicle information to a 9-1-1 operator, including the last
known GPS coordinates of your vehicle. If a connection is made between a 9-1-1
operator and your vehicle, you understand and agree that 9-1-1 operators may record
conversations and sounds in your car upon connection and consent to such recordings.
ELECTRONICS
27
Page 30 of 100

Your vehicle MUST have a working electrical system for the 9-1-1 Call system, among
others, to operate. IF YOUR VEHICLE LOSES BATTERY POWER FOR ANY REASON
(INCLUDING DURING OR AFTER AN ACCIDENT) THE 9-1-1 CALL SYSTEM, AMONG
OTHER VEHICLES SYSTEMS, WILL NOT OPERATE.
ASSIST Button (located on rearview mirror):
• If your vehicle is equipped with this feature and within cellular range, you may be able to connect to Roadside Assistance, Uconnect™ Care and Vehicle Care by pressing the
“Assist” button on the Rearview Mirror of your vehicle. To the extent any such calls
incur additional costs you are responsible for them. If Roadside Assistance is provided
to your vehicle, you agree to be responsible for any additional roadside assistance
service costs that you may incur. In order to provide Uconnect™ Services to you, we
may record and monitor your conversations with Roadside Assistance, Uconnect™
Care or Vehicle Care, whether such conversations are initiated through the Uconnect™
Services in your vehicle, or via a landline or mobile telephone, and may share
information obtained through such recording and monitoring in accordance with
regulatory requirements. You acknowledge, agree and consent to any recording,
monitoring or sharing of information obtained through any such call recordings.
How to Register with Uconnect™ Access
1. With the vehicle parked and the radio powered on, select the “Apps” soft-key located
near the bottom of the radio touch screen.
2. Select the "Uconnect Registration" App soft-key on the menu bar on the bottom of the touch screen.
3. The Uconnect™ Registration App opens, providing simple step-by-step instructions on entering your email address to begin the registration process.
4. You will receive a secured registration email from Uconnect™ Access containing a link for completing your Uconnect™ Access Registration on-line. For security reasons, this
email link will be valid for 24 hours.
5. Follow the link to complete the final step of registration and to begin using Uconnect™ Access
For additional registration assistance while in the vehicle, push the ASSIST button to
contact Uconnect™ Customer Care.
NOTE:
If 24 hours has passed and the email link is no longer valid, customers can follow the
process as previously described beginning at Step 1.
Uconnect™ Access In-Vehicle Connectivity Services
• Uconnect™ Access brings the power of the internet into your vehicle with exciting features, remote capabilities, theft alarm notification, and stolen vehicle assistance
applications through on-board connectivity service. Once registered with Uconnect™
Access, you can customize the capabilities of your vehicle system using your
Uconnect™ Access account from the vehicle, the web, or your Smartphone.
ELECTRONICS
28
Page 31 of 100

• Please refer to your Uconnect™ Access account for information on available sub-scriptions, applications and packages for your vehicle. For additional information,
contact Uconnect™ Customer Care at 855-792-4241, or visit Owner Connect
(driveSRT.com/MoparOwnerConnect).
Uconnect™ Access Additional Information
My Uconnect™ Account
• To use the Uconnect™ Features and Services, you must first register your vehicle withUconnect™ Access. Please refer to the “Register with Uconnect™ Access” section of
this User's Manual to start registration. Once registered, you can personalize your
vehicle Uconnect™ System as desired.
How to Purchase or Cancel an App
• From your Uconnect™ Access Account, you can easily purchase or cancel Applications or subscriptions. Simply log-in to your Uconnect™ Access Account, on the Owner
Connect site, and visit your Uconnect™ Store.
How to Reset the Uconnect™ Access Application
• You can easily correct any Application related issues by resetting the Application. Simply log-in to your Uconnect™ Access Account and visit the Uconnect™ Store, click
on My Apps, click on Settings, and then choose Reset/Reinstall. In minutes your App
will be reinstalled and ready to go.
Selling my Vehicle - How to Completely Remove My Uconnect™ Access Account
• To completely remove your Uconnect™ Account, simply log-in to your Uconnect™ Account and visit the Uconnect™ Store, click on My Apps, click on Settings, and then
choose Remove Uconnect™ Account. In minutes your entire Uconnect™ Account and
information will be removed from your vehicle.
NOTE:
For further assistance call 855-792-4241, or go to the Mopar Owner Connect site at
(driveSRT.com/MoparOwnerConnect).
Always Drive Safely
• ALWAYS drive safely with your hands on the wheel. You have full responsibility and assume all risks related to the use of the Uconnect™ features and applications in
this vehicle.
• For additional information, U.S. residents contact Uconnect™ Customer Care at 855-792-4241, or visit Owner Connect at driveSRT.com/MoparOwnerConnect.
Canadian residents contact Canada Customer Care Centre at 800-465-2001
(English), or 800-387-9983 (French).
ELECTRONICS
29
Page 59 of 100

NOTE:
• For the shortened SiriusXM™ Satellite Radio mode commands to be recognized youmust be in that mode. For example, if you are in SiriusXM™ Satellite Radio mode you
can say “39”, but if you are not in SiriusXM™ mode, you would need to say “Tune to
Satellite Channel 39.”
•
For additional information on available Voice Commands, visit www.driveuconnect.com/
features/entertainment/ and select Voice Commands.
Common Navigation Voice Commands
• To access the navigation voice commands, press the Uconnect™ Voice Command
button while in any mode and say “Navigation.”
• Once in the Navigation feature, you can simply Say What You Seeon the touch-screen
to give a navigation voice command.
• Locating an address can be given as a one shot entry. For example, after saying “Find
Address” and the system is ready, you can say the entire address in one command,
“1234 1st Street, Any Town, Michigan.” If you are searching for a particular address or
Point Of Interest, the available voice commands depend on what is displayed on the
touch-screen.
• When the Voice Command system is ready to be given a command, the green indicator is visible in the right corner of the touch-screen.
• The following chart lists the navigation voice commands that may be available.
Navigation
Voice
Commands:“Where To?” (Main Menu command)“View Map” (Main Menu command)“Repeat guidance” “Cancel Route”
“Detour” (During a Route Guidance)
“Where Am I?”
“Find Address”
“Go Home”
“Find Place by Category”
“Find Place by Name”
“Find Recently Found”
“Find Favorite”
“Find City”
“Find Nearest Restaurant”
“Find Nearest Fuel” “Find Nearest Transit”
“Find Nearest Lodging”
“Find Nearest Shopping”
“Find Nearest Bank”
“Find Nearest Parking”
“Find Nearest Entertainment”
“Find Nearest Recreation”
“Find Nearest Attractions”
“Find Nearest Hospitals”
“Find Nearest Community”
“Find Nearest Auto Services”
“Find Nearest Airport”
“Find Nearest Police Stations”
“Find Nearest Fire Stations”
“Find Nearest Auto Dealers”
WARNING!
Any voice commanded system should be used only in safe driving conditions following
applicable laws regarding phone use. Your attention should be focused on safely
operating the vehicle. Failure to do so may result in a collision causing you and others
to be severely injured or killed.
ELECTRONICS
57
Page 70 of 100

INSTRUMENT CLUSTER WARNING LIGHTS
- Electronic Stability Control (ESC) Activation/Malfunction Indicator Light
• The “ESC Activation/Malfunction Indicator Light” in the instrument cluster will comeon when the ignition switch is turned to the ON/RUN position. It should go out with the
engine running. If the “ESC Activation/Malfunction Indicator Light” comes on continu-
ously with the engine running, a malfunction has been detected in the ESC system.
• If this light remains on after several ignition cycles, and the vehicle has been driven several miles (kilometers) at speeds greater than 30 mph (48 km/h), we recommend
you drive to the nearest service center and have the vehicle serviced immediately.
- Tire Pressure Monitoring System (TPMS) Light
• Each tire, including the spare (if provided), should be checked monthly, when cold andinflated to the inflation pressure recommended by the vehicle manufacturer on the
vehicle placard or tire inflation pressure label. (If your vehicle has tires of a different
size than the size indicated on the vehicle placard or tire inflation pressure label, you
should determine the proper tire inflation pressure for those tires.)
• As an added safety feature, your vehicle has been equipped with a Tire Pressure Monitoring System (TPMS) that illuminates a low tire pressure telltale when one or
more of your tires is significantly under-inflated. Accordingly, when the low tire pressure
telltale illuminates, you should stop and check your tires as soon as possible, and
inflate them to the proper pressure. Driving on a significantly under-inflated tire causes
the tire to overheat and can lead to tire failure. Under-inflation also reduces fuel
efficiency and tire tread life, and may affect the vehicle’s handling and stopping ability.
• IF THE LIGHT STARTS FLASHING INDICATING A LOW TIRE PRESSURE, ADJUST THE AIR
PRESSURE IN THE LOW TIRE TO THE AIR PRESSURE SHOWN ON THE VEHICLE PLACARD
OR TIRE INFLATION PRESSURE LABEL LOCATED ON THE DRIVER'S DOOR.
NOTE:
AFTER INFLATION, THE VEHICLE MAY NEED TO BE DRIVEN FOR 20 MINUTES BEFORE
THE FLASHING LIGHT WILL TURN OFF.
• Please note that the TPMS is not a substitute for proper tire maintenance, and it is the driver’s responsibility to maintain correct tire pressure, even if under-inflation has not
reached the level to trigger illumination of the TPMS low tire pressure telltale.
• Your vehicle has also been equipped with a TPMS malfunction indicator to indicate when the system is not operating properly. The TPMS malfunction indicator is
combined with the low tire pressure telltale. When the system detects a malfunction,
the telltale will flash for approximately one minute and then remain continuously
illuminated. This sequence will continue each time the vehicle is restarted as long as
the malfunction exists.
• When the malfunction indicator is illuminated, the system may not be able to detect or signal low tire pressure as intended. TPMS malfunctions may occur for a variety of
reasons, including the installation of replacement or alternate tires or wheels on the
vehicle that prevent the TPMS from functioning properly. Always check the TPMS
WHAT TO DO IN EMERGENCIES
68
Page 71 of 100

malfunction telltale after replacing one or more tires or wheels on your vehicle, to
ensure that the replacement or alternate tires and wheels allow the TPMS to continue
to function properly.
NOTE:
Tire pressures change by approximately 1 psi (7 kPa) per 12° F (7° C) of air temperature
change. Keep this in mind when checking tire pressure inside a garage, especially in the
Winter. Example: If garage temperature is 68°F (20°C) and the outside temperature is
32°F (0°C), then the cold tire inflation pressure should be increased by 3 psi (21 kPa),
which equals 1 psi (7 kPa) for every 12°F (7°C) for this outside temperature condition.
CAUTION!
The TPMS has been optimized for the original equipment tires and wheels. TPMS
pressures and warning have been established for the tire size equipped on your vehicle.
Undesirable system operation or sensor damage may result when using replacement
equipment that is not of the same size, type, and/or style. Aftermarket wheels can
cause sensor damage. Do not use tire sealant from a can, or balance beads if your
vehicle is equipped with a TPMS, as damage to the sensors may result.
- Engine Temperature Warning Light
• This light warns of an overheated engine condition.
• If the light turns on or flashes continuously while driving, safely pull over and stop the vehicle. If the A/C system is on, turn it off. Also, shift the transmission into NEUTRAL
and idle the vehicle. If the temperature reading does not return to normal, turn the
engine off immediately.
• We recommend that you do not operate the vehicle or engine damage will occur. Have the vehicle serviced immediately.
WARNING!
A hot engine cooling system is dangerous. You or others could be badly burned by
steam or boiling coolant. You may want to call an authorized dealer for service if your
vehicle overheats.
BRAKE- Brake Warning Light
• The Brake Warning light illuminates when there is either a system malfunction or theparking brake is applied. If the light is on and the parking brake is not applied, it
indicates a possible brake hydraulic malfunction, brake booster problem or an Anti-
Lock Brake System problem.
• Please have your vehicle serviced immediately.
WHAT TO DO IN EMERGENCIES
69
Page 72 of 100

WARNING!
Driving a vehicle with the red brake light on is dangerous. Part of the brake system may
have failed. It will take longer to stop the vehicle. You could have a collision. Have the
vehicle checked immediately.
- Malfunction Indicator Light (MIL)
• Certain conditions, such as a poor fuel quality, etc., may illuminate the MIL afterengine start. The vehicle should be serviced if the light stays on through several typical
driving cycles. In most situations, the vehicle will drive normally and not require towing.
• If the MIL flashes when the engine is running, serious conditions may exist that could lead to immediate loss of power or severe catalytic converter damage. We recommend
you do not operate the vehicle. Have the vehicle serviced immediately.
- Electronic Stability Control (ESC) OFF Indicator Light
• This light indicates the Electronic Stability Control (ESC) is off.
- Charging System Light
• This light shows the status of the electrical charging system. If the charging systemlight remains on, it means that the vehicle is experiencing a problem with the charging
system.
• We recommend you do not continue driving if the charging system light is on. Have the vehicle serviced immediately.
- Oil Pressure Warning Light
• This light indicates low engine oil pressure. If the light turns on while driving, stop thevehicle and shut off the engine as soon as possible. A chime will sound when this light
turns on.
• We recommend you do not operate the vehicle or engine damage will occur. Have the vehicle serviced immediately.
- Anti-Lock Brake (ABS) Light
• This light monitors the Anti-Lock Brake System (ABS).
• If the light is not on during starting, stays on, or turns on while driving, we recommendyou drive to the nearest service center and have the vehicle serviced immediately.
- Electronic Throttle Control (ETC) Indicator Light
• This light informs you of a problem with the Electronic Throttle Control (ETC) system.
• If a problem is detected, the light will come on while the engine is running. Cycle theignition when the vehicle has completely stopped and the shift lever is placed in the
NEUTRAL position; the light should turn off.
WHAT TO DO IN EMERGENCIES
70