2013 DODGE VIPER display
[x] Cancel search: displayPage 9 of 100

Indicators
- Turn Signal Indicators
- High Beam Indicator
- Vehicle Security Indicator*
- Electronic Speed Control Set Indicator
- Electronic Stability Control (ESC) Off Indicator*
- Door Ajar Indicator***
- Trunk Ajar Indicator***
- Windshield Washer Fluid Low Indicator***
* If equipped
** Bulb Check with Ignition On
*** On vehicles equipped with a Premium Instrument Cluster, this display shows the
Electronic Vehicle Information Center (EVIC) messages when the appropriate conditions
exist.
CONTROLS AT A GLANCE
7
Page 22 of 100
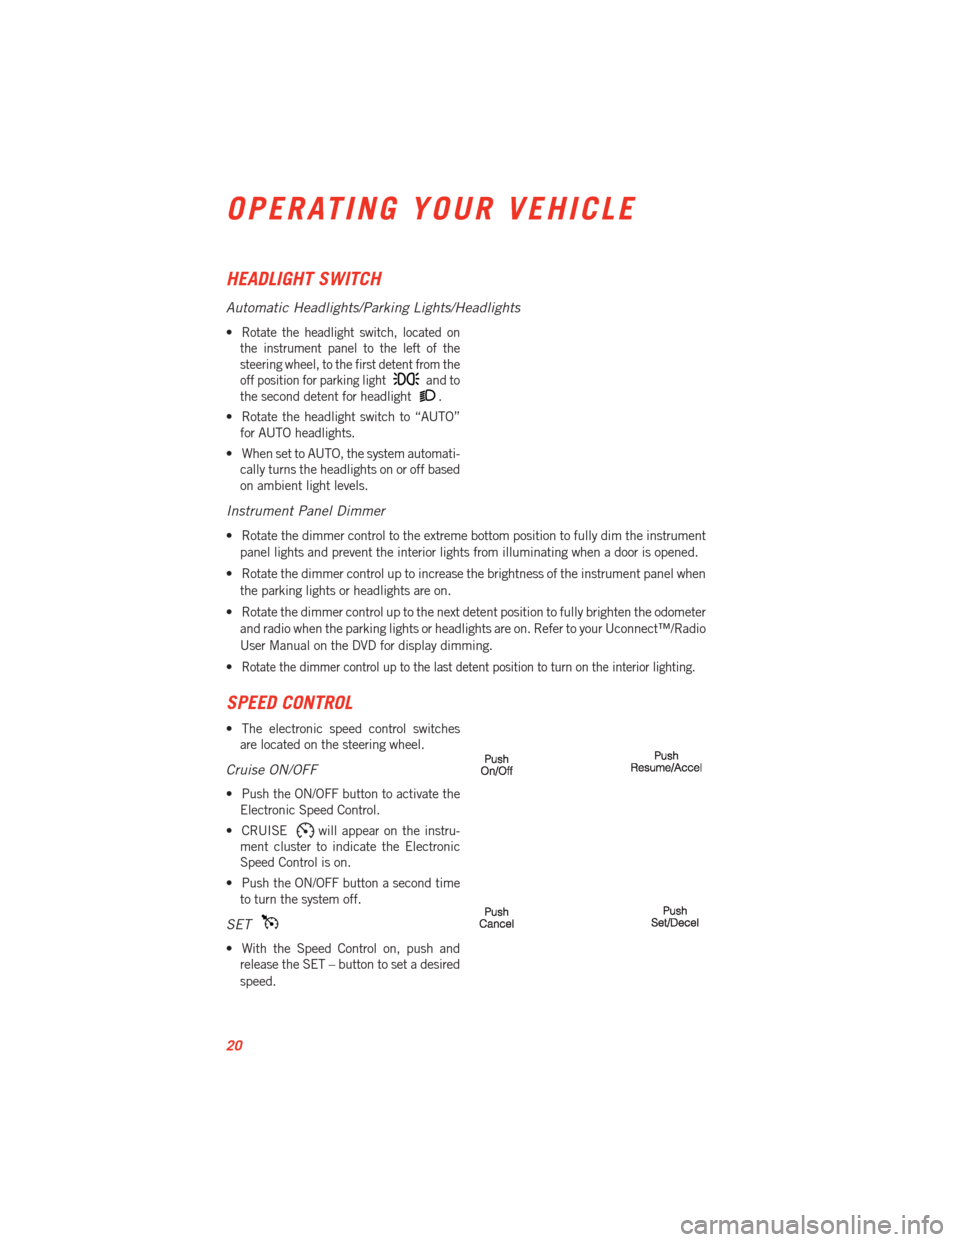
HEADLIGHT SWITCH
Automatic Headlights/Parking Lights/Headlights
•Rotate the headlight switch, located on
the instrument panel to the left of the
steering wheel, to the first detent from the
off position for parking light
and to
the second detent for headlight
.
• Rotate the headlight switch to “AUTO” for AUTO headlights.
• When set to AUTO, the system automati- cally turns the headlights on or off based
on ambient light levels.
Instrument Panel Dimmer
• Rotate the dimmer control to the extreme bottom position to fully dim the instrument
panel lights and prevent the interior lights from illuminating when a door is opened.
• Rotate the dimmer control up to increase the brightness of the instrument panel when the parking lights or headlights are on.
• Rotate the dimmer control up to the next detent position to fully brighten the odometer and radio when the parking lights or headlights are on. Refer to your Uconnect™/Radio
User Manual on the DVD for display dimming.
•
Rotate the dimmer control up to the last detent position to turn on the interior lighting.
SPEED CONTROL
• The electronic speed control switches are located on the steering wheel.
Cruise ON/OFF
• Push the ON/OFF button to activate theElectronic Speed Control.
• CRUISE
will appear on the instru-
ment cluster to indicate the Electronic
Speed Control is on.
• Push the ON/OFF button a second time to turn the system off.
SET
• With the Speed Control on, push andrelease the SET – button to set a desired
speed.
OPERATING YOUR VEHICLE
20
Page 25 of 100

PARKVIEW®REAR BACK-UP CAMERA
• You can see an on-screen image of the rear surroundings of your vehicle whenever theshift lever is put into REVERSE. The ParkView®Rear Back-Up Camera image will be
displayed in the rearview mirror or touchscreen display along with a caution note to
“check entire surroundings” across the top of the screen. After five seconds this note
will disappear.
• If the rearview mirror or touchscreen display appears foggy, clean the ParkView
®
camera located to the left of the tailgate handle.
WARNING!
Drivers must be careful when backing up; even when using the ParkView®Rear
Back-Up Camera. Always check carefully behind your vehicle, and be sure to check for
pedestrians, animals, other vehicles, obstructions, or blind spots before backing up.
You must continue to pay attention while backing up. Failure to do so can result in
serious injury or death.
OPERATING YOUR VEHICLE
23
Page 32 of 100
Uconnect™ 8.4A
Uconnect™ 8.4A AT A GLANCE
Displaying the Time
• If the time is not currently displayed on the radio or player main page, touch theSettings soft-key or the Apps soft-key and then the Settings soft-key. In the Settings list,
touch the Clock soft-key then touch the check box next to Show Time in Status Bar.
Setting the Time
• For Model 8.4A, turn the unit on, then touch the time display at the top of the screen. Touch Yes.
• If the time is not displayed at the top of the screen, touch the Settings soft-key or the Apps soft-key and then the Settings soft-key. In the Settings screen, touch the Clock
soft-key, then check or uncheck this option.
• Touch + or – next to Set Time Hours and Set Time Minutes to adjust the time.
• If these features are not available, uncheck the Sync with GPS box.
• Touch X to save your settings and exit out of the Clock Setting screen.
Audio Settings
• Touch of the Audio soft-key to activate the Audio settings screen to adjust Balance\Fade, Equalizer, and Speed Adjusted Volume.
• You can return to the Radio screen by touching the X located at the top right.
ELECTRONICS
30
Page 33 of 100
Balance/Fade
• Touch the Balance/Fade soft-key to Balance audio between the front speakers or fadethe audio between the rear and front speakers.
• Touching the Front, Rear, Left, or Right soft-keys or touch and drag the blue Speaker Icon to adjust the Balance/Fade.
Equalizer
• Touch the Equalizer soft-key to activate the Equalizer screen.
• Touch the + or - soft-keys, or by touching and dragging over the level bar for each of the equalizer bands. The level value, which spans between plus or minus 9, is displayed at
the bottom of each of the Bands.
Speed Adjusted Volume
• Touch the Speed Adjusted Volume soft-key to activate the Speed Adjusted Volume screen. The Speed Adjusted Volume is adjusted by touching the + and - buttons or by
touching and dragging over the level bar. This alters the automatic adjustment of the
audio volume with variation to vehicle speed.
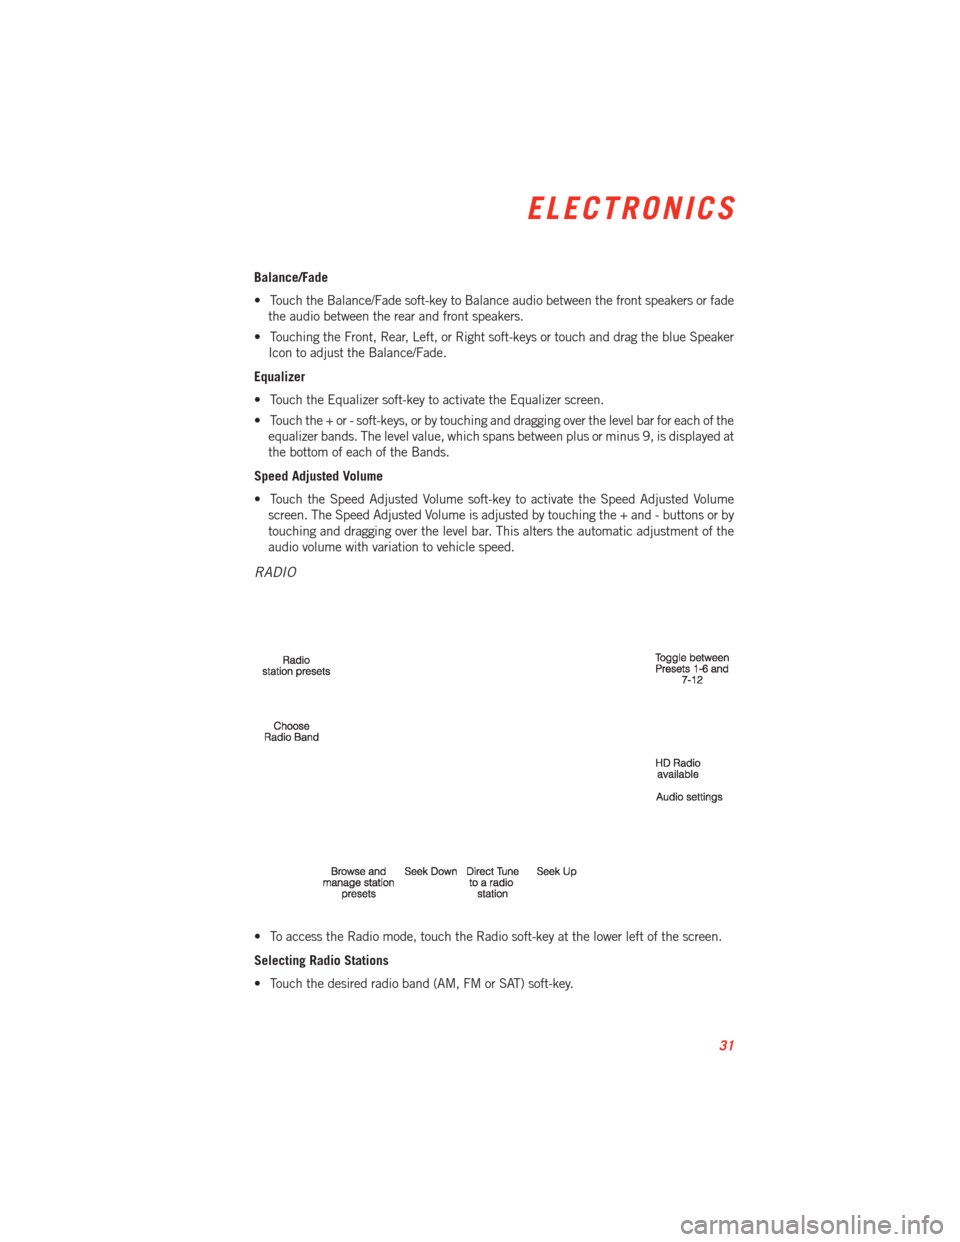
RADIO
• To access the Radio mode, touch the Radio soft-key at the lower left of the screen.
Selecting Radio Stations
• Touch the desired radio band (AM, FM or SAT) soft-key.
ELECTRONICS
31
Page 36 of 100
Replay
• Lets you replay approximately 40 minutes of the content of the current SiriusXM™channel.
Replay
Option Option Description
Play/Pause Touch to Pause content playback. Touch Pause/Play again to resume play- back.
Rewind/RW Rewinds the channel content in steps of 5 seconds. Touch and hold to rewind continuously, then release to begin playing content at that point.
Fast
Forward/FW Forwards the content, and works similarly to Rewind/RW. However, Fast
Forward/FW can only be used when content has been previously rewound.
Replay Time Displays the amount of time in the upper center of the screen by which your content lags the Live channel.
Live Resumes playback of Live content at any time while replaying rewound content.
PLAYING iPod®/USB/MP3 DEVICES
• There are many ways to play music from
iPod®/MP3 players or USB devices
through your vehicle's sound system.
Audio Jack
• The Audio Jack allows a portable device, such as an MP3 player or an iPod
®,tobe
plugged into the radio and utilize the
vehicle’s sound system, using a 3.5 mm
audio cable, to amplify the source and
play through the vehicle speakers.
•
Touch the Media soft-key then choose AUX source will change the mode to auxiliary device
if the Audio Jack is connected, allowing the music from your portable device to be heard
through the vehicle's speakers. In order activate the AUX, plug in the audio jack.
• The functions of the portable device are controlled using the device buttons. The volume may be controlled using the radio or portable device.
• Or, press the VR button on your steering wheel and state the source you would like to switch to. For example, say: "Change Source to (AUX/SD/USB/Bluetooth/Radio)”.
USB Port
• Connect your iPod
®or compatible device using a USB cable into the USB Port. USB
Memory sticks with audio files can also be used. Then, audio from the device can be
played on the vehicles sound system while providing metadata (artist, track title,
album, etc.) information on the radio display.
ELECTRONICS
34
Page 39 of 100

Changing the Navigation Voice Prompt Volume
1. Touch the View Map soft-key from the Nav Main Menu.
2. With the map displayed, touch the Settings soft-key in the lower right area of thescreen.
3. In the Settings menu, touch the Guidance soft-key.
4. In the Guidance menu, adjust the Nav Volume by touching the + or – soft-keys.
Finding Points of Interest
• From the main Navigation menu, touch Where To?, then touch Points of Interest.
• Select a Category and then a subcategory, if necessary.
• Select your destination and touch Yes.
Finding a Place by Spelling the Name
• From the Main Navigation Menu, touch Where to?, then touch Points of Interest and then touch Spell Name.
• Enter the name of your destination.
• Touch Done.
• Select your destination and touch Yes.
ELECTRONICS
37
Page 41 of 100
Adding a Stop
• To add a stop you must be navigating a route.
• Touch the Menu soft-key to return to the Main Navigation menu.
• Touch Where To?, then search for the extra stop. When another location has beenselected, you can choose to cancel your previous route, add as the first destination or
add as the last destination.
• Touch the desired selection and touch Yes.
Taking a Detour
• To take a detour you must be navigating a route.
• Touch Detour.
NOTE:
• If the route you are currently taking is the only reasonable option, the device might not calculate a detour.
• For more information, see your Uconnect™ Access User's Manual.
Uconnect™ PHONE (Bluetooth®HANDS FREE CALLING)
• If the Uconnect™ Phone Buttonexists on your steering wheel, then you have the
Uconnect™ Phone features.
• The Uconnect™ Phone is a voice-activated, hands-free, in-vehicle communications system with Voice Command Capability (see Voice Command section).
• The Uconnect™ Phone allows you to dial a phone number with your mobile phone using simple voice commands or using screen soft-keys.
• Refer to the Understand The Features Of Your Vehicle section of your vehicle's Owner's Manual on the DVD for further details.
• The Uconnect™ Phone requires a mobile phone equipped with the Bluetooth
®
Hands-Free Profile, Version 1.0 or higher. For Uconnect™ customer support, visit
www.Uconnect-Phone.com or call 1–877–855–8400. (U.S. Residents). Canadian
Residents call, 1-800-465–2001 (English) or 1-800-387-9983 (French).
Pairing a Phone
• To use the Uconnect™ Phone feature, you must first pair your Bluetooth®phone with
the Uconnect™ system.
Start pairing procedure on the radio
• Touch the Phone soft-key and then the Settings soft-key. Next, touch Add Device.
• Uconnect™ Phone will display an “In progress” screen while the system is connecting.
Start pairing procedure on mobile phone
•
Search for available devices on your Bluetooth®enabled mobile phone. This is usually
within Settings or Options under “Bluetooth”. See your mobile phone’s manual for details.
• When your phone finds the system, select “Uconnect” as the paired device.
ELECTRONICS
39