Page 192 of 683

You can choose from HIGH, LOW or OFF heat settings.
Amber indicator lights in each switch indicate the level of
heat in use. Two indicator lights will illuminate for
HIGH, one for LOW and none for OFF.
Press the switch once to select HIGH-level
heating. Press the switch a second time to select
LOW-level heating. Press the switch a third
time to shut the heating elements OFF.
NOTE:Once a heat setting is selected, heat will be felt
within two to five minutes.
When the HIGH-level setting is selected, the heater will
provide a boosted heat level during the initial stages of
operation. Then, the heat output will drop to the normal
HIGH-level. If the HIGH-level setting is selected, the
system will automatically switch to LOW-level after ap-
proximately 60 minutes of continuous operation. At that
time, the display will change from HIGH to LOW, indicat-
ing the change. The LOW-level setting will turn OFF
automatically after approximately 45 minutes.
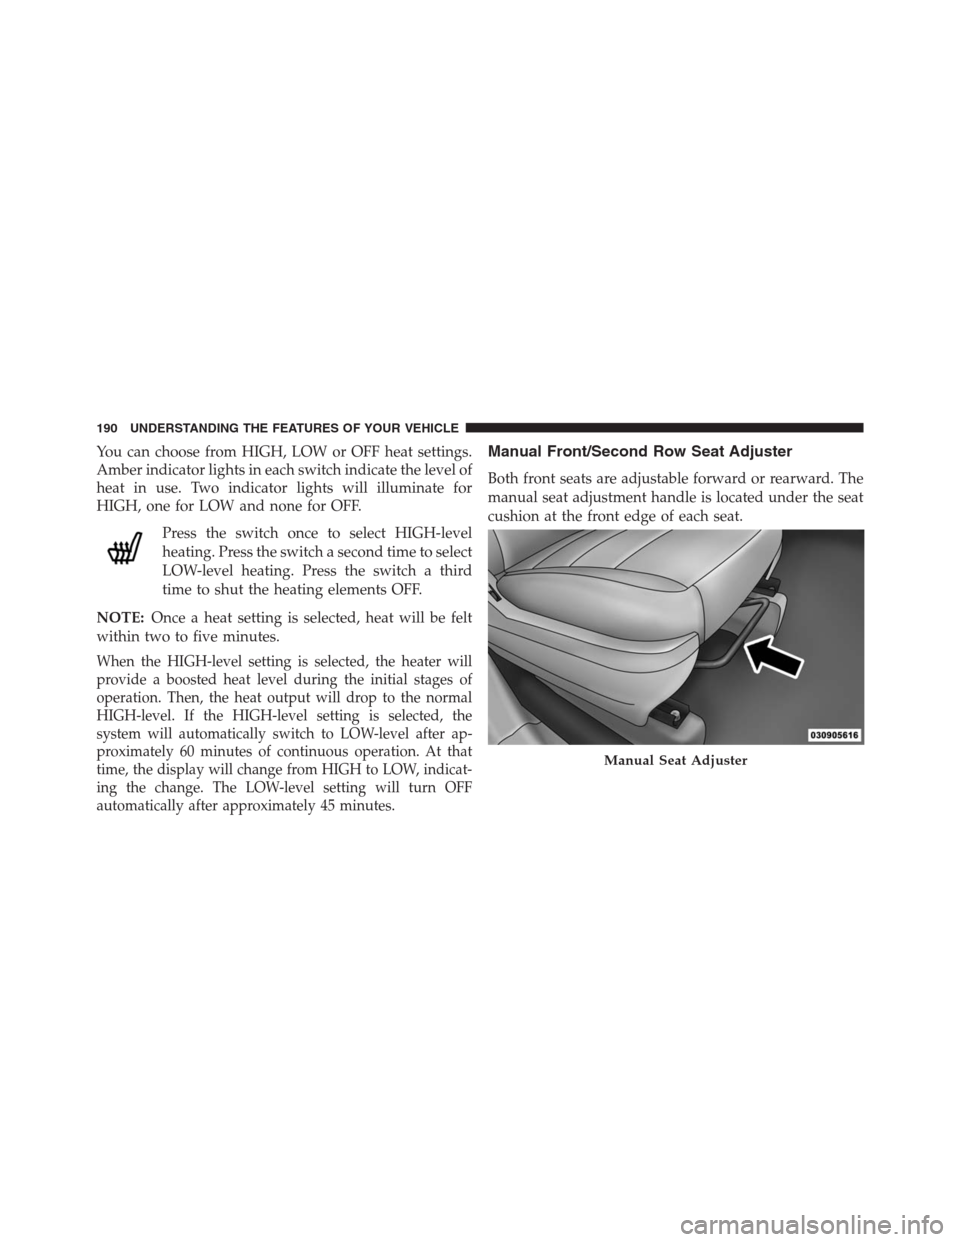
Manual Front/Second Row Seat Adjuster
Both front seats are adjustable forward or rearward. The
manual seat adjustment handle is located under the seat
cushion at the front edge of each seat.
Manual Seat Adjuster
190 UNDERSTANDING THE FEATURES OF YOUR VEHICLE
Page 205 of 683
The seat will automatically fold into position for easy
entry into the third row.
WARNING!
In the event of a collision you could be injured if the
seat is not fully latched.
Quad Seats — If Equipped
Both Quad seats are adjustable forward or rearward. The
manual seat adjustment handle is located under the seat
cushion at the front edge of each seat.
While sitting in the seat, pull up on the handle and slide
the seat forward or rearward. Release the bar once you
have reached the desired position. Then, using body
pressure, move forward and rearward on the seat to be
sure that the seat adjusters have latched.
Manual Seat Adjuster
3
UNDERSTANDING THE FEATURES OF YOUR VEHICLE 203
Page 238 of 683

Press the switch forward to move the pedals forward
(toward the front of the vehicle).
Press the switch rearward to move the pedals rearward
(toward the driver).
•The pedals can be adjusted with the ignition OFF.
•The pedalscannotbe adjusted when the vehicle is in
REVERSE or when the Electronic Speed Control Sys-
tem is on. The following messages will be displayed on
vehicles equipped with the Electronic Vehicle Informa-
tion System (EVIC) if the pedals are attempted to be
adjusted when the system is locked out (“Adjustable
Pedal Disabled — Cruise Control Engaged” or “Ad-
justable Pedal Disabled — Vehicle In Reverse”.NOTE:
•Always adjust the pedals to a position that allows full
pedal travel.
•Further small adjustments may be necessary to find
the best possible seat/pedal position.
CAUTION!
Do not place any article under the adjustable pedals
or impede its ability to move, as it may cause damage
to the pedal controls. Pedal travel may become lim-
ited if movement is stopped by an obstruction in the
adjustable pedal’s path.
236 UNDERSTANDING THE FEATURES OF YOUR VEHICLE
Page 453 of 683

Rear Temperature Control
To change the temperature in the rear of the vehicle,
rotate the temperature knob counterclockwise to lower
the temperature, and clockwise to increase the tempera-
ture. The rear temperature settings are displayed in the
front ATC panel.
When rear controls are locked by the front system, the
Rear Temperature Lock symbol on the temperature knob
is illuminated and any rear overhead adjustments are
ignored.
Rear Mode Control
Auto Mode
•
The rear system automatically maintains the correct mode
and comfort level desired by the rear seat occupants.
Headliner Mode
Air comes from the outlets in the headliner. Each
of these outlets can be individually adjusted to
direct the flow of air. Moving the air vanes of the outlets
to one side will shut off the airflow.
Bi-Level Mode
Air comes from both the headliner outlets and the
floor outlets.
NOTE:In many temperature positions, the Bi-Level
mode is designed to provide cooler air out of the head-
liner outlets and warmer air from the floor outlets.
Floor Mode
Air comes from the floor outlets.
4
UNDERSTANDING YOUR INSTRUMENT PANEL 451
Page 677 of 683

Restraint, Head...........................192
Restraints, Child...........................89
Rocking Vehicle When Stuck.................583
Roof Rack (Luggage Rack)...................295
Rotation, Tires...........................518
Safety Checks Inside Vehicle..................118
Safety Checks Outside Vehicle................120
Safety Defects, Reporting....................655
Safety, Exhaust Gas........................117
Safety Information, Tire.....................496
Safety Tips..............................117
Satellite Radio Antenna.....................373
Schedule, Maintenance.....................642
Seat Belt Maintenance......................625
Seat Belt Reminder.........................72
Seat Belts................................56
Adjustable Shoulder Belt...................65
Adjustable Upper Shoulder Anchorage.........65And Pregnant Women.....................73
Child Restraint..........................89
Extender..............................74
Front Seat.............................60
Inspection............................118
Pretensioners...........................68
Rear Seat..............................60
Seats..................................183
Adjustment...........................183
Fold in Floor (Stow nGo).................196
Memory..............................215
Power...............................184
Reclining.............................191
Stow n Go (Fold in Floor).................196
Security Alarm (Theft Alarm)..................17
Selection of Coolant (Antifreeze)...............639
Sentry Key (Immobilizer)....................15
Sentry Key Programming....................17
Sentry Key Replacement.....................16
10
INDEX 675