Page 87 of 683

Because air bag sensors estimate deceleration over time,
vehicle speed and damage are not good indicators of
whether or not an air bag should have deployed.
NOTE:In a rollover the pretensioners and/or SAB and
SABIC air bags may deploy on both sides of the vehicle.
Front And Side Impact Sensors
In front and side impacts, impact sensors can aid the
ORC in determining appropriate response to impact
events.
Enhanced Accident Response System
In the event of an impact causing air bag deployment, if
the communication network remains intact, and the
power remains intact, depending on the nature of the
event the ORC will determine whether to have the
Enhanced Accident Response System perform the follow-
ing functions:
Cut off fuel to the engine.Flash hazard lights as long as the battery has power or
until the ignition key is turned off.
Turn on the interior lights, which remain on as long as the
battery has power or until the ignition key is removed.
Unlock the doors automatically.
In order to reset the Enhanced Accident Response System
functions after an event, the ignition switch must be
changed from IGN ON to IGN OFF.
If A Deployment Occurs
The Advanced Front Air Bags are designed to deflate
immediately after deployment.
NOTE:Front and/or side air bags will not deploy in all
collisions. This does not mean something is wrong with
the air bag system.
2
THINGS TO KNOW BEFORE STARTING YOUR VEHICLE 85
Page 122 of 683

WARNING!(Continued)
•Never put floor mats or other floor coverings on top
of already installed floor mats. Additional floor
mats and other coverings will reduce the size of the
pedal area and interfere with the pedals.
•Check mounting of mats on a regular basis. Always
properly reinstall and secure floor mats that have
been removed for cleaning.
•
Always make sure that objects cannot fall into the
driver footwell while the vehicle is moving. Objects
can become trapped under the brake pedal and accel-
erator pedal causing a loss of vehicle control.
•If required, mounting posts must be properly in-
stalled, if not equipped from the factory.
Failure to properly follow floor mat installation or
mounting can cause interference with the brake
pedal and accelerator pedal operation causing loss of
control of the vehicle.
Periodic Safety Checks You Should Make Outside
The Vehicle
Tires
Examine tires for excessive tread wear and uneven wear
patterns. Check for stones, nails, glass, or other objects
lodged in the tread or sidewall. Inspect the tread for cuts
and cracks. Inspect sidewalls for cuts, cracks and bulges.
Check the wheel nuts for tightness. Check the tires
(including spare) for proper cold inflation pressure.
Lights
Have someone observe the operation of brake lights and
exterior lights while you work the controls. Check turn
signal and high beam indicator lights on the instrument
panel.
120 THINGS TO KNOW BEFORE STARTING YOUR VEHICLE
Page 190 of 683

Heated Seats — If Equipped
On some models, the front and rear seats may be
equipped with heaters located in the seat cushions.
WARNING!
•Persons who are unable to feel pain to the skin
because of advanced age, chronic illness, diabetes,
spinal cord injury, medication, alcohol use, exhaus-
tion or other physical condition must exercise care
when using the seat heater. It may cause burns
even at low temperatures, especially if used for
long periods of time.
•Do not place anything on the seat or seatback that
insulates against heat, such as a blanket or cushion.
This may cause the seat heater to overheat. Sitting
in a seat that has been overheated could cause
serious burns due to the increased surface tempera-
ture of the seat.
Vehicles Equipped With Remote Start
On models that are equipped with remote start, the driv-
er ’s heated seat can be programmed to come on during a
remote start. Refer to “Remote Starting System — If
Equipped” in “Things To Know Before Starting Your
Vehicle” for further information.
Front Heated Seats
There are two heated seat switches that allow the driver
and passenger to operate the seats independently. The
controls for each heater are located on the switch bank
below the climate controls.
You can choose from HIGH, LOW or OFF heat settings.
Amber indicator lights in each switch indicate the level of
heat in use. Two indicator lights will illuminate for
HIGH, one for LOW and none for OFF.
188 UNDERSTANDING THE FEATURES OF YOUR VEHICLE
Page 192 of 683

You can choose from HIGH, LOW or OFF heat settings.
Amber indicator lights in each switch indicate the level of
heat in use. Two indicator lights will illuminate for
HIGH, one for LOW and none for OFF.
Press the switch once to select HIGH-level
heating. Press the switch a second time to select
LOW-level heating. Press the switch a third
time to shut the heating elements OFF.
NOTE:Once a heat setting is selected, heat will be felt
within two to five minutes.
When the HIGH-level setting is selected, the heater will
provide a boosted heat level during the initial stages of
operation. Then, the heat output will drop to the normal
HIGH-level. If the HIGH-level setting is selected, the
system will automatically switch to LOW-level after ap-
proximately 60 minutes of continuous operation. At that
time, the display will change from HIGH to LOW, indicat-
ing the change. The LOW-level setting will turn OFF
automatically after approximately 45 minutes.
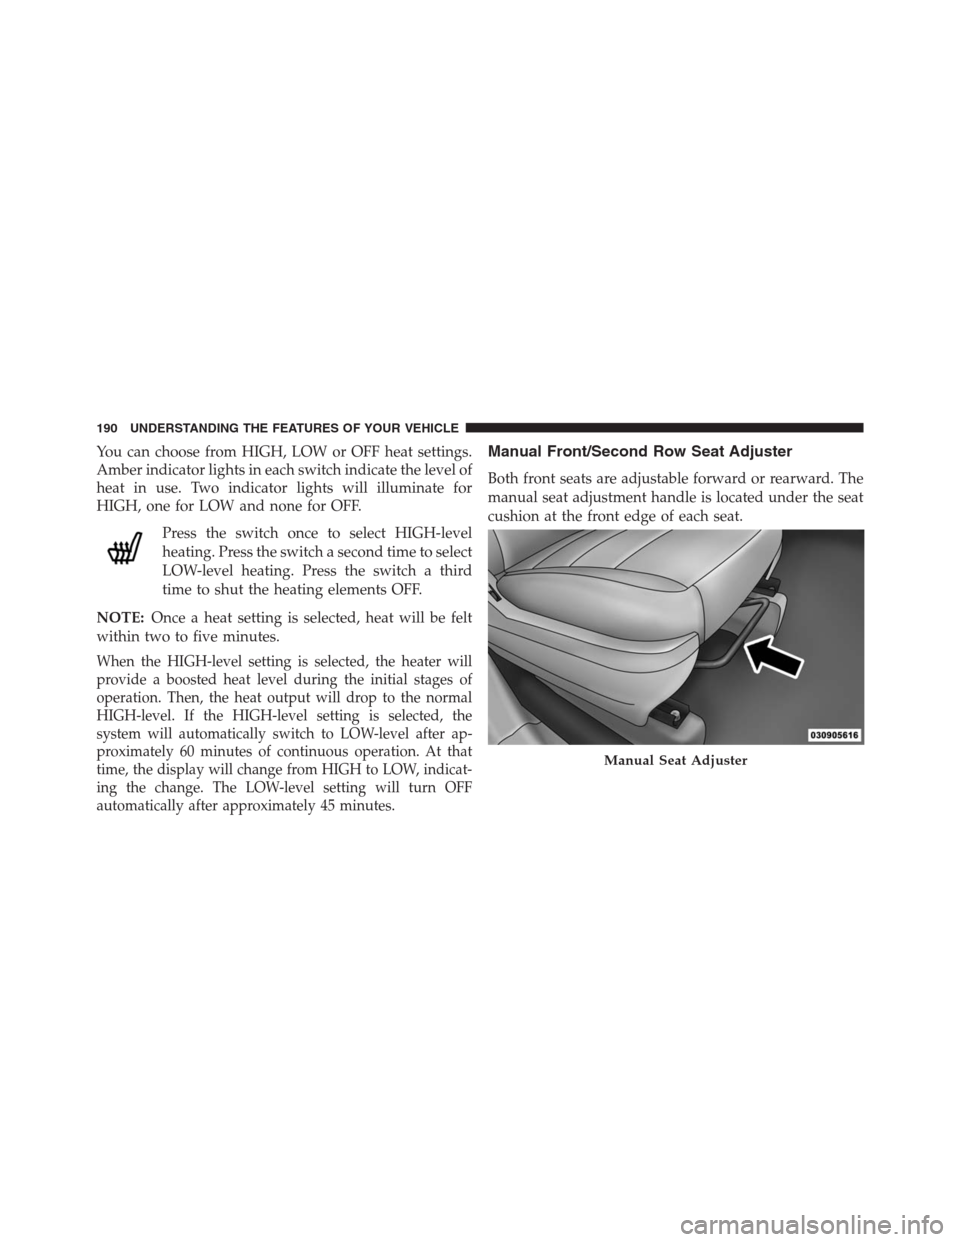
Manual Front/Second Row Seat Adjuster
Both front seats are adjustable forward or rearward. The
manual seat adjustment handle is located under the seat
cushion at the front edge of each seat.
Manual Seat Adjuster
190 UNDERSTANDING THE FEATURES OF YOUR VEHICLE
Page 224 of 683

LIGHTS
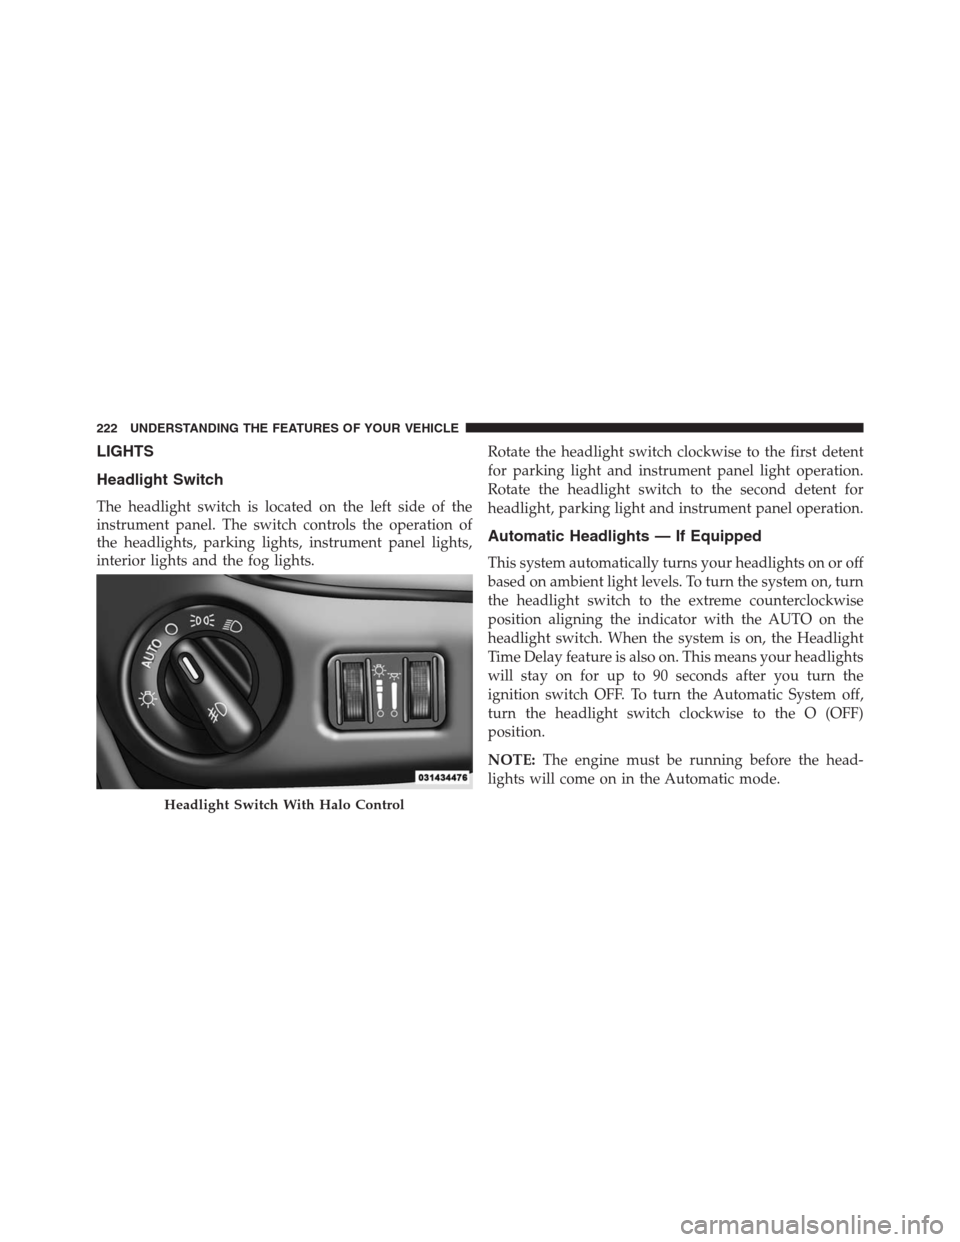
Headlight Switch
The headlight switch is located on the left side of the
instrument panel. The switch controls the operation of
the headlights, parking lights, instrument panel lights,
interior lights and the fog lights.Rotate the headlight switch clockwise to the first detent
for parking light and instrument panel light operation.
Rotate the headlight switch to the second detent for
headlight, parking light and instrument panel operation.
Automatic Headlights — If Equipped
This system automatically turns your headlights on or off
based on ambient light levels. To turn the system on, turn
the headlight switch to the extreme counterclockwise
position aligning the indicator with the AUTO on the
headlight switch. When the system is on, the Headlight
Time Delay feature is also on. This means your headlights
will stay on for up to 90 seconds after you turn the
ignition switch OFF. To turn the Automatic System off,
turn the headlight switch clockwise to the O (OFF)
position.
NOTE:The engine must be running before the head-
lights will come on in the Automatic mode.
Headlight Switch With Halo Control
222 UNDERSTANDING THE FEATURES OF YOUR VEHICLE
Page 229 of 683
Multifunction Lever
The multifunction lever is located on the left side of the
steering column.The multifunction lever controls the:
•Turn Signals
•Headlight Beams Low/High
•Flash-To-Pass (Optical Horn)
•Front and Rear Wipers — Washer Functions
Turn Signals
Move the multifunction lever up or down and the arrows
on each side of the instrument cluster flash to show
proper operation of the front and rear turn signal lights.
NOTE:If either light remains on and does not flash, or
there is a very fast flash rate, check for a defective outside
light bulb. If an indicator fails to light when the lever is
moved, it would suggest that the indicator bulb is
defective.
Multifunction Lever
3
UNDERSTANDING THE FEATURES OF YOUR VEHICLE 227
Page 313 of 683

INSTRUMENT CLUSTER DESCRIPTIONS
1. Tachometer
This gauge measures engine revolutions per minute
(RPM x 1000). Before the pointer reaches the red area,
ease up on the accelerator to prevent engine damage.
2. Front Fog Light Indicator — If Equipped
This indicator will illuminate when the front fog
lights are on.
3. Park/Headlight ON Indicator — If Equipped
This indicator will illuminate when the park
lights or headlights are turned on.4. Turn Signal Indicators
The arrow will flash with the exterior turn signal
when the turn signal lever is operated.
If the vehicle is driven more than 1 mile (1.6 km) with
either turn signal on, a continuous chime will sound to
alert you to turn the signal off. If either indicator flashes
at a rapid rate, check for a defective outside light bulb.
5. High Beam Indicator
This indicator shows that the high beam head-
lights are on. Push the multifunction lever for-
ward to switch the headlights to high beam, and pull
toward yourself (normal position) to return to low beam.
4
UNDERSTANDING YOUR INSTRUMENT PANEL 311
Page 334 of 683

•Loose Gascap Indicator
If the vehicle diagnostic system determines
that the fuel filler cap is loose, improperly
installed, or damaged, a loose gascap indicator
will display in the telltale display area. Tighten
the fuel filler cap properly and press the SELECT button
to turn off the message. If the problem continues, the
message will appear the next time the vehicle is started.
A loose, improperly installed, or damaged fuel filler cap
may also turn on the Malfunction Indicator Light (MIL).
•Windshield Washer Fluid Low Indicator
This light will turn on to indicate the wind-
shield washer fluid is low.EVIC Red Telltale Lights
This area will show reconfigurable red telltales. These
telltales include:
•Door Ajar
This light will turn on to indicate that one or
more doors may be ajar.
•Oil Pressure Warning Light
This light indicates low engine oil pressure. The
light should turn on momentarily when the engine is
started. If the light turns on while driving, stop the vehicle
and shut off the engine as soon as possible. A chime will
sound for four minutes when this light turns on.
Do not operate the vehicle until the cause is corrected.
This light does not show how much oil is in the engine.
The engine oil level must be checked under the hood.
332 UNDERSTANDING YOUR INSTRUMENT PANEL