Page 316 of 683

Unless reset, this message will continue to display each
time you turn the ignition switch to the ON/RUN
position. To turn off the message temporarily, press and
release the STEP button on the steering wheel. To reset
the oil change indicator system (after performing the
scheduled maintenance), perform the following steps.
1. Turn the ignition switch to the ON/RUN position
(do not start the engine).
2. Fully depress the accelerator pedal, slowly, three times
within 10 seconds.
3. Turn the ignition switch to the OFF/LOCK position.
NOTE:If the indicator message illuminates when you
start the engine, the oil change indicator system did not
reset. If necessary, repeat these steps.Electronic Vehicle Information Center (EVIC)
Display — If Equipped
The Electronic Vehicle Information Center (EVIC) fea-
tures a driver-interactive display that is located in the
instrument cluster. For further information, refer to
“Electronic Vehicle Information Center (EVIC)”.
7. Anti-Lock Brake (ABS) Light
This light monitors the Anti-Lock Brake System
(ABS). The light will turn on when the ignition
switch is turned to the ON/RUN position and
may stay on for as long as four seconds.
If the ABS light remains on or turns on while driving, it
indicates that the Anti-Lock portion of the brake system
is not functioning and that service is required. However,
the conventional brake system will continue to operate
normally if the BRAKE warning light is not on.
314 UNDERSTANDING YOUR INSTRUMENT PANEL
Page 329 of 683

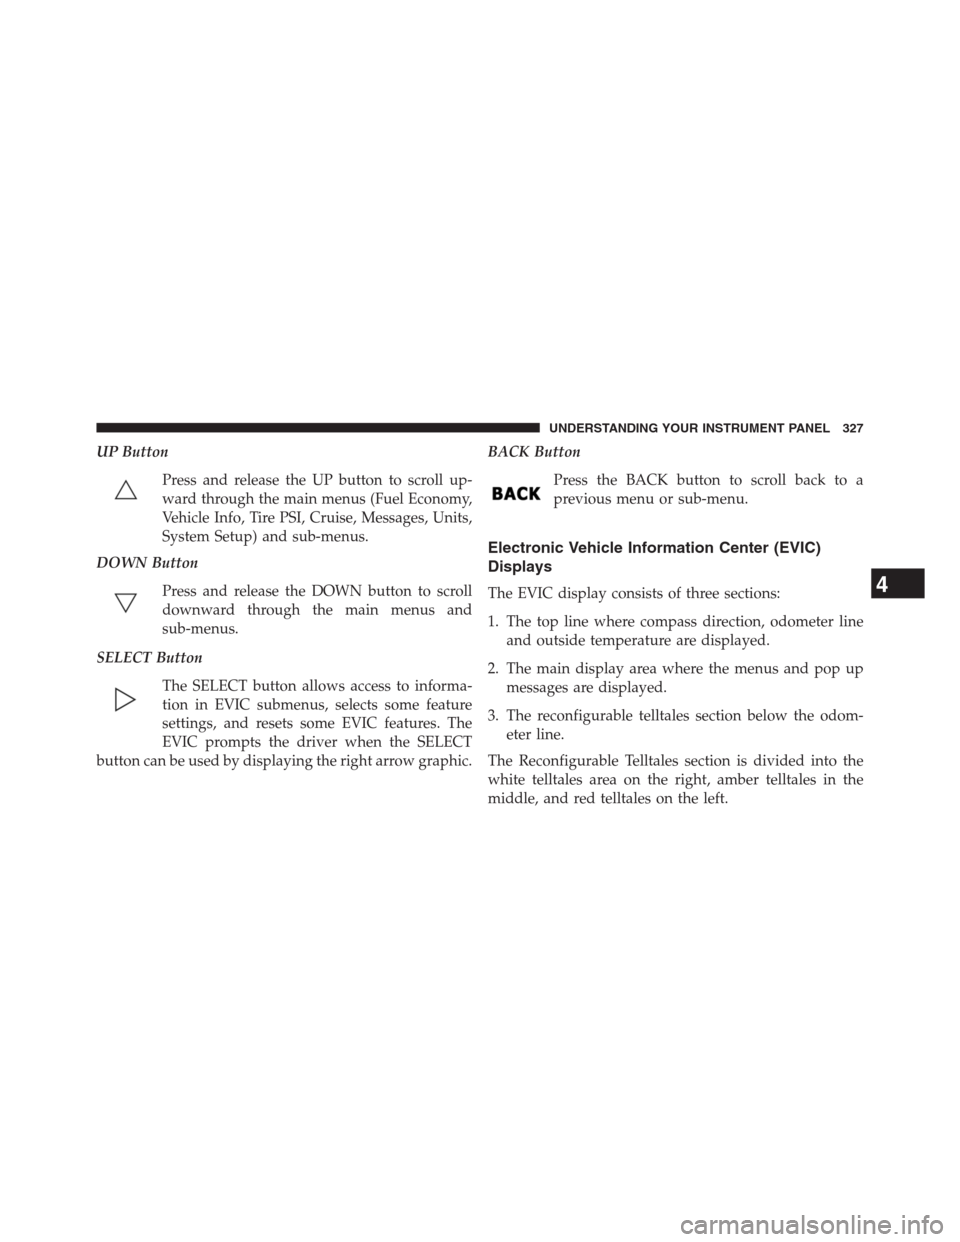
UP Button
Press and release the UP button to scroll up-
ward through the main menus (Fuel Economy,
Vehicle Info, Tire PSI, Cruise, Messages, Units,
System Setup) and sub-menus.
DOWN Button
Press and release the DOWN button to scroll
downward through the main menus and
sub-menus.
SELECT Button
The SELECT button allows access to informa-
tion in EVIC submenus, selects some feature
settings, and resets some EVIC features. The
EVIC prompts the driver when the SELECT
button can be used by displaying the right arrow graphic.BACK Button
Press the BACK button to scroll back to a
previous menu or sub-menu.
Electronic Vehicle Information Center (EVIC)
Displays
The EVIC display consists of three sections:
1. The top line where compass direction, odometer line
and outside temperature are displayed.
2. The main display area where the menus and pop up
messages are displayed.
3. The reconfigurable telltales section below the odom-
eter line.
The Reconfigurable Telltales section is divided into the
white telltales area on the right, amber telltales in the
middle, and red telltales on the left.4
UNDERSTANDING YOUR INSTRUMENT PANEL 327
Page 331 of 683
When the appropriate conditions exist, the EVIC displays
the following messages:
•Key in ignition
•Ignition or Accessory On
•Remote start aborted — Door ajar
•Remote start aborted — Hood ajar
•Remote start aborted — L/Gate ajar
•Remote start aborted — Fuel low
•Remote start disabled — Start Vehicle to Reset
•Remote start active — Key to Run
•Wrong Key
•Damaged Key
•Key not programmed•Vehicle Not in Park
•Press Brake Pedal and Push Button to Start
•Door(s) Ajar (with a single chime, if vehicle is in
motion)
•Liftgate Ajar (chime will sound when vehicle starts
moving)
•Low Tire Pressure
•Service TPM System (refer to “Tire Pressure Monitor-
ing System” in “Starting And Operating”)
•Premium TPM Service Graphic Display
•Turn Signal On
•RKE Battery Low
•LOW WASHER FLUID
•Oil Change Required
4
UNDERSTANDING YOUR INSTRUMENT PANEL 329
Page 337 of 683

WARNING!
If you continue operating the vehicle when the
Transmission Temperature Warning Light is illumi-
nated you could cause the fluid to boil over, come in
contact with hot engine or exhaust components and
cause a fire.
Oil Change Required
Your vehicle is equipped with an engine oil change
indicator system. The Oil Change Required message will
flash in the EVIC display for approximately 10 seconds,
after a single chime has sounded, to indicate the next
scheduled oil change interval. The engine oil change
indicator system is duty-cycle based, which means the
engine oil change interval may fluctuate dependent upon
your personal driving style.Unless reset, this message will continue to display each
time you turn the ignition switch to the ON/RUN
position. To turn off the message temporarily, press and
release the Menu button. To reset the oil change indicator
system (after performing the scheduled maintenance),
perform the following steps.
1. Turn the ignition switch to the ON position (do not
start the engine.)
2. Fully depress the accelerator pedal, slowly, three times
within 10 seconds.
3. Turn the ignition switch to the OFF/LOCK position.
NOTE:If the indicator message illuminates when you
start the engine, the oil change indicator system did not
reset. If necessary, repeat these steps.
4
UNDERSTANDING YOUR INSTRUMENT PANEL 335
Page 338 of 683

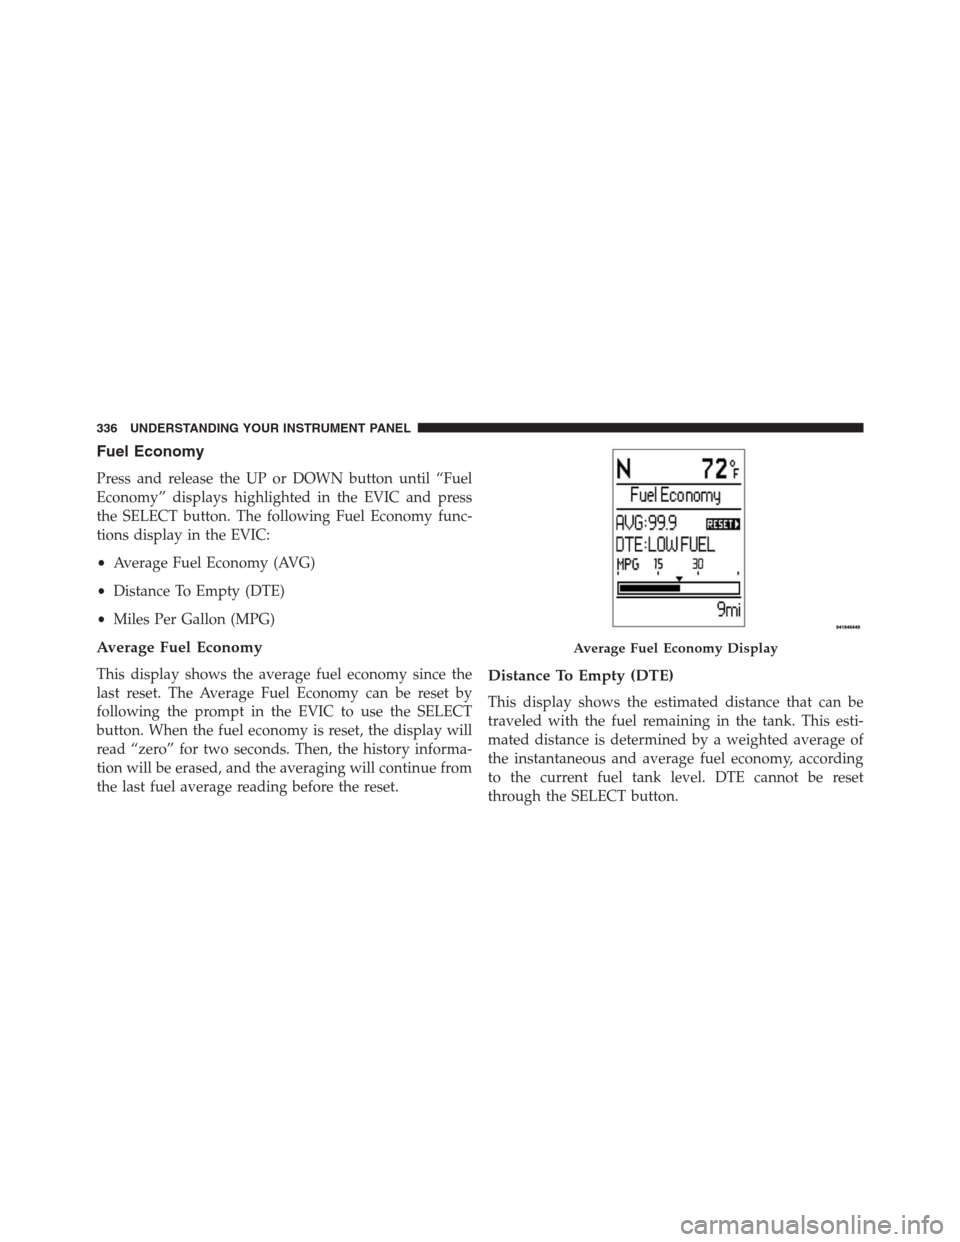
Fuel Economy
Press and release the UP or DOWN button until “Fuel
Economy” displays highlighted in the EVIC and press
the SELECT button. The following Fuel Economy func-
tions display in the EVIC:
•Average Fuel Economy (AVG)
•Distance To Empty (DTE)
•Miles Per Gallon (MPG)
Average Fuel Economy
This display shows the average fuel economy since the
last reset. The Average Fuel Economy can be reset by
following the prompt in the EVIC to use the SELECT
button. When the fuel economy is reset, the display will
read “zero” for two seconds. Then, the history informa-
tion will be erased, and the averaging will continue from
the last fuel average reading before the reset.
Average Fuel Economy Display
Distance To Empty (DTE)
This display shows the estimated distance that can be
traveled with the fuel remaining in the tank. This esti-
mated distance is determined by a weighted average of
the instantaneous and average fuel economy, according
to the current fuel tank level. DTE cannot be reset
through the SELECT button.
336 UNDERSTANDING YOUR INSTRUMENT PANEL
Page 340 of 683

Trip Info
Press and release the UP or DOWN button until “Trip
Info” is highlighted in the EVIC and press the SELECT
button. Press and release the UP/DOWN buttons to
highlight one of the following functions if you want to
reset it:
Trip A
Shows the total distance traveled for Trip A since the last
reset.
Trip B
Shows the total distance traveled for Trip B since the last
reset.
Elapsed Time
Shows the total elapsed time of travel since the last reset
when the ignition switch is in the ACC position. Elapsed
time will increment when the ignition switch is in the ON
or START position.
To Reset A Trip Function
Reset will only occur while a resettable function is
selected (highlighted). Press and hold the SELECT button
to clear the resettable function being displayed.
Tire PSI
Press and release the UP or DOWN button until “Tire
PSI:” displays highlighted in the EVIC. Press the SELECT
button to view a graphic of the vehicle with a tire
pressure value at each corner of the graphic.
338 UNDERSTANDING YOUR INSTRUMENT PANEL
Page 342 of 683

Compass / Temperature Display
The compass readings indicate the direction the vehicle is
facing. The EVIC will display one of eight compass
readings and the outside temperature.
NOTE:The system will display the last known outside
temperature when starting the vehicle and may need to
be driven several minutes before the updated tempera-
ture is displayed. Engine temperature can also affect the
displayed temperature; therefore, temperature readings
are not updated when the vehicle is not moving.
Automatic Compass Calibration
This compass is self-calibrating, which eliminates the
need to manually reset the compass. When the vehicle is
new, the compass may appear erratic and the EVIC will
display CAL until the compass is calibrated. You may
also calibrate the compass by completing one or more
360–degree turns (in an area free from large metal ormetallic objects) until the CAL indicator displayed in the
EVIC turns off. The compass will now function normally.
NOTE:
A good calibration requires a level surface and an
environment free from large metallic objects such as build-
ings, bridges, underground cables, railroad tracks, etc.
Manual Compass Calibration
If the compass appears erratic and the CAL indicator
does not appear in the EVIC display, you must put the
compass into the Calibration Mode manually, as follows:
1. Turn ON the ignition switch.
2. Press the UP or DOWN button until the Setup
(Customer-Programmable Features) menu is reached,
then press the SELECT button.
3. Press the DOWN button until “Calibrate Compass” is
displayed in the EVIC.
340 UNDERSTANDING YOUR INSTRUMENT PANEL
Page 354 of 683

Push the rotary TUNE/SCROLL control knob a fifth time
and FADE will display. Turn the TUNE/SCROLL control
knob to the left or right to adjust the sound level between
the front and rear speakers.
Push the rotary TUNE/SCROLL control knob again to
exit setting tone, balance, and fade.
AM/FM Button
Press the buttons to select either AM or FM mode.
SET/RND Button — To Set the Pushbutton
Memory
When you are receiving a station that you wish to
commit to pushbutton memory, press the SET/RND
button. The symbol SET 1 will now show in the display
window. Select the button (1 to 6) you wish to lock onto
this station and press and release that button. If a button
is not selected within five seconds after pressing theSET/RND button, the station will continue to play but
will not be stored into pushbutton memory.
You may add a second station to each pushbutton by
repeating the above procedure with this exception: Press
the SET/RND button twice and SET 2 will show in the
display window. Each button can be set for SET 1 and
SET 2 in both AM and FM. This allows a total of 12 AM
and 12 FM stations to be stored into pushbutton memory.
The stations stored in SET 2 memory can be selected by
pressing the pushbutton twice.
Every time a preset button is used, a corresponding
button number will display.
Buttons1-6
These buttons tune the radio to the stations that you
commit to pushbutton memory (12 AM and 12 FM
stations).
352 UNDERSTANDING YOUR INSTRUMENT PANEL