Page 424 of 599
WARNING!
•When in “Partial Off” mode, the TCS functionality
of ESC, (except for the limited slip feature de-
scribed in the TCS section), has been disabled and
the “ESC Off Indicator Light” will be illuminated.
When in “Partial Off” mode, the engine power
reduction feature of TCS is disabled, and the
enhanced vehicle stability offered by the ESC sys-
tem is reduced.
Full Off
This mode is intended for off-highway or off-road use
only and should not be used on any public roadways. In
this mode, all TCS and ESC stability features are turned
OFF. To enter the “Full Off” mode, press and hold the
“ESC Off” switch for five seconds while the vehicle is
stopped with the engine running. After five seconds, a chime will sound, the “ESC Activation/Malfunction In-
dicator Light” will illuminate, and the
�ESC OFF�mes-
sage will display in the vehicle odometer. Press and
release the TRIP ODOMETER button located on the
instrument cluster to clear this message. The “ESC OFF”
message may appear in the Electronic Vehicle Informa-
tion Center (EVIC). Refer to “Electronic Vehicle Informa-
tion Center (EVIC)” in “Understanding Your Instrument
Panel” for further information. To turn ESC ON again,
momentarily press the “ESC Off” switch.
NOTE: The�ESC OFF� message will display and the
audible chime will sound when the shift lever is moved
into the PARK position from any position other than
PARK and then moved out of the PARK position. This
will occur when the message was previously cleared.
422 STARTING AND OPERATING
Page 427 of 599
WARNING!(Continued)
•Failure to follow these warnings may cause the
vehicle to roll down the incline and could collide
with another vehicle, object or person, and cause
serious or fatal injury. Always remember to use the
parking brake while parking on a hill and that the
driver is responsible for braking the vehicle.
HSA Off
If you wish to turn off the HSA system, it can be done
using the Customer Programmable Features in the Elec-
tronic Vehicle Information Center (EVIC). Refer to “Elec-
tronic Vehicle Information Center (EVIC)” in “Under-
standing Your Instrument Panel” for further information.
Ready Alert Braking
Ready Alert Braking may reduce the time required to
reach full braking during emergency braking situations. It anticipates when an emergency braking situation may
occur by monitoring how fast the throttle is released
by the driver. When the throttle is released very quickly,
Ready Alert Braking applies a small amount of brake
pressure. This brake pressure will not be noticed by the
driver. The brake system uses this brake pressure to allow
a fast brake response if the driver applies the brakes.
Rain Brake Support
Rain Brake Support may improve braking performance
in wet conditions. It will periodically apply a small
amount of brake pressure to remove any water buildup
on the front brake rotors. It only functions when the
windshield wipers are in the LO or HI mode, it does not
function in the intermittent mode. When Rain Brake
Support is active, there is no notification to the driver and
no driver interaction is required.
5
STARTING AND OPERATING 425
Page 474 of 599
HAZARD WARNING FLASHERS
The Hazard Warning flasher switch is located in the
switch bank near the top center of the instrument panel.Press the switch to turn on the Hazard Warning
flasher. When the switch is activated, all direc-
tional turn signals will flash on and off to warn oncoming
traffic of an emergency. Press the switch a second time to
turn off the Hazard Warning flashers.
This is an emergency warning system and it should not
be used when the vehicle is in motion. Use it when your
vehicle is disabled and it is creating a safety hazard for
other motorists.
When you must leave the vehicle to seek assistance, the
Hazard Warning flashers will continue to operate even
though the ignition is placed in the OFF position.
NOTE: With extended use the Hazard Warning flashers
may wear down your battery.
IF YOUR ENGINE OVERHEATS
In any of the following situations, you can reduce the
potential for overheating by taking the appropriate action.
• On the highways — slow down.
•
In city traffic — while stopped, place the transmission in
NEUTRAL, but do not increase the engine idle speed.
NOTE: There are steps that you can take to slow down
an impending overheat condition:
• If your air conditioner (A/C) is on, turn it off. The A/C
system adds heat to the engine cooling system and
turning the A/C off can help remove this heat.
•
You can also turn the temperature control to maximum
heat, the mode control to floor and the blower control to
high. This allows the heater core to act as a supplement
to the radiator and aids in removing heat from the
engine cooling system.
472 WHAT TO DO IN EMERGENCIES
Page 535 of 599
Cavity Car-tridgeFuse Mini-
Fuse Description
9 30 Amp Pink — Power Locks
10 30 Amp Pink — Driver Door
11 30 Amp Pink — Passenger Door
12 — 20 Amp YellowCigar Lighters,
Instrument Panel &
Power Outlet
Console Rear
15 40 Amp Green — HVAC Blower
16 — — Fuse — Spare
17 — — Fuse — SpareCavity Car- tridgeFuse Mini-
Fuse Description
18 — 20 Amp YellowActive Dampening
Module
19 — — Fuse — Spare
20 — — Fuse — Spare
21 — — Fuse — Spare
22 — — Fuse — Spare
23 — 10 Amp RedFuel Door/
Diagnostic Port
24 — 15 Amp BlueRadio Screen
25 — 10 Amp RedTire Pressure Monitor
26 — — Fuse — Spare
7
MAINTAINING YOUR VEHICLE 533
Page 551 of 599
NOTE:
•The oil change indicator message will not monitor the
time since the last oil change. Change your vehicle’s oil
if it has been six months since your last oil change,
even if the oil change indicator message is NOT
illuminated.
• Change your engine oil more often if you drive your
vehicle off-road for an extended period of time.
• Under no circumstances should oil change intervals
exceed 6,000 miles (10,000 km) or six months, which-
ever comes first. Your authorized dealer will reset the oil change indicator
message after completing the scheduled oil change. If a
scheduled oil change is performed by someone other
than your authorized dealer, the message can be reset by
referring to the steps described under “Electronic Vehicle
Information Center (EVIC)/Oil Change Required” in
“Understanding Your Instrument Panel” for further in-
formation.
At Each Stop For Fuel
•
Check the engine oil level. Refer to “Maintenance
Procedures/Engine Oil” in “Maintaining Your Vehicle”
for further information.
• Check the windshield washer solvent and add if
required.8
MAINTENANCE SCHEDULES 549
Page 587 of 599
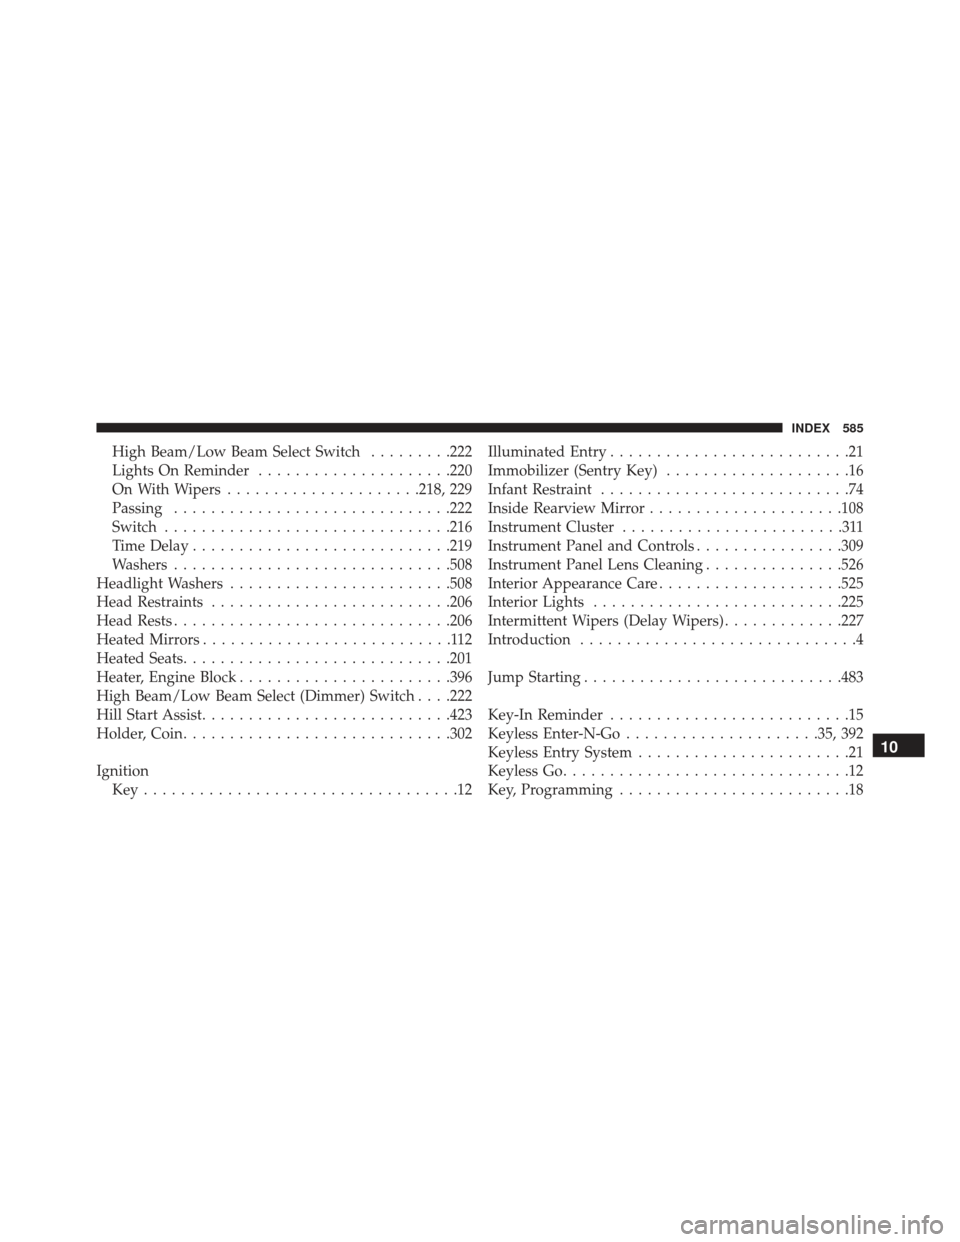
High Beam/Low Beam Select Switch.........222
Lights On Reminder .....................220
On With Wipers .....................218, 229
Passing ............................. .222
Switch .............................. .216
Time Delay ........................... .219
Washers ............................. .508
Headlight Washers ....................... .508
Head Restraints ......................... .206
Head Rests ............................. .206
Heated Mirrors ...........................112
Heated Seats ............................ .201
Heater, Engine Block ...................... .396
High Beam/Low Beam Select (Dimmer) Switch . . . .222
Hill Start Assist .......................... .423
Holder, Coin ............................ .302
Ignition Key..................................12 Illuminated Entry
..........................21
Immobilizer (Sentry Key) ....................16
Infant Restraint ...........................74
Inside Rearview Mirror .....................108
Instrument Cluster ........................311
Instrument Panel and Controls ................309
Instrument Panel Lens Cleaning ...............526
Interior Appearance Care ....................525
Interior Lights .......................... .225
Intermittent Wipers (Delay Wipers) .............227
Introduction ..............................4
Jump Starting ........................... .483
Key-In Reminder ..........................15
Keyless Enter-N-Go .....................35, 392
Keyless Entry System .......................21
Keyless Go ...............................12
Key, Programming .........................18
10
INDEX 585