2013 Citroen C8 phone
[x] Cancel search: phonePage 79 of 234

EASE OF USE and COMFORT
3
77
Practical information
1. Driver's upper glove box
FRONT INTERIOR LAYOUT
This is fi tted with a lock.
To open the glove box, lift the handle.
The light comes on when the cover is
opened.
It contains three sockets for the
connection of video equipment and
access to the fascia fuse box.
It includes special compartments for
storing maps, a packet of cigarettes,
an A4 document etc.
RCA sockets.
This permits the connection of a mobile
telephone charger, a baby's bottle
warmer, etc.
To open, press the button.
To close, press the cover.
It includes special compartments for
storing a pen, a mobile telephone,
coins or tokens and credit cards.
2. Audio equipment concealing fl ap
Lower the fl ap fully to lock it in place.
Press the fl ap to raise it.
3. Central storage compartment
4. Passenger's upper glove box
To open, press the button.
To close, press the cover.
It includes special compartments for
storing a pair of spectacles, keys, fi ve
CDs and four audio cassettes or nine
audio CDs.
5. Passenger's lower glove box
6. Lighter or 12 V socket for
accessories (120 W)
12. Mat fi tting/removal
When removing the front mat, push
the seats as far back as possible and
remove the fi xings.
When refi tting, position the mat
correctly on the pins and clip the
fi xings.
Check that the mat is secured
correctly.
To prevent the mat from becoming
caught under the pedals:
- only use mats suited to the fi xings
already present in the vehicle.
It
is imperative that these fi xings are
used.
- never fi t one mat on top of another.
7. Cooled compartment
It can hold up to three cans.
Slide the closer, located on the right, to
open (upwards) or close (downwards)
the air inlet.
8. Can holder and ashtray
This retractable and lit support contains
up to two can holders, a removable
ashtray and a location for the lighter
when it is used as a 12 V socket
(120 W).
9. Storage compartment or
additional telematics control
The storage compartment must not be
used as an ashtray.
If fi tted on your vehicle, the additional
telematics control is located on the
centre console.
10. Storage compartment
11. Door tray with space for a bottle
of water
Bluetooth functions.
Page 81 of 234

EASE OF USE and COMFORT
3
79
Practical information
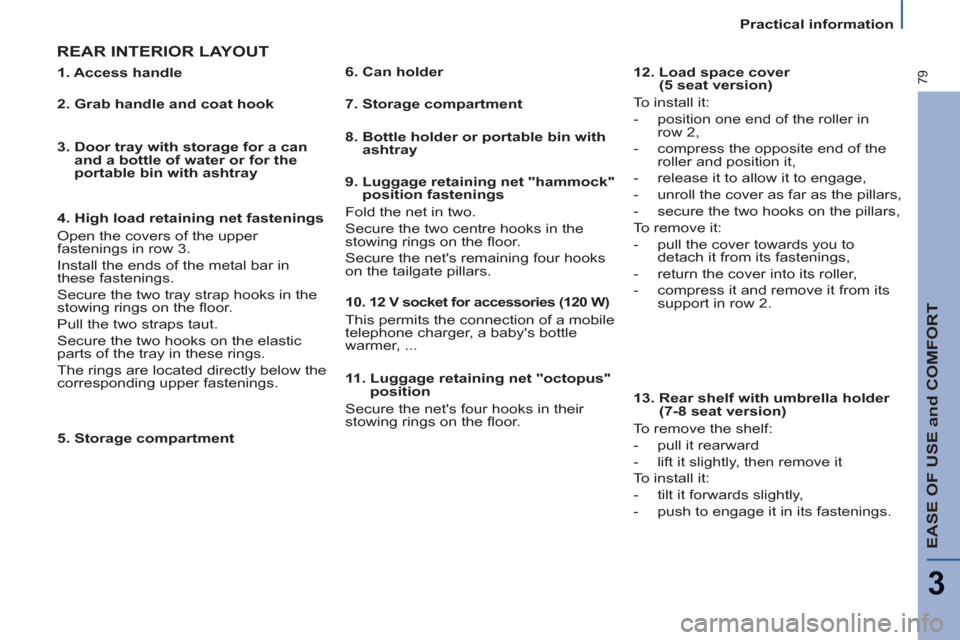
REAR INTERIOR LAYOUT
5. Storage compartment
11. Luggage retaining net "octopus"
position
Secure the net's four hooks in their
stowing rings on the fl oor.
1. Access handle
2. Grab handle and coat hook
3. Door tray with storage for a can
and a bottle of water or for the
portable bin with ashtray
4. High load retaining net fastenings
Open the covers of the upper
fastenings in row 3.
Install the ends of the metal bar in
these fastenings.
Secure the two tray strap hooks in the
stowing rings on the fl oor.
Pull the two straps taut.
Secure the two hooks on the elastic
parts of the tray in these rings.
The rings are located directly below the
corresponding upper fastenings.
6. Can holder
7. Storage compartment
8. Bottle holder or portable bin with
ashtray
9. Luggage retaining net "hammock"
position fastenings
Fold the net in two.
Secure the two centre hooks in the
stowing rings on the fl oor.
Secure the net's remaining four hooks
on the tailgate pillars.
10. 1
2 V socket for accessories (120 W)
This permits the connection of a mobile
telephone charger, a baby's bottle
warmer, ...
12. Load space cover
(5 seat version)
To install it:
- position one end of the roller in
row 2,
- compress the opposite end of the
roller and position it,
- release it to allow it to engage,
- unroll the cover as far as the pillars,
- secure the two hooks on the pillars,
To remove it:
- pull the cover towards you to
detach it from its fastenings,
- return the cover into its roller,
- compress it and remove it from its
support in row 2.
13. Rear shelf with umbrella holder
(7-8 seat version)
To remove the shelf:
- pull it rearward
- lift it slightly, then remove it
To install it:
- tilt it forwards slightly,
- push to engage it in its fastenings.
Page 109 of 234

107
Other accessories
ACCESSORIES
5
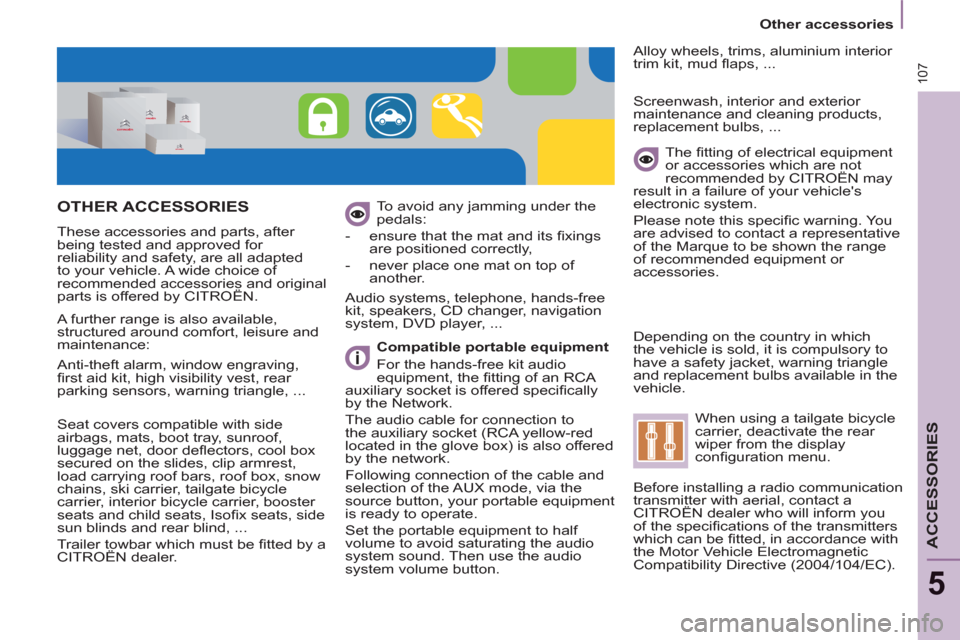
OTHER ACCESSORIES
These accessories and parts, after
being tested and approved for
reliability and safety, are all adapted
to your vehicle. A wide choice of
recommended accessories and original
parts is offered by CITROËN. To avoid any jamming under the
pedals:
- ensure that the mat and its fi xings
are positioned correctly,
- never place one mat on top of
another.
Compatible portable equipment
For the hands-free kit audio
equipment, the fi tting of an RCA
auxiliary socket is offered specifi cally
by the Network.
The audio cable for connection to
the auxiliary socket (RCA yellow-red
located in the glove box) is also offered
by the network.
Following connection of the cable and
selection of the AUX mode, via the
source button, your portable equipment
is ready to operate.
Set the portable equipment to half
volume to avoid saturating the audio
system sound. Then use the audio
system volume button.
Audio systems, telephone, hands-free
kit, speakers, CD changer, navigation
system, DVD player, ...
Alloy wheels, trims, aluminium interior
trim kit, mud fl aps, ...
Seat covers compatible with side
airbags, mats, boot tray, sunroof,
luggage net, door defl ectors, cool box
secured on the slides, clip armrest,
load carrying roof bars, roof box, snow
chains, ski carrier, tailgate bicycle
carrier, interior bicycle carrier, booster
seats and child seats, Isofi x seats, side
sun blinds and rear blind, ...
Trailer towbar which must be fi tted by a
CITROËN dealer.
The fi tting of electrical equipment
or accessories which are not
recommended by CITROËN may
result in a failure of your vehicle's
electronic system.
Please note this specifi c warning. You
are advised to contact a representative
of the Marque to be shown the range
of recommended equipment or
accessories.
Screenwash, interior and exterior
maintenance and cleaning products,
replacement bulbs, ...
Depending on the country in which
the vehicle is sold, it is compulsory to
have a safety jacket, warning triangle
and replacement bulbs available in the
vehicle.
A further range is also available,
structured around comfort, leisure and
maintenance:
Anti-theft alarm, window engraving,
fi rst aid kit, high visibility vest, rear
parking sensors, warning triangle, ...
When using a tailgate bicycle
carrier, deactivate the rear
wiper from the display
confi guration menu.
Before installing a radio communication
transmitter with aerial, contact a
CITROËN dealer who will inform you
of the specifi cations of the transmitters
which can be fi tted, in accordance with
the Motor Vehicle Electromagnetic
Compatibility Directive (2004/104/EC).
Page 127 of 234

125
QUICK HELP
7
Changing a fuse
INSTRUMENT PANEL FUSES
- Open the lower glove box on the right-hand side.
- Pull the handle to open the cover and access the fuses.
N°
Rating
(Amps)
Functions
1
15
Rear wiper.
2
-
Not used.
3
5
Airbag control unit.
4
10
Steering wheel angle sensor, Diagnostic socket, ESP sensor, Manual air conditioning, Clutch
switch, Headlamp beam height, Particle emission fi lter pump, Electrochromatic interior mirror.
5
30
Electric mirrors, Passenger's electric window motor, Sunroof row 1.
6
30
Front electric windows supply.
7
5
Courtesy lamps, Glove box lamp, Courtesy mirror lamps, Entertainment screen lamps row 2.
8
20
Multifunction display, Anti-theft alarm siren, Audio equipment, Compact disc changer, Audio/
telephone, Diesel additive control unit, Tyre under-infl ation detection control unit, Sliding doors
module control unit.
9
30
Cigarette lighter.
10
15
Steering wheel switching, Trailer fusebox.
11
15
Diagnostic socket, Ignition switch, Automatic gearbox (4-speed).
12
15
Driver's seat memory unit, Passenger's electric seat, Airbag control unit, Parking sensors control
unit, Sliding side door buttons, Hands-free kit, Automatic gearbox (6-speed).
13
5
Engine fuse box, Trailer fusebox.
14
15
Rain sensor, Automatic air conditioning, Instrument panel, Sunroofs, Odometer warning lamps
unit, Audio-telematics control.
15
30
Passenger's lock locking.
16
30
Locking/unlocking of the doors.
17
40
Heated rear screen.
Page 141 of 234

9.1
The system is protected in such a way that it will onlyoperate in your vehicle.
01 First steps - Control panel
For safety reasons, the driver must carry out operations
which require prolonged attention while the vehicle is stationary.
When the en
gine is switched off and to prevent
discharging of the battery, the system switches off following the activation of the energy economy mode.
CONTENTS
02 General o
peration
03 Steerin
g mounted controls
04 Audio settin
gs
05 Navi
gation - Guidance
06 Traffic information
07 Usin
g the telephone
0
8 Radio
09 Music media pla
yers
10 Confi
guration
11 Tr i
p computer
p.
p.
p.
p.
p.
p.
p.
p.
p.
p.
p.
9.2
9.4
9.6
9.7
9
.8
9.21
9.25
9.
36
9.40
9.
46
9.49
eMyWay
12 Screen menu map p. 9.50
Frequently asked questions p. 9.54
SATELLITE NAVIGATION SYSTEM
MULTIMEDIA BLUETOOTH
TELEPHONE AUDIO SYSTEM
Page 143 of 234

9.3
01
Select:
- the next lower / hi
gher radio frequency automatically.
- the previous
/ next CD track, MP3 track or media.
- the le
ft / right of the screen when a menu is displayed.
Move le
ft / right in "Move the map
" mode.
Abandon the current
operation, up one level in
t
he menu.
Long press: return to thepermanent display.
Continuous
press:
reinitialisation of the system.
Open the" Telephone" menu
and display the list of recent calls or accept
an incoming call.
Open the "Confi guration
" menu.
Long press: access
to the GPS coverageand the navigation demonstration mode.
Open the "Traffi c information " menuand display thecurrent traffi c alerts.
Select:
- the previous
/next line in a list or menu.
- the previous
/ next media folder.
- step b
y step selection of the previous/next radio frequency.
- the previous / next MP3 folder.
Move up/down, in "
Move the map " mode.
FIRST STEPS
Page 144 of 234

9.4
02
For a detailed global view of the menus available, refer to the
"Screen menu map" section.
For cleaning the screen, the use of a soft, non-abrasive cloth (spectacles cloth) is recommended, with no additional product. "RADIO
"
"
TELEPHONE"
(If conversation in progress)
SETUP:
PARAMETER
S
date and time, display confi guration, sound.
Changing the audio source:
RADIO:
RADIO broadcasts.
MUSIC: playing MUSIC. Pr
ess the MODE button several times in succession for access to the following displays:
GENERAL OPERATION
"FULL SCREEN MAP"
"MAP IN WINDOW"
(If navigation guidance in progress)
Page 145 of 234

9.5
02
A press on the dial gives access to short-cut menus according to thedisplay in the screen.
GENERAL OPERATION
DISPLAY ACCORDING TO CONTEXT
RADIO:
Activate / Deactivate TA
Activate / Deactivate RDS
MUSIC MEDIA PLAYERS,
CD or USB
(according to media):
Play modes:
Normal
Random
Random on all media
Repetition
TELEPHONE
(call in progress):
Private mode
FULL SCREEN MAP
OR IN A NEW WINDOW:
Stop / Restore guidance Select destination
Enter an address
Directory
GPS coordinates
Divert route
Move the map
Info. on location
Select as destination
Select as sta
ge
Save this place (contacts)
Quit map mode
Guidance criteria
Put call on hold
DTMF ring tones
Hang up
1
1
1
1
1
1
1
1
2
2
2
2
2
1
2
2
2
1
1
1
1
1
1
Change waveband
F
M
AM
2
2
1
TA 1