2013 CHEVROLET MALIBU door lock
[x] Cancel search: door lockPage 74 of 436
Black plate (22,1)Chevrolet Malibu Owner Manual - 2013 - CRC - 6/6/12
3-22 Seats and Restraints
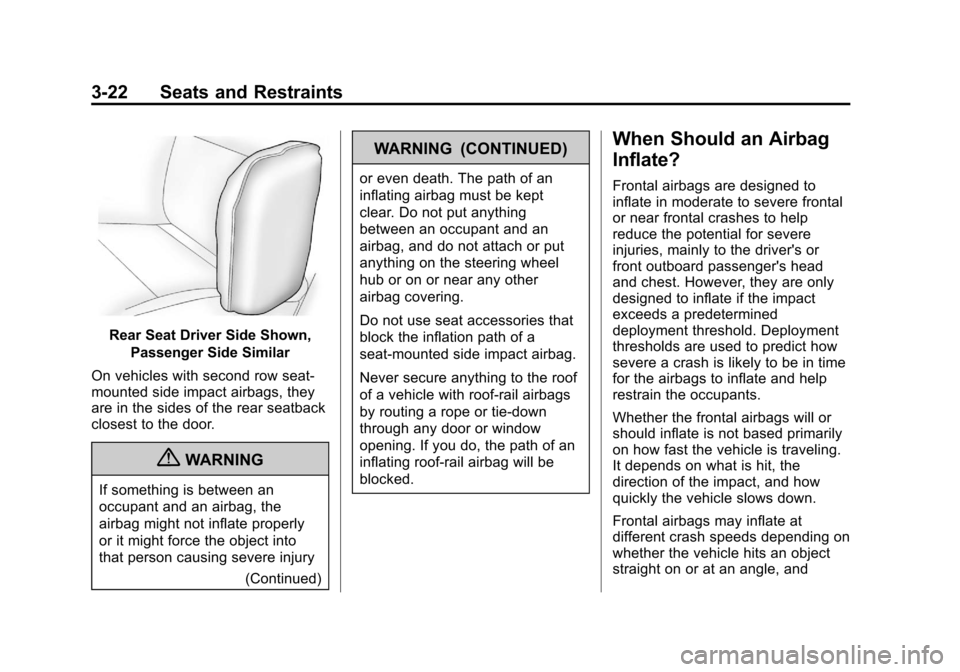
Rear Seat Driver Side Shown,Passenger Side Similar
On vehicles with second row seat‐
mounted side impact airbags, they
are in the sides of the rear seatback
closest to the door.
{WARNING
If something is between an
occupant and an airbag, the
airbag might not inflate properly
or it might force the object into
that person causing severe injury (Continued)
WARNING (CONTINUED)
or even death. The path of an
inflating airbag must be kept
clear. Do not put anything
between an occupant and an
airbag, and do not attach or put
anything on the steering wheel
hub or on or near any other
airbag covering.
Do not use seat accessories that
block the inflation path of a
seat-mounted side impact airbag.
Never secure anything to the roof
of a vehicle with roof-rail airbags
by routing a rope or tie‐down
through any door or window
opening. If you do, the path of an
inflating roof-rail airbag will be
blocked.
When Should an Airbag
Inflate?
Frontal airbags are designed to
inflate in moderate to severe frontal
or near frontal crashes to help
reduce the potential for severe
injuries, mainly to the driver's or
front outboard passenger's head
and chest. However, they are only
designed to inflate if the impact
exceeds a predetermined
deployment threshold. Deployment
thresholds are used to predict how
severe a crash is likely to be in time
for the airbags to inflate and help
restrain the occupants.
Whether the frontal airbags will or
should inflate is not based primarily
on how fast the vehicle is traveling.
It depends on what is hit, the
direction of the impact, and how
quickly the vehicle slows down.
Frontal airbags may inflate at
different crash speeds depending on
whether the vehicle hits an object
straight on or at an angle, and
Page 76 of 436
Black plate (24,1)Chevrolet Malibu Owner Manual - 2013 - CRC - 6/6/12
3-24 Seats and Restraints
How Does an Airbag
Restrain?
In moderate to severe frontal or
near frontal collisions, even belted
occupants can contact the steering
wheel or the instrument panel. In
moderate to severe side collisions,
even belted occupants can contact
the inside of the vehicle.
Airbags supplement the protection
provided by safety belts by
distributing the force of the impact
more evenly over the
occupant's body.
But airbags would not help in many
types of collisions, primarily
because the occupant's motion is
not toward those airbags. SeeWhen
Should an Airbag Inflate? on
page 3‑22.
Airbags should never be regarded
as anything more than a supplement
to safety belts.
What Will You See after
an Airbag Inflates?
After the frontal airbags and
seat-mounted side impact airbags
inflate, they quickly deflate, so
quickly that some people may not
even realize an airbag inflated.
Roof-rail airbags may still be at least
partially inflated for some time after
they inflate. Some components of
the airbag module may be hot for
several minutes. For location of the
airbags, see Where Are the
Airbags? on page 3‑21.
The parts of the airbag that come
into contact with you may be warm,
but not too hot to touch. There may
be some smoke and dust coming
from the vents in the deflated
airbags. Airbag inflation does not
prevent the driver from seeing out of
the windshield or being able to steer
the vehicle, nor does it prevent
people from leaving the vehicle.
{WARNING
When an airbag inflates, there
may be dust in the air. This dust
could cause breathing problems
for people with a history of
asthma or other breathing trouble.
To avoid this, everyone in the
vehicle should get out as soon as
it is safe to do so. If you have
breathing problems but cannot
get out of the vehicle after an
airbag inflates, then get fresh air
by opening a window or a door.
If you experience breathing
problems following an airbag
deployment, you should seek
medical attention.
The vehicle has a feature that may
automatically unlock the doors, turn
on the interior lamps and hazard
warning flashers, and shut off the
fuel system after the airbags inflate.
You can lock the doors, and turn off
Page 109 of 436
Black plate (1,1)Chevrolet Malibu Owner Manual - 2013 - CRC - 6/6/12
Instruments and Controls 5-1
Instruments and
Controls
Controls
Steering Wheel Adjustment . . . 5-2
Steering Wheel Controls . . . . . . 5-2
Horn . . . . . . . . . . . . . . . . . . . . . . . . . . 5-3
Windshield Wiper/Washer . . . . . 5-3
Compass . . . . . . . . . . . . . . . . . . . . . 5-4
Clock . . . . . . . . . . . . . . . . . . . . . . . . . 5-5
Power Outlets . . . . . . . . . . . . . . . . . 5-5
Warning Lights, Gauges, and
Indicators
Warning Lights, Gauges, andIndicators . . . . . . . . . . . . . . . . . . . . 5-7
Instrument Cluster . . . . . . . . . . . . 5-8
Speedometer . . . . . . . . . . . . . . . . 5-10
Odometer . . . . . . . . . . . . . . . . . . . . 5-10
Trip Odometer . . . . . . . . . . . . . . . 5-10
Tachometer . . . . . . . . . . . . . . . . . . 5-10
Fuel Gauge . . . . . . . . . . . . . . . . . . 5-10
Driver Efficiency Gauge . . . . . . 5-11
Engine Coolant Temperature Gauge . . . . . . . . . . . . . . . . . . . . . . 5-11
Safety Belt Reminders . . . . . . . 5-12
Airbag Readiness Light . . . . . . 5-12 Passenger Airbag Status
Indicator . . . . . . . . . . . . . . . . . . . . 5-13
Charging System Light . . . . . . 5-14
Malfunction Indicator Lamp . . . . . . . . . . . . . 5-14
Brake System Warning Light . . . . . . . . . . . . . . . . . . . . . . . 5-17
Electric Parking Brake Light . . . . . . . . . . . . . . . . . . . . . . . 5-17
Service Electric Parking Brake Light . . . . . . . . . . . . . . . . . . . . . . . 5-17
Antilock Brake System (ABS) Warning Light . . . . . . . . . . . . . . 5-18
Lane Departure Warning (LDW) Light . . . . . . . . . . . . . . . . 5-18
Forward Collision Alert (FCA) Warning Light . . . . . . . . . . . . . . 5-19
Traction Off Light . . . . . . . . . . . . 5-19
StabiliTrak
®OFF Light . . . . . . . 5-19
Traction Control System (TCS)/StabiliTrak
®Light . . . . 5-20
Engine Coolant Temperature Warning Light . . . . . . . . . . . . . . 5-20
Tire Pressure Light . . . . . . . . . . 5-21
Engine Oil Pressure Light . . . . 5-22
Low Fuel Warning Light . . . . . . 5-22
Security Light . . . . . . . . . . . . . . . . 5-22
High-Beam On Light . . . . . . . . . 5-23
Front Fog Lamp Light . . . . . . . . 5-23 Lamps On Reminder . . . . . . . . . 5-23
Cruise Control Light . . . . . . . . . 5-23
Door Ajar Light . . . . . . . . . . . . . . 5-24
Information Displays
Center Stack Display . . . . . . . . 5-24
Driver Information
Center (DIC) . . . . . . . . . . . . . . . 5-24
Vehicle Messages
Vehicle Messages . . . . . . . . . . . 5-28
Battery Voltage and ChargingMessages . . . . . . . . . . . . . . . . . . 5-28
Brake System Messages . . . . 5-28
Compass Messages . . . . . . . . . 5-29
Cruise Control Messages . . . . 5-29
Door Ajar Messages . . . . . . . . . 5-29
Engine Cooling System Messages . . . . . . . . . . . . . . . . . . 5-29
Engine Oil Messages . . . . . . . . 5-30
Engine Power Messages . . . . 5-30
Fuel System Messages . . . . . . 5-31
Key and Lock Messages . . . . . 5-31
Lamp Messages . . . . . . . . . . . . . 5-31
Object Detection System Messages . . . . . . . . . . . . . . . . . . 5-31
Ride Control System Messages . . . . . . . . . . . . . . . . . . 5-32
Security Messages . . . . . . . . . . 5-32
Page 112 of 436
Black plate (4,1)Chevrolet Malibu Owner Manual - 2013 - CRC - 6/6/12
5-4 Instruments and Controls
Heavy snow or ice can overload the
wipers. A circuit breaker stops them
until the motor cools.
Wipe Parking
If the ignition is turned to LOCK/
OFF while the wipers are on 1, 2,
or
3, they will immediately stop.
If the windshield wiper lever is then
moved to
9before the driver door
is opened, or within 10 minutes, the
wipers will restart and move to the
base of the windshield.
If the ignition is turned to LOCK/
OFF during a windshield wash, the
wipers will stop when they reach the
base of the windshield.
Windshield Washer
Pull the windshield wiper lever
toward you to spray windshield
washer fluid and activate the wipers.
The washer and wipers will continue
until the lever is released or the
maximum wash time is reached. When the windshield wiper lever is
released, additional wipes may
occur depending on how long the
windshield washer had been
activated.
If the washer fluid is low a message
may display on the Driver
Information Center (DIC), see
Washer Fluid Messages on
page 5‑34. For information on
filling the windshield washer fluid
reservoir, seeWasher Fluid on
page 10‑22.
{WARNING
In freezing weather, do not use
the washer until the windshield is
warmed. Otherwise the washer
fluid can form ice on the
windshield, blocking your vision.
Compass
There is a compass display in the
Driver Information Center (DIC). The
compass receives its heading and
other information from the GlobalPositioning System (GPS) antenna,
StabiliTrak, and vehicle speed
information.
Avoid covering the GPS antenna for
long periods of time with objects
that may interfere with the antenna's
ability to receive a satellite signal.
See
Backglass Antenna on
page 7‑21 andSatellite Radio
Antenna on page 7‑21 for the
location of the vehicle's antennas.
The compass system is designed to
operate for a certain number of
miles or degrees of turn before
needing a signal from the GPS
satellites. When the compass
display shows CAL, drive the
vehicle for a short distance in an
open area where it can receive a
GPS signal. The compass system
will automatically determine when
the GPS signal is restored and
provide a heading again. See
Compass Messages on page 5‑29
for more information on the
messages that may be displayed for
the compass.
Page 114 of 436
Black plate (6,1)Chevrolet Malibu Owner Manual - 2013 - CRC - 6/6/12
5-6 Instruments and Controls
The outlet is powered when the
ignition is in ON/RUN or ACC/
ACCESSORY, or until the driver
door is opened within 10 minutes of
turning off the vehicle. SeeRetained
Accessory Power (RAP) on
page 9‑22.
Open the protective cover to use the
accessory power outlet.
Certain electrical accessories may
not be compatible with the
accessory power outlets and could
overload vehicle or adapter fuses.
If there is a problem, see your
dealer.
When adding electrical equipment,
be sure to follow the installation
instructions included with the
equipment. See Add-On Electrical
Equipment on page 9‑50.
Notice: Hanging heavy
equipment from the power outlet
can cause damage not covered
by the vehicle warranty. The
power outlets are designed for
accessory power plugs only, such
as cell phone charge cords.Power Outlet 120 Volt
Alternating Current
The vehicle may have a power
outlet that can be used to plug in
electrical equipment that uses a
maximum limit of 150 watts.
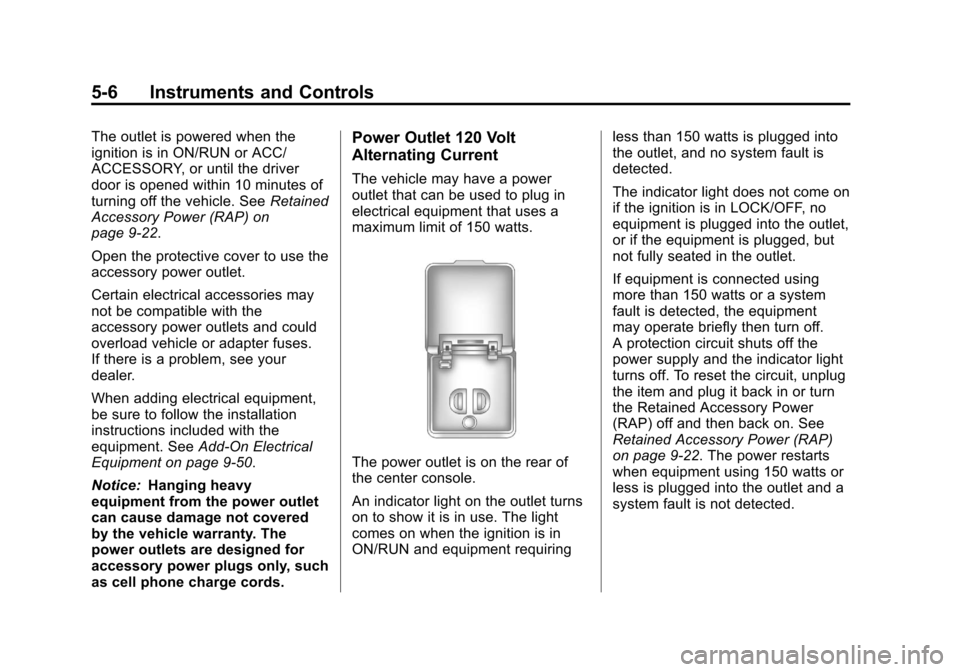
The power outlet is on the rear of
the center console.
An indicator light on the outlet turns
on to show it is in use. The light
comes on when the ignition is in
ON/RUN and equipment requiring less than 150 watts is plugged into
the outlet, and no system fault is
detected.
The indicator light does not come on
if the ignition is in LOCK/OFF, no
equipment is plugged into the outlet,
or if the equipment is plugged, but
not fully seated in the outlet.
If equipment is connected using
more than 150 watts or a system
fault is detected, the equipment
may operate briefly then turn off.
A protection circuit shuts off the
power supply and the indicator light
turns off. To reset the circuit, unplug
the item and plug it back in or turn
the Retained Accessory Power
(RAP) off and then back on. See
Retained Accessory Power (RAP)
on page 9‑22. The power restarts
when equipment using 150 watts or
less is plugged into the outlet and a
system fault is not detected.
Page 143 of 436
Black plate (35,1)Chevrolet Malibu Owner Manual - 2013 - CRC - 6/6/12
Instruments and Controls 5-35
Vehicle
Personalization
The audio system controls are used
to access the personalization
menus for customizing vehicle
features.
CONFIG (Configuration):Press to
access the Configuration
Settings menu.
TUNE/MENU: Turn to scroll
through the menus. Press to enter
the menus and select the menu
items.
BACK
/: Press to exit or move
backward in a menu.
Entering the Personalization
Menus
1. Press CONFIG to access the Configuration Settings menu.
2. Turn the TUNE/MENU knob to highlight Vehicle Settings.
3. Press TUNE/MENU to select the Vehicle Settings menu. The following list of menu items will
be available:
.Climate and Air Quality
.Comfort and Convenience
.Language
.Lighting
.Power Door Locks
.Remote Locking, Unlocking,
Starting
.Return to Factory Settings
Turn the TUNE/MENU knob to
highlight the menu. Press TUNE/
MENU to select it. Each of the
menus is detailed in the following
information.
Climate and Air Quality
Select the Climate and Air Quality
menu and the following may be
displayed:
.Auto Fan Speed
.Auto Defog
.Auto Rear Defog Auto Fan Speed
This will allow you to select the
automatic fan speed. It can be
adjusted to run lower or higher than
normal.
Press TUNE/MENU when Auto Fan
Speed is highlighted to open the
menu. Turn the TUNE/MENU knob
to highlight High, Medium, or Low.
Press TUNE/MENU to confirm the
selection and move back to the
last menu.
Remote Start Heated Seats
When turned on, this feature will
turn the heated seats on when using
remote start on cold days.
Press TUNE/MENU when Remote
Start Heated Seats is highlighted.
Turn the TUNE/MENU knob to
select On or Off. Press TUNE/
MENU to confirm the selection and
move back to the last menu.
Page 145 of 436
Black plate (37,1)Chevrolet Malibu Owner Manual - 2013 - CRC - 6/6/12
Instruments and Controls 5-37
Lighting
Select the Lighting menu and the
following may be displayed:
.Vehicle Locator Lights
.Exit Lighting
Vehicle Locator Lights
This allows the vehicle locator lights
to be turned on or off. The vehicle
locator lights come on when
unlocking the vehicle with the RKE
transmitter.
Press TUNE/MENU when Vehicle
Locator Lights is highlighted. Turn
the TUNE/MENU knob to select On
or Off. Press TUNE/MENU to
confirm and go back to the
last menu.
Exit Lighting
This allows selection of how long
the exterior lamps stay on when
leaving the vehicle and it is dark
outside. Press TUNE/MENU when Exit
Lighting is highlighted. Turn the
TUNE/MENU knob to select Off,
30 Seconds, 1 Minute, or 2 Minutes.
Press TUNE/MENU to confirm and
go back to the last menu.
Power Door Locks
Select Power Door Locks and the
following may be displayed:
.Unlocked Door Anti Lock Out
.Auto Door Unlock
.Delayed Door Lock
.Auto Door Lock
Unlocked Door Anti Lock Out
When on, this feature will keep the
driver door from locking when the
door is open. If Off is selected, the
Delayed Door Lock menu will be
available and the door will lock as
programmed through this menu.
Press TUNE/MENU when Unlocked
Door Anti Lock Out is highlighted.
Turn the TUNE/MENU knob to select On or Off. Press TUNE/
MENU to confirm and go back to the
last menu.
Auto Door Unlock
This allows selection of which of the
doors will automatically unlock when
the vehicle is shifted into P (Park).
Press TUNE/MENU when Auto
Door Unlock is highlighted. Turn the
TUNE/MENU knob to select All
Doors, Driver Door, or Off. Press
TUNE/MENU to confirm and go
back to the last menu.
Delayed Door Lock
When on, this feature will delay
the locking of the doors until
five seconds after the last door is
closed. Three chimes will signal
delayed locking is in use. Press
either the power lock button or
Qon
the RKE transmitter twice to
override the delayed locking feature
and immediately lock all of the
doors.
Page 146 of 436
Black plate (38,1)Chevrolet Malibu Owner Manual - 2013 - CRC - 6/6/12
5-38 Instruments and Controls
Press TUNE/MENU when Delayed
Door Lock is highlighted. Turn the
TUNE/MENU knob to select On or
Off. Press TUNE/MENU to confirm
and go back to the last menu.
Auto Door Lock
This allows selection of which of the
doors will automatically lock when
the vehicle is shifted out of P (Park).
Press TUNE/MENU when Auto
Door Lock is highlighted. Turn the
TUNE/MENU knob to select All
Doors, Driver Door, or Off. Press
TUNE/MENU to confirm and go
back to the last menu.
Remote Locking, Unlocking,
Starting
Select Remote Locking, Unlocking,
Starting and the following may be
displayed:
.Unlock Feedback (Lights)
.Locking Feedback
.Door Unlock Options
.Memory Remote Recall
.Remote Left in Vehicle Reminder
.Relock Remote Door
.Passive Door Unlock
.Passive Door Lock
Unlock Feedback (Lights)
When on, the exterior lamps will
flash when unlocking the vehicle
with the RKE transmitter.
Press TUNE/MENU when Unlock
Feedback (Lights) is highlighted.
Turn the TUNE/MENU knob to
select On or Off. Press TUNE/
MENU to confirm and go back to the
last menu.
Locking Feedback
This allows selection of what type of
feedback is given when locking the
vehicle with the RKE transmitter. Press TUNE/MENU when Locking
Feedback is highlighted. Turn the
TUNE/MENU knob to select Lights
and Horn, Lights Only, Horn Only,
or Off. Press TUNE/MENU to
confirm and go back to the
last menu.
Door Unlock Options
This allows selection of which doors
will unlock when pressing
Kon the
RKE transmitter.
Press TUNE/MENU when Door
Unlock Options is highlighted. Turn
the TUNE/MENU knob to select All
Doors or Driver Door Only. When
set to Driver Door Only, the driver
door will unlock the first time
Kis
pressed and all doors will unlock
when
Kis pressed a second time.
When set to All Doors, all of the
doors will unlock at the first press
of
K. Press TUNE/MENU to confirm
and go back to the last menu.