2013 CHEVROLET MALIBU door lock
[x] Cancel search: door lockPage 147 of 436
Black plate (39,1)Chevrolet Malibu Owner Manual - 2013 - CRC - 6/6/12
Instruments and Controls 5-39
Memory Remote Recall
This allows the Memory Remote
Recall feature to be turned on or off.
When on, this feature will recall the
current driver's last seat and outside
mirror positions upon unlocking the
driver door with the RKE transmitter,
and opening that door. The current
driver is identified when the RKE
transmitter is used to unlock the
driver door. If keyless access
equipped, the recall will occur upon
opening the driver door. See
“Recalling RKE Memory Positions”
underMemory Seats on page 3‑6.
Press TUNE/MENU when Memory
Remote Recall is highlighted. Turn
the TUNE/MENU knob to select On
or Off. Press TUNE/MENU to
confirm and go back to the
last menu. Remote Left in Vehicle Reminder
This allows the Remote Left in
Vehicle Reminder feature to be
turned on or off. If on, the horn will
chirp if a remote is left in the
vehicle.
Press TUNE/MENU when Remote
Left in Vehicle Reminder is
highlighted. Turn the TUNE/MENU
knob to select On or Off. Press
TUNE/MENU to confirm and go
back to the last menu.
Relock Remote Door
When on, the doors will
automatically lock after a period of
time if the vehicle is not entered or
exited.
Press TUNE/MENU when Relock
Remote Door is highlighted. Turn
the TUNE/MENU knob to select
On or Off. Press TUNE/MENU
to confirm and go back to the
last menu.Passive Door Lock
This allows selection of which doors
are unlocked by pressing the button
on the outside door handle.
Press TUNE/MENU when Passive
Door Lock is highlighted. Turn the
TUNE/MENU knob to select Off, On,
or On with Active Horn Chirp. Press
TUNE/MENU to confirm and go
back to the last menu.
Passive Door Unlock
This allows selection of which doors
are locked by pressing the button on
the outside door handle.
Press TUNE/MENU when Passive
Door Unlock is highlighted. Turn the
TUNE/MENU knob to select All
Doors or Driver Door. Press TUNE/
MENU to confirm and go back to the
last menu.
Page 231 of 436
Black plate (15,1)Chevrolet Malibu Owner Manual - 2013 - CRC - 6/6/12
Driving and Operating 9-15
If the vehicle must be shut off in an
emergency:
1. Brake using a firm and steadypressure. Do not pump the
brakes repeatedly. This may
deplete power assist, requiring
increased brake pedal force.
2. Shift the vehicle to N (Neutral). This can be done while the
vehicle is moving. After shifting
to N (Neutral), firmly apply the
brakes and steer the vehicle to a
safe location.
3. Come to a complete stop, shift to P (Park), and turn the ignition
to LOCK/OFF. On vehicles with
an automatic transmission, the
shift lever must be in P (Park) to
turn the ignition switch to the
LOCK/OFF position.
4. Set the parking brake. See Parking Brake on page 9‑29.{WARNING
Turning off the vehicle while
moving may cause loss of power
assist in the brake and steering
systems and disable the airbags.
While driving, only shut the
vehicle off in an emergency.
If the vehicle cannot be pulled over,
and must be shut off while driving,
turn the ignition to ACC/
ACCESSORY.
2 (ACC/ACCESSORY): This
position provides power to some of
the electrical accessories. It unlocks
the ignition. To move the key from
ACC/ACCESSORY to LOCK/OFF,
the shift lever must be in P (Park).
3 (ON/RUN): The ignition switch
stays in this position when the
engine is running. This position can
be used to operate the electrical
accessories, including the
ventilation fan and 12-volt power
outlets, as well as to display some warning and indicator lights. This
position can also be used for
service and diagnostics, and to
verify the proper operation of the
malfunction indicator lamp as may
be required for emission inspection
purposes. The transmission is also
unlocked in this position.
The battery could be drained if the
key is left in the ACC/ACCESSORY
or ON/RUN position with the engine
off. The vehicle might not restart if
the battery is allowed to drain for an
extended period of time.
4 (START):
This position starts the
engine. When the engine starts,
release the key. The ignition switch
will return to ON/RUN for normal
driving.
A warning tone sounds when the
driver door is opened when the
ignition is still in ACC/ACCESSORY
and the key is in the ignition. If the
ignition becomes difficult to turn,
see Keys on page 2‑2.
Page 238 of 436
Black plate (22,1)Chevrolet Malibu Owner Manual - 2013 - CRC - 6/6/12
9-22 Driving and Operating
Retained Accessory
Power (RAP)
These vehicle accessories can be
used for up to 10 minutes after the
engine is turned off:
.Audio System
.Power Windows
.Sunroof (if equipped)
These features continue to work up
to 10 minutes after the ignition is
turned to LOCK/OFF.
The power windows and sunroof will
work until any door is opened.
The radio continues to work until the
driver door is opened.
All these features operate when the
key is in ON/RUN or ACC/
ACCESSORY.
Shifting Into Park
1. Hold the brake pedal down and set the parking brake. See
Parking Brake on page 9‑29. 2. Move the shift lever into P (Park)
by holding in the button on the
shift lever and pushing the shift
lever all the way toward the front
of the vehicle.
3. Turn the ignition key to LOCK/OFF.
4. Remove the key and take it with you. If you can leave the vehicle
with the ignition key in your
hand, the vehicle is in P (Park).
Leaving the Vehicle with the
Engine Running
{WARNING
It can be dangerous to leave the
vehicle with the engine running.
It could overheat and catch fire.
It is dangerous to get out of the
vehicle if the shift lever is not fully
in P (Park) with the parking brake
firmly set. The vehicle can roll.
(Continued)
WARNING (CONTINUED)
Do not leave the vehicle when the
engine is running. If you have left
the engine running, the vehicle
can move suddenly. You or others
could be injured. To be sure the
vehicle will not move, even when
you are on fairly level ground,
always set the parking brake and
move the shift lever to P (Park).
SeeShifting Into Park on
page 9‑22.
If you have to leave the vehicle with
the engine running, be sure the
vehicle is in P (Park) and the
parking brake is firmly set before
you leave it. After you have moved
the shift lever into P (Park), hold the
regular brake pedal down. Then,
see if you can move the shift lever
away from P (Park) without first
pushing the button.
If you can, it means that the shift
lever was not fully locked in
P (Park).
Page 264 of 436
Black plate (48,1)Chevrolet Malibu Owner Manual - 2013 - CRC - 6/6/12
9-48 Driving and Operating
Filling the Tank
{WARNING
Fuel vapors and fuel fires burn
violently and can cause injury or
death.
.To help avoid injuries to you
and others, read and follow
all the instructions on the fuel
pump island.
.Turn off the engine when
refueling.
.Keep sparks, flames, and
smoking materials away
from fuel.
.Do not leave the fuel pump
unattended.
.Do not reenter the vehicle
while pumping fuel.
.Keep children away from the
fuel pump and never let
children pump fuel.(Continued)
WARNING (CONTINUED)
.Fuel can spray out if the fuel
cap is opened too quickly.
This spray can happen if the
tank is nearly full, and is
more likely in hot weather.
Open the fuel cap slowly and
wait for any hiss noise to stop
then unscrew the cap all
the way
The fuel cap is behind the fuel door
on the vehicle's passenger side. To
open the fuel door, push the
rearward center edge in and
release.
Turn the tethered fuel cap
counterclockwise to remove. If the
vehicle has E85 fuel capability, the
fuel cap will be yellow and state that
E85 or gasoline can be used. See
Fuel E85 (85% Ethanol) on
page 9‑47. While refueling, hang the
tethered fuel cap from the hook on
the fuel door. Reinstall the cap by
turning it clockwise until it clicks.
If the cap is not properly installed,
the malfunction indicator lamp will
come on. SeeMalfunction Indicator
Lamp on page 5‑14.
Do not top off or overfill the tank and
wait a few seconds before removing
the nozzle. Clean fuel from painted
surfaces as soon as possible. See
Exterior Care on page 10‑97.
Page 308 of 436
Black plate (42,1)Chevrolet Malibu Owner Manual - 2013 - CRC - 6/6/12
10-42 Vehicle Care
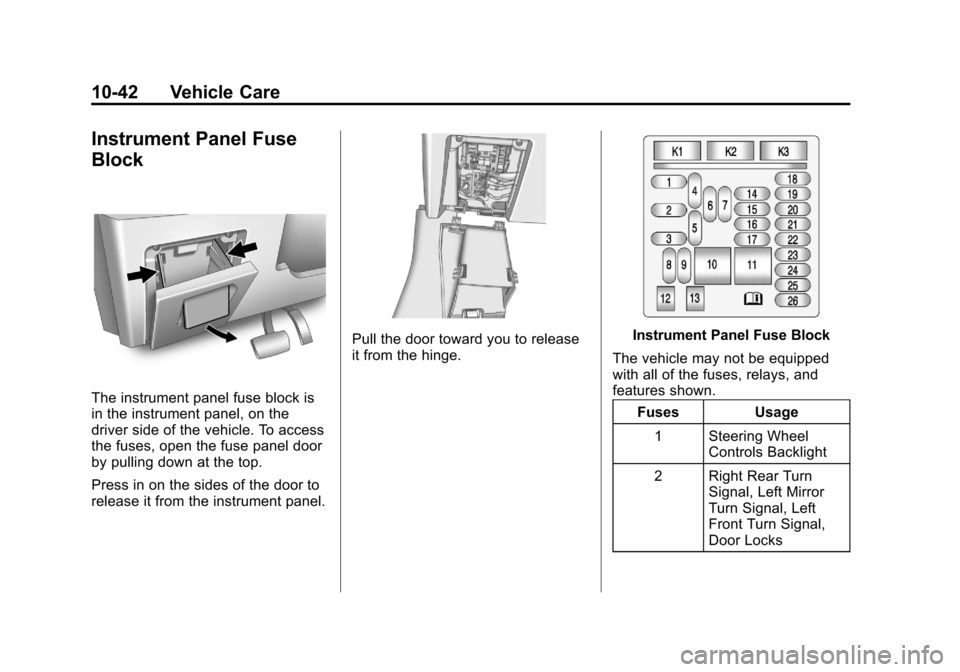
Instrument Panel Fuse
Block
The instrument panel fuse block is
in the instrument panel, on the
driver side of the vehicle. To access
the fuses, open the fuse panel door
by pulling down at the top.
Press in on the sides of the door to
release it from the instrument panel.
Pull the door toward you to release
it from the hinge.Instrument Panel Fuse Block
The vehicle may not be equipped
with all of the fuses, relays, and
features shown. Fuses Usage
1 Steering Wheel Controls Backlight
2 Right Rear Turn Signal, Left Mirror
Turn Signal, Left
Front Turn Signal,
Door Locks
Page 337 of 436
Black plate (71,1)Chevrolet Malibu Owner Manual - 2013 - CRC - 6/6/12
Vehicle Care 10-71
If a tire goes flat, avoid further tire
and wheel damage by driving slowly
to a level place. Turn on the hazard
warning flashers. SeeHazard
Warning Flashers on page 6‑4.
See If a Tire Goes Flat on
page 10‑66 for other important
safety warnings.
Do not remove any objects that
have penetrated the tire.
1. Remove the tire sealant and compressor kit from its storage
location. See Storing the Tire
Sealant and Compressor Kit on
page 10‑83.
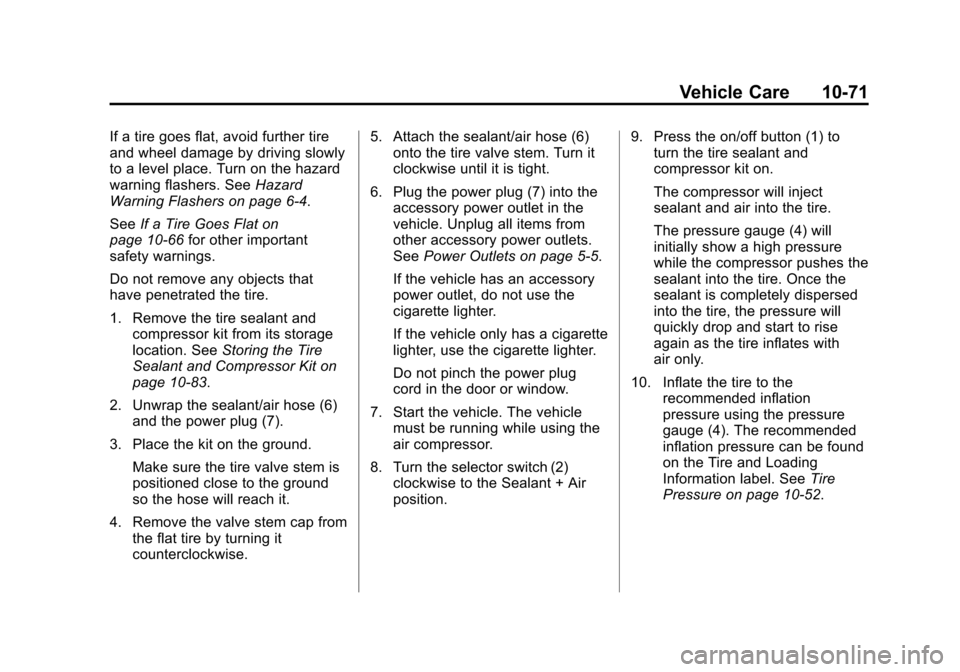
2. Unwrap the sealant/air hose (6) and the power plug (7).
3. Place the kit on the ground. Make sure the tire valve stem is
positioned close to the ground
so the hose will reach it.
4. Remove the valve stem cap from the flat tire by turning it
counterclockwise. 5. Attach the sealant/air hose (6)
onto the tire valve stem. Turn it
clockwise until it is tight.
6. Plug the power plug (7) into the accessory power outlet in the
vehicle. Unplug all items from
other accessory power outlets.
See Power Outlets on page 5‑5.
If the vehicle has an accessory
power outlet, do not use the
cigarette lighter.
If the vehicle only has a cigarette
lighter, use the cigarette lighter.
Do not pinch the power plug
cord in the door or window.
7. Start the vehicle. The vehicle must be running while using the
air compressor.
8. Turn the selector switch (2) clockwise to the Sealant + Air
position. 9. Press the on/off button (1) to
turn the tire sealant and
compressor kit on.
The compressor will inject
sealant and air into the tire.
The pressure gauge (4) will
initially show a high pressure
while the compressor pushes the
sealant into the tire. Once the
sealant is completely dispersed
into the tire, the pressure will
quickly drop and start to rise
again as the tire inflates with
air only.
10. Inflate the tire to the recommended inflation
pressure using the pressure
gauge (4). The recommended
inflation pressure can be found
on the Tire and Loading
Information label. See Tire
Pressure on page 10‑52.
Page 340 of 436

Black plate (74,1)Chevrolet Malibu Owner Manual - 2013 - CRC - 6/6/12
10-74 Vehicle Care
SeeIf a Tire Goes Flat on
page 10‑66 for other important
safety warnings.
1. Remove the tire sealant and compressor kit from its storage
location. See Storing the Tire
Sealant and Compressor Kit on
page 10‑83.
2. Unwrap the air only hose (5) and the power plug (7).
3. Place the kit on the ground. Make sure the tire valve stem is
positioned close to the ground
so the hose will reach it.
4. Remove the tire valve stem cap from the flat tire by turning it
counterclockwise.
5. Attach the air only hose (5) onto the tire valve stem by turning it
clockwise until it is tight. 6. Plug the power plug (7) into the
accessory power outlet in the
vehicle. Unplug all items from
other accessory power outlets.
See Power Outlets on page 5‑5.
If the vehicle has an accessory
power outlet, do not use the
cigarette lighter.
If the vehicle only has a cigarette
lighter, use the cigarette lighter.
Do not pinch the power plug
cord in the door or window.
7. Start the vehicle. The vehicle must be running while using the
air compressor.
8. Turn the selector switch (2) counterclockwise to the Air Only
position.
9. Press the on/off button (1) to turn the compressor on.
The compressor will inflate the
tire with air only. 10. Inflate the tire to the
recommended inflation
pressure using the pressure
gauge (4). The recommended
inflation pressure can be found
on the Tire and Loading
Information label. See Tire
Pressure on page 10‑52.
The pressure gauge (4) may
read higher than the actual tire
pressure while the compressor
is on. Turn the compressor off
to get an accurate reading. The
compressor may be turned on/
off until the correct pressure is
reached. If the tire is inflated
higher than the recommended
pressure, press the pressure
relief button (3), if equipped,
until the proper pressure
reading is reached. This option
is only functional when using
the air only hose (5).
Page 345 of 436
Black plate (79,1)Chevrolet Malibu Owner Manual - 2013 - CRC - 6/6/12
Vehicle Care 10-79
4. Remove the valve stem cap fromthe flat tire by turning it
counterclockwise.
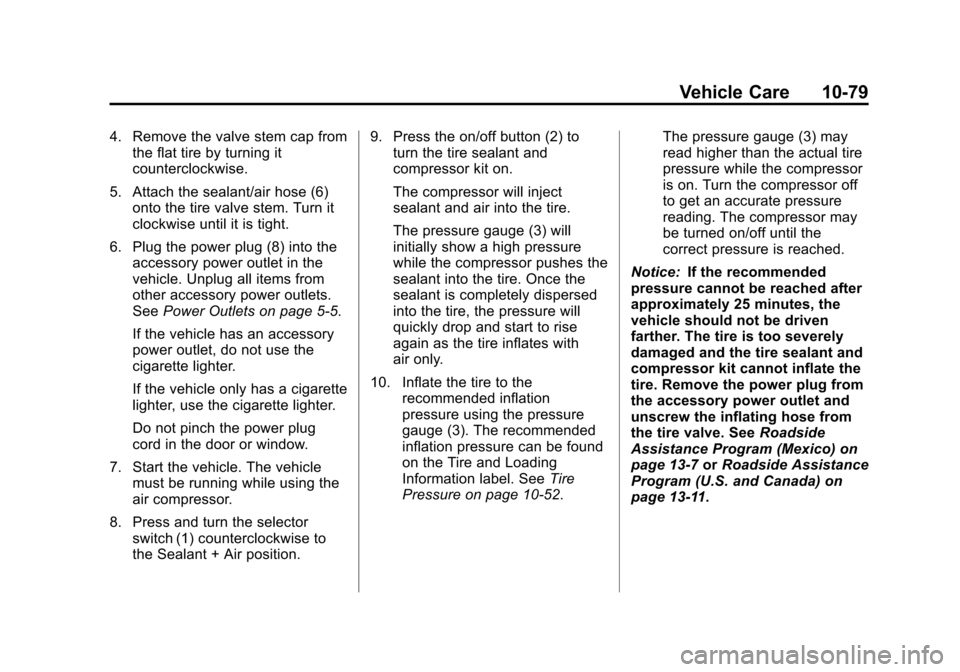
5. Attach the sealant/air hose (6) onto the tire valve stem. Turn it
clockwise until it is tight.
6. Plug the power plug (8) into the accessory power outlet in the
vehicle. Unplug all items from
other accessory power outlets.
See Power Outlets on page 5‑5.
If the vehicle has an accessory
power outlet, do not use the
cigarette lighter.
If the vehicle only has a cigarette
lighter, use the cigarette lighter.
Do not pinch the power plug
cord in the door or window.
7. Start the vehicle. The vehicle must be running while using the
air compressor.
8. Press and turn the selector switch (1) counterclockwise to
the Sealant + Air position. 9. Press the on/off button (2) to
turn the tire sealant and
compressor kit on.
The compressor will inject
sealant and air into the tire.
The pressure gauge (3) will
initially show a high pressure
while the compressor pushes the
sealant into the tire. Once the
sealant is completely dispersed
into the tire, the pressure will
quickly drop and start to rise
again as the tire inflates with
air only.
10. Inflate the tire to the recommended inflation
pressure using the pressure
gauge (3). The recommended
inflation pressure can be found
on the Tire and Loading
Information label. See Tire
Pressure on page 10‑52. The pressure gauge (3) may
read higher than the actual tire
pressure while the compressor
is on. Turn the compressor off
to get an accurate pressure
reading. The compressor may
be turned on/off until the
correct pressure is reached.
Notice: If the recommended
pressure cannot be reached after
approximately 25 minutes, the
vehicle should not be driven
farther. The tire is too severely
damaged and the tire sealant and
compressor kit cannot inflate the
tire. Remove the power plug from
the accessory power outlet and
unscrew the inflating hose from
the tire valve. See Roadside
Assistance Program (Mexico) on
page 13‑7 orRoadside Assistance
Program (U.S. and Canada) on
page 13‑11.