2013 CHEVROLET IMPALA fold seats
[x] Cancel search: fold seatsPage 13 of 350
Black plate (7,1)Chevrolet Impala Owner Manual - 2013 - crc - 8/27/12
In Brief 1-7
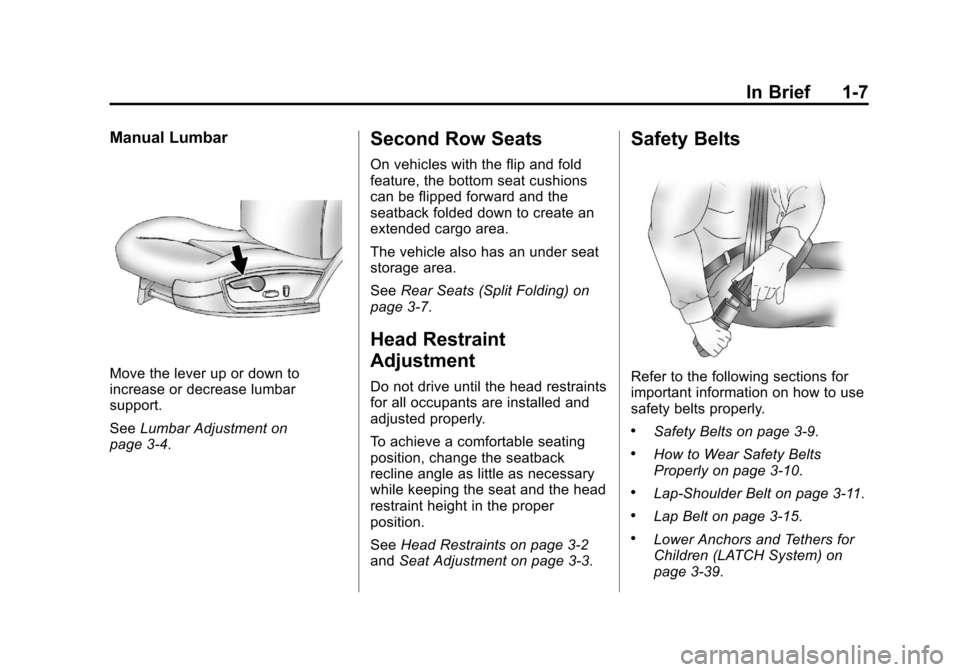
Manual Lumbar
Move the lever up or down to
increase or decrease lumbar
support.
SeeLumbar Adjustment on
page 3‑4.
Second Row Seats
On vehicles with the flip and fold
feature, the bottom seat cushions
can be flipped forward and the
seatback folded down to create an
extended cargo area.
The vehicle also has an under seat
storage area.
See Rear Seats (Split Folding) on
page 3‑7.
Head Restraint
Adjustment
Do not drive until the head restraints
for all occupants are installed and
adjusted properly.
To achieve a comfortable seating
position, change the seatback
recline angle as little as necessary
while keeping the seat and the head
restraint height in the proper
position.
See Head Restraints on page 3‑2
and Seat Adjustment on page 3‑3.
Safety Belts
Refer to the following sections for
important information on how to use
safety belts properly.
.Safety Belts on page 3‑9.
.How to Wear Safety Belts
Properly on page 3‑10.
.Lap-Shoulder Belt on page 3‑11.
.Lap Belt on page 3‑15.
.Lower Anchors and Tethers for
Children (LATCH System) on
page 3‑39.
Page 35 of 350
Black plate (9,1)Chevrolet Impala Owner Manual - 2013 - crc - 8/27/12
Keys, Doors, and Windows 2-9
Doors
Trunk
{WARNING
Exhaust gases can enter the
vehicle if it is driven with the
liftgate, trunk/hatch open, or with
any objects that pass through the
seal between the body and the
trunk/hatch or liftgate. Engine
exhaust contains Carbon
Monoxide (CO) which cannot be
seen or smelled. It can cause
unconsciousness and even death.
If the vehicle must be driven with
the liftgate, or trunk/hatch open:
.Close all of the windows.
.Fully open the air outlets on
or under the instrument
panel.(Continued)
WARNING (Continued)
.Adjust the Climate Control
system to a setting that
brings in only outside air and
set the fan speed to the
highest setting. See “Climate
Control Systems” in the
Index.
.If the vehicle is equipped with
a power liftgate, disable the
power liftgate function.
For more information about
carbon monoxide, see Engine
Exhaust on page 9‑19.
Trunk Release
To open the trunk from the outside,
press
Von the RKE transmitter.
See Remote Keyless Entry (RKE)
System Operation on page 2‑2.
Or, use the key in the lock cylinder,
if equipped.
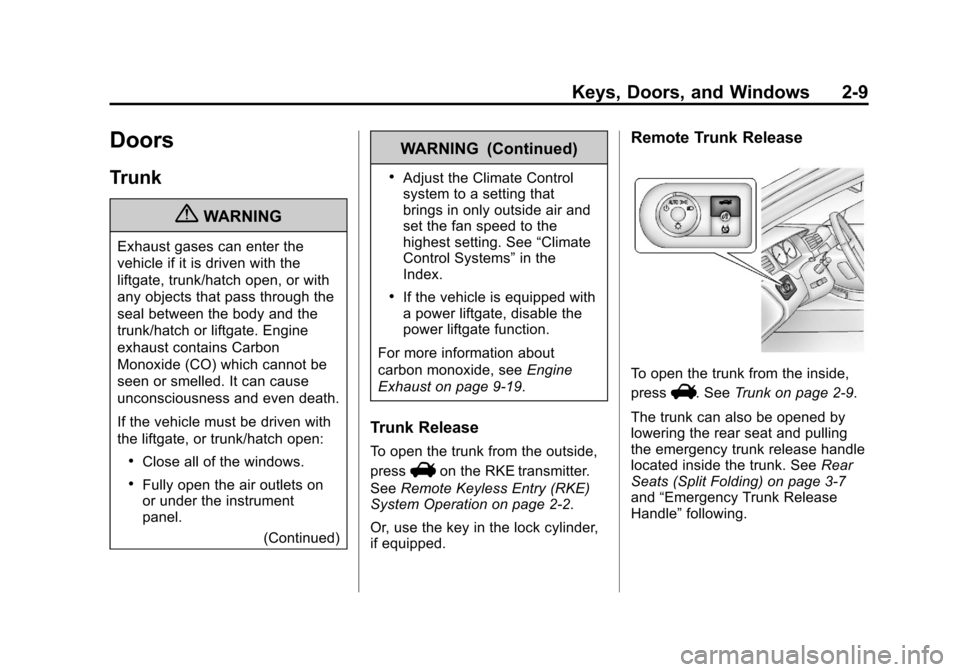
Remote Trunk Release
To open the trunk from the inside,
press
V. See Trunk on page 2‑9.
The trunk can also be opened by
lowering the rear seat and pulling
the emergency trunk release handle
located inside the trunk. See Rear
Seats (Split Folding) on page 3‑7
and “Emergency Trunk Release
Handle” following.
Page 45 of 350
Black plate (1,1)Chevrolet Impala Owner Manual - 2013 - crc - 8/27/12
Seats and Restraints 3-1
Seats and
Restraints
Head Restraints
Head Restraints . . . . . . . . . . . . . . . 3-2
Front Seats
Seat Adjustment . . . . . . . . . . . . . . 3-3
Center Seat . . . . . . . . . . . . . . . . . . . 3-4
Power Seat Adjustment . . . . . . . 3-4
Lumbar Adjustment . . . . . . . . . . . 3-4
Reclining Seatbacks . . . . . . . . . . 3-5
Heated Front Seats . . . . . . . . . . . 3-6
Rear Seats
Rear Seats (Split Folding) . . . . . 3-7
Safety Belts
Safety Belts . . . . . . . . . . . . . . . . . . . 3-9
How to Wear Safety BeltsProperly . . . . . . . . . . . . . . . . . . . . 3-10
Lap-Shoulder Belt . . . . . . . . . . . . 3-11
Safety Belt Use During Pregnancy . . . . . . . . . . . . . . . . . . 3-15 Lap Belt . . . . . . . . . . . . . . . . . . . . . 3-15
Safety Belt Extender . . . . . . . . . 3-16
Safety System Check . . . . . . . . 3-17
Safety Belt Care . . . . . . . . . . . . . 3-17
Replacing Safety Belt System
Parts after a Crash . . . . . . . . . 3-17
Airbag System
Airbag System . . . . . . . . . . . . . . . 3-18
Where Are the Airbags? . . . . . 3-20
When Should an AirbagInflate? . . . . . . . . . . . . . . . . . . . . . 3-21
What Makes an Airbag Inflate? . . . . . . . . . . . . . . . . . . . . . 3-23
How Does an Airbag Restrain? . . . . . . . . . . . . . . . . . . . 3-23
What Will You See after an
Airbag Inflates? . . . . . . . . . . . . 3-23
Passenger Sensing System . . . . . . . . . . . . . . . . . . . . . 3-25
Servicing the Airbag-Equipped Vehicle . . . . . . . . . . . . . . . . . . . . . 3-29 Adding Equipment to the
Airbag-Equipped Vehicle . . . 3-30
Airbag System Check . . . . . . . . 3-31
Replacing Airbag System Parts after a Crash . . . . . . . . . 3-31
Child Restraints
Older Children . . . . . . . . . . . . . . . 3-32
Infants and Young
Children . . . . . . . . . . . . . . . . . . . . 3-34
Child Restraint Systems . . . . . 3-36
Where to Put the Restraint . . . 3-38
Lower Anchors and Tethers for Children (LATCH
System) . . . . . . . . . . . . . . . . . . . . 3-39
Replacing LATCH System Parts After a Crash . . . . . . . . . 3-45
Securing Child Restraints (Rear Seat) . . . . . . . . . . . . . . . . . 3-45
Securing Child Restraints (Center Front Seat
Position) . . . . . . . . . . . . . . . . . . . 3-47
Securing Child Restraints (Right Front Seat
Position) . . . . . . . . . . . . . . . . . . . 3-47
Page 51 of 350
Black plate (7,1)Chevrolet Impala Owner Manual - 2013 - crc - 8/27/12
Seats and Restraints 3-7
Press the button once for the
highest setting. With each press of
the button, the heated seat will
change to the next lower setting,
and then to the off setting. The
lights indicate two for the highest
setting and one for the lowest.
The passenger seat may take
longer to heat up.
The heated seats are canceled
each time the ignition is turned off.
To use this feature after restarting
the vehicle, press the desired button
again.Rear Seats
Rear Seats (Split Folding)
Flip and Fold Feature
On vehicles with this feature, the
seat cushions flip forward and the
seatbacks fold down to create an
extended flat cargo area.
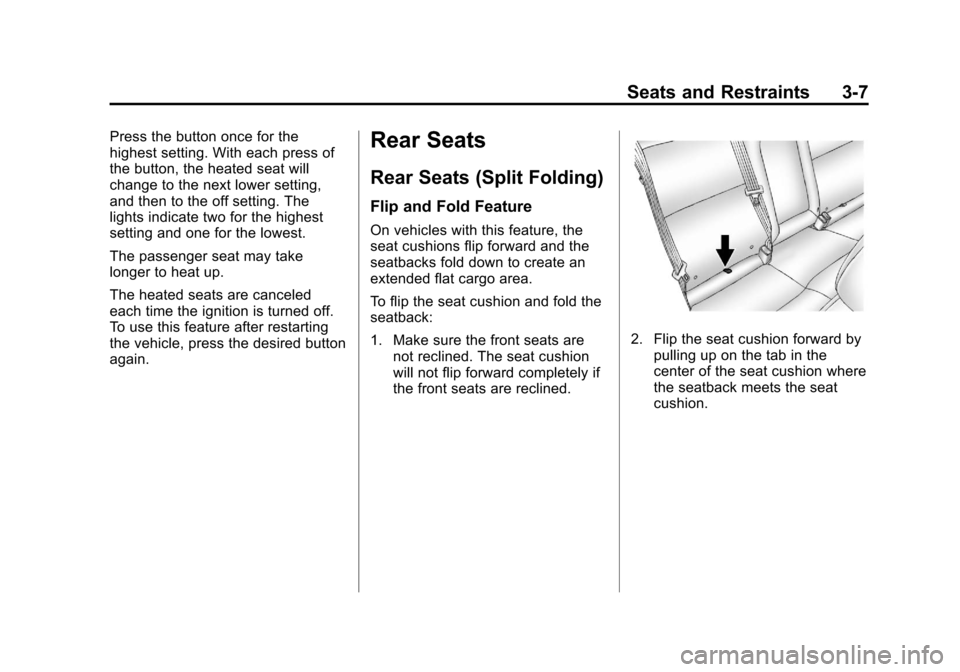
To flip the seat cushion and fold the
seatback:
1. Make sure the front seats arenot reclined. The seat cushion
will not flip forward completely if
the front seats are reclined.
2. Flip the seat cushion forward bypulling up on the tab in the
center of the seat cushion where
the seatback meets the seat
cushion.
Page 87 of 350
Black plate (43,1)Chevrolet Impala Owner Manual - 2013 - crc - 8/27/12
Seats and Restraints 3-43
WARNING (Continued)
of the retractor to set the lock,
if the vehicle has one, after the
child restraint has been installed.
Notice: Do not let the LATCH
attachments rub against the
vehicle’ s safety belts. This may
damage these parts. If necessary,
move buckled safety belts to
avoid rubbing the LATCH
attachments.
Do not fold the empty rear seat
with a safety belt buckled. This
could damage the safety belt or
the seat. Unbuckle and return the
safety belt to its stowed position,
before folding the seat.
If you need to secure more than one
child restraint in the rear seat, see
Where to Put the Restraint on
page 3‑38.
This system is designed to make
the installation of child restraints
easier. When using lower anchors, do not use the vehicle's safety belts.
Instead, use the vehicle's anchors
and child restraint attachments to
secure the restraints. Some
restraints also use another vehicle
anchor to secure a top tether.
1. Attach and tighten the lower
attachments to the lower
anchors. If the child restraint
does not have lower
attachments or the desired
seating position does not have
lower anchors, secure the child
restraint with the top tether and
the safety belts. Refer to your
child restraint manufacturer
instructions and the instructions
in this manual.
1.1. Find the lower anchors for the desired seating
position.
1.2. Put the child restraint on the seat.
1.3. Attach and tighten the lower attachments on the child
restraint to the lower
anchors. 2. If the child restraint manufacturer
recommends that the top tether
be attached, attach and tighten
the top tether to the top tether
anchor, if equipped. Refer to the
child restraint instructions and
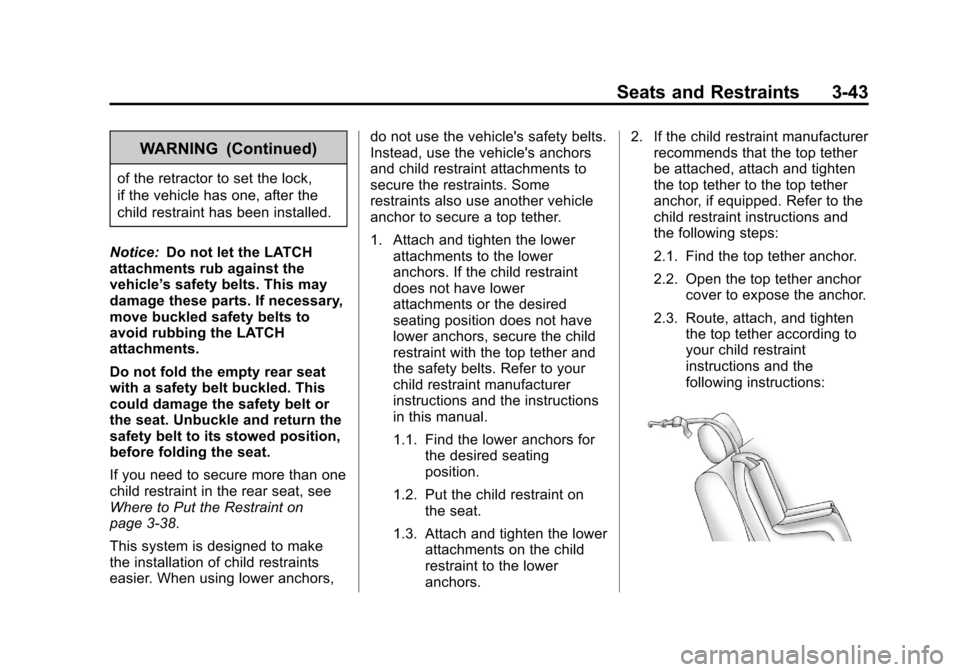
the following steps:
2.1. Find the top tether anchor.
2.2. Open the top tether anchor
cover to expose the anchor.
2.3. Route, attach, and tighten the top tether according to
your child restraint
instructions and the
following instructions:
Page 95 of 350
Black plate (1,1)Chevrolet Impala Owner Manual - 2013 - crc - 8/27/12
Storage 4-1
Storage
Storage Compartments
Glove Box . . . . . . . . . . . . . . . . . . . . 4-1
Cupholders . . . . . . . . . . . . . . . . . . . 4-1
Sunglasses Storage . . . . . . . . . . 4-1
Armrest Storage . . . . . . . . . . . . . . 4-1
Rear Storage . . . . . . . . . . . . . . . . . 4-1
Center Console Storage . . . . . . 4-1
Additional Storage Features
Convenience Net . . . . . . . . . . . . . 4-2
Storage
Compartments
Glove Box
Lift up on the glove box lever to
open it.
Cupholders
Cupholders may be built into the
front center console, front portion of
the front center seat, and rear
armrest of the vehicle.
Sunglasses Storage
A storage compartment for
sunglasses may be located above
the rearview mirror. Push on the
cover to open the compartment.
Armrest Storage
For vehicles with a rear seat
armrest, pull the tab on the armrest
forward to access it.
Rear Storage
For vehicles with a split folding rear
seat, there are two storage areas
underneath. Pull the tab(s) located
by the passenger side safety belt
buckle and the driver side rear seat
to access the storage areas. See
Rear Seats (Split Folding) on
page 3‑7for more information.
Center Console Storage
For vehicles with a front center
console storage area, open it by
pulling up on the latch located in the
front of the console cover. There
may be a removable tray inside.
Page 193 of 350
Black plate (13,1)Chevrolet Impala Owner Manual - 2013 - crc - 8/27/12
Driving and Operating 9-13
WARNING (Continued)far forward as possible.
Try to spread the weight
evenly.
.Never stack heavier
things, like suitcases,
inside the vehicle so that
some of them are above
the tops of the seats.
.Do not leave an
unsecured child restraint
in the vehicle.
.Secure loose items in the
vehicle.
.Do not leave a seat folded
down unless needed.
Starting and
Operating
New Vehicle Break-In
Notice: The vehicle does not
need an elaborate break-in. But it
will perform better in the long run
if you follow these guidelines:
.Do not drive at any one
constant speed, fast or slow,
for the first 805 km
(500 miles). Do not make
full-throttle starts. Avoid
downshifting to brake or
slow the vehicle.
.Avoid making hard stops for
the first 322 km (200 miles) or
so. During this time the new
brake linings are not yet
broken in. Hard stops with
new linings can mean
premature wear and earlier
replacement. Follow this
breaking-in guideline every
time you get new brake
linings.
.Do not tow a trailer during
break-in. See Trailer Towing
on page 9‑39 for the trailer
towing capabilities of your
vehicle and more
information.
Following break‐in, engine speed
and load can be gradually
increased.
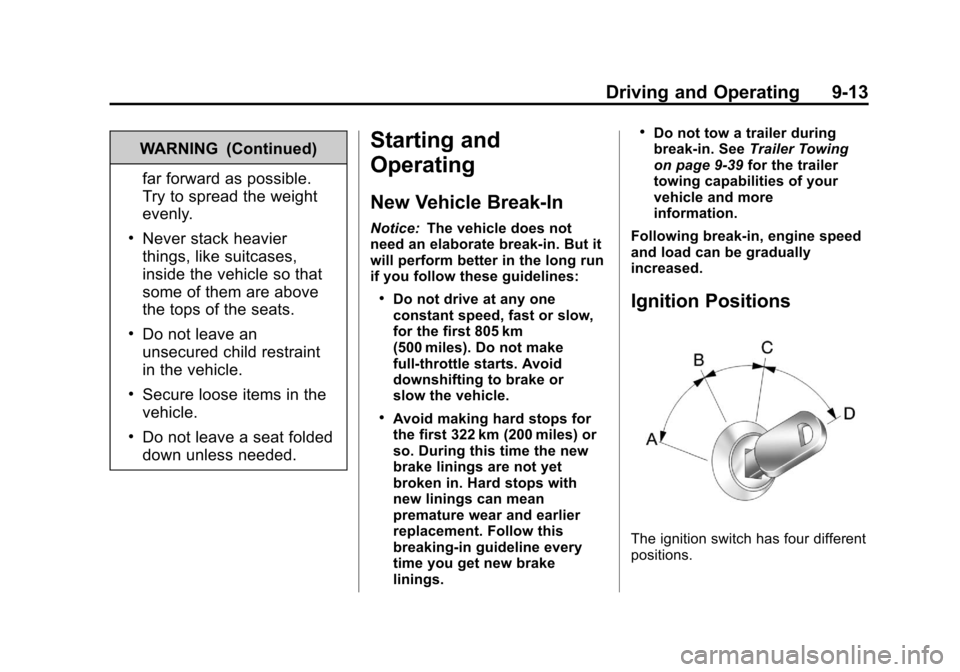
Ignition Positions
The ignition switch has four different
positions.