2013 CHEVROLET IMPALA clock
[x] Cancel search: clockPage 15 of 350
Black plate (9,1)Chevrolet Impala Owner Manual - 2013 - crc - 8/27/12
In Brief 1-9
Interior Mirror
Vehicles with a manual rearview
mirror can be adjusted by holding
the mirror in the center to move it for
a clearer view behind the vehicle.
Adjust the mirror to avoid glare from
the headlamps behind. Pull the
lever, located at the bottom of the
mirror for nighttime use. Return the
lever to its original position for the
day position.
SeeManual Rearview Mirror on
page 2‑14.
On vehicles with an automatic
dimming rearview mirror. The mirror
will automatically adjust to reduce
the glare of lights from behind the
vehicle. See Automatic Dimming
Rearview Mirror on page 2‑14.
Steering Wheel
Adjustment
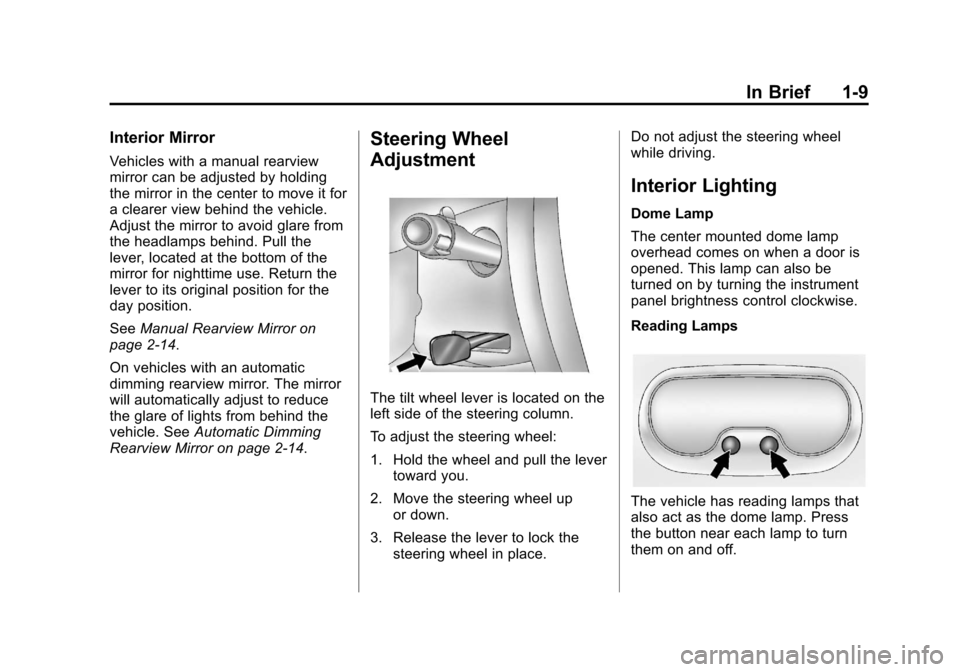
The tilt wheel lever is located on the
left side of the steering column.
To adjust the steering wheel:
1. Hold the wheel and pull the lever toward you.
2. Move the steering wheel up or down.
3. Release the lever to lock the steering wheel in place. Do not adjust the steering wheel
while driving.
Interior Lighting
Dome Lamp
The center mounted dome lamp
overhead comes on when a door is
opened. This lamp can also be
turned on by turning the instrument
panel brightness control clockwise.
Reading Lamps
The vehicle has reading lamps that
also act as the dome lamp. Press
the button near each lamp to turn
them on and off.
Page 20 of 350
Black plate (14,1)Chevrolet Impala Owner Manual - 2013 - crc - 8/27/12
1-14 In Brief
go through up to 6 pages of
favorites, each having 6 favorite
stations available per page. Each
page of favorites can contain any
combination of AM, FM, or XM
stations.
For radios without a FAV button, up
to 18 stations (6 FM1, 6 FM2, and
6 AM), can be programmed on the 6
numbered buttons.
SeeOperation on page 7‑2.
Setting the Clock
To set the time for the Radio with
CD (Base):
1. Press the
Hbutton until the hour
begins flashing on the display.
Press
Ha second time and the
minutes begin flashing on the
display.
2. To increase or decrease the time, do one of the following
while the hours or minutes are
flashing:
.Turn thefknob.
.Press¨SEEK or©SEEK.
.Press\FWD orsREV.
3. Press the
Hbutton again until
the clock display stops flashing
to set the currently displayed
time, or wait five seconds until
the flashing stops and the
current time displayed is
automatically set.
For detailed instructions on setting
the clock for your specific audio
system, see Clock on page 5‑6.
Satellite Radio
SiriusXM®is a satellite radio service
based in the 48 contiguous United
States and 10 Canadian provinces.
SiriusXM satellite radio has a wide
variety of programming and
commercial-free music, coast to
coast, and in digital-quality sound.
A fee is required to receive the
SiriusXM service. For more information, refer to:
.www.siriusxm.com or call
1-866-635-2349 (U.S.)
.www.xmradio.ca or call
1-877-209-0079 (Canada)
See Satellite Radio on page 7‑8.
Portable Audio Devices
This vehicle may have an auxiliary
input jack, located on the audio
faceplate. External devices such as
iPods
®, MP3 players, etc. can be
connected to the auxiliary input jack
using a 3.5 mm (1/8 in) input jack
cable.
See “Using the Auxiliary Input Jack”
under Auxiliary Devices on
page 7‑18.
Bluetooth®
For vehicles with a Bluetooth
system, it allows users with a
Bluetooth-enabled cell phone to
make and receive hands-free calls
using the vehicle’ s audio system
and controls.
Page 32 of 350

Black plate (6,1)Chevrolet Impala Owner Manual - 2013 - crc - 8/27/12
2-6 Keys, Doors, and Windows
Ignition Positions on page 9‑13for
information regarding the ignition
positions on your vehicle.
The remote vehicle start feature will
not operate if any of the follow
occur:
.The vehicle's key is in the
ignition.
.The vehicle's hood is open.
.The hazard warning flashers
are on.
.The check engine light is on.
See Malfunction Indicator Lamp
on page 5‑14.
.The engine coolant temperature
is too high.
.The oil pressure is low.
.The content theft-deterrent alarm
has been activated.
.Two remote vehicle starts,
or one start with a time
extension, have already been
provided for that ignition cycle.
Door Locks
{WARNING
Unlocked doors can be
dangerous.
.Passengers, especially
children, can easily open the
doors and fall out of a moving
vehicle. When a door is
locked, the handle will not
open it. The chance of being
thrown out of the vehicle in a
crash is increased if the
doors are not locked. So, all
passengers should wear
safety belts properly and the
doors should be locked
whenever the vehicle is
driven.
.Young children who get into
unlocked vehicles may be
unable to get out. A child can
be overcome by extreme heat
and can suffer permanent
(Continued)
WARNING (Continued)
injuries or even death from
heat stroke. Always lock the
vehicle whenever leaving it.
.Outsiders can easily enter
through an unlocked door
when you slow down or stop
the vehicle. Locking the doors
can help prevent this from
happening.
From the outside, use the key in the
driver door or use the Remote
Keyless Entry (RKE) transmitter to
lock and unlock the vehicle. From
the inside, use the manual or power
door locks.
To lock or unlock the driver side
door from the outside with the key,
insert the key and turn it clockwise
or counterclockwise.
To lock or unlock the door from the
inside, push or pull the manual
lock knob.
Page 97 of 350
Black plate (1,1)Chevrolet Impala Owner Manual - 2013 - crc - 8/27/12
Instruments and Controls 5-1
Instruments and
Controls
Controls
Steering Wheel Adjustment . . . 5-2
Steering Wheel Controls . . . . . . 5-2
Horn . . . . . . . . . . . . . . . . . . . . . . . . . . 5-3
Windshield Wiper/Washer . . . . . 5-3
Compass . . . . . . . . . . . . . . . . . . . . . 5-4
Clock . . . . . . . . . . . . . . . . . . . . . . . . . 5-6
Power Outlets . . . . . . . . . . . . . . . . . 5-7
Cigarette Lighter . . . . . . . . . . . . . . 5-8
Warning Lights, Gauges, and
Indicators
Warning Lights, Gauges, andIndicators . . . . . . . . . . . . . . . . . . . . 5-8
Instrument Cluster . . . . . . . . . . . . 5-9
Speedometer . . . . . . . . . . . . . . . . 5-10
Odometer . . . . . . . . . . . . . . . . . . . . 5-10
Tachometer . . . . . . . . . . . . . . . . . . 5-10
Fuel Gauge . . . . . . . . . . . . . . . . . . 5-10
Engine Coolant Temperature Gauge . . . . . . . . . . . . . . . . . . . . . . 5-11 Safety Belt Reminders . . . . . . . 5-12
Airbag Readiness Light . . . . . . 5-12
Passenger Airbag Status
Indicator . . . . . . . . . . . . . . . . . . . . 5-13
Charging System Light . . . . . . 5-14
Malfunction
Indicator Lamp . . . . . . . . . . . . . 5-14
Brake System Warning Light . . . . . . . . . . . . . . . . . . . . . . . 5-17
Antilock Brake System (ABS) Warning Light . . . . . . . . . . . . . . 5-18
Electronic Stability Control (ESC) Off Light . . . . . . . . . . . . . 5-18
Electronic Stability Control (ESC)/Traction Control
System (TCS) Indicator/
Warning Light . . . . . . . . . . . . . . 5-19
Engine Coolant Temperature Warning Light . . . . . . . . . . . . . . 5-19
Tire Pressure Light . . . . . . . . . . 5-20
Engine Oil Pressure Light . . . . 5-20
Security Light . . . . . . . . . . . . . . . . 5-20
High-Beam On Light . . . . . . . . . 5-21
Front Fog Lamp Light . . . . . . . . 5-21
Cruise Control Light . . . . . . . . . 5-21
Information Displays
Driver Information Center (DIC) . . . . . . . . . . . . . . . 5-22
Vehicle Messages
Vehicle Messages . . . . . . . . . . . 5-26
Battery Voltage and ChargingMessages . . . . . . . . . . . . . . . . . . 5-26
Brake System Messages . . . . 5-26
Door Ajar Messages . . . . . . . . . 5-26
Engine Cooling System Messages . . . . . . . . . . . . . . . . . . 5-27
Engine Oil Messages . . . . . . . . 5-28
Engine Power Messages . . . . 5-29
Fuel System Messages . . . . . . 5-29
Key and Lock Messages . . . . . 5-29
Lamp Messages . . . . . . . . . . . . . 5-29
Ride Control System Messages . . . . . . . . . . . . . . . . . . 5-30
Airbag System Messages . . . . 5-31
Security Messages . . . . . . . . . . 5-31
Service Vehicle Messages . . . 5-31
Tire Messages . . . . . . . . . . . . . . . 5-32
Transmission Messages . . . . . 5-33
Vehicle Reminder Messages . . . . . . . . . . . . . . . . . . 5-33
Washer Fluid Messages . . . . . 5-33
Page 102 of 350
Black plate (6,1)Chevrolet Impala Owner Manual - 2013 - crc - 8/27/12
5-6 Instruments and Controls
CALIBRATION COMPLETE for a
few seconds when the
calibration is complete. The DIC
display will then return to
PRESS
VTO CALIBRATE
COMPASS.
Clock
Without Date Display
AM/FM Base Radio with a Single
CD Player
This radio has a
Hbutton for setting
the time.
To set the time:
1. Press the
Hbutton until the hour
begins flashing on the display.
Press
Ha second time and the
minutes begin flashing on the
display.
2. To increase or decrease the time, do one of the following
while the hours or minutes are
flashing:
.Turn thefknob.
.Press¨SEEK or©SEEK.
.Press\FWD orsREV.
3. Press the
Hbutton again until
the clock display stops flashing
to set the currently displayed
time, or wait five seconds until
the flashing stops and the
current time displayed is
automatically set.
To change the time default setting
from 12 hour to 24 hour, press
the
Hbutton until 12H or 24H is
displayed. Once 12H or 24H is
displayed, turn the
fknob to the
desired option to select the setting.
Press the
Hbutton again to apply
the setting, or let the screen
time out.
With Date Display
Single CD (MP3) Player
This radio has a
Hbutton for setting
the time. To set the time and date:
1. Turn the radio on.
2. Press the
Hbutton and the HR,
MIN, MM, DD, and YYYY (hour,
minute, month, day, and year)
display.
3. Press the pushbutton located under any one of the tabs to be
changed.
4. To increase the time or date, do one of the following:
.Press the pushbutton below
the selected tab.
.Turn thefknob clockwise.
.Press¨SEEK.
.Press\FWD.
5. To decrease the time or date, do one of the following:
.Turn thefknob counter‐
clockwise.
.Press©SEEK.
Page 145 of 350
Black plate (5,1)Chevrolet Impala Owner Manual - 2013 - crc - 8/27/12
Lighting 6-5
Press#to turn the fog lamps on or
off. A light will come on in the
instrument panel cluster.
When the headlamps are changed
to high beam, the fog lamps also
go off.
Some localities have laws that
require the headlamps to be on
along with the fog lamps.Interior Lighting
Instrument Panel
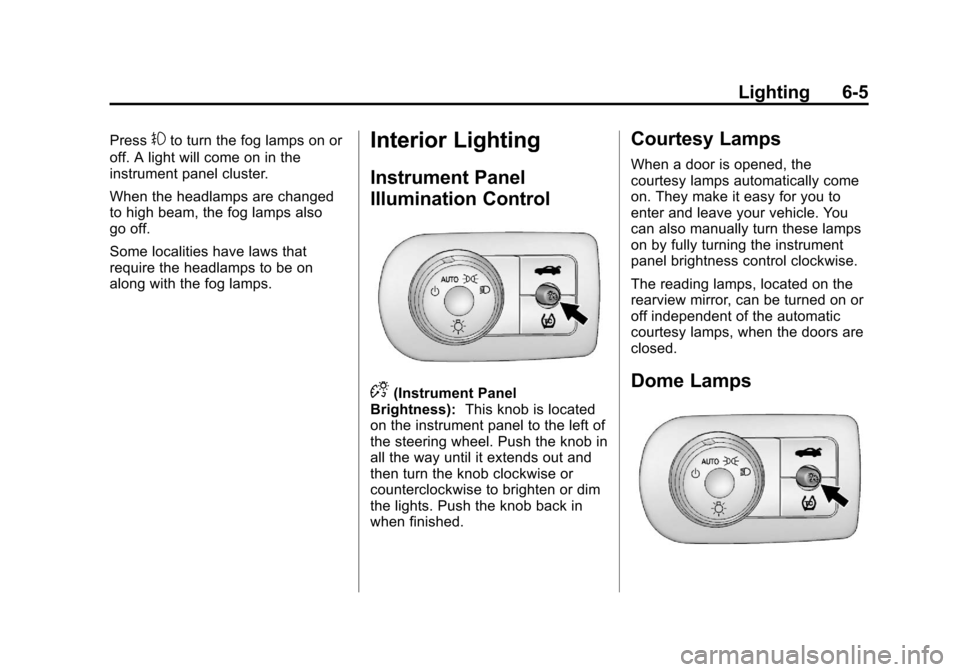
Illumination Control
D(Instrument Panel
Brightness): This knob is located
on the instrument panel to the left of
the steering wheel. Push the knob in
all the way until it extends out and
then turn the knob clockwise or
counterclockwise to brighten or dim
the lights. Push the knob back in
when finished.
Courtesy Lamps
When a door is opened, the
courtesy lamps automatically come
on. They make it easy for you to
enter and leave your vehicle. You
can also manually turn these lamps
on by fully turning the instrument
panel brightness control clockwise.
The reading lamps, located on the
rearview mirror, can be turned on or
off independent of the automatic
courtesy lamps, when the doors are
closed.
Dome Lamps
Page 146 of 350
Black plate (6,1)Chevrolet Impala Owner Manual - 2013 - crc - 8/27/12
6-6 Lighting
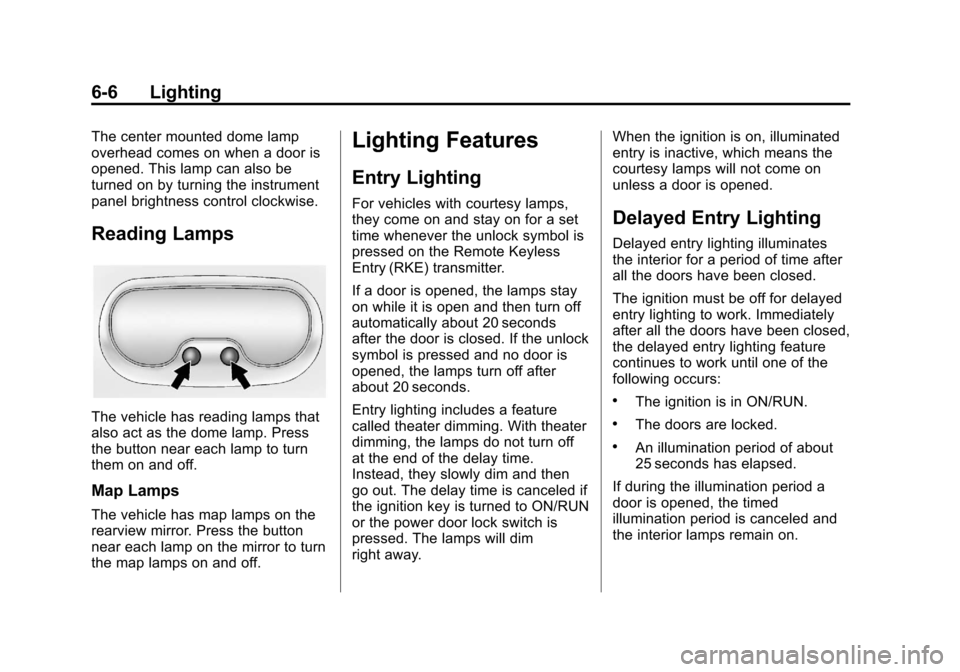
The center mounted dome lamp
overhead comes on when a door is
opened. This lamp can also be
turned on by turning the instrument
panel brightness control clockwise.
Reading Lamps
The vehicle has reading lamps that
also act as the dome lamp. Press
the button near each lamp to turn
them on and off.
Map Lamps
The vehicle has map lamps on the
rearview mirror. Press the button
near each lamp on the mirror to turn
the map lamps on and off.
Lighting Features
Entry Lighting
For vehicles with courtesy lamps,
they come on and stay on for a set
time whenever the unlock symbol is
pressed on the Remote Keyless
Entry (RKE) transmitter.
If a door is opened, the lamps stay
on while it is open and then turn off
automatically about 20 seconds
after the door is closed. If the unlock
symbol is pressed and no door is
opened, the lamps turn off after
about 20 seconds.
Entry lighting includes a feature
called theater dimming. With theater
dimming, the lamps do not turn off
at the end of the delay time.
Instead, they slowly dim and then
go out. The delay time is canceled if
the ignition key is turned to ON/RUN
or the power door lock switch is
pressed. The lamps will dim
right away.When the ignition is on, illuminated
entry is inactive, which means the
courtesy lamps will not come on
unless a door is opened.Delayed Entry Lighting
Delayed entry lighting illuminates
the interior for a period of time after
all the doors have been closed.
The ignition must be off for delayed
entry lighting to work. Immediately
after all the doors have been closed,
the delayed entry lighting feature
continues to work until one of the
following occurs:
.The ignition is in ON/RUN.
.The doors are locked.
.An illumination period of about
25 seconds has elapsed.
If during the illumination period a
door is opened, the timed
illumination period is canceled and
the interior lamps remain on.
Page 152 of 350
Black plate (4,1)Chevrolet Impala Owner Manual - 2013 - crc - 8/27/12
7-4 Infotainment System
4. Press the softkey under thedesired Speed Compensated
Volume setting (OFF, Low, Med,
or High) to select the level of
radio volume compensation. The
display times out after
approximately 10 seconds. Each
higher setting allows for more
radio volume compensation at
faster vehicle speeds.
Setting the Tone (Bass/Treble)
Radio with CD
To adjust the bass or treble:
1. Press the
fknob until Bass or
Treble displays.
2. To adjust the setting, do one of the following:
.Turn thefknob.
.Press¨SEEK or©SEEK.
.Press\FWD orsREV.
EQ (Equalization): Press this
button to choose bass and treble
equalization settings designed for
different types of music. Selecting MANUAL or changing bass or
treble, returns the EQ to the manual
bass and treble settings.
Unique EQ settings can be saved
for each source.
Setting the Tone (Bass/
Midrange/Treble) Radio with
CD (MP3)
BASS/MID/TREB (Bass, Midrange,
or Treble):
To adjust the bass,
midrange, or treble:
1. Press the
fknob until the tone
control tabs display.
2. Highlight the desired tone control tab by doing one of the
following:
.Press thefknob.
.Press the softkey under the
desired tab.
3. Adjust the setting by doing one of the following:
.Turn thefknob clockwise
or counterclockwise.
.Press¨SEEK or©SEEK.
.Press\FWD orsREV.
If a station's frequency is weak or if
there is static, decrease the treble.
To quickly adjust bass, midrange,
or treble to the middle position,
press the softkey positioned under
the BASS, MID, or TREB tab for
more than two seconds. A beep
sounds and the level adjusts to the
middle position.
To quickly adjust all tone and
speaker controls to the middle
position, press the
fknob for more
than two seconds until a beep
sounds.
EQ (Equalization): Press this
button to choose bass and treble
equalization settings designed for
different types of music. Selecting
MANUAL or changing bass or treble
returns the EQ to the manual bass
and treble settings.
Unique EQ settings can be saved
for each source.