2013 CHEVROLET IMPALA clock
[x] Cancel search: clockPage 153 of 350
Black plate (5,1)Chevrolet Impala Owner Manual - 2013 - crc - 8/27/12
Infotainment System 7-5
If the radio has a Bose®audio
system, the EQ settings are either
MANUAL or TALK.
Adjusting the Speakers
(Balance/Fade) Radio with CD
To adjust the balance or fade:
1. Press the
`button or press the
fknob until the speaker control
label displays.
2. To adjust the setting, do one of the following:
.Turn thefknob.
.Press¨SEEK or©SEEK.
.Press\FWD orsREV.
Adjusting the Speakers
(Balance/Fade) Radio with
CD (MP3)
BAL/FADE (Balance/Fade): To
adjust the balance or fade:
1. Press the
fknob until the
speaker control tabs display. 2. Highlight the desired speaker
control tab by doing one of the
following:
.Press thefknob.
.Press the softkey under the
desired tab.
3. Adjust the setting by doing one of the following:
.Turn thefknob clockwise
or counterclockwise.
.Press¨SEEK or©SEEK.
.Press\FWD orsREV.
To quickly adjust all speaker and
tone controls to the middle position,
press the
fknob for more than
two seconds.
If the Rear Seat Audio (RSA) is
turned on, the radio disables FADE
and mutes the rear speakers.
Radio Messages
Calibration Error: Displays if the
radio is no longer calibrated
properly for the vehicle. The vehicle
must be returned to your dealer for
service.
Loc or Locked: Displays when the
TheftLock
®system has activated.
Take the vehicle to your dealer for
service.
If any error occurs repeatedly or if
an error cannot be corrected,
contact your dealer.
Page 176 of 350
Black plate (2,1)Chevrolet Impala Owner Manual - 2013 - crc - 8/27/12
8-2 Climate Controls
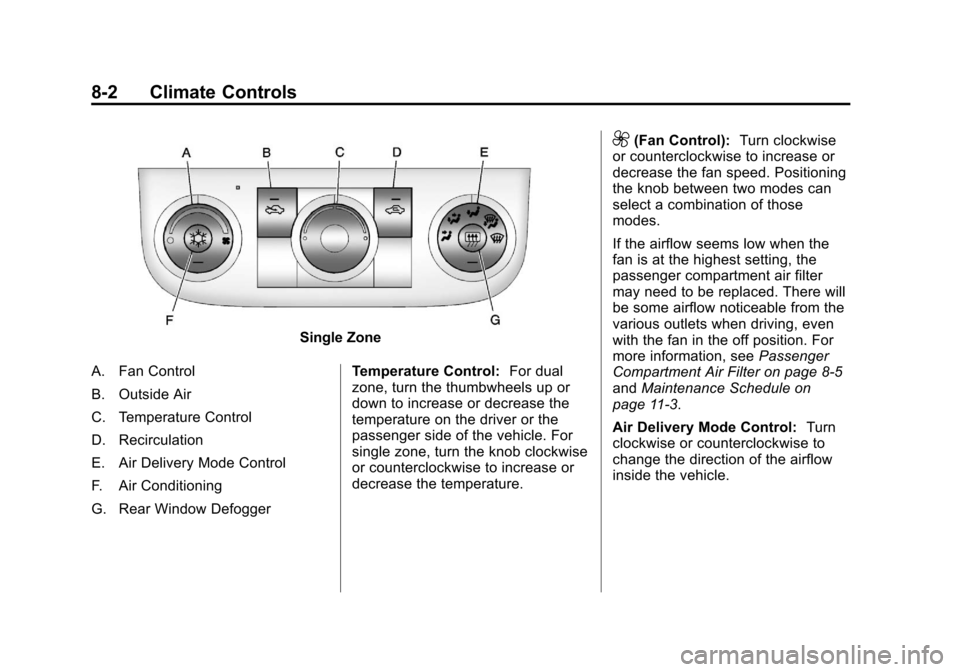
Single Zone
A. Fan Control
B. Outside Air
C. Temperature Control
D. Recirculation
E. Air Delivery Mode Control
F. Air Conditioning
G. Rear Window Defogger Temperature Control:
For dual
zone, turn the thumbwheels up or
down to increase or decrease the
temperature on the driver or the
passenger side of the vehicle. For
single zone, turn the knob clockwise
or counterclockwise to increase or
decrease the temperature.
9(Fan Control): Turn clockwise
or counterclockwise to increase or
decrease the fan speed. Positioning
the knob between two modes can
select a combination of those
modes.
If the airflow seems low when the
fan is at the highest setting, the
passenger compartment air filter
may need to be replaced. There will
be some airflow noticeable from the
various outlets when driving, even
with the fan in the off position. For
more information, see Passenger
Compartment Air Filter on page 8‑5
and Maintenance Schedule on
page 11‑3.
Air Delivery Mode Control: Turn
clockwise or counterclockwise to
change the direction of the airflow
inside the vehicle.
Page 194 of 350
Black plate (14,1)Chevrolet Impala Owner Manual - 2013 - crc - 8/27/12
9-14 Driving and Operating
To shift out of P (Park), the ignition
must be in ON/RUN and the brake
pedal must be applied.
Notice:Using a tool to force the
key to turn in the ignition could
cause damage to the switch or
break the key. Use the correct
key, make sure it is all the way in,
and turn it only with your hand.
If the key cannot be turned by
hand, see your dealer.
A (STOPPING THE ENGINE/
LOCK/OFF): When the vehicle is
stopped, turn the ignition switch to
LOCK/OFF to turn the engine off.
Retained Accessory Power (RAP)
will remain active. See Retained
Accessory Power (RAP) on
page 9‑17
This position locks the ignition and
steering wheel. It also locks the
transmission. This is the only
position in which the ignition key
can be inserted or removed.
The steering can bind with the
wheels turned off center. If this
happens, move the steering wheel from left to right while turning the
key to ACC/ACCESSORY. If this
doesn't work, then the vehicle needs
service.
Do not turn the engine off when the
vehicle is moving. This will cause a
loss of power assist in the brake
and steering systems and disable
the airbags.
If the vehicle must be shut off in an
emergency:
1. Brake using a firm and steady
pressure. Do not pump the
brakes repeatedly. This may
deplete power assist, requiring
increased brake pedal force.
2. Shift the vehicle to N (Neutral). This can be done while the
vehicle is moving. After shifting
to N (Neutral), firmly apply the
brakes and steer the vehicle to a
safe location.
3. Come to a complete stop, shift to P (Park), and turn the ignition
to LOCK/OFF. On vehicles with
an automatic transmission, the shift lever must be in P (Park) to
turn the ignition switch to the
LOCK/OFF position.
4. Set the parking brake. See Parking Brake on page 9‑24
{WARNING
Turning off the vehicle while
moving may cause loss of power
assist in the brake and steering
systems and disable the airbags.
While driving, only shut the
vehicle off in an emergency.
If the vehicle cannot be pulled over,
and must be shut off while driving,
turn the ignition to ACC/
ACCESSORY.
B (ACC/ACCESSORY): This is the
position in which you can operate
the radio and windshield wipers
while the engine is off. To use ACC/
ACCESSORY, turn the key
clockwise.
Page 214 of 350
Black plate (34,1)Chevrolet Impala Owner Manual - 2013 - crc - 8/27/12
9-34 Driving and Operating
Filling the Tank
{WARNING
Fuel vapors and fuel fires burn
violently and can cause injury or
death.
.To help avoid injuries to you
and others, read and follow
all the instructions on the fuel
pump island.
.Turn off the engine when
refueling.
.Keep sparks, flames, and
smoking materials away
from fuel.
.Do not leave the fuel pump
unattended.
.Do not reenter the vehicle
while pumping fuel.
.Keep children away from the
fuel pump and never let
children pump fuel.(Continued)
WARNING (Continued)
.Fuel can spray out if the fuel
cap is opened too quickly.
This spray can happen if the
tank is nearly full, and is
more likely in hot weather.
Open the fuel cap slowly and
wait for any hiss noise to stop
then unscrew the cap all
the way
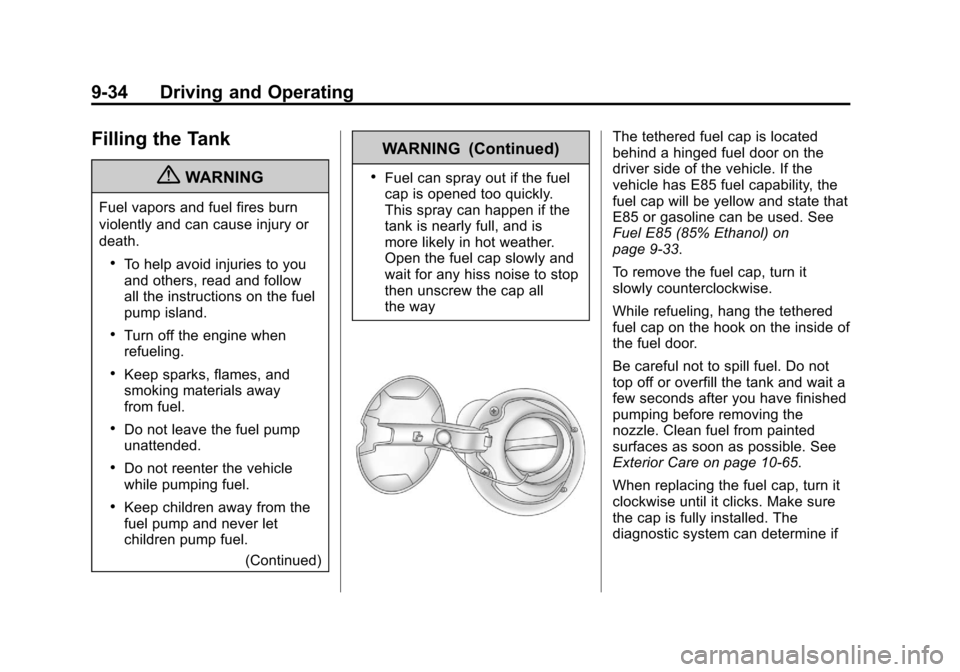
The tethered fuel cap is located
behind a hinged fuel door on the
driver side of the vehicle. If the
vehicle has E85 fuel capability, the
fuel cap will be yellow and state that
E85 or gasoline can be used. See
Fuel E85 (85% Ethanol) on
page 9‑33.
To remove the fuel cap, turn it
slowly counterclockwise.
While refueling, hang the tethered
fuel cap on the hook on the inside of
the fuel door.
Be careful not to spill fuel. Do not
top off or overfill the tank and wait a
few seconds after you have finished
pumping before removing the
nozzle. Clean fuel from painted
surfaces as soon as possible. See
Exterior Care on page 10‑65.
When replacing the fuel cap, turn it
clockwise until it clicks. Make sure
the cap is fully installed. The
diagnostic system can determine if
Page 235 of 350
Black plate (13,1)Chevrolet Impala Owner Manual - 2013 - crc - 8/27/12
Vehicle Care 10-13
If no coolant is visible in the coolant
surge tank, add coolant as follows:
How to Add Coolant to the
Coolant Surge Tank
{WARNING
You can be burned if you spill
coolant on hot engine parts.
Coolant contains ethylene glycol
and it will burn if the engine parts
are hot enough. Do not spill
coolant on a hot engine.
Notice: This vehicle has a
specific coolant fill procedure.
Failure to follow this procedure
could cause the engine to
overheat and be severely
damaged.
{WARNING
An electric engine cooling fan
under the hood can start up even
when the engine is not running
and can cause injury. Keep
hands, clothing, and tools away
from any underhood electric fan.
{WARNING
Steam and scalding liquids from a
hot cooling system can blow out
and burn you badly. They are
under pressure, and if you turn
the surge tank pressure
cap —even a little —they can
come out at high speed. Never
turn the cap when the cooling
system, including the surge tank
pressure cap, is hot. Wait for the
cooling system and surge tank
pressure cap to cool if you ever
have to turn the pressure cap.
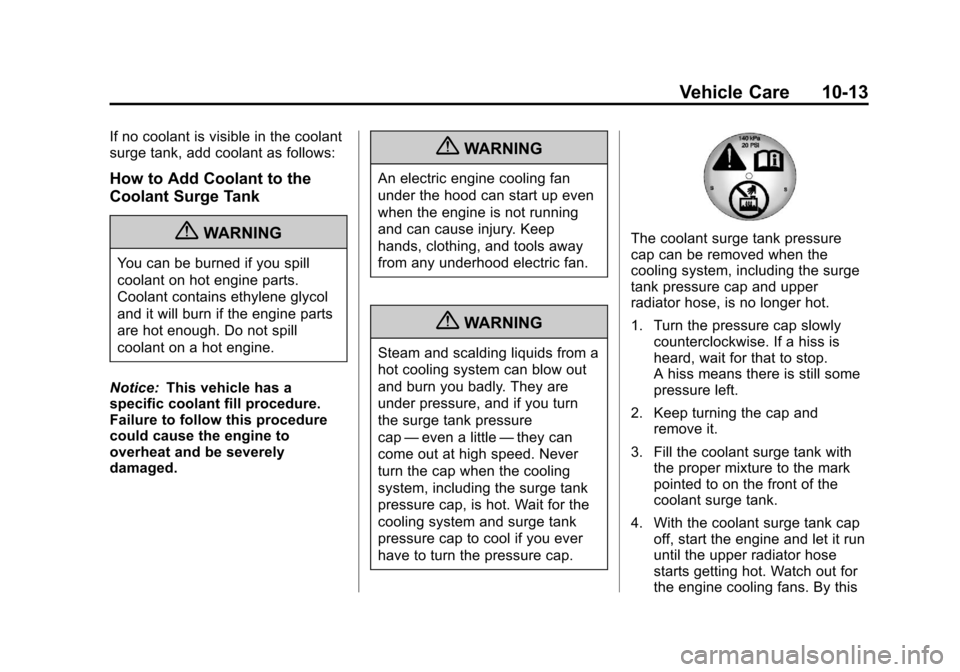
The coolant surge tank pressure
cap can be removed when the
cooling system, including the surge
tank pressure cap and upper
radiator hose, is no longer hot.
1. Turn the pressure cap slowly counterclockwise. If a hiss is
heard, wait for that to stop.
A hiss means there is still some
pressure left.
2. Keep turning the cap and remove it.
3. Fill the coolant surge tank with the proper mixture to the mark
pointed to on the front of the
coolant surge tank.
4. With the coolant surge tank cap off, start the engine and let it run
until the upper radiator hose
starts getting hot. Watch out for
the engine cooling fans. By this
Page 245 of 350
Black plate (23,1)Chevrolet Impala Owner Manual - 2013 - crc - 8/27/12
Vehicle Care 10-23
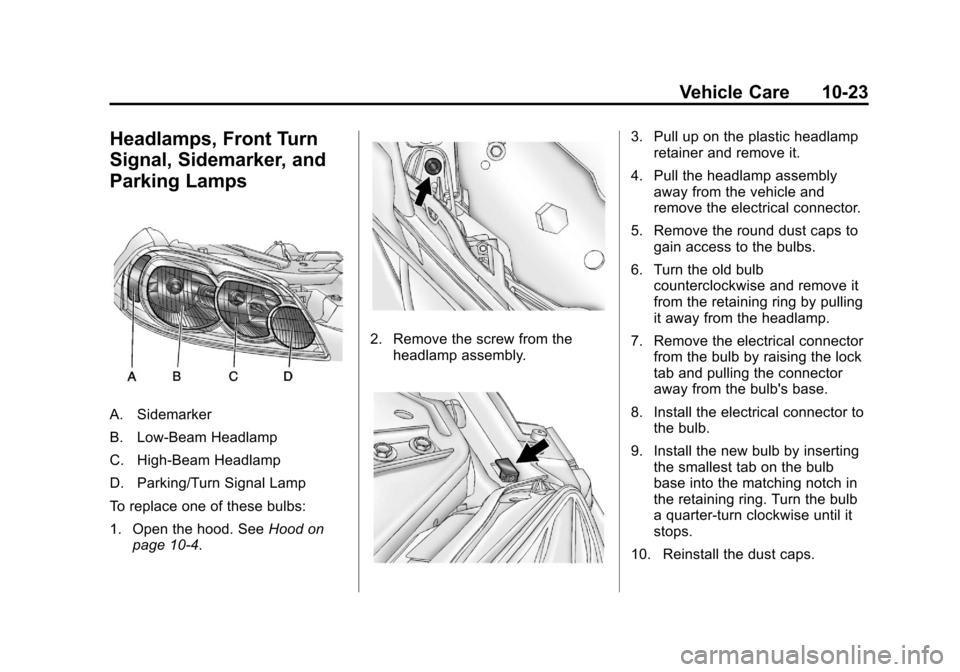
Headlamps, Front Turn
Signal, Sidemarker, and
Parking Lamps
A. Sidemarker
B. Low-Beam Headlamp
C. High-Beam Headlamp
D. Parking/Turn Signal Lamp
To replace one of these bulbs:
1. Open the hood. SeeHood on
page 10‑4.
2. Remove the screw from the headlamp assembly.
3. Pull up on the plastic headlampretainer and remove it.
4. Pull the headlamp assembly away from the vehicle and
remove the electrical connector.
5. Remove the round dust caps to gain access to the bulbs.
6. Turn the old bulb counterclockwise and remove it
from the retaining ring by pulling
it away from the headlamp.
7. Remove the electrical connector from the bulb by raising the lock
tab and pulling the connector
away from the bulb's base.
8. Install the electrical connector to the bulb.
9. Install the new bulb by inserting the smallest tab on the bulb
base into the matching notch in
the retaining ring. Turn the bulb
a quarter-turn clockwise until it
stops.
10. Reinstall the dust caps.
Page 247 of 350
Black plate (25,1)Chevrolet Impala Owner Manual - 2013 - crc - 8/27/12
Vehicle Care 10-25
To replace one of these bulbs:
1. Open the trunk. SeeTrunk on
page 2‑9.
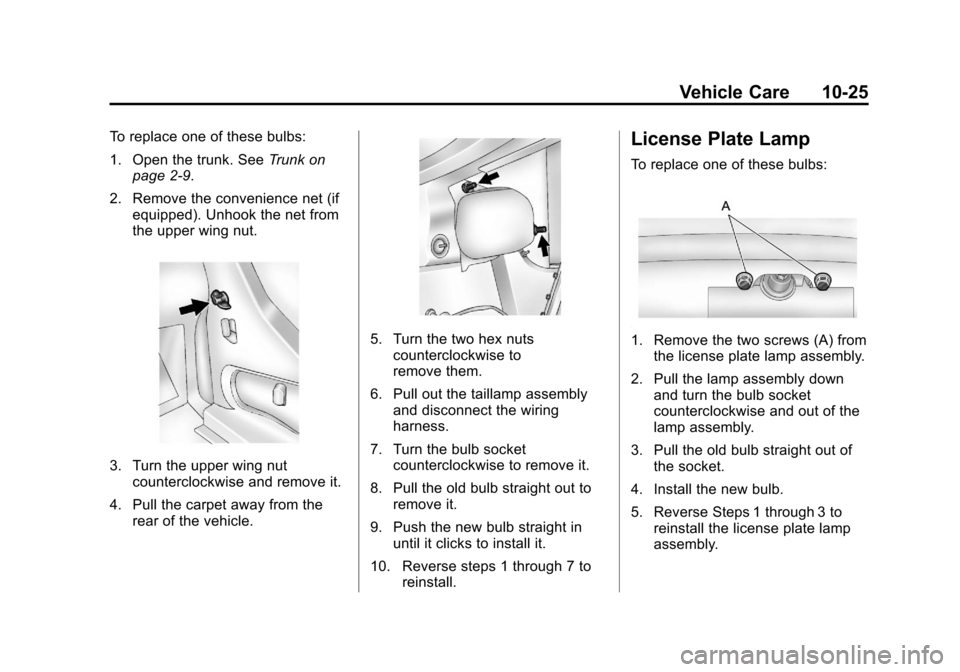
2. Remove the convenience net (if equipped). Unhook the net from
the upper wing nut.
3. Turn the upper wing nutcounterclockwise and remove it.
4. Pull the carpet away from the rear of the vehicle.
5. Turn the two hex nutscounterclockwise to
remove them.
6. Pull out the taillamp assembly and disconnect the wiring
harness.
7. Turn the bulb socket counterclockwise to remove it.
8. Pull the old bulb straight out to remove it.
9. Push the new bulb straight in until it clicks to install it.
10. Reverse steps 1 through 7 to reinstall.
License Plate Lamp
To replace one of these bulbs:
1. Remove the two screws (A) from
the license plate lamp assembly.
2. Pull the lamp assembly down and turn the bulb socket
counterclockwise and out of the
lamp assembly.
3. Pull the old bulb straight out of the socket.
4. Install the new bulb.
5. Reverse Steps 1 through 3 to reinstall the license plate lamp
assembly.
Page 275 of 350
Black plate (53,1)Chevrolet Impala Owner Manual - 2013 - crc - 8/27/12
Vehicle Care 10-53
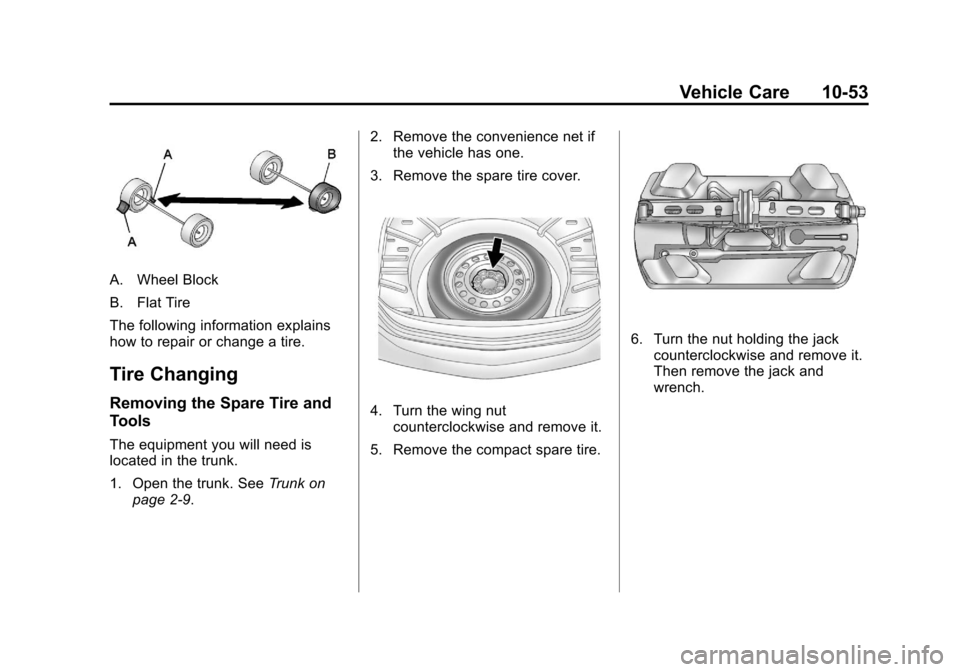
A. Wheel Block
B. Flat Tire
The following information explains
how to repair or change a tire.
Tire Changing
Removing the Spare Tire and
Tools
The equipment you will need is
located in the trunk.
1. Open the trunk. SeeTrunk on
page 2‑9. 2. Remove the convenience net if
the vehicle has one.
3. Remove the spare tire cover.
4. Turn the wing nut counterclockwise and remove it.
5. Remove the compact spare tire.
6. Turn the nut holding the jack counterclockwise and remove it.
Then remove the jack and
wrench.