2013 CHEVROLET IMPALA CD player
[x] Cancel search: CD playerPage 1 of 350

Black plate (1,1)Chevrolet Impala Owner Manual - 2013 - crc - 8/27/12
2013 Chevrolet Impala Owner ManualM
In Brief. . . . . . . . . . . . . . . . . . . . . . . . 1-1
Instrument Panel . . . . . . . . . . . . . . 1-2
Initial Drive Information . . . . . . . . 1-3
Vehicle Features . . . . . . . . . . . . . 1-13
Performance and Maintenance . . . . . . . . . . . . . . . . 1-17
Keys, Doors, and Windows . . . . . . . . . . . . . . . . . . . . 2-1
Keys and Locks . . . . . . . . . . . . . . . 2-1
Doors . . . . . . . . . . . . . . . . . . . . . . . . . . 2-9
Vehicle Security . . . . . . . . . . . . . . 2-10
Exterior Mirrors . . . . . . . . . . . . . . . 2-13
Interior Mirrors . . . . . . . . . . . . . . . . 2-14
Windows . . . . . . . . . . . . . . . . . . . . . 2-15
Roof . . . . . . . . . . . . . . . . . . . . . . . . . . 2-16
Seats and Restraints . . . . . . . . . 3-1
Head Restraints . . . . . . . . . . . . . . . 3-2
Front Seats . . . . . . . . . . . . . . . . . . . . 3-3
Rear Seats . . . . . . . . . . . . . . . . . . . . 3-7
Safety Belts . . . . . . . . . . . . . . . . . . . . 3-9
Airbag System . . . . . . . . . . . . . . . . 3-18
Child Restraints . . . . . . . . . . . . . . 3-32 Storage
. . . . . . . . . . . . . . . . . . . . . . . 4-1
Storage Compartments . . . . . . . . 4-1
Additional Storage Features . . . 4-2
Instruments and Controls . . . . 5-1
Controls . . . . . . . . . . . . . . . . . . . . . . . 5-2
Warning Lights, Gauges, and
Indicators . . . . . . . . . . . . . . . . . . . . 5-8
Information Displays . . . . . . . . . . 5-22
Vehicle Messages . . . . . . . . . . . . 5-26
Vehicle Personalization . . . . . . . 5-33
Universal Remote System . . . . 5-39
Lighting . . . . . . . . . . . . . . . . . . . . . . . 6-1
Exterior Lighting . . . . . . . . . . . . . . . 6-1
Interior Lighting . . . . . . . . . . . . . . . . 6-5
Lighting Features . . . . . . . . . . . . . . 6-6
Infotainment System . . . . . . . . . 7-1
Introduction . . . . . . . . . . . . . . . . . . . . 7-1
Radio . . . . . . . . . . . . . . . . . . . . . . . . . . 7-6
Audio Players . . . . . . . . . . . . . . . . 7-13
Phone . . . . . . . . . . . . . . . . . . . . . . . . 7-19 Climate Controls
. . . . . . . . . . . . . 8-1
Climate Control Systems . . . . . . 8-1
Air Vents . . . . . . . . . . . . . . . . . . . . . . . 8-5
Maintenance . . . . . . . . . . . . . . . . . . . 8-5
Driving and Operating . . . . . . . . 9-1
Driving Information . . . . . . . . . . . . . 9-2
Starting and Operating . . . . . . . 9-13
Engine Exhaust . . . . . . . . . . . . . . 9-19
Automatic Transmission . . . . . . 9-20
Brakes . . . . . . . . . . . . . . . . . . . . . . . 9-23
Ride Control Systems . . . . . . . . 9-25
Cruise Control . . . . . . . . . . . . . . . . 9-28
Fuel . . . . . . . . . . . . . . . . . . . . . . . . . . 9-30
Towing . . . . . . . . . . . . . . . . . . . . . . . 9-36
Conversions and Add-Ons . . . 9-41
Vehicle Care . . . . . . . . . . . . . . . . . 10-1
General Information . . . . . . . . . . 10-2
Vehicle Checks . . . . . . . . . . . . . . . 10-3
Headlamp Aiming . . . . . . . . . . . 10-22
Bulb Replacement . . . . . . . . . . 10-22
Electrical System . . . . . . . . . . . . 10-26
Page 20 of 350
Black plate (14,1)Chevrolet Impala Owner Manual - 2013 - crc - 8/27/12
1-14 In Brief
go through up to 6 pages of
favorites, each having 6 favorite
stations available per page. Each
page of favorites can contain any
combination of AM, FM, or XM
stations.
For radios without a FAV button, up
to 18 stations (6 FM1, 6 FM2, and
6 AM), can be programmed on the 6
numbered buttons.
SeeOperation on page 7‑2.
Setting the Clock
To set the time for the Radio with
CD (Base):
1. Press the
Hbutton until the hour
begins flashing on the display.
Press
Ha second time and the
minutes begin flashing on the
display.
2. To increase or decrease the time, do one of the following
while the hours or minutes are
flashing:
.Turn thefknob.
.Press¨SEEK or©SEEK.
.Press\FWD orsREV.
3. Press the
Hbutton again until
the clock display stops flashing
to set the currently displayed
time, or wait five seconds until
the flashing stops and the
current time displayed is
automatically set.
For detailed instructions on setting
the clock for your specific audio
system, see Clock on page 5‑6.
Satellite Radio
SiriusXM®is a satellite radio service
based in the 48 contiguous United
States and 10 Canadian provinces.
SiriusXM satellite radio has a wide
variety of programming and
commercial-free music, coast to
coast, and in digital-quality sound.
A fee is required to receive the
SiriusXM service. For more information, refer to:
.www.siriusxm.com or call
1-866-635-2349 (U.S.)
.www.xmradio.ca or call
1-877-209-0079 (Canada)
See Satellite Radio on page 7‑8.
Portable Audio Devices
This vehicle may have an auxiliary
input jack, located on the audio
faceplate. External devices such as
iPods
®, MP3 players, etc. can be
connected to the auxiliary input jack
using a 3.5 mm (1/8 in) input jack
cable.
See “Using the Auxiliary Input Jack”
under Auxiliary Devices on
page 7‑18.
Bluetooth®
For vehicles with a Bluetooth
system, it allows users with a
Bluetooth-enabled cell phone to
make and receive hands-free calls
using the vehicle’ s audio system
and controls.
Page 22 of 350
Black plate (16,1)Chevrolet Impala Owner Manual - 2013 - crc - 8/27/12
1-16 In Brief
SET−:Press to set the speed and
activate cruise control or make the
vehicle decelerate.
[: Press to disengage cruise
control without erasing the set
speed from memory.
For more information, see Cruise
Control on page 9‑28.
Power Outlets
The vehicle has three 12‐volt outlets
which can be used to plug in
electrical equipment, such as a cell
phone or MP3 player.
On vehicles with a center console,
one outlet is located inside the
center floor console and two outlets
are located at the front of the
console bin under the instrument
panel. On vehicles without a center
console, two are located under the
climate controls and another outlet
for the rear seat passengers is at
the rear of the center front seat.
Remove the cover to access and
replace when not in use.
See
Power Outlets on page 5‑7.
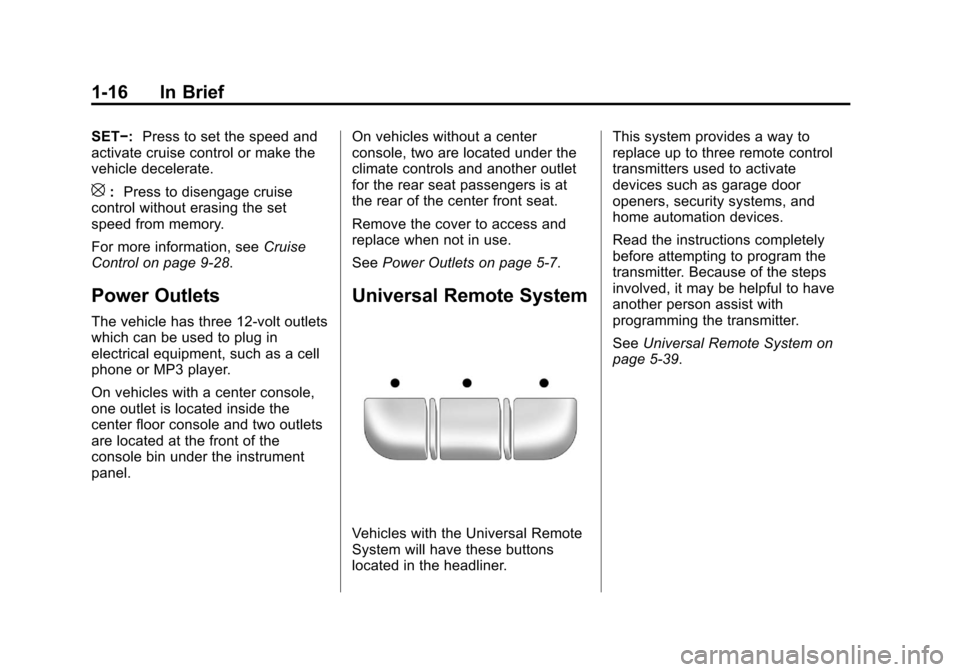
Universal Remote System
Vehicles with the Universal Remote
System will have these buttons
located in the headliner. This system provides a way to
replace up to three remote control
transmitters used to activate
devices such as garage door
openers, security systems, and
home automation devices.
Read the instructions completely
before attempting to program the
transmitter. Because of the steps
involved, it may be helpful to have
another person assist with
programming the transmitter.
See
Universal Remote System on
page 5‑39.
Page 102 of 350
Black plate (6,1)Chevrolet Impala Owner Manual - 2013 - crc - 8/27/12
5-6 Instruments and Controls
CALIBRATION COMPLETE for a
few seconds when the
calibration is complete. The DIC
display will then return to
PRESS
VTO CALIBRATE
COMPASS.
Clock
Without Date Display
AM/FM Base Radio with a Single
CD Player
This radio has a
Hbutton for setting
the time.
To set the time:
1. Press the
Hbutton until the hour
begins flashing on the display.
Press
Ha second time and the
minutes begin flashing on the
display.
2. To increase or decrease the time, do one of the following
while the hours or minutes are
flashing:
.Turn thefknob.
.Press¨SEEK or©SEEK.
.Press\FWD orsREV.
3. Press the
Hbutton again until
the clock display stops flashing
to set the currently displayed
time, or wait five seconds until
the flashing stops and the
current time displayed is
automatically set.
To change the time default setting
from 12 hour to 24 hour, press
the
Hbutton until 12H or 24H is
displayed. Once 12H or 24H is
displayed, turn the
fknob to the
desired option to select the setting.
Press the
Hbutton again to apply
the setting, or let the screen
time out.
With Date Display
Single CD (MP3) Player
This radio has a
Hbutton for setting
the time. To set the time and date:
1. Turn the radio on.
2. Press the
Hbutton and the HR,
MIN, MM, DD, and YYYY (hour,
minute, month, day, and year)
display.
3. Press the pushbutton located under any one of the tabs to be
changed.
4. To increase the time or date, do one of the following:
.Press the pushbutton below
the selected tab.
.Turn thefknob clockwise.
.Press¨SEEK.
.Press\FWD.
5. To decrease the time or date, do one of the following:
.Turn thefknob counter‐
clockwise.
.Press©SEEK.
Page 103 of 350
Black plate (7,1)Chevrolet Impala Owner Manual - 2013 - crc - 8/27/12
Instruments and Controls 5-7
.PresssREV.
The date does not automatically
display. To see the date press the
H
button while the radio is on. The
date with display times out after a
few seconds and goes back to the
normal radio and time display.
To change the time default setting
from 12 hour to 24 hour or to
change the date default setting from
month/day/year to day/month/year:
1. Press the
Hbutton and then the
pushbutton located under the
forward arrow tab. The time 12H
and 24H, and the date MM/DD/
YYYY (month, day, and year)
and DD/MM/YYYY (day, month,
and year) displays.
2. Press the pushbutton located under the desired option.
3. Press the
Hor MENU button
again to apply the selected
default, or let the screen
time out.
Power Outlets
The vehicle has three 12‐volt outlets
which can be used to plug in
electrical equipment, such as a cell
phone or MP3 player.
On vehicles with a center console,
one outlet is located inside the
center floor console and two outlets
are located at the front of the
console bin under the instrument
panel.
On vehicles without a center
console, two are located under the
climate controls and another outlet
for the rear seat passengers is at
the rear of the center front seat.
Remove the cover to access and
replace when not in use.
{WARNING
Power is always supplied to the
outlets. Do not leave electrical
equipment plugged in when the
(Continued)
WARNING (Continued)
vehicle is not in use because the
vehicle could catch fire and cause
injury or death.
Notice: Leaving electrical
equipment plugged in for an
extended period of time while the
vehicle is off will drain the
battery. Always unplug electrical
equipment when not in use and
do not plug in equipment that
exceeds the maximum 20 ampere
rating.
Certain accessory plugs may not be
compatible with the accessory
power outlet and could overload
vehicle and adapter fuses. If a
problem is experienced, see your
dealer.
When adding electrical equipment,
be sure to follow the proper
installation instructions included with
the equipment. See Add-On
Electrical Equipment on page 9‑41.
Page 149 of 350
Black plate (1,1)Chevrolet Impala Owner Manual - 2013 - crc - 8/27/12
Infotainment System 7-1
Infotainment
System
Introduction
Infotainment . . . . . . . . . . . . . . . . . . . 7-1
Theft-Deterrent Feature . . . . . . . 7-2
Operation . . . . . . . . . . . . . . . . . . . . . 7-2
Radio
AM-FM Radio . . . . . . . . . . . . . . . . . 7-6
Satellite Radio . . . . . . . . . . . . . . . . 7-8
Radio Reception . . . . . . . . . . . . . 7-11
Backglass Antenna . . . . . . . . . . 7-12
Satellite Radio Antenna . . . . . . 7-13
Audio Players
CD Player . . . . . . . . . . . . . . . . . . . 7-13
Auxiliary Devices . . . . . . . . . . . . 7-18
Phone
Bluetooth . . . . . . . . . . . . . . . . . . . . 7-19
Introduction
Infotainment
Determine which radio the vehicle
has and read the following pages to
become familiar with its features.
{WARNING
Taking your eyes off the road for
extended periods could cause a
crash resulting in injury or death
to you or others. Do not give
extended attention to infotainment
tasks while driving.
This system provides access to
many audio and non-audio listings.
To minimize taking your eyes off the
road while driving, do the following
while the vehicle is parked:
.Become familiar with the
operation and controls of the
audio system.
.Set up the tone, speaker
adjustments, and preset radio
stations.
For more information, see Defensive
Driving on page 9‑2.
Notice: Contact your dealer
before adding any equipment.
Adding audio or communication
equipment could interfere with
the operation of the engine, radio,
or other systems, and could
damage them. Follow federal
rules covering mobile radio and
telephone equipment.
The vehicle has Retained
Accessory Power (RAP). With RAP,
the audio system can be played
even after the ignition is turned off.
See Retained Accessory Power
(RAP) on page 9‑17 for more
information.
Page 161 of 350
Black plate (13,1)Chevrolet Impala Owner Manual - 2013 - crc - 8/27/12
Infotainment System 7-13
not be covered by the vehicle
warranty. Do not clear the inside
rear window with sharp objects.
Notice:Do not apply aftermarket
glass tinting with metallic film.
The metallic film in some tinting
materials will interfere with or
distort the incoming radio
reception. Any damage caused to
the backglass antenna due to
metallic tinting materials will not
be covered by the vehicle
warranty.
Satellite Radio Antenna
The XM Satellite Radio antenna is
located on the roof of the vehicle.
Keep the antenna clear of
obstructions for clear radio
reception.
If the vehicle has a sunroof, the
performance of the XM system (if
equipped) may be affected if the
sunroof is open.
Audio Players
CD Player
Some CD players can play MP3
CD-R or CD-RW discs. See “MP3”
later in this section for more
information.
The CD player can play the smaller
8 cm (3 in) single discs with an
adapter ring.
Care of the CD Player
Do not add labels to a disc. It could
get caught in the CD player. Use a
marking pen to write on the top of
the disc if a description is needed.
Do not use CD lens cleaners. They
could damage the CD player.
Notice: If a label is added to a
CD, more than one CD is inserted
into the slot at a time, or an
attempt is made to play scratched
or damaged CDs, the CD player
could be damaged. While using
the CD player, use only CDs in
good condition without any label, load one CD at a time, and keep
the CD player and the loading slot
free of foreign materials, liquids,
and debris.
If an error displays, see
“CD
Messages” later in this section.
Care of CDs
Store a disc in its original case or a
protective case and away from
direct sunlight and dust. If the
bottom of a disc is damaged it may
not play properly or at all. Do not
touch the bottom of a disc while
handling it, pick it up by grasping
the outer edges or the edge of the
hole and the outer edge.
If the surface of a disc is dirty, take
a soft, lint‐free cloth or dampen a
clean, soft cloth in a mild, neutral
detergent solution mixed with water,
and clean it. Make sure the wiping
process starts from the center to
the edge.
Page 162 of 350

Black plate (14,1)Chevrolet Impala Owner Manual - 2013 - crc - 8/27/12
7-14 Infotainment System
Inserting a Disc
Insert the disc partway into the slot,
label side up. The player pulls it in
and the disc begins playing.
Use an adapter ring when playing
the smaller 8 cm (3 in) discs.
Smaller discs with the adapter ring
are loaded the same way as a
full-size disc.
Ejecting a Disc
ZEJECT:Press to eject the disc.
If the disc is not removed after
several seconds, the CD player
automatically pulls the disc back in.
Playing a CD
When a CD is inserted into the
player, the CD symbol displays. As
each new track starts to play, the
track number displays.
If the ignition or radio is turned off
when a CD is in the player, the CD
stays in the player. If the ignition or
radio is turned on when a CD is in the player, the CD starts to play
where it stopped, if it was the last
selected audio source.
Buttons and Knobs
The buttons and knobs on the radio
control the following features.
f(Tune):
Turn to select tracks on
the CD.
©SEEK: Press to go to the start of
the current track, if more than
10 seconds have played. Press and
hold or press multiple times to
continue moving backward through
the tracks on the CD.
¨SEEK: Press to go to the next
track. Press and hold or press
multiple times to continue moving
forward through the tracks on
the CD.
sREV (Reverse): Press and hold
to reverse playback quickly within a
track. Sound is heard at a reduced
volume and the elapsed time of the
track displays. Release to resume
playing the track.
\FWD (Fast Forward): Press
and hold to advance playback
quickly within a track. Sound is
heard at a reduced volume and the
elapsed time of the track displays.
Release to resume playing the
track.
4(Information): Press to display
available additional information
about the current track.
BAND: Press to listen to the radio
while a CD is playing. The CD
remains inside the CD player.
CD/AUX (CD/Auxiliary): Press to
play a CD while listening to the
radio or a portable audio device.
Press this button again and the
system automatically searches for
an auxiliary input device, such as a
portable audio player. If a portable
audio player is not connected, No
Aux Input Device Found may
display.