Page 36 of 402

Black plate (10,1)Chevrolet Express Owner Manual - 2013 - 1stPrintReady - 6/19/12
2-10 Keys, Doors, and Windows
then open the door. When the door
is closed, the check strap will
automatically re-engage.
Sliding Door
To open the sliding side door from
the outside, pull the handle toward
the rear of the vehicle and slide the
door open.
To close the sliding side door from
the outside, use the handle to slide
the door toward the front of the
vehicle.When the door is closed, it will be
flush with the side of the body.
To open the sliding side door from
the inside, pull the handle toward
the rear of the vehicle. Then, slide
the door toward the rear of the
vehicle.
To close the sliding side door from
the inside, grasp the handle and
slide the door toward the front of the
vehicle.
Make sure the door is completely
closed before driving away.
Rear Doors
{WARNING
Unlocked doors can be
dangerous.
.Passengers, especially
children, can easily open the
doors and fall out of a moving
vehicle. When a door is
locked, the handle will not
open it. The chance of being
thrown out of the vehicle in a
crash is increased if the
doors are not locked. So, all
passengers should wear
safety belts properly and the
doors should be locked
whenever the vehicle is
driven.
.Young children who get into
unlocked vehicles may be
unable to get out. A child can
be overcome by extreme heat
and can suffer permanent
(Continued)
Page 37 of 402

Black plate (11,1)Chevrolet Express Owner Manual - 2013 - 1stPrintReady - 6/19/12
Keys, Doors, and Windows 2-11
WARNING (CONTINUED)
injuries or even death from
heat stroke. Always lock the
vehicle whenever leaving it.
.Outsiders can easily enter
through an unlocked door
when you slow down or stop
the vehicle. Locking the doors
can help prevent this from
happening.
To open the rear doors from the
outside, pull the handle toward you
to open the passenger side rear
door first.
To open the driver side rear door,
pull the latch release at the inside
edge of the door.
To close the rear doors, close the
driver side rear door first. Then
close the passenger side rear door.
Check to make sure both doors are
completely closed.
Vehicle Security
This vehicle has theft-deterrent
features; however, they do not make
the vehicle impossible to steal.
Immobilizer
See Radio Frequency Statement on
page 13‑20 for information
regarding Part 15 of the Federal
Communications Commission (FCC)
rules and Industry Canada
Standards RSS-GEN/210/220/310.
Immobilizer Operation
This vehicle is equipped with the
PASS-Key® III+ (Personalized
Automotive Security System)
theft-deterrent system.
PASS-Key III+ is a passive theft
deterrent system.
The system is automatically armed
when the key is removed from the
ignition.
You do not have to manually arm or
disarm the system.
Page 39 of 402

Black plate (13,1)Chevrolet Express Owner Manual - 2013 - 1stPrintReady - 6/19/12
Keys, Doors, and Windows 2-13
5. Repeat Steps 1–4 if additionalkeys are to be programmed.
If you lose or damage a
PASS-Key III+ key, see your dealer
or a locksmith who can service
PASS-Key III+ to have a new
key made.
Do not leave the key or device that
disarms or deactivates the
theft-deterrent system in the vehicle.Exterior Mirrors
Convex Mirrors
{WARNING
A convex mirror can make things,
like other vehicles, look farther
away than they really are. If you
cut too sharply into the right lane,
you could hit a vehicle on the
right. Check the inside mirror or
glance over your shoulder before
changing lanes.
The passenger side mirror is convex
shaped. A convex mirror's surface is
curved so more can be seen from
the driver seat.
Manual Mirrors
Adjust the mirrors by pressing the
mirror up and down and left and
right.
The mirrors can be manually folded
in or out.
On the lower portion of each mirror
is an auxiliary convex mirror.
A convex mirror's surface is curved
so you can see more from the driver
seat. The auxiliary convex mirrors
can be adjusted manually by
pressing the mirror.
Page 41 of 402

Black plate (15,1)Chevrolet Express Owner Manual - 2013 - 1stPrintReady - 6/19/12
Keys, Doors, and Windows 2-15
Interior Mirrors
Manual Rearview Mirror
To adjust the inside rearview mirror,
hold the rearview mirror in the
center and move it to view the area
behind the vehicle.
For vehicles with a manual rearview
mirror, push the tab forward for
daytime use and pull it for nighttime
use to avoid glare from the
headlamps from behind.
Cargo vans without rear door glass
may not have an inside rearview
mirror.
The vehicle may have a Rear Vision
Camera (RVC). SeeRear Vision
Camera (RVC) on page 9‑38.
Windows
{WARNING
Never leave a child, a helpless
adult, or a pet alone in a vehicle,
especially with the windows
closed in warm or hot weather.
They can be overcome by the
extreme heat and suffer
permanent injuries or even death
from heat stroke.
Manual Windows
Operate the manual windows by
turning the hand crank on each door
to raise or lower the side door
windows.
Power Windows
{WARNING
Children could be seriously
injured or killed if caught in the
path of a closing window. Never
leave keys in a vehicle with
children. See Keys on page 2‑1.
Page 46 of 402
Black plate (2,1)Chevrolet Express Owner Manual - 2013 - 1stPrintReady - 6/19/12
3-2 Seats and Restraints
Head Restraints
On vehicles with factory installed
seats, the front seats have built-in
head restraints that are not
adjustable in the outboard seating
positions.
Front Seats
Seat Adjustment
{WARNING
You can lose control of the
vehicle if you try to adjust a driver
seat while the vehicle is moving.
Adjust the driver seat only when
the vehicle is not moving.
To adjust the seat:
1. Lift the bar under the front edgeof the seat cushion to unlock
the seat.
2. Slide the seat to the desired position and release the bar.
3. Try to move the seat back and forth to be sure the seat is
locked in place.
Page 47 of 402

Black plate (3,1)Chevrolet Express Owner Manual - 2013 - 1stPrintReady - 6/19/12
Seats and Restraints 3-3
Power Seat Adjustment
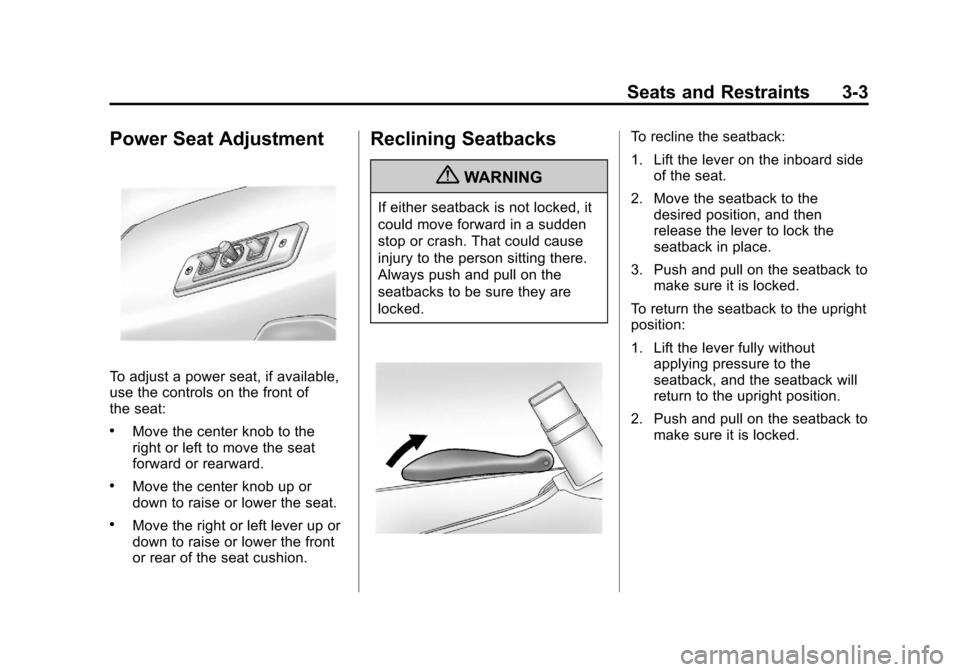
To adjust a power seat, if available,
use the controls on the front of
the seat:
.Move the center knob to the
right or left to move the seat
forward or rearward.
.Move the center knob up or
down to raise or lower the seat.
.Move the right or left lever up or
down to raise or lower the front
or rear of the seat cushion.
Reclining Seatbacks
{WARNING
If either seatback is not locked, it
could move forward in a sudden
stop or crash. That could cause
injury to the person sitting there.
Always push and pull on the
seatbacks to be sure they are
locked.
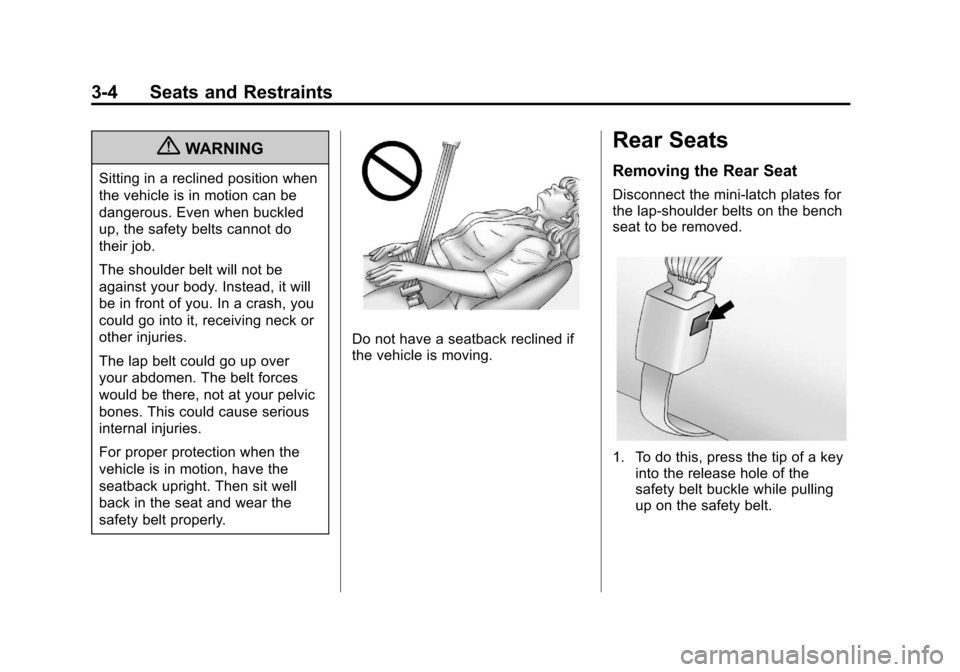
To recline the seatback:
1. Lift the lever on the inboard sideof the seat.
2. Move the seatback to the desired position, and then
release the lever to lock the
seatback in place.
3. Push and pull on the seatback to make sure it is locked.
To return the seatback to the upright
position:
1. Lift the lever fully without applying pressure to the
seatback, and the seatback will
return to the upright position.
2. Push and pull on the seatback to make sure it is locked.
Page 48 of 402

Black plate (4,1)Chevrolet Express Owner Manual - 2013 - 1stPrintReady - 6/19/12
3-4 Seats and Restraints
{WARNING
Sitting in a reclined position when
the vehicle is in motion can be
dangerous. Even when buckled
up, the safety belts cannot do
their job.
The shoulder belt will not be
against your body. Instead, it will
be in front of you. In a crash, you
could go into it, receiving neck or
other injuries.
The lap belt could go up over
your abdomen. The belt forces
would be there, not at your pelvic
bones. This could cause serious
internal injuries.
For proper protection when the
vehicle is in motion, have the
seatback upright. Then sit well
back in the seat and wear the
safety belt properly.
Do not have a seatback reclined if
the vehicle is moving.
Rear Seats
Removing the Rear Seat
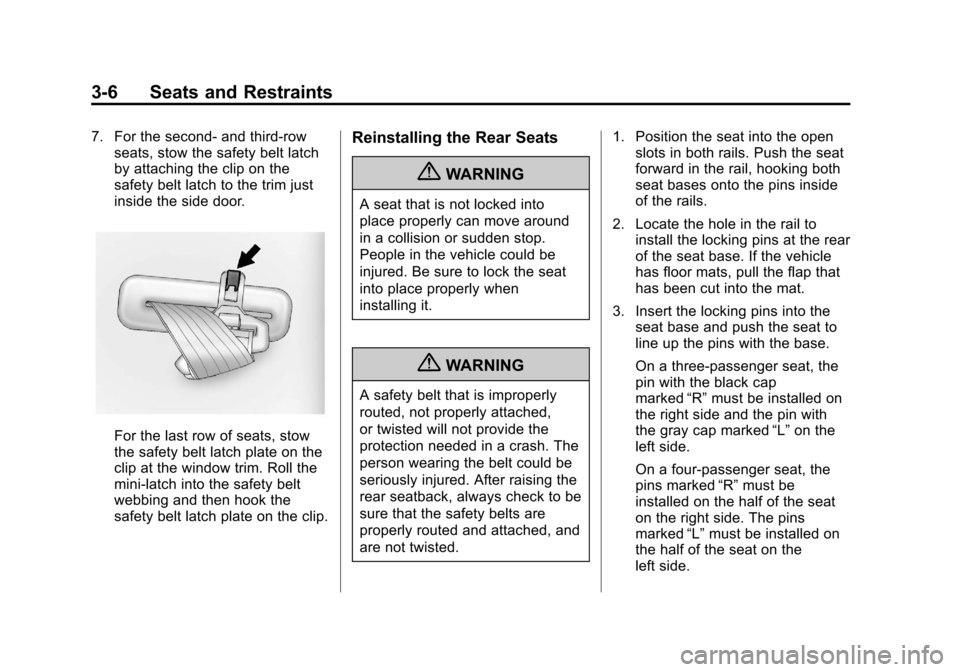
Disconnect the mini-latch plates for
the lap‐shoulder belts on the bench
seat to be removed.
1. To do this, press the tip of a keyinto the release hole of the
safety belt buckle while pulling
up on the safety belt.
Page 50 of 402

Black plate (6,1)Chevrolet Express Owner Manual - 2013 - 1stPrintReady - 6/19/12
3-6 Seats and Restraints
7. For the second- and third-rowseats, stow the safety belt latch
by attaching the clip on the
safety belt latch to the trim just
inside the side door.
For the last row of seats, stow
the safety belt latch plate on the
clip at the window trim. Roll the
mini-latch into the safety belt
webbing and then hook the
safety belt latch plate on the clip.
Reinstalling the Rear Seats
{WARNING
A seat that is not locked into
place properly can move around
in a collision or sudden stop.
People in the vehicle could be
injured. Be sure to lock the seat
into place properly when
installing it.
{WARNING
A safety belt that is improperly
routed, not properly attached,
or twisted will not provide the
protection needed in a crash. The
person wearing the belt could be
seriously injured. After raising the
rear seatback, always check to be
sure that the safety belts are
properly routed and attached, and
are not twisted. 1. Position the seat into the open
slots in both rails. Push the seat
forward in the rail, hooking both
seat bases onto the pins inside
of the rails.
2. Locate the hole in the rail to install the locking pins at the rear
of the seat base. If the vehicle
has floor mats, pull the flap that
has been cut into the mat.
3. Insert the locking pins into the seat base and push the seat to
line up the pins with the base.
On a three-passenger seat, the
pin with the black cap
marked “R”must be installed on
the right side and the pin with
the gray cap marked “L”on the
left side.
On a four-passenger seat, the
pins marked “R”must be
installed on the half of the seat
on the right side. The pins
marked “L”must be installed on
the half of the seat on the
left side.