2013 CHEVROLET CORVETTE transmission
[x] Cancel search: transmissionPage 55 of 414
Black plate (25,1)Chevrolet Corvette Owner Manual - 2013 - crc2 - 11/8/12
Keys, Doors, and Windows 2-25
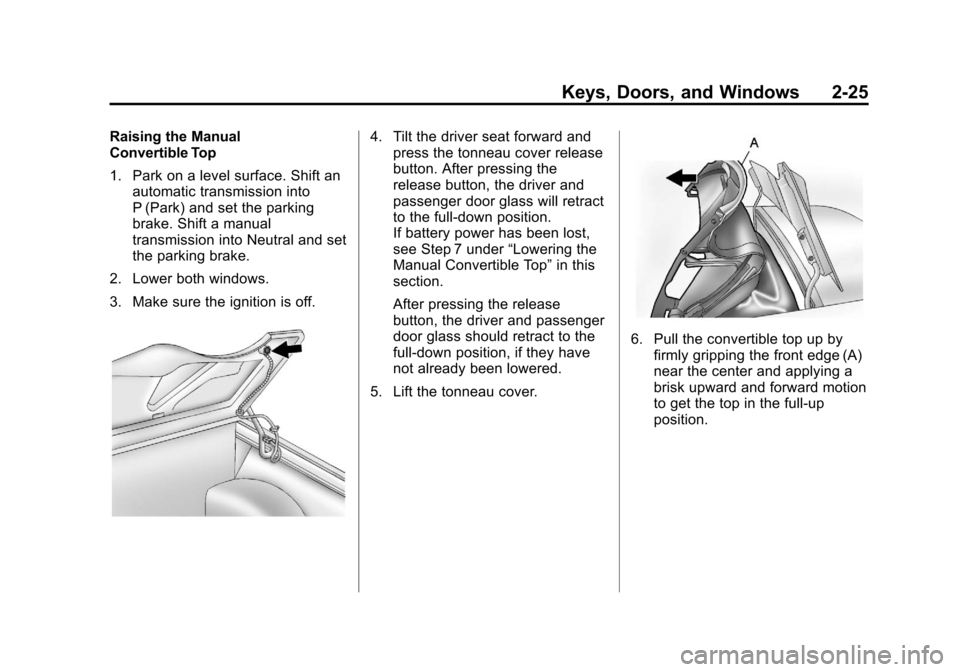
Raising the Manual
Convertible Top
1. Park on a level surface. Shift anautomatic transmission into
P (Park) and set the parking
brake. Shift a manual
transmission into Neutral and set
the parking brake.
2. Lower both windows.
3. Make sure the ignition is off.4. Tilt the driver seat forward and press the tonneau cover release
button. After pressing the
release button, the driver and
passenger door glass will retract
to the full-down position.
If battery power has been lost,
see Step 7 under “Lowering the
Manual Convertible Top” in this
section.
After pressing the release
button, the driver and passenger
door glass should retract to the
full-down position, if they have
not already been lowered.
5. Lift the tonneau cover.
6. Pull the convertible top up by firmly gripping the front edge (A)
near the center and applying a
brisk upward and forward motion
to get the top in the full-up
position.
Page 56 of 414
Black plate (26,1)Chevrolet Corvette Owner Manual - 2013 - crc2 - 11/8/12
2-26 Keys, Doors, and Windows
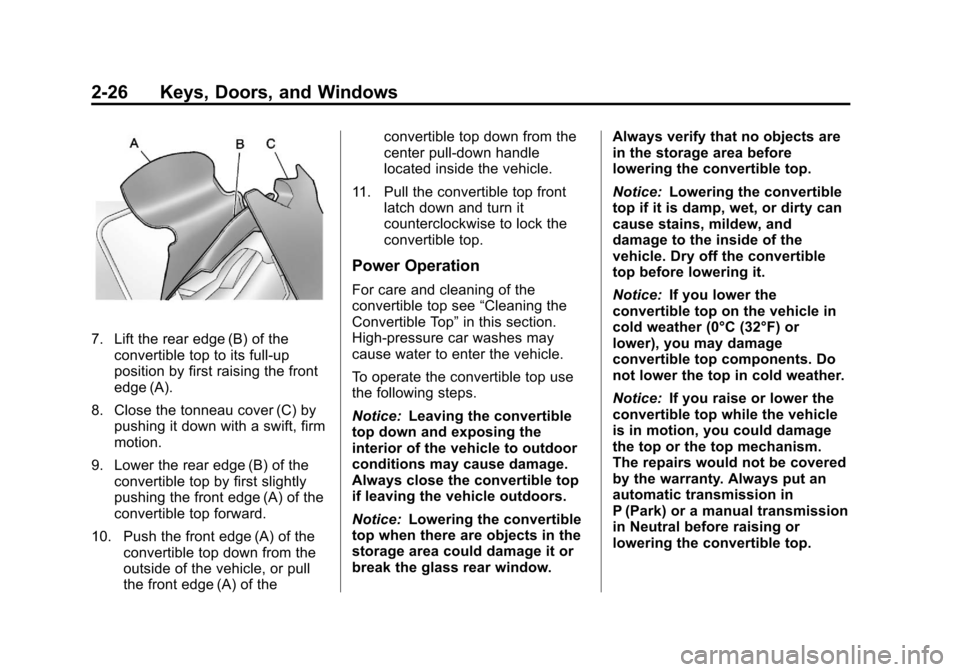
7. Lift the rear edge (B) of theconvertible top to its full-up
position by first raising the front
edge (A).
8. Close the tonneau cover (C) by pushing it down with a swift, firm
motion.
9. Lower the rear edge (B) of the convertible top by first slightly
pushing the front edge (A) of the
convertible top forward.
10. Push the front edge (A) of the convertible top down from the
outside of the vehicle, or pull
the front edge (A) of the convertible top down from the
center pull-down handle
located inside the vehicle.
11. Pull the convertible top front latch down and turn it
counterclockwise to lock the
convertible top.
Power Operation
For care and cleaning of the
convertible top see “Cleaning the
Convertible Top” in this section.
High-pressure car washes may
cause water to enter the vehicle.
To operate the convertible top use
the following steps.
Notice: Leaving the convertible
top down and exposing the
interior of the vehicle to outdoor
conditions may cause damage.
Always close the convertible top
if leaving the vehicle outdoors.
Notice: Lowering the convertible
top when there are objects in the
storage area could damage it or
break the glass rear window. Always verify that no objects are
in the storage area before
lowering the convertible top.
Notice:
Lowering the convertible
top if it is damp, wet, or dirty can
cause stains, mildew, and
damage to the inside of the
vehicle. Dry off the convertible
top before lowering it.
Notice: If you lower the
convertible top on the vehicle in
cold weather (0°C (32°F) or
lower), you may damage
convertible top components. Do
not lower the top in cold weather.
Notice: If you raise or lower the
convertible top while the vehicle
is in motion, you could damage
the top or the top mechanism.
The repairs would not be covered
by the warranty. Always put an
automatic transmission in
P (Park) or a manual transmission
in Neutral before raising or
lowering the convertible top.
Page 57 of 414
Black plate (27,1)Chevrolet Corvette Owner Manual - 2013 - crc2 - 11/8/12
Keys, Doors, and Windows 2-27
Lowering the Power
Convertible Top
1. Park on a level surface. Start theengine. Shift an automatic
transmission into P (Park) and
set the parking brake. Shift a
manual transmission into Neutral
and set the parking brake.
2. Make sure the trunk is closed, the rear trunk partition in the rear
storage area is in the fastened
upright position, and no objects
are forward of the divider. See
“Rear Trunk Partition” inRear
Storage on page 4‑1.
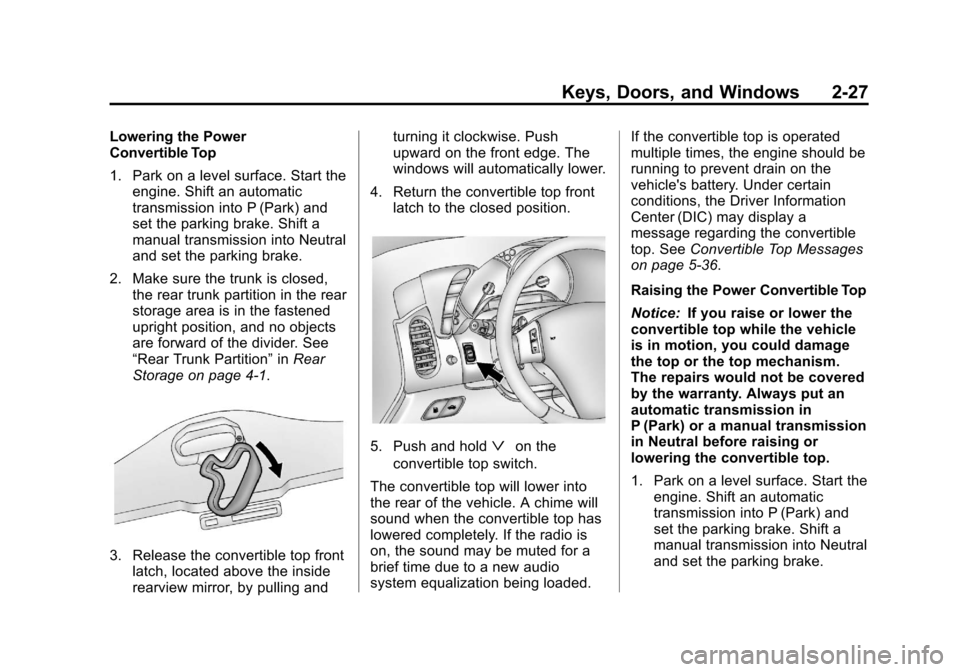
3. Release the convertible top front latch, located above the inside
rearview mirror, by pulling and turning it clockwise. Push
upward on the front edge. The
windows will automatically lower.
4. Return the convertible top front latch to the closed position.
5. Push and holdªon the
convertible top switch.
The convertible top will lower into
the rear of the vehicle. A chime will
sound when the convertible top has
lowered completely. If the radio is
on, the sound may be muted for a
brief time due to a new audio
system equalization being loaded. If the convertible top is operated
multiple times, the engine should be
running to prevent drain on the
vehicle's battery. Under certain
conditions, the Driver Information
Center (DIC) may display a
message regarding the convertible
top. See
Convertible Top Messages
on page 5‑36.
Raising the Power Convertible Top
Notice: If you raise or lower the
convertible top while the vehicle
is in motion, you could damage
the top or the top mechanism.
The repairs would not be covered
by the warranty. Always put an
automatic transmission in
P (Park) or a manual transmission
in Neutral before raising or
lowering the convertible top.
1. Park on a level surface. Start the engine. Shift an automatic
transmission into P (Park) and
set the parking brake. Shift a
manual transmission into Neutral
and set the parking brake.
Page 65 of 414

Black plate (5,1)Chevrolet Corvette Owner Manual - 2013 - crc2 - 11/8/12
Seats and Restraints 3-5
Storing Memory Positions
To save into memory:
1. Adjust the driver seat, bothoutside mirrors, and the
telescopic steering column (if
equipped).
2. Press and hold “1”until
two beeps sound.
3. Repeat for a second driver position using “2.”
To recall a memory position:
.On vehicles with an automatic
transmission, press and release
“1” or“2.”
If the vehicle is in P (Park), a
single beep sounds and the
memory position is recalled after
a brief delay.
If the vehicle is not in P (Park),
three beeps sound and the
memory position is not recalled.
.On vehicles with a manual
transmission, when the vehicle
is on, the parking brake must be
set to recall a memory position.
Press and release “1”or“2.”
A single beep sounds and the
memory position is recalled after
a brief delay.
If the vehicle is on and the
parking brake is not set,
three beeps sound and the
memory position is not recalled.
Memory Remote Recall (Automatic
Transmission)
This feature can recall the driver
seat, outside mirrors, and telescopic
steering column (if equipped) to
stored positions when entering the
vehicle.
To activate, enter the vehicle and
start the engine. The driver seat,
outside mirrors, and telescopic
steering column will move to the
memory position associated with the
transmitter used to unlock the
vehicle. This feature is turned on or off using
the vehicle personalization menu.
See
Vehicle Personalization on
page 5‑51.
To stop recall movement, press one
of the power seat controls, power
mirror or memory buttons, or the
telescopic steering column switch.
If something has blocked the driver
seat while recalling a memory
position, the recall may stop.
Remove the obstruction; then press
and hold the appropriate manual
control for the memory item that is
not recalling for two seconds. Try
recalling the memory position again
by pressing the appropriate memory
button. If the memory position is still
not recalling, see your dealer for
service.
Easy Exit Driver Seat
This feature can move the seat
rearward and the telescopic steering
column (if equipped) out of the way
to allow extra room to exit the
vehicle.
Page 66 of 414
Black plate (6,1)Chevrolet Corvette Owner Manual - 2013 - crc2 - 11/8/12
3-6 Seats and Restraints
B(Easy Exit Driver Seat):Press
to save and recall the easy exit seat
position.
To save into memory:
1. Recall the desired driving position by pressing “1.”
2. Adjust the seat and the telescopic steering column to the
desired exit position.
3. Press and hold
Buntil
two beeps sound.
4. Repeat for a second driver position using “2.”
To recall, press and release
B.
The vehicle must be in P (Park) for
an automatic transmission or the
parking brake must be set for a
manual transmission. A single beep
sounds. The seat and telescopic
steering column will move to the
position previously stored for the
identified driver. If this feature is programmed on in
the vehicle personalization menu,
automatic recall occurs when one of
the following conditions is met:
.The vehicle is turned off, in
Retained Accessory
Power (RAP) or accessory
mode, and the driver door is
opened.
.The vehicle is turned off, or in
RAP, and the unlock button on
the RKE transmitter is pressed.
If something has blocked the driver
seat while recalling the exit position,
the recall may stop. Remove the
obstruction; then press and hold the
power seat control rearward for
two seconds. Try recalling the exit
position again. If the exit position is
still not recalling, see your dealer for
service.
See Vehicle Personalization on
page 5‑51.
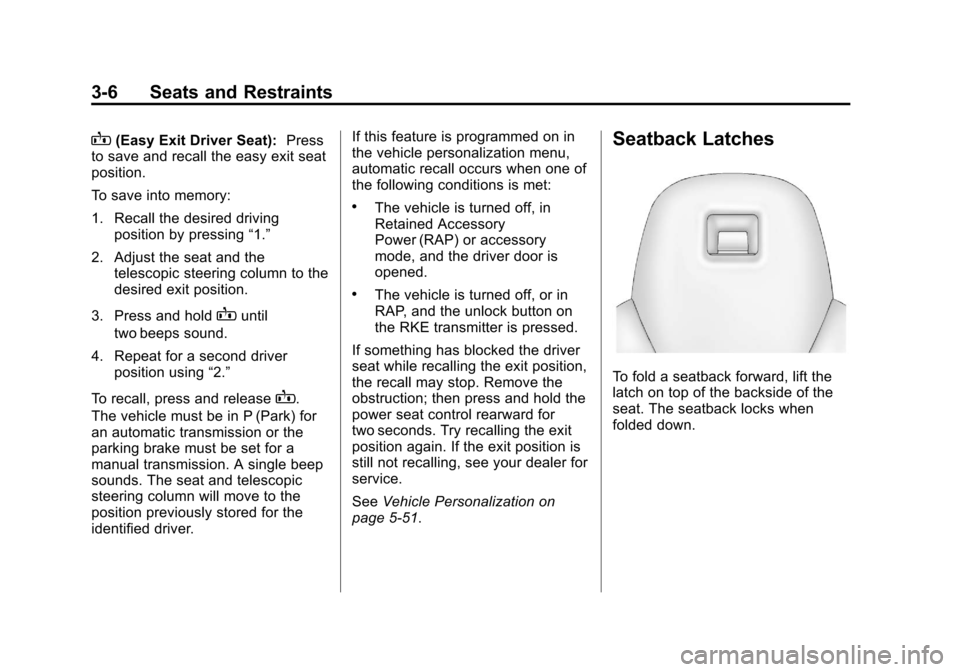
Seatback Latches
To fold a seatback forward, lift the
latch on top of the backside of the
seat. The seatback locks when
folded down.
Page 105 of 414
Black plate (1,1)Chevrolet Corvette Owner Manual - 2013 - crc2 - 11/8/12
Instruments and Controls 5-1
Instruments and
Controls
Controls
Steering Wheel Adjustment . . . 5-2
Steering Wheel Controls . . . . . . 5-3
Horn . . . . . . . . . . . . . . . . . . . . . . . . . . 5-4
Windshield Wiper/Washer . . . . . 5-4
Compass . . . . . . . . . . . . . . . . . . . . . 5-5
Clock . . . . . . . . . . . . . . . . . . . . . . . . . 5-6
Power Outlets . . . . . . . . . . . . . . . . . 5-6
Cigarette Lighter . . . . . . . . . . . . . . 5-7
Ashtrays . . . . . . . . . . . . . . . . . . . . . . 5-7
Warning Lights, Gauges, and
Indicators
Warning Lights, Gauges, andIndicators . . . . . . . . . . . . . . . . . . . . 5-8
Instrument Cluster . . . . . . . . . . . . 5-9
Speedometer . . . . . . . . . . . . . . . . 5-12
Odometer . . . . . . . . . . . . . . . . . . . . 5-12
Tachometer . . . . . . . . . . . . . . . . . . 5-12
Fuel Gauge . . . . . . . . . . . . . . . . . . 5-12
Boost Gauge (ZR1) . . . . . . . . . . 5-13
Engine Oil Pressure Gauge . . . . . . . . . . . . . . . . . . . . . . 5-14 Engine Coolant Temperature
Gauge . . . . . . . . . . . . . . . . . . . . . . 5-15
Voltmeter Gauge . . . . . . . . . . . . . 5-16
Safety Belt Reminders . . . . . . . 5-16
Airbag Readiness Light . . . . . . 5-16
Passenger Airbag Status Indicator . . . . . . . . . . . . . . . . . . . . 5-17
Malfunction Indicator Lamp . . . . . . . . . . . . . 5-18
Brake System Warning Light . . . . . . . . . . . . . . . . . . . . . . . 5-20
Antilock Brake System (ABS) Warning Light . . . . . . . . . . . . . . 5-21
One-to-Four Shift Light (Manual Transmission) . . . . . 5-21
Traction Off Light . . . . . . . . . . . . 5-22
StabiliTrak
®OFF Light . . . . . . . 5-22
Active Handling System Light . . . . . . . . . . . . . . . . . . . . . . . 5-23
Tire Pressure Light . . . . . . . . . . 5-23
Security Light . . . . . . . . . . . . . . . . 5-24
High-Beam On Light . . . . . . . . . 5-24
Front Fog Lamp Light . . . . . . . . 5-24
Lamps On Reminder . . . . . . . . . 5-25
Information Displays
Driver Information Center (DIC) . . . . . . . . . . . . . . . 5-25
Head-Up Display (HUD) . . . . . 5-30
Vehicle Messages
Vehicle Messages . . . . . . . . . . . 5-34
Battery Voltage and Charging Messages . . . . . . . . . . . . . . . . . . 5-34
Brake System Messages . . . . 5-35
Convertible Top Messages . . . 5-36
Cruise Control Messages . . . . 5-37
Door Ajar Messages . . . . . . . . . 5-37
Engine Cooling System Messages . . . . . . . . . . . . . . . . . . 5-38
Engine Oil Messages . . . . . . . . 5-39
Engine Power Messages . . . . 5-39
Fuel System Messages . . . . . . 5-40
Key and Lock Messages . . . . . 5-40
Lamp Messages . . . . . . . . . . . . . 5-42
Ride Control System Messages . . . . . . . . . . . . . . . . . . 5-42
Safety Belt Messages . . . . . . . 5-46
Service Vehicle Messages . . . 5-47
Starting the Vehicle Messages . . . . . . . . . . . . . . . . . . 5-47
Tire Messages . . . . . . . . . . . . . . . 5-48
Transmission Messages . . . . . 5-50
Vehicle Reminder Messages . . . . . . . . . . . . . . . . . . 5-51
Washer Fluid Messages . . . . . 5-51
Vehicle Personalization
Vehicle Personalization . . . . . . 5-51
Page 122 of 414

Black plate (18,1)Chevrolet Corvette Owner Manual - 2013 - crc2 - 11/8/12
5-18 Instruments and Controls
{WARNING
If the airbag readiness light ever
comes on and stays on, it means
that something may be wrong
with the airbag system. To help
avoid injury to yourself or others,
have the vehicle serviced right
away. SeeAirbag Readiness
Light on page 5‑16 for more
information, including important
safety information.
Malfunction
Indicator Lamp
A computer system called OBD II
(On-Board Diagnostics-Second
Generation) monitors the operation
of the vehicle to ensure emissions
are at acceptable levels, helping to
maintain a clean environment. The
malfunction indicator lamp comes
on when the vehicle is placed in
Service Only Mode, as a check to
show it is working. If it does not, have the vehicle serviced by your
dealer. See
Ignition Positions on
page 9‑18 for more information.
If the malfunction indicator lamp
comes on while the engine is
running, this indicates that the OBD
II system has detected a problem
and diagnosis and service might be
required.
Malfunctions often are indicated by
the system before any problem is
apparent. Being aware of the light
can prevent more serious damage
to the vehicle. This system also
assists the service technician in
correctly diagnosing any
malfunction. Notice:
If the vehicle is
continually driven with this light
on, the emission controls might
not work as well, the vehicle fuel
economy might not be as good,
and the engine might not run as
smoothly. This could lead to
costly repairs that might not be
covered by the vehicle warranty.
Notice: Modifications made to the
engine, transmission, exhaust,
intake, or fuel system of the
vehicle or the replacement of the
original tires with other than
those of the same Tire
Performance Criteria (TPC) can
affect the vehicle's emission
controls and can cause this light
to come on. Modifications to
these systems could lead to
costly repairs not covered by the
vehicle warranty. This could also
result in a failure to pass a
required Emission Inspection/
Maintenance test. See
Accessories and Modifications on
page 10‑3.
Page 125 of 414

Black plate (21,1)Chevrolet Corvette Owner Manual - 2013 - crc2 - 11/8/12
Instruments and Controls 5-21
If this warning light stays on after
the engine is started, the parking
brake may still be set or there could
be a brake problem. Refer to
Parking Brake on page 9‑33to see
if it is set. If the parking brake is not
set, have the brake system
inspected right away.
If the light comes on while driving
and a CHECK BRAKE FLUID
message shows on the DIC, pull off
the road and stop carefully. The
pedal may be harder to push or the
pedal may go closer to the floor.
It may take longer to stop. If the
light is still on, have the vehicle
towed for service. See Towing the
Vehicle on page 10‑79 andBrake
System Messages on page 5‑35 for
more information.Antilock Brake System
(ABS) Warning Light
For vehicles with the Antilock Brake
System (ABS), this light comes on
briefly when the engine is started.
If it does not, have the vehicle
serviced by your dealer. If the
system is working normally the
indicator light then goes off.
If the ABS light stays on, turn the
ignition off. If the light comes on
while driving, stop as soon as it is
safely possible and turn the ignition
off. Then start the engine again to
reset the system. If the ABS light
stays on, or comes on again while
driving, the vehicle needs service.
If the regular brake system warning
light is not on, the vehicle still has
brakes, but not antilock brakes. If the regular brake system warning
light is also on, the vehicle does not
have antilock brakes and there is a
problem with the regular brakes.
See
Brake System Warning Light on
page 5‑20.
One-to-Four Shift Light
(Manual Transmission)
When this light comes on, the
vehicle can only be shifted from
1 (First) to 4 (Fourth) instead of
1 (First) to 2 (Second).
The shift must be completed into
4 (Fourth) to turn off this feature.
This helps the vehicle get the best
possible fuel economy.
After shifting to 4 (Fourth), the
vehicle can be downshifted to a
lower gear.