2013 CHEVROLET CORVETTE transmission
[x] Cancel search: transmissionPage 34 of 414
Black plate (4,1)Chevrolet Corvette Owner Manual - 2013 - crc2 - 11/8/12
2-4 Keys, Doors, and Windows
K(Unlock):Press once to unlock
only the driver door. Press
Ktwice
within five seconds to unlock both
doors. The interior lamps may
come on.
Pressing
Kalso recalls the memory
settings. See Memory Seats on
page 3‑4 for more information.
}(Hatch/Trunk): Press and
hold for about one second to unlock
the hatch/trunk. If the engine is
running, the shift lever must be in
P (Park) for an automatic
transmission. For a manual
transmission, the shift lever must be
in N (Neutral) with the parking
brake set.
L(Panic): Press to sound the
horn. Press any other button on the
RKE transmitter to stop it.
Programming Transmitters to
the Vehicle
Only RKE transmitters programmed
to this vehicle will work. If a
transmitter is lost or stolen, a replacement can be purchased and
programmed through your dealer.
The vehicle can be reprogrammed
so that lost or stolen transmitters no
longer work. Each vehicle can have
up to four transmitters
programmed to it.
Programming with a Recognized
Transmitter
A new transmitter can be
programmed to the vehicle when
there is one recognized transmitter.
For vehicles sold in Canada, two
recognized transmitters are required
to program a new transmitter.
1. The vehicle must be off.
2. Both the recognized and new
transmitters must be with you.
3. Insert the vehicle key into the key cylinder located above the
license plate.
4. Open the hatch/trunk.
5. Turn the key five times within five seconds. 6. The DIC displays READY FOR
FOB #2, 3 or 4.
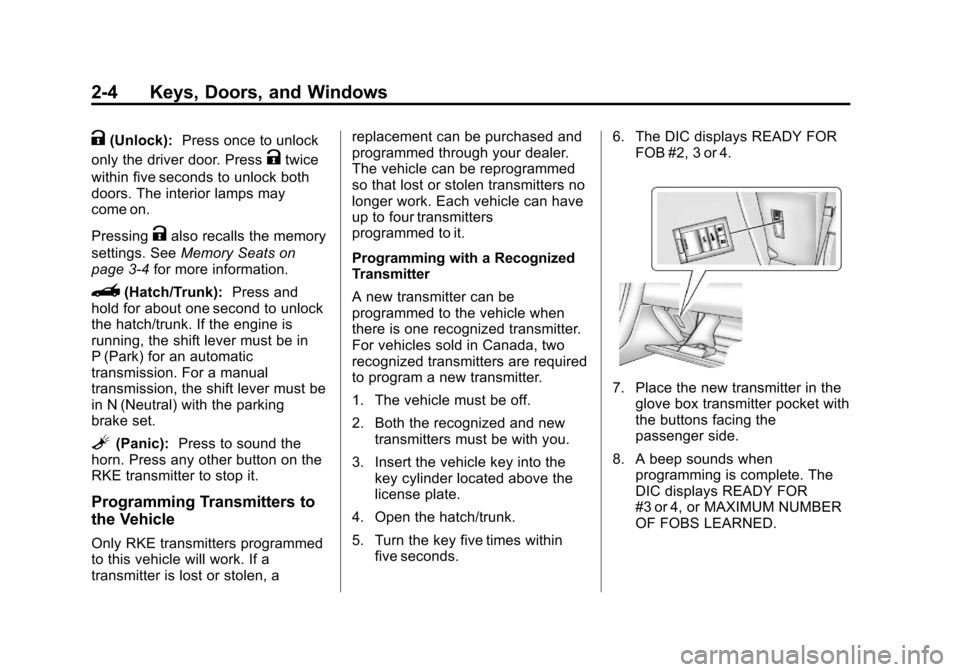
7. Place the new transmitter in theglove box transmitter pocket with
the buttons facing the
passenger side.
8. A beep sounds when programming is complete. The
DIC displays READY FOR
#3 or 4, or MAXIMUM NUMBER
OF FOBS LEARNED.
Page 36 of 414
Black plate (6,1)Chevrolet Corvette Owner Manual - 2013 - crc2 - 11/8/12
2-6 Keys, Doors, and Windows
13. A beep sounds onceprogramming in complete. The
DIC displays READY
FOR FOB #2.
To program additional
transmitters, take transmitter 1
out of the transmitter pocket
and place transmitter 2 in the
pocket. Up to four transmitters
can be programmed. The DIC
then displays MAXIMUM
NUMBER OF FOBS LEARNED
and exits the
programming mode.
Press Acc. on the ignition
switch to complete the process.
14. Press Acc. on the ignition switch if programming is
complete.
15. Press
Kon each newly
programmed transmitter to
complete the process.
Starting the Vehicle with a Low
Transmitter Battery
If the transmitter battery is weak, the
DIC may display NO FOBS
DETECTED when trying to start the
vehicle. To start the vehicle, place
the transmitter in the glove box
transmitter pocket with the buttons
facing the passenger side. Then,
with the vehicle in P (Park) for an
automatic transmission, press the
brake pedal and
/. If the vehicle
has a manual transmission, press
the clutch and
/. Replace the
transmitter battery as soon as
possible. Change the transmitter
battery if the DIC displays FOB
BATTERY LOW.
Battery Replacement
Notice: When replacing the
battery, do not touch any of the
circuitry on the transmitter. Static
from your body could damage the
transmitter.
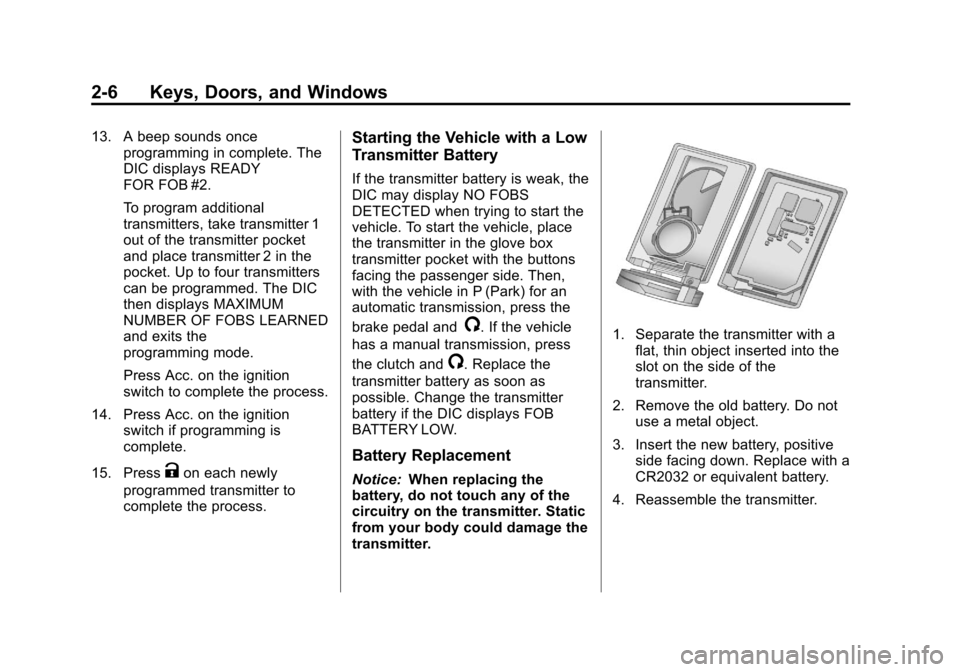
1. Separate the transmitter with a
flat, thin object inserted into the
slot on the side of the
transmitter.
2. Remove the old battery. Do not use a metal object.
3. Insert the new battery, positive side facing down. Replace with a
CR2032 or equivalent battery.
4. Reassemble the transmitter.
Page 39 of 414
Black plate (9,1)Chevrolet Corvette Owner Manual - 2013 - crc2 - 11/8/12
Keys, Doors, and Windows 2-9
Q(Lock):Press to lock the doors.
When pressed, a beep sounds.
If the door is closed when pressed,
the indicator light comes on for a
few seconds, then turns off. If the
door is open when pressed, the
indicator light stays on.
Automatic Door Locks
The vehicle is programmed so that
when the doors are closed, the
ignition is on, and the shift lever is
moved out of P (Park) for automatic
transmissions, or when vehicle
speed becomes faster than 13 km/h
(8 mph) for manual transmissions,
both doors will lock.
Use the power door unlock switch to
unlock the door when the vehicle is
not in P (Park). When the door is
closed again, the doors will lock
either when your foot is removed
from the brake or the vehicle speed
becomes faster than
13 km/h (8 mph).
Automatic Door Unlock
The vehicle is programmed so that
when the shift lever is moved into
P (Park) for automatic transmission
vehicles or when the ignition is
turned off or is in Retained
Accessory Power (RAP) for manual
transmission vehicles, both doors
will unlock.
With the vehicle stopped and the
engine running, door unlocking can
be programmed through the Driver
Information Center (DIC). This
allows the driver to choose various
unlock settings. For programming
information, see Vehicle
Personalization on page 5‑51.
Lockout Protection
The vehicle can be programmed to
sound the horn three times and
unlock the driver door when both
doors are closed and there is a
Remote Keyless Entry (RKE)
transmitter inside the vehicle. When
the driver door is opened, a
reminder chime will sound. The
vehicle will remain locked only when
at least one transmitter has been
removed from the vehicle and both
doors are closed. See Vehicle
Personalization on page 5‑51.
Page 40 of 414
Black plate (10,1)Chevrolet Corvette Owner Manual - 2013 - crc2 - 11/8/12
2-10 Keys, Doors, and Windows
Doors
Hatch
{WARNING
Exhaust gases can enter the
vehicle if it is driven with the
liftgate, trunk/hatch open, or with
any objects that pass through the
seal between the body and the
trunk/hatch or liftgate. Engine
exhaust contains carbon
monoxide (CO) which cannot be
seen or smelled. It can cause
unconsciousness and even death.
If the vehicle must be driven with
the liftgate or trunk/hatch open:
.Close all of the windows.
.Fully open the air outlets on
or under the instrument
panel.(Continued)
WARNING (Continued)
.Adjust the climate control
system to a setting that
brings in only outside air and
set the fan speed to the
highest setting. See “Climate
Control Systems” in the
Index.
.If the vehicle is equipped with
a power liftgate, disable the
power liftgate function.
For more information about
carbon monoxide, see Engine
Exhaust on page 9‑24.
Hatch/Trunk Release
The vehicle must be in P (Park) with
an automatic transmission and
Neutral with a manual transmission.
For manual transmission vehicles,
the parking brake must be set when
the engine is running for the hatch/
trunk release to operate. See
Parking Brake on page 9‑33. To release the hatch/trunk:
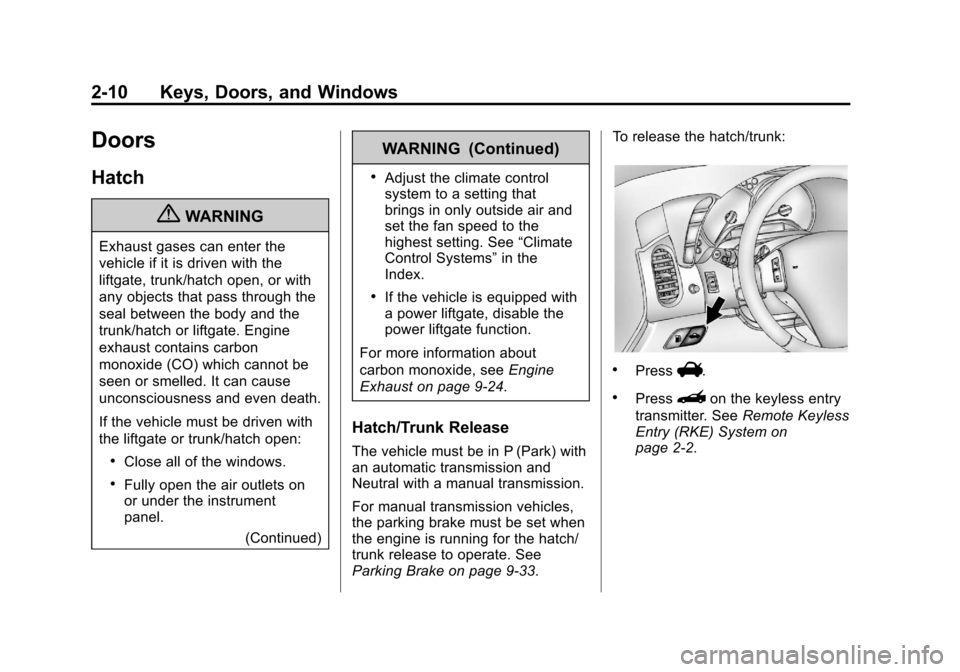
.PressV.
.Press}on the keyless entry
transmitter. See Remote Keyless
Entry (RKE) System on
page 2‑2.
Page 48 of 414
Black plate (18,1)Chevrolet Corvette Owner Manual - 2013 - crc2 - 11/8/12
2-18 Keys, Doors, and Windows
Roof
Roof Panel
On vehicles with a removable roof
panel, follow the procedures when
removing or installing it.
Removing the Roof Panel
{WARNING
Do not try to remove a roof panel
while the vehicle is moving.
Trying to remove the roof panel
while the vehicle is moving could
cause an accident. The panel
could fall into the vehicle and
cause you to lose control, or it
could fly off and strike another
vehicle. You or others could be
injured. Remove the roof panel
only when the vehicle is parked.Until you are sure you can remove
the panel alone, have someone
help you.
Notice:
If you drop or rest a roof
panel on its edges, the roof panel,
paint, and/or weatherstripping
may be damaged. Always place
the roof panel in the stowage
receivers after removing it from
the vehicle.
1. Park on a level surface and set the parking brake. Shift an
automatic transmission into
P (Park). Shift a manual
transmission into Neutral.
2. Make sure the ignition is off.
3. Lower both sun visors.
4. Open the rear hatch and remove any items that may interfere with
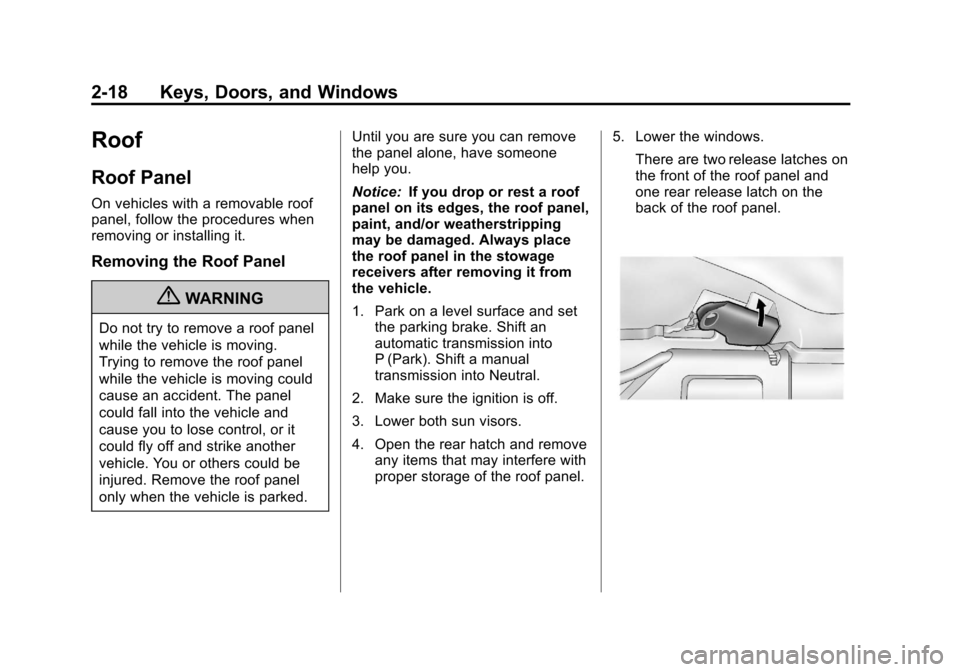
proper storage of the roof panel. 5. Lower the windows.
There are two release latches on
the front of the roof panel and
one rear release latch on the
back of the roof panel.
Page 51 of 414
Black plate (21,1)Chevrolet Corvette Owner Manual - 2013 - crc2 - 11/8/12
Keys, Doors, and Windows 2-21
In most cases, it makes it easier if
two people install the roof panel.
1. Park on a level surface and setthe parking brake. Shift an
automatic transmission into
P (Park). Shift a manual
transmission into Neutral.
2. Check that the front release latches and the rear release
latch on the vehicle's roof
opening are in their opened
positions before attempting to
install the roof panel.
3. To remove the roof panel from the rear storage area of the
vehicle, pull up on the rear edge
and remove it from the
storage area.
4. Carefully place the roof panel over the top of the vehicle.
5. Position the rear edge of the roof panel to the weatherstrip on the
back of the roof opening. Then
align and fit the pins at the rear
of the roof panel inside the
openings in the rear overhead weatherstrip. Gently lower the
front edge of the roof panel to
the front of the roof opening.
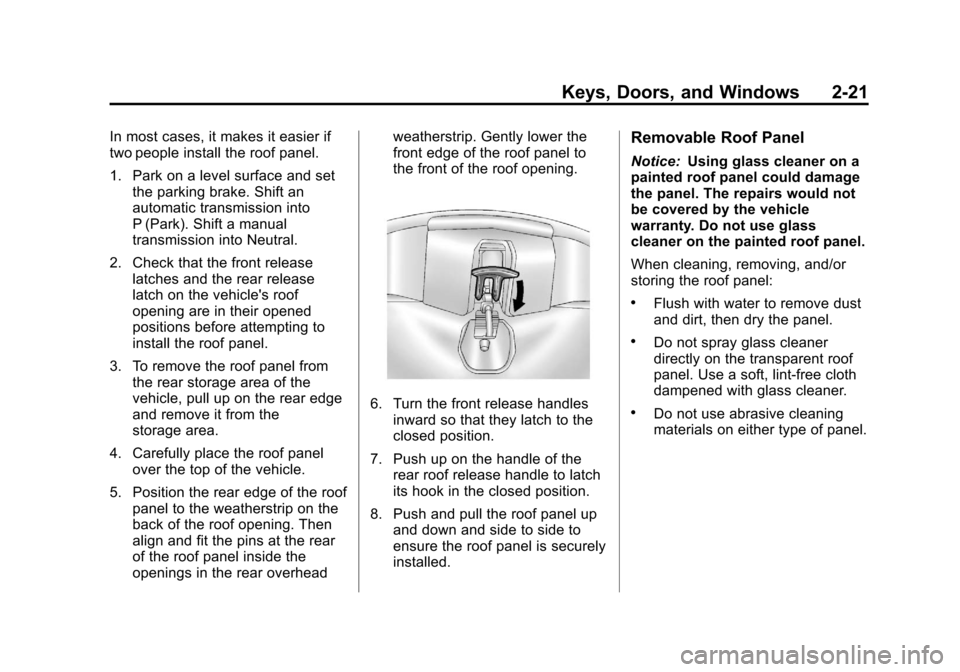
6. Turn the front release handles
inward so that they latch to the
closed position.
7. Push up on the handle of the rear roof release handle to latch
its hook in the closed position.
8. Push and pull the roof panel up and down and side to side to
ensure the roof panel is securely
installed.
Removable Roof Panel
Notice: Using glass cleaner on a
painted roof panel could damage
the panel. The repairs would not
be covered by the vehicle
warranty. Do not use glass
cleaner on the painted roof panel.
When cleaning, removing, and/or
storing the roof panel:
.Flush with water to remove dust
and dirt, then dry the panel.
.Do not spray glass cleaner
directly on the transparent roof
panel. Use a soft, lint-free cloth
dampened with glass cleaner.
.Do not use abrasive cleaning
materials on either type of panel.
Page 52 of 414
Black plate (22,1)Chevrolet Corvette Owner Manual - 2013 - crc2 - 11/8/12
2-22 Keys, Doors, and Windows
Convertible Top
After a power reconnect such as
battery replacement, the power
windows need to be initialized for
the convertible top to work. See
“Power Window Initialize”inPower
Windows on page 2‑17.
Manual Operation
For care and cleaning of the
convertible top, see “Cleaning the
Convertible Top” in this section.
High-pressure car washes may
cause water to enter the vehicle.
If the vehicle has this feature, the
following procedures explain the
proper operation of the manual
convertible top. The parts of the manual convertible
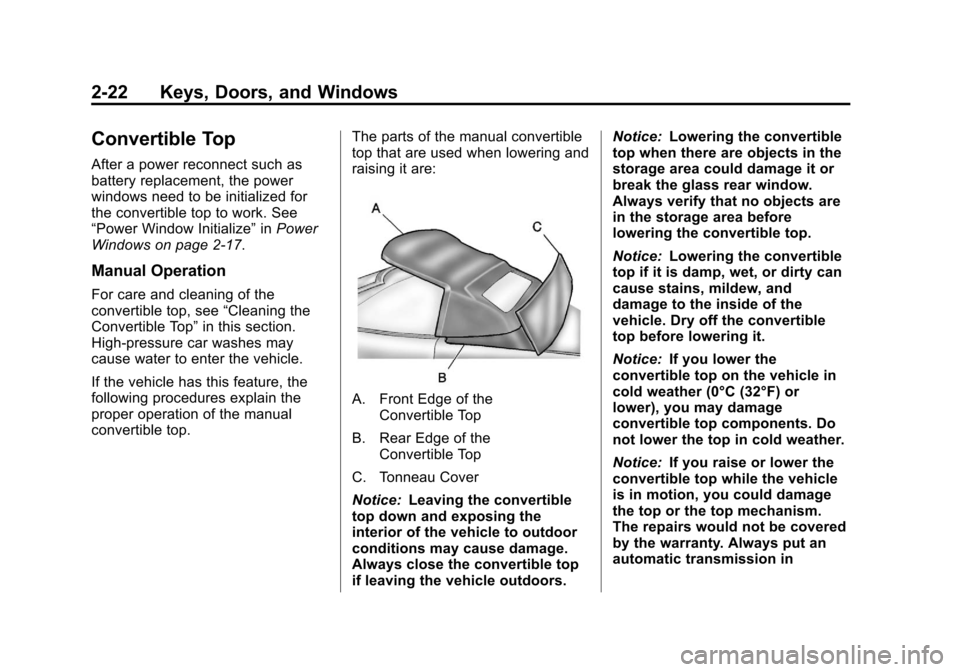
top that are used when lowering and
raising it are:
A. Front Edge of the
Convertible Top
B. Rear Edge of the Convertible Top
C. Tonneau Cover
Notice: Leaving the convertible
top down and exposing the
interior of the vehicle to outdoor
conditions may cause damage.
Always close the convertible top
if leaving the vehicle outdoors. Notice:
Lowering the convertible
top when there are objects in the
storage area could damage it or
break the glass rear window.
Always verify that no objects are
in the storage area before
lowering the convertible top.
Notice: Lowering the convertible
top if it is damp, wet, or dirty can
cause stains, mildew, and
damage to the inside of the
vehicle. Dry off the convertible
top before lowering it.
Notice: If you lower the
convertible top on the vehicle in
cold weather (0°C (32°F) or
lower), you may damage
convertible top components. Do
not lower the top in cold weather.
Notice: If you raise or lower the
convertible top while the vehicle
is in motion, you could damage
the top or the top mechanism.
The repairs would not be covered
by the warranty. Always put an
automatic transmission in
Page 53 of 414
Black plate (23,1)Chevrolet Corvette Owner Manual - 2013 - crc2 - 11/8/12
Keys, Doors, and Windows 2-23
P (Park) or a manual transmission
in Neutral before raising or
lowering the convertible top.
Lowering the Manual
Convertible Top
1. Park on a level surface. Shift anautomatic transmission into
P (Park) and set the parking
brake. Shift a manual
transmission into Neutral and set
the parking brake.
2. Make sure the ignition is off.
3. Make sure the trunk is closed.
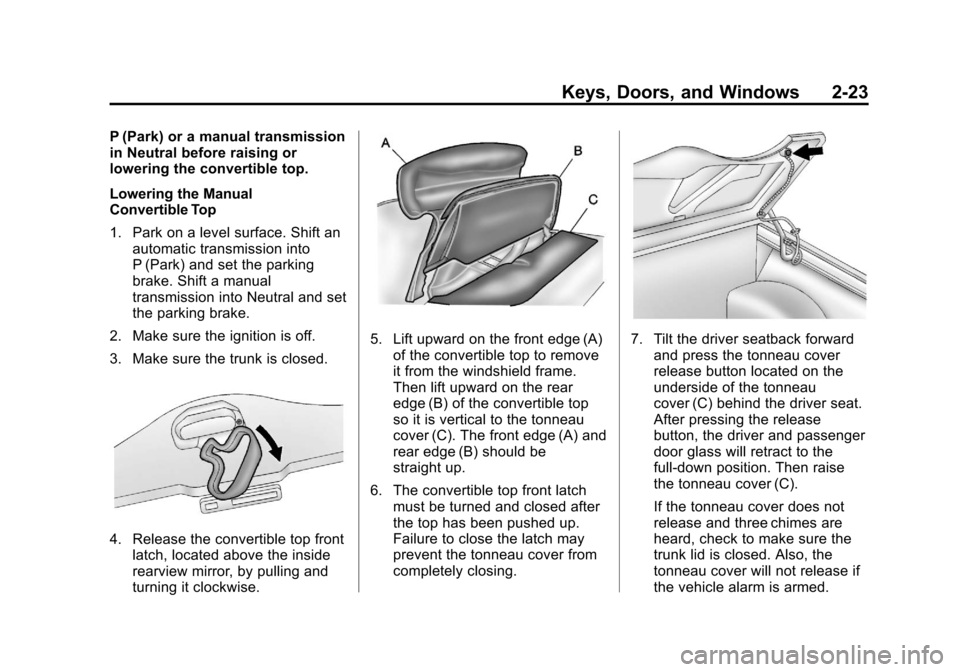
4. Release the convertible top front latch, located above the inside
rearview mirror, by pulling and
turning it clockwise.
5. Lift upward on the front edge (A)of the convertible top to remove
it from the windshield frame.
Then lift upward on the rear
edge (B) of the convertible top
so it is vertical to the tonneau
cover (C). The front edge (A) and
rear edge (B) should be
straight up.
6. The convertible top front latch must be turned and closed after
the top has been pushed up.
Failure to close the latch may
prevent the tonneau cover from
completely closing.7. Tilt the driver seatback forwardand press the tonneau cover
release button located on the
underside of the tonneau
cover (C) behind the driver seat.
After pressing the release
button, the driver and passenger
door glass will retract to the
full-down position. Then raise
the tonneau cover (C).
If the tonneau cover does not
release and three chimes are
heard, check to make sure the
trunk lid is closed. Also, the
tonneau cover will not release if
the vehicle alarm is armed.