Page 297 of 374
Black plate (63,1)Chevrolet Captiva Sport Owner Manual - 2013 - crc - 11/12/12
Vehicle Care 10-63To store the flat or spare tire and
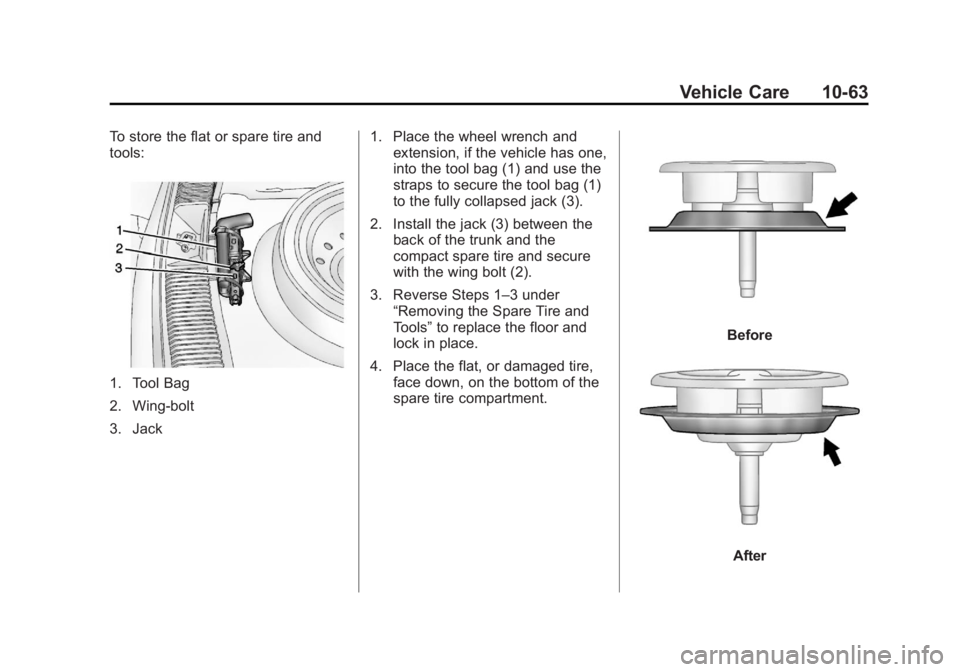
tools:
1. Tool Bag
2. Wing-bolt
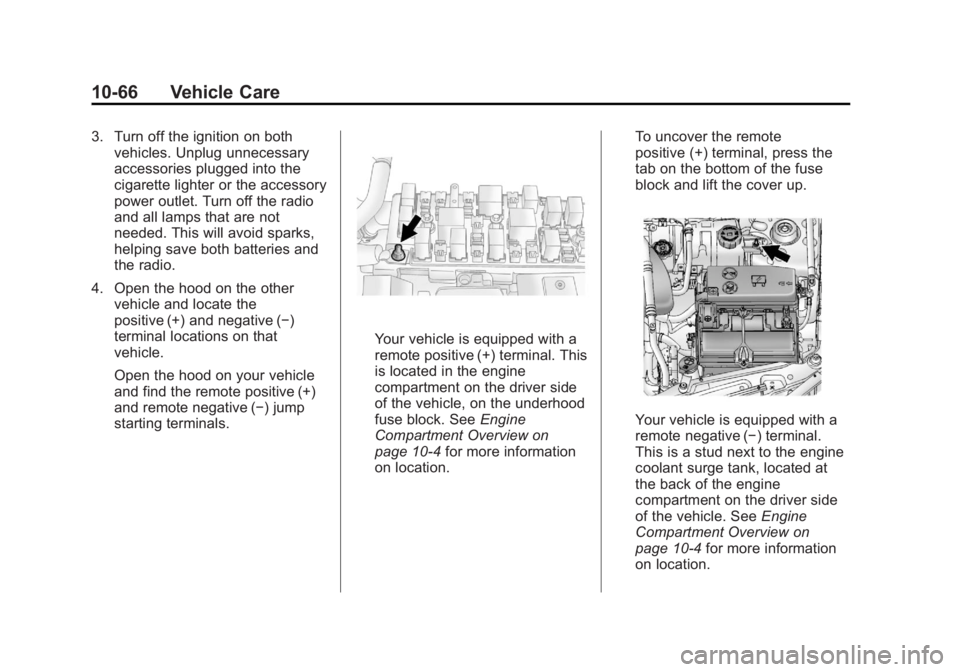
3. Jack 1. Place the wheel wrench and
extension, if the vehicle has one,
into the tool bag (1) and use the
straps to secure the tool bag (1)
to the fully collapsed jack (3).
2. Install the jack (3) between the
back of the trunk and the
compact spare tire and secure
with the wing bolt (2).
3. Reverse Steps 1 – 3 under
“ Removing the Spare Tire and
Tools ” to replace the floor and
lock in place.
4. Place the flat, or damaged tire,
face down, on the bottom of the
spare tire compartment. Before
After
Page 298 of 374

Black plate (64,1)Chevrolet Captiva Sport Owner Manual - 2013 - crc - 11/12/12
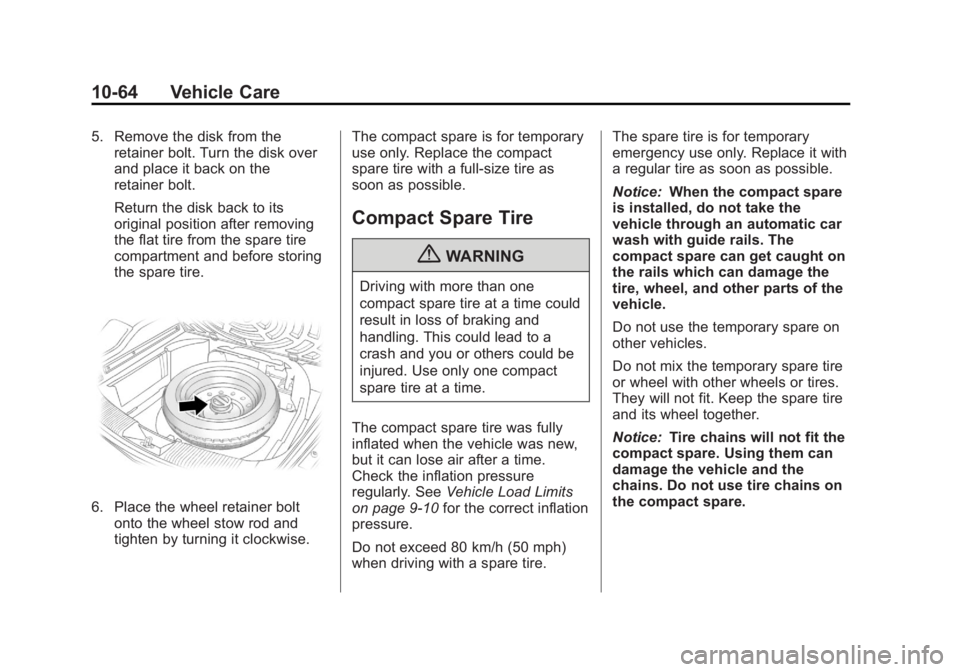
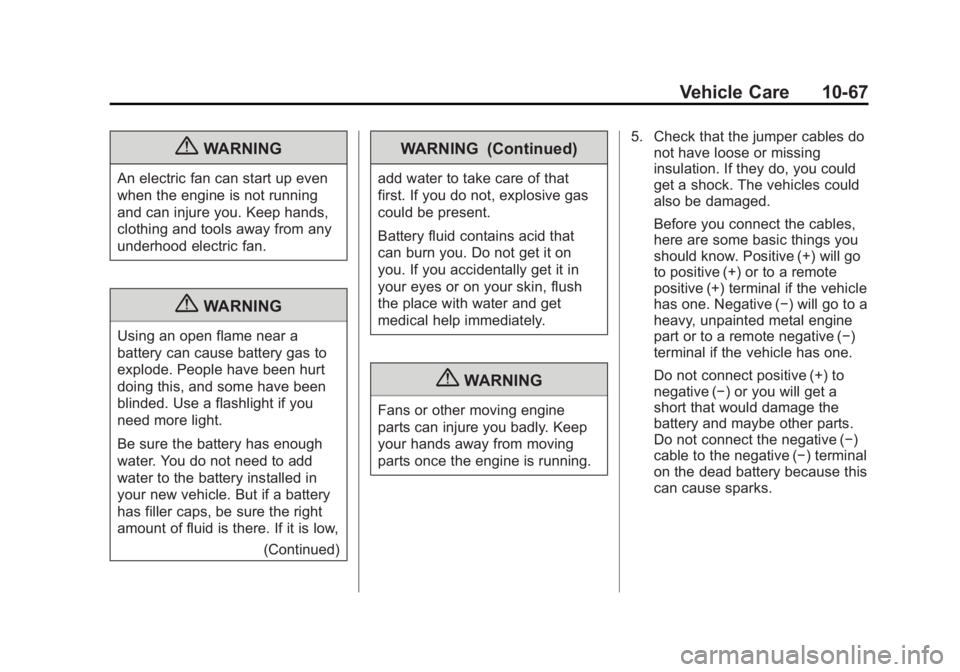
10-64 Vehicle Care 5. Remove the disk from the
retainer bolt. Turn the disk over
and place it back on the
retainer bolt.
Return the disk back to its
original position after removing
the flat tire from the spare tire
compartment and before storing
the spare tire.
6. Place the wheel retainer bolt
onto the wheel stow rod and
tighten by turning it clockwise. The compact spare is for temporary
use only. Replace the compact
spare tire with a full-size tire as
soon as possible.
Compact Spare Tire
{ WARNINGDriving with more than one
compact spare tire at a time could
result in loss of braking and
handling. This could lead to a
crash and you or others could be
injured. Use only one compact
spare tire at a time.
The compact spare tire was fully
inflated when the vehicle was new,
but it can lose air after a time.
Check the inflation pressure
regularly. See Vehicle Load Limits
on page 9 ‑ 10 for the correct inflation
pressure.
Do not exceed 80 km/h (50 mph)
when driving with a spare tire. The spare tire is for temporary
emergency use only. Replace it with
a regular tire as soon as possible.
Notice: When the compact spare
is installed, do not take the
vehicle through an automatic car
wash with guide rails. The
compact spare can get caught on
the rails which can damage the
tire, wheel, and other parts of the
vehicle.
Do not use the temporary spare on
other vehicles.
Do not mix the temporary spare tire
or wheel with other wheels or tires.
They will not fit. Keep the spare tire
and its wheel together.
Notice: Tire chains will not fit the
compact spare. Using them can
damage the vehicle and the
chains. Do not use tire chains on
the compact spare.
Page 299 of 374

Black plate (65,1)Chevrolet Captiva Sport Owner Manual - 2013 - crc - 11/12/12
Vehicle Care 10-65
Jump Starting For more information about the
vehicle battery, see Battery on
page 10 ‑ 23 .
If the vehicle battery has run down,
you may want to use another
vehicle and some jumper cables to
start your vehicle. Be sure to use
the following steps to do it safely.
{ WARNINGBatteries can hurt you. They can
be dangerous because: .
They contain acid that can
burn you. .
They contain gas that can
explode or ignite. .
They contain enough
electricity to burn you.
If you do not follow these steps
exactly, some or all of these
things can hurt you. Notice: Ignoring these steps
could result in costly damage to
the vehicle that would not be
covered by the warranty.
Trying to start the vehicle by
pushing or pulling it will not
work, and it could damage the
vehicle.
1. Check the other vehicle. It must
have a 12-volt battery with a
negative ground system.
Notice: Only use a vehicle that
has a 12-volt system with a
negative ground for jump
starting. If the other vehicle does
not have a 12-volt system with a
negative ground, both vehicles
can be damaged. 2. Get the vehicles close enough
so the jumper cables can reach,
but be sure the vehicles are not
touching each other. If they are,
it could cause a ground
connection you do not want. You
would not be able to start your
vehicle, and the bad grounding
could damage the electrical
systems.
To avoid the possibility of the
vehicles rolling, set the parking
brake firmly on both vehicles
involved in the jump start
procedure. Put the transmission
in P (Park) before setting the
parking brake.
Notice: If any accessories are left
on or plugged in during the jump
starting procedure, they could be
damaged. The repairs would not
be covered by the vehicle
warranty. Whenever possible,
turn off or unplug all accessories
on either vehicle when jump
starting the vehicle.
Page 300 of 374

Black plate (66,1)Chevrolet Captiva Sport Owner Manual - 2013 - crc - 11/12/12
10-66 Vehicle Care 3. Turn off the ignition on both
vehicles. Unplug unnecessary
accessories plugged into the
cigarette lighter or the accessory
power outlet. Turn off the radio
and all lamps that are not
needed. This will avoid sparks,
helping save both batteries and
the radio.
4. Open the hood on the other
vehicle and locate the
positive (+) and negative ( − )
terminal locations on that
vehicle.
Open the hood on your vehicle
and find the remote positive (+)
and remote negative ( − ) jump
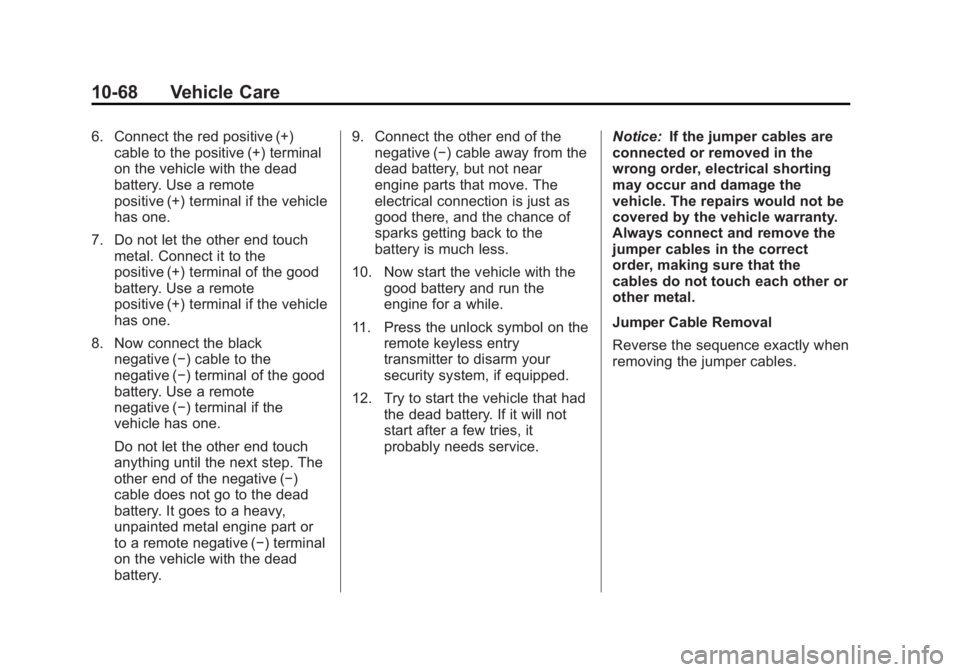
starting terminals. Your vehicle is equipped with a
remote positive (+) terminal. This
is located in the engine
compartment on the driver side
of the vehicle, on the underhood
fuse block. See Engine
Compartment Overview on
page 10 ‑ 4 for more information
on location. To uncover the remote
positive (+) terminal, press the
tab on the bottom of the fuse
block and lift the cover up.
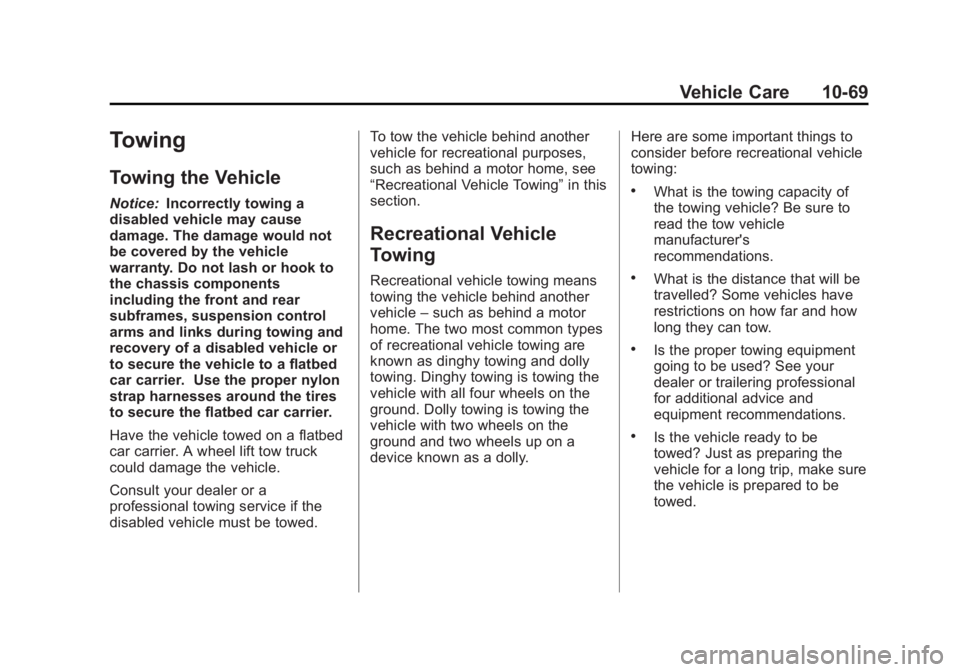
Your vehicle is equipped with a
remote negative ( − ) terminal.
This is a stud next to the engine
coolant surge tank, located at
the back of the engine
compartment on the driver side
of the vehicle. See Engine
Compartment Overview on
page 10 ‑ 4 for more information
on location.
Page 301 of 374

Black plate (67,1)Chevrolet Captiva Sport Owner Manual - 2013 - crc - 11/12/12
Vehicle Care 10-67
{ WARNINGAn electric fan can start up even
when the engine is not running
and can injure you. Keep hands,
clothing and tools away from any
underhood electric fan.
{ WARNINGUsing an open flame near a
battery can cause battery gas to
explode. People have been hurt
doing this, and some have been
blinded. Use a flashlight if you
need more light.
Be sure the battery has enough
water. You do not need to add
water to the battery installed in
your new vehicle. But if a battery
has filler caps, be sure the right
amount of fluid is there. If it is low,
(Continued) WARNING (Continued) add water to take care of that
first. If you do not, explosive gas
could be present.
Battery fluid contains acid that
can burn you. Do not get it on
you. If you accidentally get it in
your eyes or on your skin, flush
the place with water and get
medical help immediately.
{ WARNING
Fans or other moving engine
parts can injure you badly. Keep
your hands away from moving
parts once the engine is running. 5. Check that the jumper cables do
not have loose or missing
insulation. If they do, you could
get a shock. The vehicles could
also be damaged.
Before you connect the cables,
here are some basic things you
should know. Positive (+) will go
to positive (+) or to a remote
positive (+) terminal if the vehicle
has one. Negative ( − ) will go to a
heavy, unpainted metal engine
part or to a remote negative ( − )
terminal if the vehicle has one.
Do not connect positive (+) to
negative ( − ) or you will get a
short that would damage the
battery and maybe other parts.
Do not connect the negative ( − )
cable to the negative ( − ) terminal
on the dead battery because this
can cause sparks.
Page 302 of 374

Black plate (68,1)Chevrolet Captiva Sport Owner Manual - 2013 - crc - 11/12/12
10-68 Vehicle Care 6. Connect the red positive (+)
cable to the positive (+) terminal
on the vehicle with the dead
battery. Use a remote
positive (+) terminal if the vehicle
has one.
7. Do not let the other end touch
metal. Connect it to the
positive (+) terminal of the good
battery. Use a remote
positive (+) terminal if the vehicle
has one.
8. Now connect the black
negative ( − ) cable to the
negative ( − ) terminal of the good
battery. Use a remote
negative ( − ) terminal if the
vehicle has one.
Do not let the other end touch
anything until the next step. The
other end of the negative ( − )
cable does not go to the dead
battery. It goes to a heavy,
unpainted metal engine part or
to a remote negative ( − ) terminal
on the vehicle with the dead
battery. 9. Connect the other end of the
negative ( − ) cable away from the
dead battery, but not near
engine parts that move. The
electrical connection is just as
good there, and the chance of
sparks getting back to the
battery is much less.
10. Now start the vehicle with the
good battery and run the
engine for a while.
11. Press the unlock symbol on the
remote keyless entry
transmitter to disarm your
security system, if equipped.
12. Try to start the vehicle that had
the dead battery. If it will not
start after a few tries, it
probably needs service. Notice: If the jumper cables are
connected or removed in the
wrong order, electrical shorting
may occur and damage the
vehicle. The repairs would not be
covered by the vehicle warranty.
Always connect and remove the
jumper cables in the correct
order, making sure that the
cables do not touch each other or
other metal.
Jumper Cable Removal
Reverse the sequence exactly when
removing the jumper cables.
Page 303 of 374

Black plate (69,1)Chevrolet Captiva Sport Owner Manual - 2013 - crc - 11/12/12
Vehicle Care 10-69
Towing Towing the Vehicle Notice: Incorrectly towing a
disabled vehicle may cause
damage. The damage would not
be covered by the vehicle
warranty. Do not lash or hook to
the chassis components
including the front and rear
subframes, suspension control
arms and links during towing and
recovery of a disabled vehicle or
to secure the vehicle to a flatbed
car carrier. Use the proper nylon
strap harnesses around the tires
to secure the flatbed car carrier.
Have the vehicle towed on a flatbed
car carrier. A wheel lift tow truck
could damage the vehicle.
Consult your dealer or a
professional towing service if the
disabled vehicle must be towed. To tow the vehicle behind another
vehicle for recreational purposes,
such as behind a motor home, see
“ Recreational Vehicle Towing ” in this
section.
Recreational Vehicle
Towing Recreational vehicle towing means
towing the vehicle behind another
vehicle – such as behind a motor
home. The two most common types
of recreational vehicle towing are
known as dinghy towing and dolly
towing. Dinghy towing is towing the
vehicle with all four wheels on the
ground. Dolly towing is towing the
vehicle with two wheels on the
ground and two wheels up on a
device known as a dolly. Here are some important things to
consider before recreational vehicle
towing: .
What is the towing capacity of
the towing vehicle? Be sure to
read the tow vehicle
manufacturer's
recommendations. .
What is the distance that will be
travelled? Some vehicles have
restrictions on how far and how
long they can tow. .
Is the proper towing equipment
going to be used? See your
dealer or trailering professional
for additional advice and
equipment recommendations. .
Is the vehicle ready to be
towed? Just as preparing the
vehicle for a long trip, make sure
the vehicle is prepared to be
towed.
Page 304 of 374

Black plate (70,1)Chevrolet Captiva Sport Owner Manual - 2013 - crc - 11/12/12
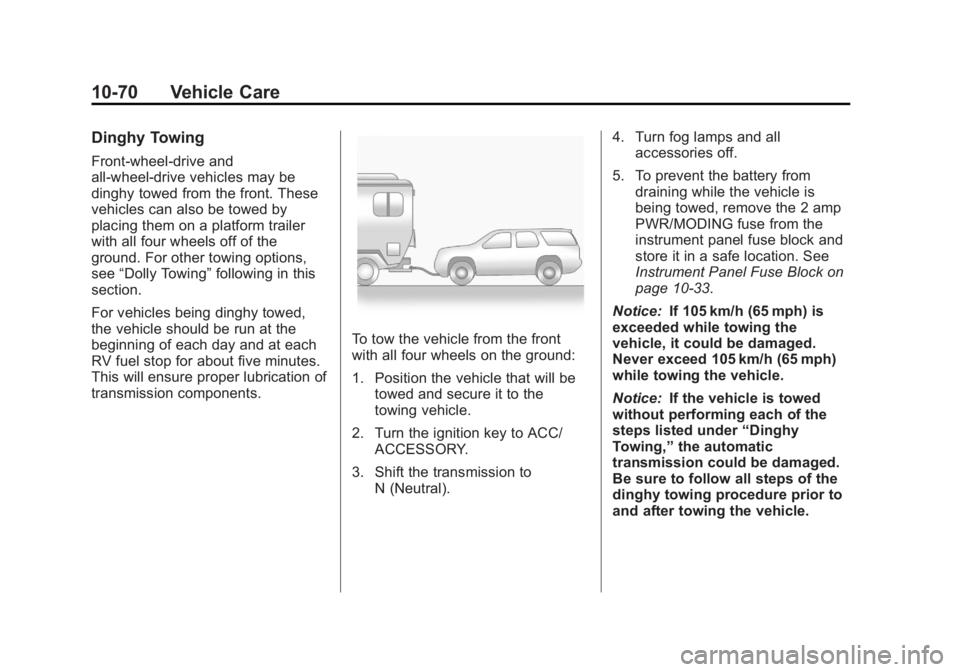
10-70 Vehicle Care Dinghy Towing Front-wheel-drive and
all-wheel-drive vehicles may be
dinghy towed from the front. These
vehicles can also be towed by
placing them on a platform trailer
with all four wheels off of the
ground. For other towing options,
see “ Dolly Towing ” following in this
section.
For vehicles being dinghy towed,
the vehicle should be run at the
beginning of each day and at each
RV fuel stop for about five minutes.
This will ensure proper lubrication of
transmission components. To tow the vehicle from the front
with all four wheels on the ground:
1. Position the vehicle that will be
towed and secure it to the
towing vehicle.
2. Turn the ignition key to ACC/
ACCESSORY.
3. Shift the transmission to
N (Neutral). 4. Turn fog lamps and all
accessories off.
5. To prevent the battery from
draining while the vehicle is
being towed, remove the 2 amp
PWR/MODING fuse from the
instrument panel fuse block and
store it in a safe location. See
Instrument Panel Fuse Block on
page 10 ‑ 33 .
Notice: If 105 km/h (65 mph) is
exceeded while towing the
vehicle, it could be damaged.
Never exceed 105 km/h (65 mph)
while towing the vehicle.
Notice: If the vehicle is towed
without performing each of the
steps listed under “ Dinghy
Towing, ” the automatic
transmission could be damaged.
Be sure to follow all steps of the
dinghy towing procedure prior to
and after towing the vehicle.