2013 CHEVROLET CAPTIVA SPORT change time
[x] Cancel search: change timePage 135 of 374
Black plate (39,1)Chevrolet Captiva Sport Owner Manual - 2013 - crc - 11/12/12
Instruments and Controls 5-39The key must be out of the ignition
for this feature to work. You can
temporarily override delayed locking
by pressing the power door lock
switch twice or the lock button on
the RKE transmitter twice. See
Delayed Locking on page 2 ‑ 6 .
Press
U until PRESS
V TO SET
DELAY DOOR LOCK appears on
the DIC display. Press
V once to
access the settings for this feature.
Then press
U to scroll through the
following settings:
OFF: There will be no delayed
locking of the vehicle's doors.
ON (default): The doors will not
lock until five seconds after the last
door is closed.
NO CHANGE: No change will be
made to this feature. The current
setting will remain.
To select a setting, press
V while
the desired setting is displayed on
the DIC. EXIT LIGHTING
This feature allows you to select the
amount of time you want the
exterior lamps to remain on when it
is dark enough outside. This
happens after the key is turned from
ON/RUN to LOCK/OFF.
Press
U until PRESS
V TO SET
EXIT LIGHTING appears on the DIC
display. Press
V once to access the
settings for this feature. Then press
U to scroll through the following
settings:
OFF: The exterior lamps will not
turn on.
10 SECONDS (default): The
exterior lamps will stay on for
10 seconds.
30 SECONDS: The exterior lamps
will stay on for 30 seconds.
2 MINUTES: The exterior lamps will
stay on for two minutes.
NO CHANGE: No change will be
made to this feature. The current
setting will remain. To select a setting, press
V while
the desired setting is displayed on
the DIC.
APPROACH LIGHTING
This feature allows you to select
whether or not to have the exterior
lamps turn on briefly during low light
periods after unlocking the vehicle
using the Remote Keyless Entry
(RKE) transmitter.
Press
U until PRESS
V TO SET
APPROACH LIGHTING appears on
the DIC display. Press
V once to
access the settings for this feature.
Then press
U to scroll through the
following settings:
OFF: The exterior lamps will not
turn on when you unlock the vehicle
with the RKE transmitter.
ON (default): If it is dark enough
outside, the exterior lamps will turn
on briefly when you unlock the
vehicle with the RKE transmitter.
Page 137 of 374
Black plate (41,1)Chevrolet Captiva Sport Owner Manual - 2013 - crc - 11/12/12
Instruments and Controls 5-41Press
U until PRESS
V TO
RESTORE DEFAULTS appears on
the DIC display. Press
V once to
access the settings for this feature.
Then press
U to scroll through the
following settings:
RESTORE (default): The
customization features will be set to
their factory default settings.
NO CHANGE: The customization
features will not be set to their
factory default settings.
To select a setting, press
V while
the desired setting is displayed on
the DIC.
EXIT FEATURE SETTINGS
This feature allows you to exit the
feature settings menu.
Press
U until PRESS
V TO EXIT
FEATURE SETTINGS appears in
the DIC display. Press
V once to
exit the menu. If you do not exit, pressing
U again
will return you to the beginning of
the feature settings menu.
Exiting the Feature
Settings Menu The feature settings menu will be
exited when any of the following
occurs: .
The vehicle is no longer in
ON/RUN. .
The
3 or
T DIC buttons are
pressed. .
The end of the feature settings
menu is reached and exited. .
A 40-second time period has
elapsed with no selection made. Universal Remote
System See Radio Frequency Statement on
page 13 ‑ 20 for information
regarding Part 15 of the Federal
Communications Commission (FCC)
rules and Industry Canada
Standards RSS-GEN/210/220/310.
Universal Remote System
Programming
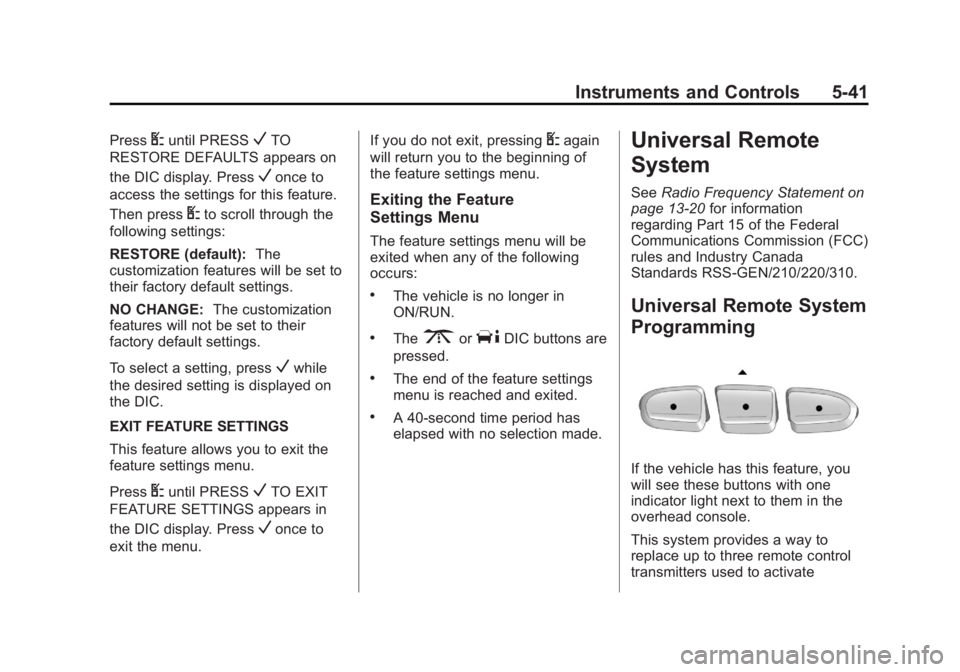
If the vehicle has this feature, you
will see these buttons with one
indicator light next to them in the
overhead console.
This system provides a way to
replace up to three remote control
transmitters used to activate
Page 138 of 374
Black plate (42,1)Chevrolet Captiva Sport Owner Manual - 2013 - crc - 11/12/12
5-42 Instruments and Controls devices such as garage door
openers, security systems, and
home automation devices.
Do not use the Universal Remote
system with any garage door opener
that does not have the stop and
reverse feature. This includes any
garage door opener model
manufactured before April 1,1982.
Read the instructions completely
before attempting to program the
Universal Remote system. Because
of the steps involved, it may be
helpful to have another person
available to assist with programming
the Universal Remote system.
Keep the original hand-held
transmitter for use in other vehicles
as well as for future Universal
Remote system programming. It is
also recommended that upon the
sale of the vehicle, the programmed
Universal Remote system buttons
be erased for security purposes.
See “ Erasing Universal Remote
System Buttons ” later in this
section. When programming a garage door,
park outside of the garage. Park
directly in line with and facing the
garage door opener motor-head or
gate motor-head. Be sure that
people and objects are clear of the
garage door or gate being
programmed.
It is recommended that a new
battery be installed in the hand-held
transmitter for quicker and more
accurate transmission of the
radio-frequency signal.
Programming the Universal
Remote System For questions or help programming
the Universal Remote system, call
1-800-355-3515 or go to
www.homelink.com.
Programming a garage door opener
involves time-sensitive actions, so
read the entire procedure before
starting. Otherwise, the device will
time out and the procedure will have
to be repeated. To program up to three devices:
1. Hold the end of the hand-held
transmitter about 3 to 8 cm (1 to
3 in) away from the Universal
Remote system buttons while
keeping the indicator light in
view. The hand-held transmitter
was supplied by the
manufacturer of the garage door
opener receiver
(motor-head unit).
2. At the same time, press and
hold both the hand-held
transmitter button and one of the
three Universal Remote system
buttons to be used to operate
the garage door. Do not release
the Universal Remote system
button or the hand-held
transmitter button until the
indicator light changes from a
slowly to a rapidly flashing light.
You now may release both
buttons.
Page 143 of 374
Black plate (1,1)Chevrolet Captiva Sport Owner Manual - 2013 - crc - 11/12/12
Lighting 6-1
Lighting Exterior Lighting Exterior Lamp Controls . . . . . . . . 6-1
Headlamp High/Low-Beam
Changer . . . . . . . . . . . . . . . . . . . . . 6-2
Flash-to-Pass . . . . . . . . . . . . . . . . . 6-2
Daytime Running
Lamps (DRL) . . . . . . . . . . . . . . . . 6-2
Automatic Headlamp
System . . . . . . . . . . . . . . . . . . . . . . 6-3
Hazard Warning Flashers . . . . . 6-3
Turn and Lane-Change
Signals . . . . . . . . . . . . . . . . . . . . . . 6-3
Fog Lamps . . . . . . . . . . . . . . . . . . . . 6-4
Interior Lighting Instrument Panel Illumination
Control . . . . . . . . . . . . . . . . . . . . . . 6-4
Dome Lamps . . . . . . . . . . . . . . . . . 6-5
Reading Lamps . . . . . . . . . . . . . . . 6-5
Lighting Features Entry Lighting . . . . . . . . . . . . . . . . . 6-6
Battery Load Management . . . . 6-6
Battery Power Protection . . . . . . 6-6 Exterior Lighting Exterior Lamp Controls
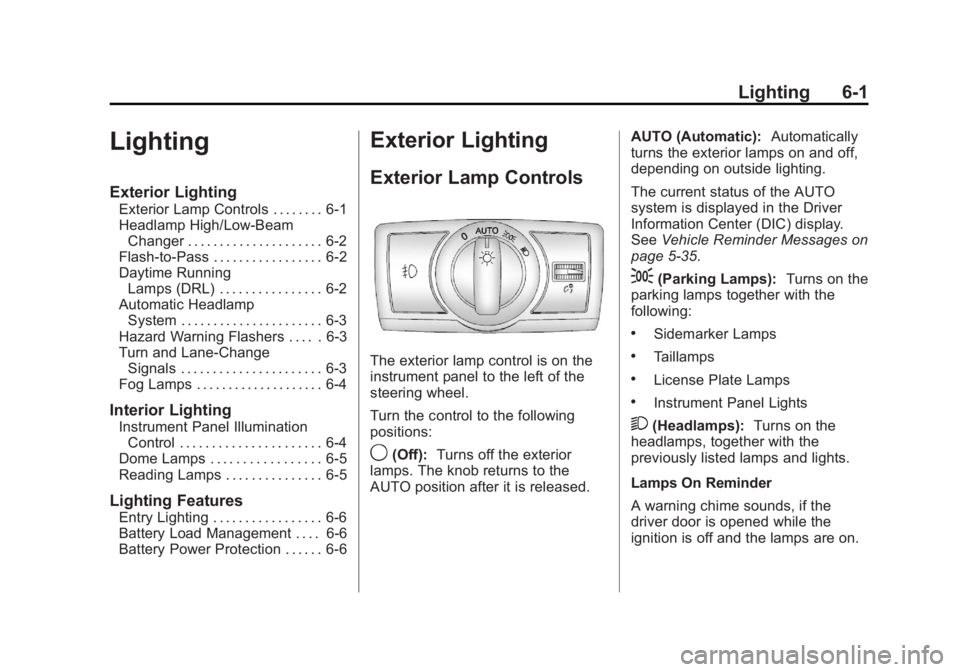
The exterior lamp control is on the
instrument panel to the left of the
steering wheel.
Turn the control to the following
positions:
9 (Off): Turns off the exterior
lamps. The knob returns to the
AUTO position after it is released. AUTO (Automatic): Automatically
turns the exterior lamps on and off,
depending on outside lighting.
The current status of the AUTO
system is displayed in the Driver
Information Center (DIC) display.
See Vehicle Reminder Messages on
page 5 ‑ 35 .
; (Parking Lamps): Turns on the
parking lamps together with the
following: .
Sidemarker Lamps .
Taillamps .
License Plate Lamps .
Instrument Panel Lights
2 (Headlamps): Turns on the
headlamps, together with the
previously listed lamps and lights.
Lamps On Reminder
A warning chime sounds, if the
driver door is opened while the
ignition is off and the lamps are on.
Page 144 of 374
Black plate (2,1)Chevrolet Captiva Sport Owner Manual - 2013 - crc - 11/12/12
6-2 Lighting Wiper-Activated Headlamps
The headlamps and parking lamps
turn on automatically if the exterior
lamp control is set in the AUTO
position and the windshield wipers
are turned on and have completed
eight wipe cycles.
When the ignition is turned off, the
wiper-activated headlamps
immediately turn off. They also turn
off if the windshield wiper control is
turned off.
Headlamp High/
Low-Beam Changer
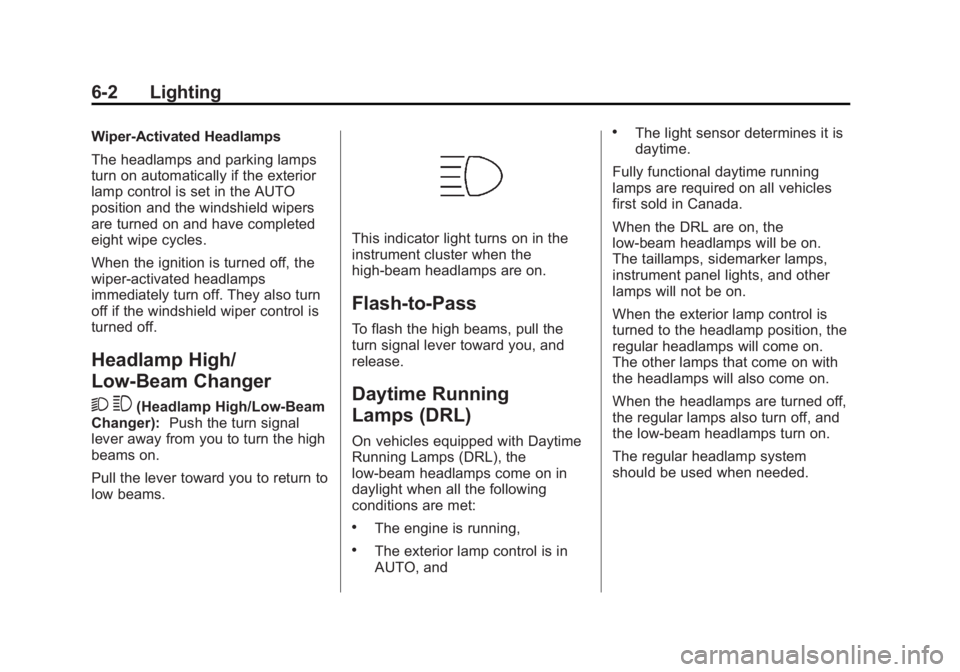
2 3 (Headlamp High/Low-Beam
Changer): Push the turn signal
lever away from you to turn the high
beams on.
Pull the lever toward you to return to
low beams. This indicator light turns on in the
instrument cluster when the
high-beam headlamps are on.
Flash-to-Pass To flash the high beams, pull the
turn signal lever toward you, and
release.
Daytime Running
Lamps (DRL) On vehicles equipped with Daytime
Running Lamps (DRL), the
low-beam headlamps come on in
daylight when all the following
conditions are met: .
The engine is running, .
The exterior lamp control is in
AUTO, and .
The light sensor determines it is
daytime.
Fully functional daytime running
lamps are required on all vehicles
first sold in Canada.
When the DRL are on, the
low-beam headlamps will be on.
The taillamps, sidemarker lamps,
instrument panel lights, and other
lamps will not be on.
When the exterior lamp control is
turned to the headlamp position, the
regular headlamps will come on.
The other lamps that come on with
the headlamps will also come on.
When the headlamps are turned off,
the regular lamps also turn off, and
the low-beam headlamps turn on.
The regular headlamp system
should be used when needed.
Page 145 of 374
Black plate (3,1)Chevrolet Captiva Sport Owner Manual - 2013 - crc - 11/12/12
Lighting 6-3
Automatic Headlamp
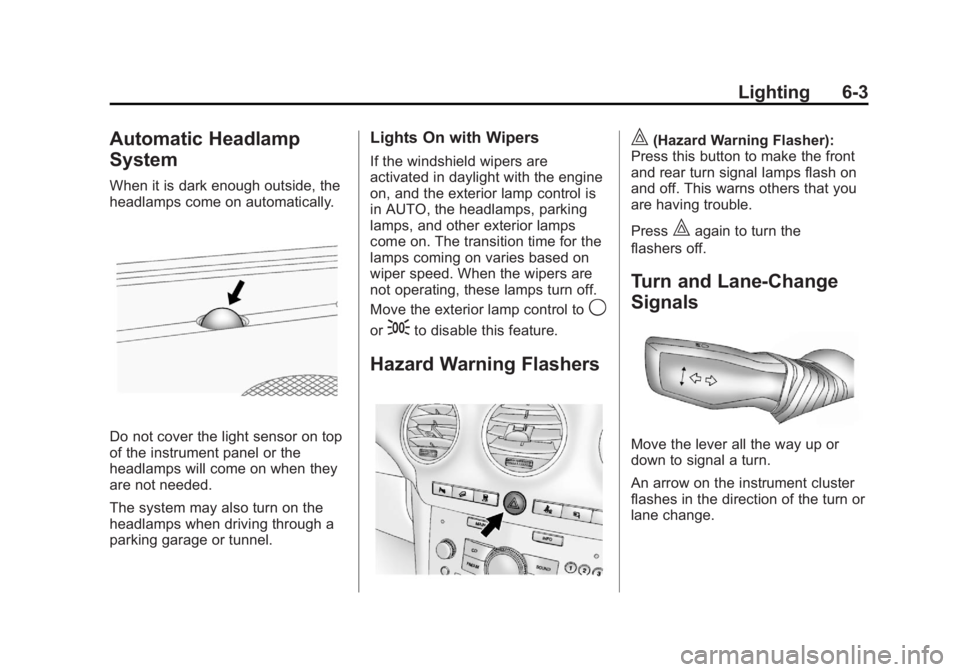
System When it is dark enough outside, the
headlamps come on automatically.
Do not cover the light sensor on top
of the instrument panel or the
headlamps will come on when they
are not needed.
The system may also turn on the
headlamps when driving through a
parking garage or tunnel. Lights On with Wipers If the windshield wipers are
activated in daylight with the engine
on, and the exterior lamp control is
in AUTO, the headlamps, parking
lamps, and other exterior lamps
come on. The transition time for the
lamps coming on varies based on
wiper speed. When the wipers are
not operating, these lamps turn off.
Move the exterior lamp control to
9or
; to disable this feature.
Hazard Warning Flashers | (Hazard Warning Flasher):
Press this button to make the front
and rear turn signal lamps flash on
and off. This warns others that you
are having trouble.
Press
| again to turn the
flashers off.
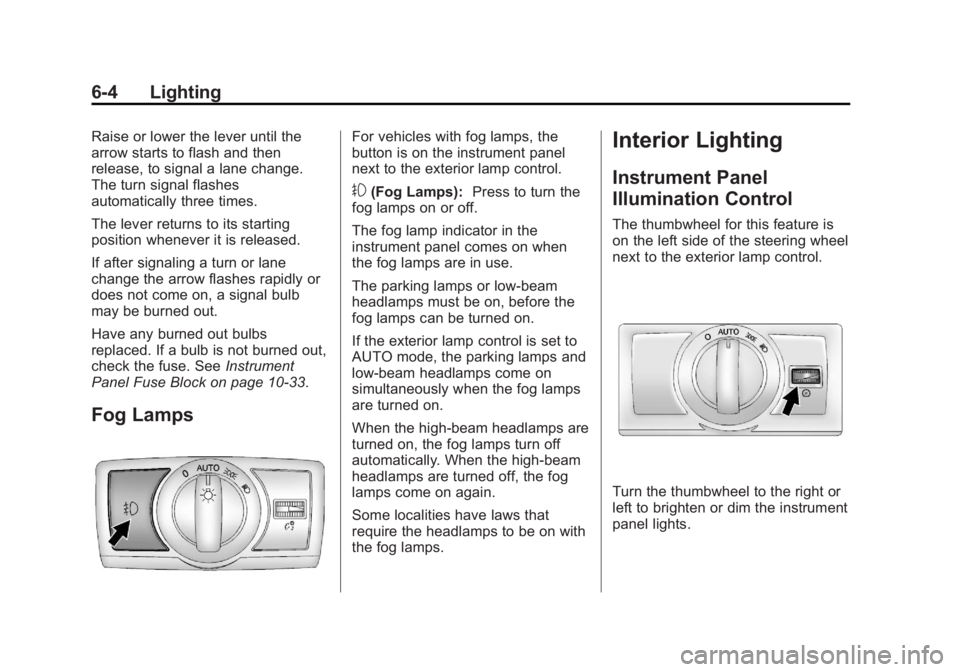
Turn and Lane-Change
Signals
Move the lever all the way up or
down to signal a turn.
An arrow on the instrument cluster
flashes in the direction of the turn or
lane change.
Page 146 of 374
Black plate (4,1)Chevrolet Captiva Sport Owner Manual - 2013 - crc - 11/12/12
6-4 Lighting Raise or lower the lever until the
arrow starts to flash and then
release, to signal a lane change.
The turn signal flashes
automatically three times.
The lever returns to its starting
position whenever it is released.
If after signaling a turn or lane
change the arrow flashes rapidly or
does not come on, a signal bulb
may be burned out.
Have any burned out bulbs
replaced. If a bulb is not burned out,
check the fuse. See Instrument
Panel Fuse Block on page 10 ‑ 33 .
Fog Lamps For vehicles with fog lamps, the
button is on the instrument panel
next to the exterior lamp control.
# (Fog Lamps): Press to turn the
fog lamps on or off.
The fog lamp indicator in the
instrument panel comes on when
the fog lamps are in use.
The parking lamps or low-beam
headlamps must be on, before the
fog lamps can be turned on.
If the exterior lamp control is set to
AUTO mode, the parking lamps and
low-beam headlamps come on
simultaneously when the fog lamps
are turned on.
When the high-beam headlamps are
turned on, the fog lamps turn off
automatically. When the high-beam
headlamps are turned off, the fog
lamps come on again.
Some localities have laws that
require the headlamps to be on with
the fog lamps. Interior Lighting Instrument Panel
Illumination Control The thumbwheel for this feature is
on the left side of the steering wheel
next to the exterior lamp control.
Turn the thumbwheel to the right or
left to brighten or dim the instrument
panel lights.
Page 162 of 374
Black plate (14,1)Chevrolet Captiva Sport Owner Manual - 2013 - crc - 11/12/12
7-14 Infotainment System displays on the top line of the
display and artist information
displays on the bottom line. When
information is not available, NO
INFO displays.
f (Tune): Turn to select MP3 files
on the CD currently playing.
© SEEK: Press to go to the start of
the track, if more than 10 seconds
have played. Press and hold or
press multiple times to continue
moving backward through tracks.
¨ SEEK: Press to go to the next
track. Press and hold or press
multiple times to continue moving
forward through tracks.
s REV (Reverse): Press and hold
to reverse playback quickly. Sound
is heard at a reduced volume and
the elapsed time of the file displays.
Release
s REV to resume playing.
\ FWD (Fast Forward): Press
and hold to advance playback
quickly. Sound is heard at a reduced
volume and the elapsed time of the file displays. Release
\ FWD to
resume playing. The elapsed time of
the file displays.
S c (Previous Folder): Press
the softkey below the
S c tab to
go to the first track in the previous
folder.
c T (Next Folder): Press the
softkey below the
c T tab to go to
the first track in the next folder.
RDM (Random): Press to listen to
tracks in random, rather than
sequential order. To use random:
1. Press the softkey under the
RDM tab until Random Current
Disc displays.
2. Press the softkey again to turn
off random play.
h (Music Navigator): Press the
softkey below the
h tab to have
the files played in order by artist or
album. The player scans the disc to
sort the files by artist and album ID3
tag information. It can take several
minutes to scan the disc depending on the number of files on the disc.
The radio may begin playing while it
is scanning in the background.
When the scan is finished, the disc
begins playing files in order by
artist. The current artist playing is
shown on the second line of the
display. Once all songs by that artist
are played, the player moves to the
next artist in alphabetical order and
begins playing files by that artist.
To listen to files by another artist,
press the softkey below either arrow
tab. The disc goes to the next or
previous artist in alphabetical order.
Continue pressing either softkey
below the arrow tab until the desired
artist displays.
To change from playback by artist to
playback by album:
1. Press the softkey below the Sort
By tab.
2. Press one of the softkeys below
the album tab from the sort
screen.