2013 CHEVROLET AVALANCHE ignition
[x] Cancel search: ignitionPage 52 of 494

Black plate (18,1)Chevrolet Avalanche Owner Manual - 2013 - CRC - 8/27/12
2-18 Keys, Doors, and Windows
The security light will come on if
there is a problem with arming or
disarming the theft-deterrent
system.
When the PASS-Key III+ system
senses that someone is using the
wrong key, it prevents the vehicle
from starting. Anyone using a
trial-and-error method to start the
vehicle will be discouraged because
of the high number of electrical key
codes.
If the engine does not start and the
security light on the instrument
panel cluster comes on when trying
to start the vehicle, there may be a
problem with the theft-deterrent
system. Turn the ignition off and try
again.
If the engine still does not start, and
the key appears to be undamaged,
try another ignition key. At this time,
you may also want to check the
fuse. SeeFuses and Circuit
Breakers on page 10‑34. If the
engine still does not start with the
other key, the vehicle needs service. If the vehicle does start, the first key
may be faulty. See your dealer who
can service the PASS-Key III+ to
have a new key made.
It is possible for the PASS-Key III+
decoder to learn the transponder
value of a new or replacement key.
Up to 10 keys may be programmed
for the vehicle. The following
procedure is for programming
additional keys only. If all the
currently programmed keys are lost
or do not operate, you must see
your dealer or a locksmith who can
service PASS-Key III+ to have keys
made and programmed to the
system.
See your dealer or a locksmith who
can service PASS-Key III+ to get a
new key blank cut exactly as the
ignition key that operates the
system.
To program the new additional key:
1. Verify that the new key has
a
1stamped on it.
2. Insert the original, already programmed key in the ignition
and start the engine. If the
engine will not start, see your
dealer for service.
3. After the engine has started, turn the key to LOCK/OFF, and
remove the key.
4. Insert the new key to be programmed and turn it to the
ON/RUN position within
five seconds of turning the
ignition to the LOCK/OFF
position in Step 3.
The security light will turn off
once the key has been
programmed.
5. Repeat Steps 1 through 4 if additional keys are to be
programmed.
Page 55 of 494

Black plate (21,1)Chevrolet Avalanche Owner Manual - 2013 - CRC - 8/27/12
Keys, Doors, and Windows 2-21
Resetting the Power Folding
Mirrors
Reset the power folding mirrors if:
.The mirrors are accidentally
obstructed while folding.
.They are accidentally manually
folded/unfolded.
.The mirrors will not stay in the
unfolded position.
.The mirrors vibrate at normal
driving speeds.
Fold and unfold the mirrors one time
using the mirror controls to reset
them to their normal position.
A popping noise may be heard
during the resetting of the power
folding mirrors. This sound is normal
after a manual folding operation.
Manual Folding
Fold the mirrors inward to prevent
damage when going through an
automatic car wash. To fold, pull the
mirror toward the vehicle. Push the
mirror outward, to return to its
original position.
Heated Mirrors
1
(Rear Window Defogger):
Press to heat the mirrors.
See “Rear Window Defogger” under
Dual Automatic Climate Control
System on page 8‑4 orClimate
Control Systems on page 8‑1 for
more information.
Automatic Dimming
Mirror
If the vehicle has the automatic
dimming mirror, the driver outside
mirror automatically adjusts for the
glare of the headlamps from behind.
This feature is controlled by the
on and off setting on the inside
rearview mirror. See Automatic
Dimming Rearview Mirror on
page 2‑22.
Park Tilt Mirrors
If the vehicle has the memory
package, the exterior mirrors tilt to
a preselected position when the
vehicle is in R (Reverse). This
feature lets the driver view the curb
when parallel parking. The mirrors
return to the original position
when the vehicle is shifted out of
R (Reverse), or the ignition is turned
off or to OFF/LOCK.
This feature can be programed
through the Driver Information
Center (DIC). See Vehicle
Personalization (With DIC Buttons)
on page 5‑44 for more information.
Page 57 of 494
Black plate (23,1)Chevrolet Avalanche Owner Manual - 2013 - CRC - 8/27/12
Keys, Doors, and Windows 2-23
Windows
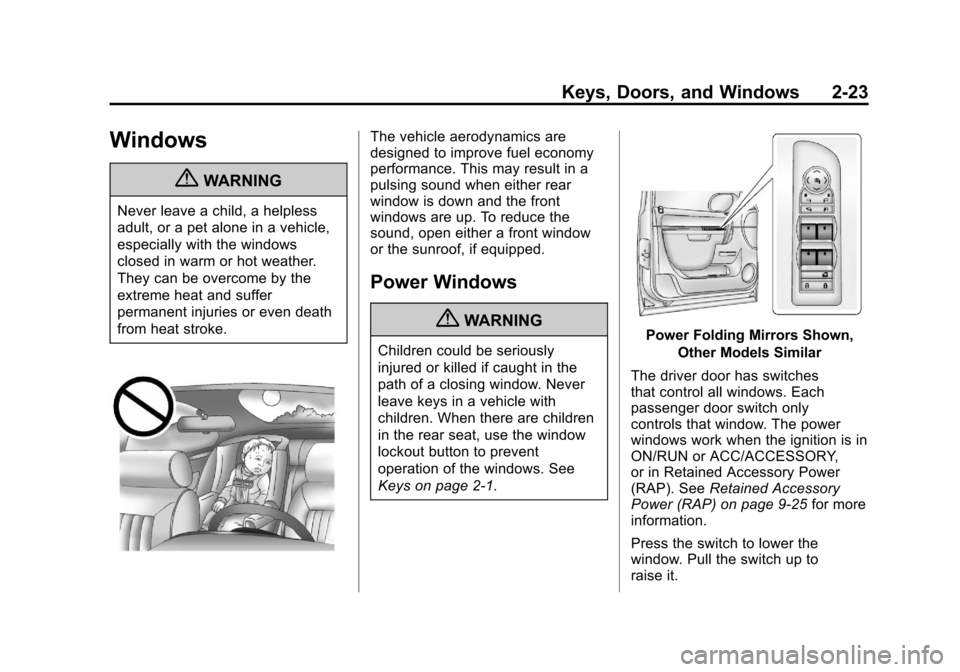
{WARNING
Never leave a child, a helpless
adult, or a pet alone in a vehicle,
especially with the windows
closed in warm or hot weather.
They can be overcome by the
extreme heat and suffer
permanent injuries or even death
from heat stroke.
The vehicle aerodynamics are
designed to improve fuel economy
performance. This may result in a
pulsing sound when either rear
window is down and the front
windows are up. To reduce the
sound, open either a front window
or the sunroof, if equipped.
Power Windows
{WARNING
Children could be seriously
injured or killed if caught in the
path of a closing window. Never
leave keys in a vehicle with
children. When there are children
in the rear seat, use the window
lockout button to prevent
operation of the windows. See
Keys on page 2‑1.Power Folding Mirrors Shown,Other Models Similar
The driver door has switches
that control all windows. Each
passenger door switch only
controls that window. The power
windows work when the ignition is in
ON/RUN or ACC/ACCESSORY,
or in Retained Accessory Power
(RAP). See Retained Accessory
Power (RAP) on page 9‑25 for more
information.
Press the switch to lower the
window. Pull the switch up to
raise it.
Page 59 of 494
Black plate (25,1)Chevrolet Avalanche Owner Manual - 2013 - CRC - 8/27/12
Keys, Doors, and Windows 2-25
Roof
Sunroof
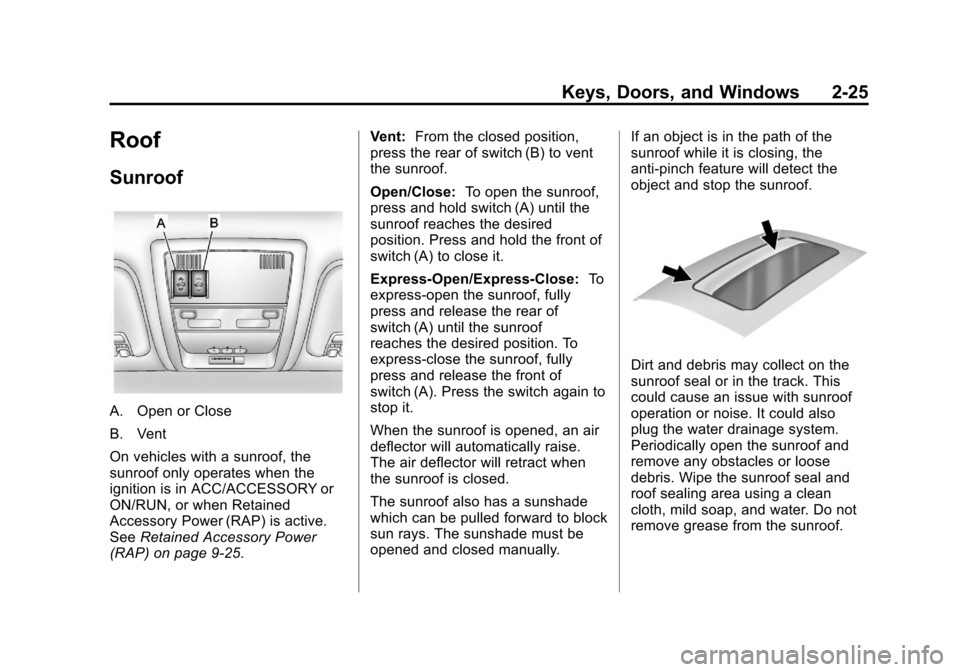
A. Open or Close
B. Vent
On vehicles with a sunroof, the
sunroof only operates when the
ignition is in ACC/ACCESSORY or
ON/RUN, or when Retained
Accessory Power (RAP) is active.
SeeRetained Accessory Power
(RAP) on page 9‑25. Vent:
From the closed position,
press the rear of switch (B) to vent
the sunroof.
Open/Close: To open the sunroof,
press and hold switch (A) until the
sunroof reaches the desired
position. Press and hold the front of
switch (A) to close it.
Express-Open/Express-Close: To
express-open the sunroof, fully
press and release the rear of
switch (A) until the sunroof
reaches the desired position. To
express-close the sunroof, fully
press and release the front of
switch (A). Press the switch again to
stop it.
When the sunroof is opened, an air
deflector will automatically raise.
The air deflector will retract when
the sunroof is closed.
The sunroof also has a sunshade
which can be pulled forward to block
sun rays. The sunshade must be
opened and closed manually. If an object is in the path of the
sunroof while it is closing, the
anti-pinch feature will detect the
object and stop the sunroof.
Dirt and debris may collect on the
sunroof seal or in the track. This
could cause an issue with sunroof
operation or noise. It could also
plug the water drainage system.
Periodically open the sunroof and
remove any obstacles or loose
debris. Wipe the sunroof seal and
roof sealing area using a clean
cloth, mild soap, and water. Do not
remove grease from the sunroof.
Page 68 of 494
Black plate (8,1)Chevrolet Avalanche Owner Manual - 2013 - CRC - 8/27/12
3-8 Seats and Restraints
If something has blocked the driver
seat and/or the adjustable pedals
while recalling a memory position,
the recall may stop. Remove the
obstruction; then press and hold the
appropriate manual control for the
memory item that is not recalling for
two seconds. Try recalling the
memory position again by pressing
the appropriate memory button.
If the memory position is still not
recalling, see your dealer for
service.
Easy Exit Driver Seat
This feature can move the seat
rearward to allow extra room to exit
the vehicle.
B(Easy Exit Driver Seat):Press
to recall the easy exit seat position.
The vehicle must be in P (Park). If the easy exit seat feature is
programmed on in the vehicle
personalization menu, automatic
seat movement occurs when the
ignition key is removed.
A single beep sounds. The driver
seat moves back approximately
8 cm (3 in). To move the seat back
farther, press
Bagain until the
seat is all the way back.
If something has blocked the driver
seat while recalling the exit position,
the recall may stop. Remove the
obstruction; then press and hold the
power seat control rearward for
two seconds. Try recalling the exit
position again. If the exit position is
still not recalling, see your dealer for
service.
See Vehicle Personalization (With
DIC Buttons) on page 5‑44.
Heated and Ventilated
Front Seats
{WARNING
If you cannot feel temperature
change or pain to the skin, the
seat heater may cause burns. To
reduce the risk of burns, people
with such a condition should use
care when using the seat heater,
especially for long periods of
time. Do not place anything on
the seat that insulates against
heat, such as a blanket, cushion,
cover, or similar item. This may
cause the seat heater to
overheat. An overheated seat
heater may cause a burn or may
damage the seat.
Page 69 of 494
Black plate (9,1)Chevrolet Avalanche Owner Manual - 2013 - CRC - 8/27/12
Seats and Restraints 3-9
Heated and Cooled Seat ButtonsShown, Heated Seat Buttons Similar
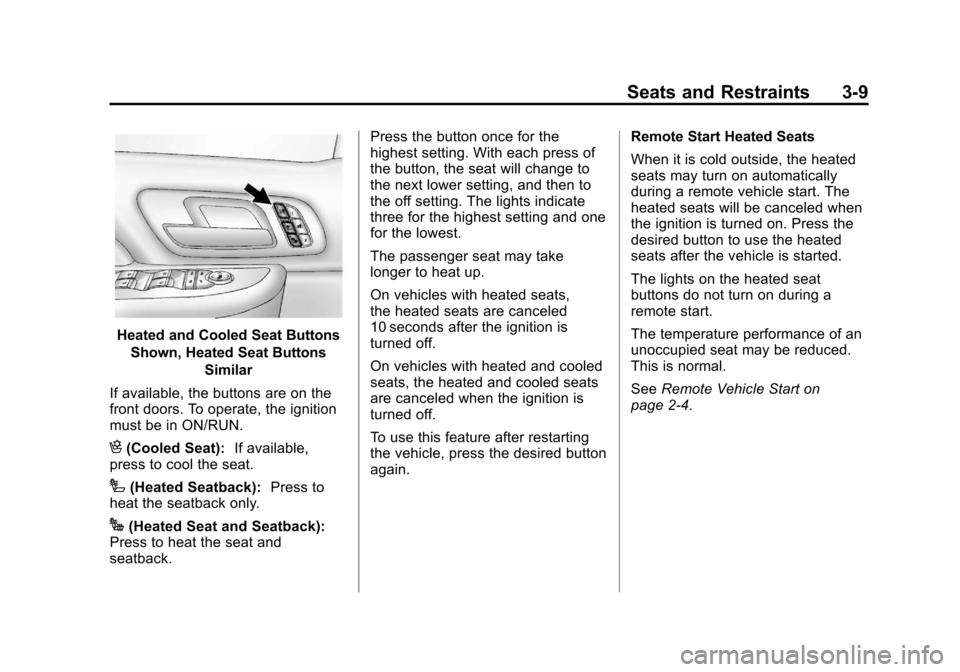
If available, the buttons are on the
front doors. To operate, the ignition
must be in ON/RUN.
H(Cooled Seat): If available,
press to cool the seat.
I(Heated Seatback): Press to
heat the seatback only.
J(Heated Seat and Seatback):
Press to heat the seat and
seatback. Press the button once for the
highest setting. With each press of
the button, the seat will change to
the next lower setting, and then to
the off setting. The lights indicate
three for the highest setting and one
for the lowest.
The passenger seat may take
longer to heat up.
On vehicles with heated seats,
the heated seats are canceled
10 seconds after the ignition is
turned off.
On vehicles with heated and cooled
seats, the heated and cooled seats
are canceled when the ignition is
turned off.
To use this feature after restarting
the vehicle, press the desired button
again.
Remote Start Heated Seats
When it is cold outside, the heated
seats may turn on automatically
during a remote vehicle start. The
heated seats will be canceled when
the ignition is turned on. Press the
desired button to use the heated
seats after the vehicle is started.
The lights on the heated seat
buttons do not turn on during a
remote start.
The temperature performance of an
unoccupied seat may be reduced.
This is normal.
See
Remote Vehicle Start on
page 2‑4.
Page 133 of 494
Black plate (7,1)Chevrolet Avalanche Owner Manual - 2013 - CRC - 8/27/12
Instruments and Controls 5-7
strong magnetic field interfering with
the compass. Such interference
may be caused by a magnetic CB or
cell phone antenna mount, a
magnetic emergency light, magnetic
note pad holder, or any other
magnetic item. Turn off the vehicle,
move the magnetic item, then turn
on the vehicle and calibrate the
compass.
To calibrate the compass, use the
following procedure:
Compass Calibration Procedure
1. Before calibrating the compass,make sure the compass zone is
set to the variance zone in which
the vehicle is located. See
“Compass Variance (Zone)
Procedure” earlier in this
section.
Do not operate any switches
such as window, sunroof,
climate controls, or seats during
the calibration procedure. 2. Press the vehicle information
button until PRESS
VTO
CALIBRATE COMPASS
displays. Or, if the vehicle does
not have DIC buttons, press the
trip odometer reset stem until
CALIBRATE COMPASS
displays.
3. Press the set/reset button to start the compass calibration. Or,
if the vehicle does not have DIC
buttons, press and hold the trip
odometer reset stem for
two seconds to start the
compass calibration.
4. The DIC will display CALIBRATING: DRIVE IN
CIRCLES. Drive the vehicle in
tight circles at less than 8 km/h
(5 mph) to complete the
calibration. The DIC will display
CALIBRATION COMPLETE
for a few seconds when the
calibration is complete. The DIC
display will then return to the
previous menu.Clock
To set the time and date:
1. Turn the ignition key to ACC/ACCESSORY or ON/RUN, then
press the
Obutton to turn the
radio on.
2. Press the
Hbutton to display
HR, MIN, MM, DD, YYYY (hour,
minute, month, day, and year).
3. Press the softkey located under any one of the tabs to change
that setting.
4. To increase the time or date, do one of the following:
.Press the softkey below the
selected tab.
.Press the¨SEEK button.
.Press the\FWD button.
.Turn thefknob clockwise.
Page 137 of 494
Black plate (11,1)Chevrolet Avalanche Owner Manual - 2013 - CRC - 8/27/12
Instruments and Controls 5-11
Speedometer
The speedometer shows the
vehicle's speed in either kilometers
per hour (km/h) or miles per
hour (mph).
Odometer
The odometer shows how far the
vehicle has been driven, in either
kilometers or miles.
Trip Odometer
The trip odometer can show how far
the vehicle has been driven since
the trip odometer was last set
to zero.
Press the reset button, located on
the instrument panel cluster next to
the trip odometer display, to toggle
between the trip odometer and the
regular odometer. Holding the reset
button for approximately one second
while the trip odometer is displayed
resets it.To display the odometer reading
with the ignition off, press the reset
button.
Tachometer
The tachometer displays the engine
speed in revolutions per
minute (rpm).
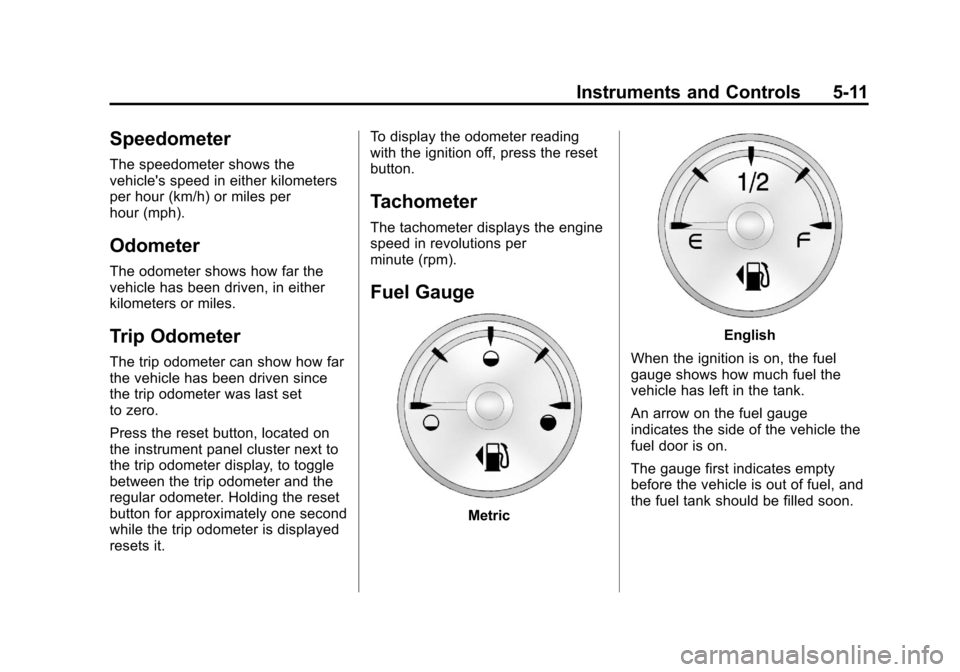
Fuel Gauge
Metric
English
When the ignition is on, the fuel
gauge shows how much fuel the
vehicle has left in the tank.
An arrow on the fuel gauge
indicates the side of the vehicle the
fuel door is on.
The gauge first indicates empty
before the vehicle is out of fuel, and
the fuel tank should be filled soon.